
Related Manuals for FLO-DYNAMICS C-VAC3


Summary of Contents for FLO-DYNAMICS C-VAC3
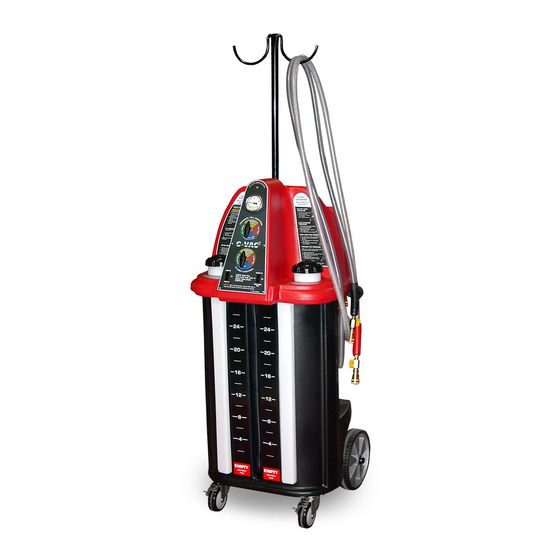
- Page 1 CVAC 3 Coolant Flush Complete Service Manual Complete Service & Maintenance Guide For additional Service or Troubleshooting questions contact Flo-Dynamics Technical Support at 1-800-303-5874...
- Page 2 9/24/2018 Section Includes: Section Overview Contact Information Getting Started S E C T I O N 1 Table of Contents Technical Support 1-800-303-5874...
-
Page 3: Table Of Contents
Section Overview SECTION 1 - Table of Contents Pg.2 Section Overview Pg.3 Contact Information Pg.3 ~ Getting Started Pg.4 Basic Tools Pg.5 Filter Screen Pg.6 Machine Cleanout Procedure Pg.7-9 Service Panel R & R Pg.10 Control Panel R & R Pg.11 Control Panel Exploded View Pg.12... -
Page 4: Getting Started
9/24/2018 Section Includes: Basic Tools List Filter Screen Machine Cleanout Service Panel Access Control Panel Access + Exploded View G E T T I N G S T A R T E D Machine Service Access Technical Support 1-800-303-5874... -
Page 5: Basic Tools
Basic Tools List Hex Head Wrenches 3/8”, 1/2”, 7/8” & 1” Open End Wrenches 3/8”, 1/2”, 3/4”, 13/16”, 7/8”, 15/16” & 1” Large Crescent Wrench Nut Driver 3/8” Standard & Phillips Head Screwdrivers ... -
Page 6: Filter Screen
FIGURE 1-1 Filter Screen 1. Locate the external filter at the end of the black service hose where it attaches to the machine. Figure 1-1 2. Unscrew the cup portion from the filter housing. Figure 1-2 3. This filter screen can be cleaned with tap water and then blown out with compressed air. -
Page 7: Machine Cleanout Procedure
FIGURE 1-3 Machine Cleanout (1) If the machine is slow or stops flushing, but the motor Cup & Screen and air still operate, please follow these procedures. Housing Clean the filter(s): Cleaning the filters should be done as a normal part of machine maintenance to prevent problems from occurring. - Page 8 FIGURE 1-5 Machine Cleanout (2) Shut-off Valve Check for possible restrictions in the quick disconnects at the ends of the hoses: 1. Unscrew the quick disconnect from the shut off valve at the end of the hose. Figure 1-5 ...
- Page 9 FIGURE 1-7 Machine Cleanout (3) To power flush the machine: Radiator Hose 1. Confirm there is new fluid in both the red & green Adaptor tanks so the machine will operate. 2. Connect the red & black service hoses together using the step adapters and the short section of radiator hose provided with the machine.
- Page 10 FIGURE 1-9 Service Panels 1. Using 1/8” hex head wrench, remove the [4] screws securing the service panel and remove. 2. Top Panel – Figure 1-9 3. Rear Panel – Figure 1-10 (4)1/8” Hex FIGURE 1-10 (4)1/8” Hex...
-
Page 11: Control Panel R & R
FIGURE 1-11 Control Panel 1. Turn both knobs to the upward position, & remove using a Philips-head screwdriver. Figure 1- 2. Remove 4 way ball-valve mounting nuts with 3/4" open-end wrench. Figure 1-11 3. Using 1/8” hex head wrench, remove the [5] screws securing the service panel. - Page 12 Item Part # Description CVAC Control Panel Exploded View Control Panel – Black P941315 941227 4-Way Valve Male Connector 3/8 – 1/2 940124 940114 90 Deg Elbow 941278 2.5 Panel Gauge & U-Clamp Control Box – CVAC3 941409 941341 2-Way Pump Switch 941342 3-Way Vacuum Switch 941324...
-
Page 13: Troubleshooting
9/24/2018 Section Includes: Most Common Problems & The Solutions.` S E C T I O N 2 Troubleshooting Technical Support 1-800-303-5874... -
Page 14: Common Problems & Solutions
Common Problems & Solutions Verify the Black Hose external filter isn’t Machine will not power up. clogged. Verify the Power Source produces 12.6v or higher. Machine may have an internal clog, Power- Verify the Battery Cables are tight, clean and are not Flush the machine to push &... -
Page 15: Cvac Wiring Diagram Simplified
CVAC Wiring Diagram (Simplified) -
Page 16: Cvac Hydraulic Diagram Simplified
CVAC Hydraulic Diagram (Simplified) -
Page 17: Service Procedures
9/24/2018 Section Includes: • Service Hose R&R • Battery Cable R&R • Pump R&R • Vacuum Generator R&R + Exploded View • Air Solenoid R&R • Pressure Gauge R&R • Control Board R&R S E C T I O N 3 Service Procedures Technical Support 1-800-303-5874... - Page 18 FIGURE 3-1 Service Hoses 941346 1. Use 1” open-end wrench to hold top nut in place, while loosening bottom nut with 7/8” open-end wrench. Reverse procedure to install. Service Hose Parts Numbers: 941467 – Black Service Hose (New Style) Figure 3-1 ...
- Page 19 FIGURE 3-2 Battery Cables Battery Cable Wires 1. Remove bottom service panel using 1/8” hex- head wrench. 2. Unplug the two wires shown, and untie knot in cord. Figure 3-2, 4 3. Cut terminals off with wire cutters, and pull the old cables out from bottom.
- Page 20 FIGURE 3-5 Remove Pump 1. Remove bottom service panel using 1/8” hex- head wrench. 2. Disconnect all hoses & wires from pump. Newer model pumps will have tabs to release the hose barbs from the pump. Push tabs towards the front of the machine then pull the barb &...
- Page 21 FIGURE 3-8 Vacuum Generator 1. Remove bottom service panel using 1/8” hex- head wrench. ( Pg. 21) 2. Remove pump mounting screws and move pump forward for clearance ( Figure 3-7 3. Disconnect solenoid valve from vacuum generator.
- Page 22 Item Part # Description CVAC Vacuum Generator Exploded View 941275 Vacuum Generator 941783 Straight Fitting Male 40200117 Air Solenoid Male Fitting Muffler – Vacuum Generator 40200124...
- Page 23 FIGURE 3-11 Air Solenoid Valve 1. Remove bottom service panel using 1/8” hex- head wrench. 2. Use 3/8” open-end wrench to push fitting in, while pulling the air hose out. Figure 3-11 3. Push left side fitting in to remove solenoid valve Push White housing or Remove the Air hose attached to the Top Fitting...
- Page 24 FIGURE 3-13 Pressure Gauge 1. Remove the Control Panel (refer to Getting Started – Control Panel). Figure 3-13 2. Loosen mounting screws with flat-head screwdriver, slide bracket off, and remove the gauge. Figure 3-14 3. Replace with new gauge. NOTE: Be sure to apply thread-sealer to fittings before replacing any hoses.
- Page 25 FIGURE 3-15 Control Board Remove 1. Remove the control panel (refer to Getting Started – Control Panel). Figure 3-15 2. Remove (2) mounting screws with 1/8” hex-head , while using 3/8” open-end wrench Figure 3-16 wrench to hold back nut in place Figure 3-17 ...
-
Page 26: Tank Service Procedures
9/24/2018 Section Includes: Top Sink R&R Level Switch R&R (New & Used Parts List S E C T I O N 4 Tank Service Procedures Technical Support 1-800-303-5874... - Page 27 FIGURE 4-1 Top Sink Removal of the Top Sink is only necessary when needing to replace Tanks or Tank Sensors. All other components can be accessed through the Service Panels** 3/8” Worm 1. Remove the control panel ( Pg.11 Gear ...
- Page 28 FIGURE 4-4 Level Switches Waste Tank New Machine Drain Valve 1. Drain the used fluid tank Figure 4-4 2. Drain any remaining fluid from waste fluid tank by disconnecting the bottom T-fitting to the Waste Tank with a 7/8” open-end wrench. Figure 4-5 ...
- Page 29 FIGURE 4-6 Level Switches Waste Tank 7/8” FIGURE 4-8 15/16” FIGURE 4-7 FIGURE 4-9 Bottom Waste level Switch Bottom of Tank...
- Page 30 FIGURE 4-10 Level Switch New Tank 1. Drain the waste & new fluid tank to be serviced (refer to Getting Started). 2. Remove waste tank. (refer to Level Switches Waste Tank) 3. Remove top of machine. (refer to Top Sink). ...
-
Page 31: Parts List
Parts List Part # Description Part # Description 941275 Vacuum Generator 941341 2-Way Pump Switch 941276 Solenoid Valve 941342 3-Way Vacuum Switch 941277 4-Way Ball Valve 941343 Vinyl Mat 941278 Pressure Gauge 941346 Red Service Hose 941280 White Plastic Tank (L) 941463 In-Line Filter 941281...
Need help?
Do you have a question about the C-VAC3 and is the answer not in the manual?
Questions and answers