Table of Contents
Advertisement
Quick Links
Advertisement
Table of Contents
Troubleshooting

Related Manuals for Adaptec ARO-1130U2


Summary of Contents for Adaptec ARO-1130U2
- Page 1 NSTALLATION AND ARDWARE UIDE ARO-1130U2 RAID O PC S PTION ARD FOR YSTEMS...
- Page 2 691 South Milpitas Boulevard Milpitas, CA 95035 © 1998 Adaptec, Inc. All rights reserved. Adaptec, and the Adaptec logo are trademarks of Adaptec, Inc. which may be regis- tered in some jurisdictions. Printed in Singapore STOCK NO.: 512215-00, Rev. A RQ 12/98...
- Page 3 ARO-1130U2 RAID Option Card for PC Systems with RAID port III Installation and Hardware Guide...
- Page 4 Copyright © 1998 Adaptec, Inc. All rights reserved. No part of this publication may be repro- duced, stored in a retrieval system, or transmitted in any form or by any means, elec- tronic, mechanical, photocopying, recording or otherwise, without the prior written consent of Adaptec, Inc., 691 South Milpitas Blvd., Milpitas, CA 95035.
- Page 5 This device complies with part 15 of the FCC rules. Operation is subject to the following two con- ditions: (1) this device may not cause harmful interference and (2) this device must accept any interference received, including interference that may cause undesired operation. Adaptec, Inc. Tested To Comply With FCC Standards...
-
Page 7: Table Of Contents
2 Installing ARO-1130U2 Hardware ARO-1130U2 Layout 2-2 Verifying Presence of DIMM Memory 2-3 Installing the ARO-1130U2 2-4 Connecting the LED Cable to the ARO-1130U2 2-5 Completing the Installation 2-6 3 Using the Array1000 BIOS & Driver Selection Utility Running the Array1000 BIOS & Driver Selection Utility 3-2... - Page 8 Using the ARO-1130U2 with an AHA-294x, AHA-3940, or Other AIC-78xx Based Host Adapter and Driver Disk B (Windows NT Only) B-2 Scenario #1: Adding an ARO-1130U2 to a RAIDport II or III System with an AHA-294x, AHA-3940, or Other AIC-78xx Based Host Adapter B-3...
- Page 9 Scenario #2: Adding an AHA-294x, AHA-3940, or Other AIC-78xx Based Host Adapter to a RAIDport II or III System with an ARO-1130U2 B-6 Backing up the Windows NT Registry B-10 C Troubleshooting Troubleshooting Checklist C-1 Windows NT Troubleshooting C-2 Error Messages While Setting Up Windows NT C-2...
-
Page 11: Introduction
Use the Adaptec CI/O Management Software the ARO-1130U2, to create additional arrays (CI/O is required for array management in order to provide the proper level of fault toler- ance and event notification). Refer to the Adaptec CI/O Management Software User’s Guide for instructions on installing and using the soft-... -
Page 12: System Requirements
Web Site at http://www.adaptec.com/raid for a list of approved DIMMs and vendors. Five MBytes of free hard disk space for the ARO-1130U2 software (five MBytes of free hard disk space on the Windows system disk are also required for the temporary files created during installation of the software). -
Page 13: Installation Overview
Installation Overview To install ARO-1130U2 hardware and software, follow these steps: Locate the RAIDport III expansion slot on the motherboard. (Chapter 2) Install the ARO-1130U2 into the RAIDport III expansion slot. (Chapter 2) Connect any additional SCSI devices to the RAID ready SCSI connectors on the motherboard. -
Page 15: Installing Aro-1130U2 Hardware
Installing ARO-1130U2 Hardware This chapter explains how to install the ARO-1130U2 in your system. Note: If the Array1000 BIOS & Driver Selection Utility (Chapter 3) determines you require driver Disk B of the ™ Array1000U2 Family Manager Set driver diskettes, see Appendix B, Using the ARO-1130U2 with Other Adaptec Products. -
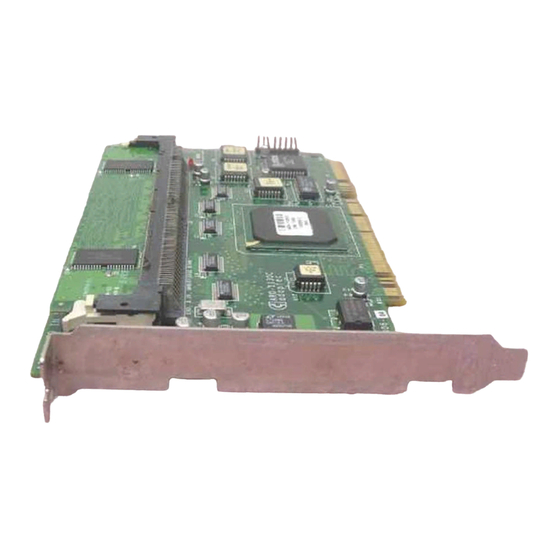
Page 16: Aro-1130U2 Layout
ARO-1130U2 Installation and Hardware Guide ARO-1130U2 Layout Figure 2-1 identifies the major ARO-1130U2 components. You may find it helpful to refer to this information while installing the ARO-1130U2. DIMM Memory Socket Must be populated with a 168-pin EDO, 3.3v DIMM... -
Page 17: Verifying Presence Of Dimm Memory
DIMM is not pre-installed, a 168-pin EDO 3.3v 60ns or faster DIMM can be used. (See the Adaptec Web Site at http://www.adaptec.com/ raid for a list of approved DIMMs and vendors.) 168-pin DIMM Figure 2-2. Installing a DIMM in the ARO-1130U2 DIMM Memory Socket... -
Page 18: Installing The Aro-1130U2
Step 3, as shown in Figure 2-3. Expansion Slot Bracket Screw ARO-1130U2 Card Bracket PCI Expansion Slots RAID port III Expansion Slot Figure 2-3. Installing the ARO-1130U2 in a Typical RAID port III Expansion Slot Bus Contacts... -
Page 19: Connecting The Led Cable To The Aro-1130U2
LED to light whenever there is activity on SCSI Channel A (con- trolled by ARO-1130U2), disconnect the LED cable from the mother- board and connect it to the LED connector on the ARO-1130U2. If the LED has a two-position cable, connect the cable to pins 1 and 2 of the LED connector, as shown in Figure 2-4. -
Page 20: Completing The Installation
ARO-1130U2 Installation and Hardware Guide Completing the Installation Once the ARO-1130U2 is installed in your system, refer to the docu- mentation that came with your computer and SCSI devices for spe- cific instructions on setting up your SCSI devices and connecting them to the SCSI connectors on the motherboard. -
Page 21: Using The Array1000 Bios & Driver Selection Utility
Using the Array1000 BIOS & Driver Selection Utility Whenever you install a new ARO-1130U2 in your system and before you run the Adaptec ArrayConfigU2 program to create the first array in your system, always run the Array1000 BIOS & Driver Selection Utility. -
Page 22: Running The Array1000 Bios & Driver Selection Utility
Note: If you receive an “Unsupported Hardware Con- figuration,” message during setup, contact the system manufacturer. The ARO-1130U2 is not supported by the system. Express setup automatically updates the ARO-1130U2 BIOS. Select Express setup and the utility will do the rest. - Page 23 – Save Current BIOS to a File. Saves the current ARO-1130U2 BIOS to a file. – Erase Current BIOS. Erases the current ARO-1130U2 BIOS. To access these options, select Advanced setup and con- tinue with Step 3. From the Main Menu, select the array adapter card you want to upgrade (only available array adapters can be selected).
-
Page 25: Creating An Array With The Arrayconfigu2 Utility
Once the array is created, use Adaptec CI/O Management Software to create additional arrays and to manage the arrays over the net- work. Refer to the Adaptec CI/O Management Software User’s Guide for instructions on installing and using the software. -
Page 26: Creating An Array
ARO-1130U2 Installation and Hardware Guide Creating an Array Before creating the array, make sure the disks for the array are con- nected and installed in your system (or array enclosure), and that you have run the Array1000 BIOS & Driver Selection Utility, as described in Chapter 3. - Page 27 Creating an Array With the ArrayConfigU2 Utility When the next screen appears, select the type of array you want to create: – Select Optimized for Performance (RAID 0) if you want the fastest possible data input and output from the new array.
- Page 28 ARO-1130U2 Installation and Hardware Guide When the next menu appears, select a boot order for the new array. – Select Disk Array will be Boot Drive if you want your workstation to boot from the new array. If you selected Optimized for Data Protection in Step 4, booting from an array safeguards the information on your boot drive.
-
Page 29: Creating An Array With Custom Setup
If one disk in a pair fails, data is available. The actual data capacity of the array equals half the total available disk space. See the Adaptec CI/O Management Software User’s Guide for more information on selecting a RAID level. - Page 30 Select drives for the array by pressing the until the drive name is highlighted, and then press Ins or Enter. The names of selected drives appear in the Adaptec Array # box. To select drives on a different channel press Tab to select another channel and then select the drives from the SCSI IDs on the Channel menu.
- Page 31 Create additional arrays. You may use ArrayConfigU2 to create additional arrays (if disks are available), however we recom- mend using Adaptec CI/O Management Software to create additional arrays. (CI/O is required for array management in order to provide the proper level of fault tolerance and event notification.) See the Adaptec CI/O Management Software User’s...
-
Page 32: Making The Array Bootable
ARO-1130U2 Installation and Hardware Guide When all arrays are created, exit ArrayConfigU2, remove the ArrayConfigU2 diskette, and reboot the system. After you reboot you can write data to the arrays. At this point, you can make the array bootable as described in the next section. - Page 33 Creating an Array With the ArrayConfigU2 Utility Prepare the array as you normally would prepare a boot disk drive for your operating system. See either Chapter 5, Installing the Software Driver for Windows NT, Chapter 6, Installing the Software Driver for Novell NetWare, or Chapter 7, Installing the Software Driver for SCO UnixWare.
-
Page 35: Installing The Software Driver For Windows Nt
Installing the Software Driver for Windows NT This chapter explains how to install the ARO-1130U2 software driver ( cda1000.sys ) for Windows NT (Windows NT 4.0 Server and Workstation). Before installing the driver, make sure you have com- pleted the following: Installed the ARO-1130U2 in your system. -
Page 36: Installing The Array1000U2 Driver For Windows Nt
2) has an Adaptec AHA-294x host adapter installed; AND 3) requires driver Disk B (as determined by the Array1000 BIOS & Driver Selection Utility), see Using the ARO-1130U2 with an AHA-294x, AHA-3940, or Other AIC-78xx Based Host Adapter and Driver Disk B (Windows NT Only) on page B-2 for instruc- tions on installing the Array1000U2 Miniport Driver. -
Page 37: Installing The Driver When Installing Windows Nt
Press S to skip autodetection of your SCSI host adapter. Press S again to specify an additional device. Press Enter to select Others; insert the Appropriate Adaptec Array1000U2 Family Manager Set driver diskette (Disk A or Disk B) in your floppy disk drive and press Enter. (See Run- ning the Array1000 BIOS &... -
Page 38: Installing The Driver When Windows Nt Is Already Installed
ARO-1130U2 Installation and Hardware Guide If you want to add drivers (other than for the ARO-1130U2), press S and repeat Step 5 for each additional adapter and insert the appropriate disk provided by the hardware manufacturer. Press Enter to continue with the Windows NT operating system setup. -
Page 39: Windows Nt Installation And Configuration Notes
Installing the Software Driver for Windows NT Windows NT Installation and Configuration Notes Windows NT 1 GByte Partition Limitation During Windows NT installation, if your system configuration has multiple arrays and/or single drives, Windows NT limits the size of the partitions you can create to 1 GByte. To work around this 1 GByte limitation, try the following: During Windows NT installation, create the 1 GByte partition (do not finish setup);... - Page 40 ARO-1130U2 Installation and Hardware Guide Boot Order In Windows NT vs. Array Config U2 During Windows NT installation, Windows NT does not show the devices in the boot order. Instead, it shows the arrays with the lower SCSI ID (on lower channel) first. To minimize confusion during...
-
Page 41: Installing The Software Driver For Novell Netware
Installing the Software Driver for Novell NetWare This chapter explains how to install the ARO-1130U2 software driver ( cda1000h.ham ) for Novell NetWare (NetWare 4.11 and 5.0). Before installing the driver, make sure you have completed the following: Installed the ARO-1130U2 in your system (See Chapter 2) Run the Array1000 BIOS &... -
Page 42: Installing The Array1000U2 Driver For Novell Netware
ARO-1130U2 Installation and Hardware Guide Note: If your RAIDport III system has an Adaptec AIC-78xx device (for example, AHA-2940 or AHA-3940 host adapter) installed (which is not associated with the RAIDport), the NetWare driver for these adapters must be from the Adaptec 7800 Family Manager Set 2.10 or higher. -
Page 43: Installing The Driver When Installing Netware
Install DOS on your system and create a DOS partition. Copy the aspi8u2.sys and aspicd.sys files from the \dos direc- tory on the Adaptec Array1000U2 Family Manager Set driver diskette to a directory (e.g., c:\scsi ) on your hard disk drive. - Page 44 When prompted, select Save parameters and continue. Select No when prompted to select an additional disk driver. Select Continue Installation. When NetWare installation is complete, install Adaptec CI/O Management Software from the server console. Refer to the Adaptec CI/O Management Software User’s Guide for instructions...
- Page 45 Older versions of the aic78xx.dsk driver (before v1.30) are compatible with cda1000h.ham as long as the ARO-1130U2 PCI slot is not specified on the command line (e.g., load aic7870.dsk slot=z). If there is an AIC-78xx based card (e.g., AHA-2940) in the system, z must point to that card’s slot number and not to the ARO-1130U2 slot number.
- Page 46 Install DOS on your system and create a DOS partition. Copy the aspi8u2.sys and aspicd.sys files from the \dos direc- tory on the Adaptec Array1000U2 Family Manager Set driver diskette to a directory (e.g., c:\scsi ) on your hard disk drive.
- Page 47 – Delete the Storage Adapters drivers for adapters that are not present in your system. Insert the Adaptec Array1000U2 Family Manager Set driver diskette in your floppy drive. Select Storage Adapters and press Enter. To add Storage Adapter driver, press Insert.
- Page 48 DOS prompt (C: \ ). Change to the c:\nwserver directory and enter server At this point, install Adaptec CI/O Management Software from the server console. Refer to the Adaptec CI/O Management Software User’s Guide for instructions on installing and using the software.
-
Page 49: Installing The Driver When Netware Is Already Installed
NetWare you have installed. NetWare 4.11 Copy the cda1000h.ham file from the appropriate Adaptec Array1000U2 Family Manager Set driver diskette (Disk A or Disk B) into the server’s startup directory (e.g., c:\nwserver ) on your hard disk drive. -
Page 50: Netware Installation And Configuration Notes
DOS partition is too small. It, however, does allow you to continue installation. Ignore this error message. Unloading cda1000h.ham When running Adaptec CI/O Management Software, do not unload cda1000h.ham while iomgr.nlm is still loaded. Unstable behavior may result. 6-10... -
Page 51: Installing The Software Driver For Sco Unixware
Installing the Software Driver for SCO UnixWare This chapter explains how to install the ARO-1130U2 software driver ( cda1000 ) for SCO UnixWare 7.0. Before installing the driver, make sure you have completed the following: Installed the ARO-1130U2 in your system. (See Chapter 2) Run the Array1000 BIOS &... -
Page 52: Installing The Array1000U2 Driver For Unixware
SCO UnixWare device driver configuration data; otherwise select Continue With Installation. Note: If you used Disk B of the Adaptec Array1000U2 Family Manager Set driver diskette for SCO UnixWare in Step 2 above, enter the DCU to edit the Hardware Device Configuration before continuing with installa- tion. -
Page 53: Installing The Driver When Sco Unixware Is Already Installed
Return). The package is loaded into your SCO UnixWare oper- ating system. When the package has loaded, you may be prompted to install the diskette again. Do not reinsert the HBA diskette (Adaptec Array1000U2 Family Manager Set driver diskette for SCO UnixWare). Instead, type q (quit) and press Enter. -
Page 54: Unixware Installation And Configuration Notes
UnixWare Installation and Configuration Notes Editing Hardware Device Configuration in DCU If you used Disk B of the Adaptec Array1000U2 Family Manager Set driver diskette for SCO UnixWare in Step 3 on page 7-2, you need to enter the DCU to edit the Hardware Device Configuration. Follow the instructions below: Enter the DCU when prompted during installation. -
Page 55: A Configuring Aro-1130U2 With The Scsi Select Utility
Configuring ARO-1130U2 with the SCSISelect Utility The SCSISelect configuration utility allows you to change SCSI set- tings without opening the server chassis or handling the card. SCSISelect also contains utilities that allow you to low-level format or verify the disk media of your SCSI hard disk drives. -
Page 56: Starting The Scsiselect Utility
ARO-1130U2 Installation and Hardware Guide Starting the SCSI Select Utility To start SCSISelect, press the F6 key when the following prompt appears when you turn on or reboot your system: Press <F6> for SCSISelect (TM) Utility! The menu that appears displays the options Configure/View Host Adapter Settings and SCSI Disk Utilities, as shown in Figure A-1. -
Page 57: Exiting Scsiselect
MS-DOS Fdisk and Format . Most SCSI disk devices are preformatted at the factory and do not need to be formatted again. The Adaptec Format Disk util- ity is compatible with the vast majority of SCSI disk drives. Caution: A low-level format destroys all data on the drive. -
Page 58: Scsiselect Settings
The following settings are the SCSISelect settings most likely to require any modification: Host Adapter SCSI ID— This option sets the ARO-1130U2’s SCSI ID. We recommend that you leave the ARO-1130U2 set to SCSI ID 7, which gives the ARO-1130U2 the highest priority on the SCSI bus. -
Page 59: Scsi Device Configuration
Include in BIOS Scan—This option determines whether the Array1000U2 BIOS supports hard disk drives attached to the SCSI channel. When set to Yes, the ARO-1130U2 BIOS controls the hard disk drive. When set to No, the ARO-1130U2 BIOS does not control the hard disk drive. -
Page 60: Additional Options
Array1000U2 BIOS This option determines whether the ARO-1130U2 BIOS is installed at boot time. When set to Enabled, the ARO-1130U2 BIOS is installed and all Int13 (except bootable CD-ROM) devices are supported. When set to Disabled, the ARO-1130U2 BIOS is not installed. -
Page 61: B Using The Aro-1130U2 With Other Adaptec
Using the ARO-1130U2 with Other Adaptec Products You cannot install more than one ARO-1130U2 card in the same system; however, you can install an ARO-1130U2 in servers that have other PCI-, ISA-, or EISA-based host adapters installed. When installing multiple adapters, consider the following: ™... -
Page 62: Using Driver Disk B
AHA-3940, or Other AIC-78xx Based Host Adapter and Driver Disk B (Windows NT Only) This section offers two scenarios for using the ARO-1130U2 in a sys- tem also containing any of the above host adapters. If the Array1000 BIOS & Driver Selection Utility (see Chapter 3) determines you require Disk B of the manager set driver diskettes, follow the sce- nario below that matches your situation. -
Page 63: Scenario #1: Adding An Aro-1130U2 To A Raid Port Ii Or Iii
Using the ARO-1130U2 with Other Adaptec Products Scenario #1: Adding an ARO-1130U2 to a RAID port II or III System with an AHA-294x, AHA-3940, or Other AIC-78xx Based Host Adapter These instructions assume that Windows NT is already installed on the server and that the boot drive is currently connected to an AHA-294x, AHA-3940, or any other AIC-78xx based host adapter. - Page 64 ARO-1130U2 Installation and Hardware Guide When the Registry Editor window appears, expand the tree on the left until you can see the nodes under \HKEY_LOCAL_MACHINE\System\CurrentControlSet\Ser- vices . Select cda1000 on the left part of the screen. Write down the cda1000 Tag value that appears on the right part of the screen.
- Page 65 Using the ARO-1130U2 with Other Adaptec Products 01 01 00 00 etc. You need to write down all the number groups from all rows in the table. In each group of eight numbers, reverse the sequence of the two-digit pairs, like this:...
-
Page 66: Scenario #2: Adding An Aha-294X, Aha-3940, Or Other
These instructions assume that Windows NT is already installed on the server and that the boot drive is connected to the SCSI channel controlled by the ARO-1130U2. If the AHA-294x, AHA-3940, or any other AIC-78xx based host adapter is already installed, shut down the server, remove the adapter from the slot, and restart the system. - Page 67 Using the ARO-1130U2 with Other Adaptec Products Changing Registry Settings Back up the NT Registry, using one of the techniques described in Backing up the Windows NT Registry on page B-10. Caution: It is very important to back up the NT Regis- try before you make any changes to it.
- Page 68 ARO-1130U2 Installation and Hardware Guide Click the right mouse button on SCSI Miniport on the right side of the window and select Modify from the pop-up menu. A table appears with columns of two- and four-number groups, something like this:...
- Page 69 Using the ARO-1130U2 with Other Adaptec Products Write down the series of resulting numbers, without all the extra zeroes. In this example, it is 2, 3, 1, 101, etc. This is the Tag value loading sequence for SCSI Miniport drivers. In...
-
Page 70: Backing Up The Windows Nt Registry
ARO-1130U2 Installation and Hardware Guide Backing up the Windows NT Registry It is very important to back up the Windows NT Registry before making any changes to it. This will allow you to recover if the changes make your system unusable. Here are two ways to back up the Windows NT Registry. -
Page 71: Troubleshooting Checklist
Troubleshooting Checklist Check the following if you have problems installing or running the ARO-1130U2 and SCSI devices: Does the ARO-1130U2 BIOS sign-on message appear during bootup? If not, check the following items: – Is the ARO-1130U2 properly seated in a RAIDport expansion slot? Refer to your computer documentation for the slot location. -
Page 72: Windows Nt Troubleshooting
ARO-1130U2 Installation and Hardware Guide Windows NT Troubleshooting Error Messages While Setting Up Windows NT “Setup is unable to locate the hard drive partition prepared by the MS-DOS portion of setup” “xxxx MB disk y at Id z on bus 0 on cda1000.sys does not contain a partition suitable for starting Window NT”... - Page 73 Troubleshooting “Partition Size Too Large” When installing Windows NT, this message appears if attempting to create a system partition larger than 4 GBytes. Windows NT has a maximum system partition size of 4096 MBytes. Create a partition that is smaller than 4 GBytes and continue the Windows NT installa- tion.
-
Page 75: D Using A Cd-Rom Drive
Using a CD-ROM Drive Should you need to install a SCSI CD-ROM, the Array1000U2 Fam- ily Manager Set drivers diskette included with the ARO-1130U2 con- tains the DOS driver software you need in order to use a CD-ROM controlled by the ARO-1130U2. This appendix explains how to set up your CD-ROM drive so that you can initially install your software. - Page 76 ARO-1130U2 Installation and Hardware Guide To complete the driver installation, edit the config.sys file to include command lines for aspi8dos.sys and aspicd.sys , and edit the autoexec.bat file to include a command line for mscdex.exe . The fol- lowing examples illustrate the command line format and the com- mand options appropriate for most systems: Sample command lines for config.sys file:...
- Page 77 ASPI manager also increases. Use this option only if you want to run an ASPI program that specifies a higher number of concurrent commands. Displays information about the ARO-1130U2 and attached SCSI devices when the computer boots. Enables aspi8dos to recognize all eight possible LUNs associated with each SCSI ID.
- Page 78 ARO-1130U2 Installation and Hardware Guide Command Line Options for aspicd.sys Option Example /d: <name> /d:aspicd0 Required in the config.sys command line. Assigns a name to the CD-ROM drive so that mscdex can assign the CD-ROM a logical drive letter. The name must exactly match the CD-ROM drive name in the mscdex command line in autoexec.bat .
-
Page 79: Index
AAA-130 Series RAID cards B-1 Adaptec CI/O Management Software 1-3 AHA-2940 family driver B-6 ARO-1130U2 BIOS address B-1 board layout 2-2 components 2-2 driver B-3 installation 2-4 system requirements 1-2 using with AHA-2940 adapter B-3 Array booting from 4-8, C-1 creating 4-5–4-8... - Page 80 ARO-1130U2 Installation and Hardware Guide Enable disconnection A-1, A-5 Expansion slot 2-2, 2-4 Format disk 4-7, A-3 Hardware installation 1-3 Host adapter SCSI ID A-1 ID numbers A-4, C-1 IDE drives 2-5 Include in BIOS scan A-5 Initialize mode 4-7...
- Page 81 Termination A-1, A-4, C-1 Transfer rates A-1, A-5 Troubleshooting C-1–C-3 Ultra SCSI A-1, A-4 UnixWare 7-1–7-4 driver installation 7-2–7-3 Verify disk media A-3 Wide negotiation A-1, A-5 Windows NT 5-1–5-6 driver installation 5-2–5-4 registry B-3, B-10 Index Index-3...
Need help?
Do you have a question about the ARO-1130U2 and is the answer not in the manual?
Questions and answers