Table of Contents
Advertisement
Quick Links
Printed Matter No. 9839 1462 01
Publication Date 2020-04-27
Valid from Serial No. A1450001
EBB26-055
(5500 r/min)
Read all safety warnings and instructions
Failure to follow the safety warnings and instructions may result in
electric shock, fire and/or serious injury.
Save all warnings and instructions for future reference
8432000000
WARNING
EBB26-055
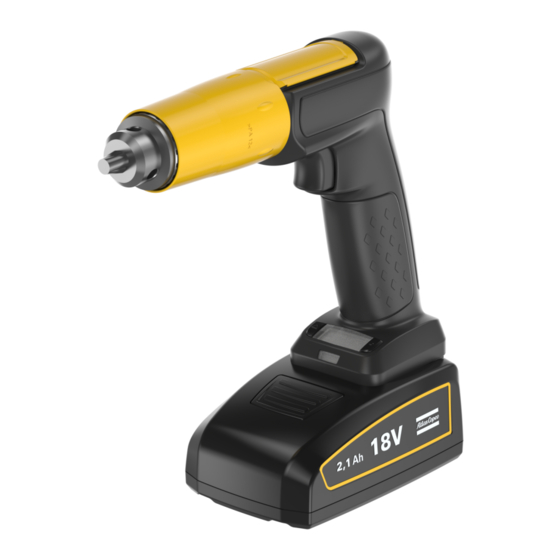
Pistol-grip Drills
Product Instructions
Advertisement
Table of Contents

Related Manuals for Atlas Copco EBB26-055


Summary of Contents for Atlas Copco EBB26-055
- Page 1 EBB26-055 Printed Matter No. 9839 1462 01 Pistol-grip Drills Publication Date 2020-04-27 Valid from Serial No. A1450001 Product Instructions EBB26-055 8432000000 (5500 r/min) WARNING Read all safety warnings and instructions Failure to follow the safety warnings and instructions may result in electric shock, fire and/or serious injury.
-
Page 2: Table Of Contents
Preventive Maintenance .............. 18 Overhaul .................... 18 Lubrication Instructions................... 18 Lubrication ................... 18 Dismantling/Assembling Instructions .............. 19 Assembling the Chuck................. 19 Assembling the Planetary Gear............ 20 Software Update Status.................. 22 Updating the Tool Software ................ 22 Troubleshooting.................... 23 Overheated Tool ..................... 23 © Atlas Copco Industrial Technique AB - 9839 1462 01... - Page 3 Troubleshooting Tool Events ................ 23 Recycling ....................... 26 Environmental Regulations................ 26 Recycling Instruction.................. 26 © Atlas Copco Industrial Technique AB - 9839 1462 01...
-
Page 4: Product Information
■ Damage to parts that occurs as a result of inadequate maintenance or performed by parties other than Atlas Copco or their Certified Service Partners during the warranty period is not covered by the warranty. ■ To avoid damage or destruction of tool parts, service the tool according to the recommended mainte- nance schedules and follow the correct instructions. -
Page 5: Servaid
For further Technical Information, please contact your local Atlas Copco representative. Safety Data Sheets MSDS/SDS The Safety Data Sheets describe the chemical products sold by Atlas Copco. Please consult the Atlas Copco website for more information www.atlascopco.com/sds. Country of Origin For the Country of Origin, please refer to the information on the product label. -
Page 6: System Functionality
For more information, see ToolsTalk Service 2 User Edition user guide. Display (HMI) Note that depending on the model, some features and functions are not available on the tool. Main Display © Atlas Copco Industrial Technique AB - 9839 1462 01... - Page 7 Index of program listed and stored Index of active program selected Revolutions per minute Cutter usage accumulated Cutter usage limited Name of the drill program Display Icons Icon Description Battery warning © Atlas Copco Industrial Technique AB - 9839 1462 01...
- Page 8 Product Information EBB26-055 Icon Description Temperature warning Warning Revolutions per minute Wi-Fi Zone Tethering © Atlas Copco Industrial Technique AB - 9839 1462 01...
- Page 9 EBB26-055 Product Information Icon Description Service Unlock LED light ON LED light OFF © Atlas Copco Industrial Technique AB - 9839 1462 01...
- Page 10 Product Information EBB26-055 Icon Description OK - apply function NOK - cancel function Cutter usage © Atlas Copco Industrial Technique AB - 9839 1462 01...
-
Page 11: Tool Functionality
The tool is equipped with a display and a front LED light. Configured tool programs are stored in the tool and features can be selected for usage. Technical Product Data Technical Product Data can be found on either ServAid, or the Atlas Copco website. Please visit: https://servaid.atlascopco.com or www.atlascopco.com. -
Page 12: Installation
To remove the battery, press the button on the battery and push it out. Tool Upgrade A tool upgrade can be performed by an Atlas Copco Industrial Technique AB Service technician. Contact your Atlas Copco Industrial Technique AB representative for support and more information. -
Page 13: Operation
When the tool is reconnected to the network again the tool is unlocked and fully operational again. For more information to configure the Wi-Fi Tethering, see ToolsTalk Service 2 User Edition user guide. © Atlas Copco Industrial Technique AB - 9839 1462 01... -
Page 14: Operating The Tool
Press RIGHT button to navigate. Press LEFT button and hold down for approximately 2 seconds. Press LEFT button to select. Key Lock On start up the display lock is active. © Atlas Copco Industrial Technique AB - 9839 1462 01... - Page 15 A scroll indicator is shown on the right hand side (white) of the display. Display example Press the tool trigger to use the selected drill program. Timeout The display will timeout and revert to the startup screen if left inactive. © Atlas Copco Industrial Technique AB - 9839 1462 01...
- Page 16 Lock on service alarm can be configured, where the tool will not operate once usage limit has exceeded. Data monitored can be stored in the tool as 'Usage at last service'. © Atlas Copco Industrial Technique AB - 9839 1462 01...
- Page 17 EBB26-055 Operation For more information to configure the Service Alarm, refer to the ToolsTalk Service 2 User Edition user guide. © Atlas Copco Industrial Technique AB - 9839 1462 01...
-
Page 18: Service
Lubricate gears with grease containing molybdenum disulphide (e.g. Molykote BR2 Plus). Lubricate o- rings and threaded connections with grease (e.g. Almagard LE 3751) before assembling. Brand Type Molykote BR2 Plus Almagard LE 3751 © Atlas Copco Industrial Technique AB - 9839 1462 01... -
Page 19: Dismantling/Assembling Instructions
Place the tool in the plastic clamps (4080 1133 80). Put the plastic clamps with the motor and handle to a vise. Assemble the front part of the motor. Tighten to 30 Nm, left threaded. © Atlas Copco Industrial Technique AB - 9839 1462 01... -
Page 20: Assembling The Planetary Gear
Press the ball bearing (10) onto the shaft (7). Mount the snap ring (11) onto the shaft (7). Insert the plug (2) into the front part (3). Insert the assembled shaft (7) into the front part (3). © Atlas Copco Industrial Technique AB - 9839 1462 01... - Page 21 Make sure to place the mounting tool so that it presses both the inner and outer ring of the bear- ings. Push down the press. Press the front part and mounting tool together. Make sure the front part has a flush surface. © Atlas Copco Industrial Technique AB - 9839 1462 01...
-
Page 22: Software Update Status
To prevent damage to the tool: ■ Make sure the battery is fully charged when performing a software update. ■ Do not remove the battery from the tool while the software update is in progress. © Atlas Copco Industrial Technique AB - 9839 1462 01... -
Page 23: Troubleshooting
Tool events which appears on the display: Icon display Light Event Tool behaviors Flashing red Overheated The tool will not start drilling. Steady red Battery empty The tool will not start drilling. © Atlas Copco Industrial Technique AB - 9839 1462 01... - Page 24 [limit exceeded - lock] Flashing red Service The tool will start drilling. [limit reached - no lock] Steady red Service The tool will not start drilling. [limit reached - lock] © Atlas Copco Industrial Technique AB - 9839 1462 01...
- Page 25 The tool will not start drilling. ■ Current offset adjust- ment error The reason for the event/ state will go away. ■ Battery voltage low while drilling Not available for all models. © Atlas Copco Industrial Technique AB - 9839 1462 01...
- Page 26 Motor housing, complete Electronics Handle and trigger Left Plastic, Other, PA6GF30 Display (HMI) and radio Electronics board module Main board Electronics Battery connector Plastic, Other, PA6 Screws 2 pcs Metal, Steel © Atlas Copco Industrial Technique AB - 9839 1462 01...
- Page 28 Original instructions © Copyright 2020, Atlas Copco Industrial Technique AB. All rights reserved. Any unauthorized use or copying of the contents or part thereof is prohibited. Atlas Copco Industrial This applies in particular to trademarks, model denominations, part numbers Technique AB and drawings.
Need help?
Do you have a question about the EBB26-055 and is the answer not in the manual?
Questions and answers