Haier HP200S1 Operation And Installation Manual
Heat pump water heater
Hide thumbs
Also See for HP200S1:
- Installation and service manual (41 pages) ,
- Operation and installation manual (7 pages)
Table of Contents
Advertisement
Available languages
Available languages
Advertisement
Chapters
Table of Contents

Related Manuals for Haier HP200S1


Summary of Contents for Haier HP200S1
- Page 1 Heat pump Water Heater Operation and Installation Manual ELECTRICITE ELECTRICITE PERFORMANCE Model HP200S1 HP300S1 Please read this manual carefully prior to your use of this water heater. The appearance of the water heater given in this manual is for reference only.
-
Page 2: Table Of Contents
10.Product Fiche ......................... 30 11.Warranty certificate ......................31 Dear users of Haier, Thank you for choosing Haier products. Please read this manual carefully and follow the operation and safety instruction to ensure best installation and utilization of the product. Product safety statement: 1.The appliance is not to be used by persons (including... -
Page 3: Safety Instructions
Safety instructions (to be followed at any time) Interpretation of marks and symbols Failure to respect these instructions may lead to serious malfunctions of the device and to risks for the user Instructions with this warning mark shall be strictly followed during operation. They relate to product and body safety of users. - Page 4 Safety instructions (to be followed at any time) The outlet water temperature Means for disconnection from of a water heater is typically the main supply having a higher than the temperature contact separation in all poles indicated on the display. Hot that provide full...
- Page 5 Safety instructions (to be followed at any time) Rotate the safety valve handle Water heaters shall once a month. The valve works equipped with a dedicated well if there is water flowing power line residual out, otherwise check current circuit breakers. The blocking and replace the safety action current shall not exceed valve if necessary.
-
Page 6: Instructions On Transportation And Storage
Instructions on transportation and storage 1. During transportation or storage, the heat pump water heater shall be packed in the undamaged package to avoid damage to appearance and performance of the product; 2. During transportation or storage, the heat pump water heater shall be in the upright position;... -
Page 7: Technical Parameters
Technical parameters Model ( system ) HP200S1 HP300S1 Model (tank unit) TS200HE-S1 TS300HE-S1 UE1.0-S1 UE1.5-S1 Model (external unit) Tank volume 195L 293L Rated voltage/ frequency 230V/50Hz 230V/50Hz Tank rated pressure 0.85MPa 0.85MPa Corrosion protection Magnesium rod(x2) Magnesium rod(x2) Water proof grade... -
Page 8: Description Of Parts And Components
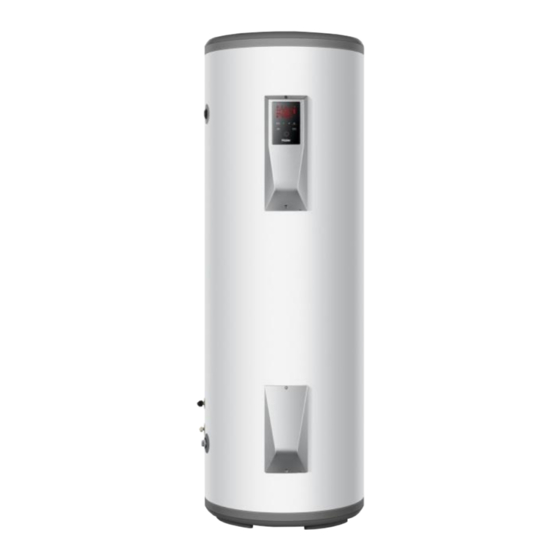
Description of parts and components Heat pump structure Hot water Safety outlet AUTO ECO+ BOOST HP HC START ERROR STOP MODE valve TIMER BOOST Electrical cover Electrical cover -down Refrigerant Refrigerant outlet inlet Cold water Drain outlet inlet Air grille Electrical cover HP200S1/HP300S1... - Page 9 Description of parts and components Exploded view(tank unit) Description Plastic cover Flange Top cover Tank case Electrical cover - up Display panel Anode Rod Anode Rod Heating element Electrical cover - down Bottom Cover Handle Tank temperature sensor Display panel signal wire Interconnection cable (3*1.5mm2) Accessories(tank unit)...
- Page 10 Description of parts and components Exploded view(external unit) 10 11 Description Description Compressor Air grille Expansion valve Front cover Evaporator Controller panel Top Cover Bottom Cover Right Cover Four-way valve Electrical cover Accessories(external unit) Expansion Part Protective Rubber External Drain pipe for Elbow name bolts...
-
Page 11: Installation Introduction
Installation introduction Installation precaution - Do not install the water heater in the position where exposed to gas, vapours or dust. - Install the tank unit and external unit on a flat, solid surface.The surface can support the machine weight and the condensate water can be drained freely. - Noise due to operating and air flow do not bother neighbors. - Page 12 Installation introduction Installation dimensions Unit:mm Model HP200S1 899 681 1765 1530 HP300S1 1519 1795 899 681...
- Page 13 Installation introduction Installation dimensions(external unit) Air inlet > 300mm > 300mm > 600mm > 1500mm Air outlet > 500mm Installation dimensions(tank unit) > 500mm Expansion bolts < 50mm The strap of tank 2/3H...
- Page 14 Installation introduction Tools for the connection of refrigerant lines a) Group manometer suitable for use with R134a, with charge and vacuum tubes; b) Vacuum pump; c) Torque wrenches for nominal diameter of 1/4 “and 3/8” sizes on both sides to respond to the measures of the pipe unions;...
- Page 15 Installation introduction Connecting the tank unit a) Shape the pipes according to the path; b) Remove the threaded brass flare nuts(A) on the tank unit and store them (check that no impurities are left); c) Cut the pipe to the fixed length, with a pipe cutter, avoiding any deformation; d) Remove burrs with pipe reamer avoiding to get impurities inside (keep down the tube);...
- Page 16 Installation introduction Connecting the external unit When making the connections, you should respect the standards and local directives. Remove the flare nuts from 2 and 3 way valves, Insert the flare nuts on the pipes, screw the flare nuts to connect the external unit with the same method described for the tank unit.
- Page 17 Installation introduction Charge of the refrigerant gas The product can be installed with refrigerant connection between internal and external unit up to 20 m. The declared performances are referred to refrigerant connection pipes of 5 m; different types of installation may lead to different values of performance. In case you are adding R134a gas in the circuit, will be needed: - R134a refrigerant tank.
- Page 18 Installation introduction Installation caution When making the connections, you should respect the standards and local directives. - Select copper pipes for pipeline connection. - The inlet water pressure is between 0.1~0.6MPa. If lower than 0.1 MPa, a booster pump shall be added at the water inlet; if higher than 0.6 MPa, a pressure relief valve shall be added at the water inlet.
- Page 19 Installation introduction Pipeline installation diagram Thermostatic valve Installation A 230V 50Hz Check valve Hot water outlet Water outlet of safety valve Pressure Stop Check valve valve relief valve Drain valve Cold water inlet Water outlet Installation B(for France only) Thermostatic valve Connected to cold water inlet 230V of the water tank...
- Page 20 Through poor conditions of the electrical MAINS, shortly voltage drops can appear when starting the EQUIPMENT. This can influence other equipment (eg. blinking of a lamp). If the MAINS-IMPEDANCE Zmax < 0.304 OHM(HP200S1) Zmax < 0.289 OHM(HP300S1) , such disturbances are not expected. (In case of...
- Page 21 Installation introduction Electrical connections Electrical cover Terminal block L N L Earth connection Fixing board Tank temperature Correct sensor Terminal block Display panel signal wire Earth connection Off-peak power signal wire Fixing board (2*0.75mm2 ) Alimentation Interconnection cable cable Description Availability Type Cable...
- Page 22 Installation introduction Off-peak power signal wire connection Interconnection cable(3*1.5mm² ) 123kwh Auto Alimentation cable(3*2.5mm²) Tank temperature sensor Display panel signal wire Off-peak power signal wire (2*0.75mm Commissioning Installers shall use checking list for trial operation of water heaters as per the user manual and make √...
- Page 23 Installation introduction Wiring diagram Wiring diagram Transformer Display panel CN26 Fan capacitor Brown Black White White Four-way valve External unit Compressor Defrost temperature sensor L-OUT capacitor Exhaust temperature sensor L-IN Compressor White White Ambient temperature sensor Current transformer Intake temperature sensor Heat_L Brown L-OUT...
-
Page 24: Operation And Functions
Operation and functions Display AUTO BOOST ECO+ HP HC START STOP ERROR MODE BOOST TIMER Description of the pictograms Symbol Description Power ON/OFF switch When turned off, the display shows the time and the actual water temperature. When turned on, the display shows the working mode. - Page 25 Description of the pictograms Symbol Description Auto mode -Optimised management of the heat pump and the electrics for guaranteed comfort; - Prior using heat pump; - If compressor works more than the default 8 hours , start the auxiliary power; - The compressor maximum continuous working time( can be adjust in the installer settings.
- Page 26 Description of the pictograms Symbol Description Boost mode. Heat pump and Auxiliary electrical heater are activated at the same time. Heat pump working icon. Auxiliary electrical heater working icon. Time of peak/off-peak hours. In Time of peak/off-peak hours mode, the symbol corresponding to the mode is displayed. Alarm display icon....
- Page 27 Operating functions Installer settings - To open the installer settings, press switch off the system, then press at the same time for 10 seconds. - When menu is open, press to change the value of the settings. - Press to confirm the settings. - Press to close the menu.
-
Page 28: Checking And Maintenance
Checking and maintenance - Installation and maintenance of the appliance must be done by a qualified professional . - Before working on the appliance,Shut down the machine and cut off the power supply . - Do not touch with wet hands. - Maintenance operations are important to guarantee optimum performance and extend the life of the equipment. -
Page 29: Faults And Protection
Faults and protection Digital Release Fault type Action indication Operating temperature protection Air exhaust temperature protection Compressor protection After fault is solved, Evaporation high temperature switch on power protection supply for release Compressor over-current Over-current protection protection The system will automatically cut off Electricity leakage alarming power supply if any line fault occurs Over temperature alarming The actual water temperature≥85℃... -
Page 30: Product Fiche
Load profiles of water heaters, Type Refrigerant R134a/1300g R134a/1500g Qingdao Economic & Technology Development Zone Haier Water-Heater Co.,Ltd. Manufacturer Haier Industry Park, Economic & Technology Development Zone, 266101 Qingdao, Address PEOPLE'S REPUBLIC OF CHINA Heat pump water heater Denomination Hot water... -
Page 31: Warranty Certificate
Warranty certificate Length of warranty: - Guarantee of the watertightness of the tank: 5 years - Electrical System (Electronic and Heat Pump): 2 years Replacement of a component or product can not in any case extend the initial warranty period. DATE OF PURCHASE : .......................... - Page 33 Chauffe-eau thermodynamique Manuel d’installation et d’utilisation ELECTRICITE ELECTRICITE PERFORMANCE Modèles HP200S1 HP300S1 Consulter ce manuel avant installation et première utilisation. Nous vous recommandons de conserver ce manuel et de le consulter avant toute manipulation, reglage ou entretien de l’appareil. Les schémas et visuels sont donnés à titre...
- Page 34 11. Certificat de garantie ......................31 Cher client: Merci d’avoir choisi un des modèles de chauffe-eau thermodynamiques Haier. Veuillez lire attentivement ce manuel avant l’installation et la première utillisation. Nous vous recommandons de respecter chaque étapes decrites dans ce manuel pour une installation dans les regles et une utilisation optimale du produit.
-
Page 35: Consignes De Sécurité
Consignes de sécurité (le non respect de ces consignes peut entrainer des disfonctionnements sérieux de l’appareil et des risques pour l’utilisateur) Interprétation des symboles Ce symbole d’avertissement concerne la sécurité du produit et de l’utilisateur, les recommandations et indications signalées par ce symbole doivent être suivies scrupuleusement. - Page 36 Consignes de sécurité Lors de l’ouverture de la vanne Ne pas insérer les doigts, la d’eau chaude sanitaire, la main ou tout objet dans la température d’eau de sortie grille de l’appareil de manière chauffe-eau à éviter tout risque de blessure généralement supérieure à...
- Page 37 Consignes de sécurité Actionner soupape Le chauffe-eau doit utiliser un groupe de sécurité une fois par circuit d’alimentation mois. Si de l’eau coule, la spécifique et être équipé d'un soupape est en état de disjoncteur différentiel dont le marche. Dans le cas contraire, courant résiduel ne dépasse vérifier que la soupape n’est pas 30mA.
-
Page 38: Transport Et Stockage
Transport et stockage 1. Lors du transport et du stockage, l'unité extérieur doit être bien emballé pour éviter la dégradation d’aspect et de performance du produit; 2. Lors du transport et du stockage l'unité extérieur doit rester en position verticale. Maintenez l'unité... -
Page 39: Paramètres Techniques
Paramètres techniques Modèle(système) HP200S1 HP300S1 Modèle(unité réservoir) TS200HE-S1 TS300HE-S1 Modèle(unité extérieure) UE1.0-S1 UE1.5-S1 Volume du réservoir 195L 293L Voltage/fréquence nominale 230V/50Hz 230V/50Hz Pression nominale du réservoir 0.85MPa 0.85MPa Protection contre la corrosion Anode magnésium(X2) Anode magnésium(X2) IPX4 IPX4 Niveau d’imperméabilité... -
Page 40: Désignation Des Composants
Structure de la pompe à chaleur Sortie d’eau chaude AUTO ECO+ BOOST HP HC Bouchon START ERROR STOP MODE TIMER BOOST Boitier de protection Boitier de protection sortie Entrée refrigérant refrigérant Entrée Vidange d'eau froide Boitier de Grille de protection protection HP200S1/HP300S1... - Page 41 Désignation des composants Vue éclatée (Unité Réservoir) Description Couvercle de protection élec. Flange Couvercle de la cuve Cuve Boitier de électronique - haute Affichage Anode de magnésium Anode de magnésium Appoint électronique Boitier de électronique - base Fond de la cuve Poignée le capteur de température du ballon...
- Page 42 Désignation des composants Vue éclatée (Unité extérieure) 10 11 Description Description Grille de protection Compresseur Détenteur électronique Panneau avant Evaporateur Carte électronique Ventilateur Panneau supérieur Panneau inférieur Panneau droit Vanne 4 voies Boitier de protection Accessories(Unité extérieure) Unité bague de Tuyau d'évacuation Pieds Chevilles...
-
Page 43: Instructions D'installation
Instructions d’installation Précautions d’installation - Ne pas installer le chauffe-eau dans un endroit exposé aux gaz, vapeurs ou poussières. - Installer l'appareil sur une surface plate et stable, pouvant supporter le poids de l'appareil rempli d'eau et permettant d'installer l'évacuation des condensats. - Veiller à... - Page 44 Instructions d’installation Dimensions d’installation En mm Model HP200S1 899 681 1765 1530 HP300S1 1519 1795 899 681...
- Page 45 Instructions d’installation Dimensions d’installation(Unité extérieure) -espaces à respecter Entrée d'air > 300mm > 300mm > 600mm > 1500mm Sortie d'air > 500mm Dimensions d’installation (Unité Réservoir) > 500mm Chevilles < 50mm La sangle de réservoir 2/3H...
- Page 46 Instructions d’installation Outils pour le raccordement des conduites de fluide frigorigène a) Regrouper le manomètre adapté pour une utilisation avec le R134a, avec des tubes de charge et à vide ; b) Pompe à vide ; c) Les clés dynamométriques pour un diamètre nominal de 1/4"et 3/8" de dimensions, sur les deux côtés, afin de répondre aux mesures des raccords de tuyaux ;...
- Page 47 Instructions d’installation Connexion de l'appareil interne a) Façonner les tuyaux selon le chemin ; b) Retirer les écrous flare en laiton(A) sur l'appareil intérieur (ballon) et le stocker (vérifier qu'aucune impureté ne soit laissée); c) Couper le tube selon la longueur fixe, avec un coupe-tube, évitant toute déformation ;...
- Page 48 Introductions d’installation Connexion de l'appareil externe Lors du raccordement, vous devez respecter les normes et directives locales. Retirer le couvercle en plastique des raccords coniques, visser les raccords coniques pour connecter l'appareil extérieur avec la même méthode décrite pour l'appareil interne. Connexion de Pompe à...
- Page 49 Instructions d’installation Charge de Refrigèrent Le produit est pret-chargé pour un raccordement de 3m - 10m . - Les performances déclarées sont en référence aux tuyaux de raccordement de raccordement de fluide frigorigène de 5 m ; différents types d'installation peuvent conduire à différentes valeurs de performance.
- Page 50 Introductions d’installation Précautions de connexion hydraulique Pour faire les connexions, vous devriez respecter les normes et les directives locales. - Choisir des conduits en cuivre pour la connexion de la tuyauterie. - La pression de l'eau entrée doit se situer entre 1 et 6 bar maximum. Si elle est inférieure à...
- Page 51 Instructions d’installation Schéma d’installation Installation A Mitigeur thermostatique 230V 50Hz Clapet anti-retour Sortie chaude Piquage pour soupape de sécurité Détendeur Arrêt Antiretour vanne de drainage Entrée eau froide Vidange Installation B(uniquement pour la France) Mitigeur thermostatique Entrée réservoir 230V 50Hz Antiretour Clapet Arrêt...
- Page 52 - Seuls les professionnels qualifiés peuvent effectuer les connexions électriques, toujours en état hors tension. - La mise à la terre doit être conforme aux normes locales. -Le Chauffe-eau thermodynamique doit etre alimenter par mono-phase 16A (HP200S1) 20A (HP300S1) approvisionnement nécessitant un électricien agréé pour le raccordement.
- Page 53 Instructions d’installation Connexions électriques Boitier de protection L N L Bornier Prise de terre Bride de fixation le capteur de température du réservoir Bornier la ligne de signal du contrôleur HP/HC signal cable (2*0.75mm2 ) bord de fixation Allimentation Interconnector electrique Description Type...
- Page 54 Instructions d’installation Connexion de HP/HC signal Interconnector (3*1.5mm 123kwh Auto Allimentation électrique (3*2.5mm le capteur de température du réservoir la ligne de signal du contrôleur HP/HC signal cable (2*0.75mm2) Mise en service list de contrôle L’installateur effectue les vérifications de mise en service du chauffe-eau conformément au manuel d’utilisation et coche les cases: Les fils de liaison électrique sont bien connectés? La disposition des tuyaux d’évacuation est connecté?
- Page 55 Instructions d’installation Schéma Electronique Schéma Electronique Transform. Condensateur Panneau CN26 ventilateur Brun Noir Ventilateur Blanc Blanc Vanne de 4 voies Unité extérieure Condensateur Capteur de température décongeler compresseur Rouge L-OUT Capteur Téchapp. L-IN Compresseur Blanc Blanc Capteur Tambiante Transform de courant Capteur de température d'admission Brun L-OUT...
-
Page 56: Fonctionnement Et Reglages
Fonctionnement et reglages Affichage AUTO BOOST ECO+ HP HC START STOP ERROR MODE BOOST TIMER Description des pictogrammes Symbol Description Interrupteur ON/OFF d’alimentation Lorsqu'il est éteint, l'écran affiche l'heure et la température réelle de l'eau. Lorsqu'il est éteint, l'écran affiche le mode de fonctionnement. Le réglage de la température par défaut est de 55 °... - Page 57 Fonctionnement et reglages Description des pictogrammes Symbol Description Mode Auto -Gestion optimisée de la pompe à chaleur et de l'appoint électrique pour un confort optimal - La pompe à chaleur fonctionne en priorité; -Lorsque le temps de fonctionnement de la pompe à chaleur dépasse le temps de fonctionnement continu maximum ( 8 heures par défaut ), l'appoint électrique prend le relais;...
- Page 58 Fonctionnement et reglages Description des pictogrammes Symbol Description Mode Boost. La pompe à chaleur et l'appoint électrique sont activés en même temps.(sert aussi de mode secours) Icône de fonctionnement de la pompe à chaleur. Icône de fonctionnement du chauffage électrique. Les symbol HC ou HP s'allume automatiquement selon le signale réseau électrique.
- Page 59 Fonctionnement et réglages Paramètres d'installation - Pour utiliser les paramètres d'installation, appuyer sur pour éteindre le système, puis appuyer sur en même temps pendant 10 secondes. - Lorsque le menu est ouvert, appuyer sur pour changer les valeurs des paramètres. - Appuyer sur pour confirmer les paramètres.
-
Page 60: Vérification Et Entretien
Vérification et entretien - L’installation et l’entretien de l'appareil doivent être effectués par un professionnel qualifié. - Avant de travailler sur l'appareil, arrêter la machine et couper l'alimentation électrique. - Ne pas toucher avec les mains mouillées. - Les opérations de maintenance sont importantes pour garantir les performances optimales et prolonger la durée de vie de l'équipement. -
Page 61: Défauts Et Mises En Sécurité
Défauts et mises en sécurité Indication Annulation de Catégorie du défaut Conditions d’actio n digitale protection Protection de température de fonctionnement Après le dépannage, Protection du Protection de température remise sous tension compresseur d’échappement pour l’annulation Protection de température d’évaporation Protection contre Après le dépannage, surcourant du... -
Page 62: Fiche Produit
Cycle de soutirage de teste réfrigérant R134a/1300g R134a/1500g Qingdao Economic & Technology Development Zone Haier Water-Heater Co.,Ltd. Fabricant Haier Industry Park, Economic & Technology Development Zone, 266101 Qingdao, adresse PEOPLE'S REPUBLIC OF CHINA Chauffe eau thermodynamique dénomination utilisation prévue Eau chaude package double Type de l'Assemblée... -
Page 63: Certificat De Garantie
Certificat de garantie Durée de garantie: - Garantie de l’étanchéité de la cuve : 5 ans - System électriques - électroniques et Pompe à chaleur : 2 ans Le remplacement d’un composant ou d’un produit ne peut en aucun cas prolonger la durée initiale de la garantie. - Page 65 Scaldabagno a pompa di calore Manuale di Istruzioni e di installazione ELECTRICITE ELECTRICITE PERFORMANCE Modello HP200S1 HP300S1 Prima di effettuare l’installazione dell'apparecchio leggere attentamente le istruzioni. Conservare questo manuale per riferimenti futuri. fare attenzione alle avvertenze descritte nel manuale! Le caratteristiche di ventilazione del locale nel quale è...
- Page 66 11. certificato di garanzia..........................31 Gentile Cliente, desideriamo ringraziarLa per aver preferito nel suo acquisto lo scaldabagno di Haier. Questo libretto è stato preparato per informarLa, con avvertenze e consigli, sulla sua installazione, il suo uso corretto e la sua manutenzione per poterne apprezzare tutte le qualità.
-
Page 67: Indicazioni Per La Sicurezza E Per La Lettura Dei Simboli
Indicazioni per la sicurezza e per la lettura dei simboli Significato dei simboli presenti nel libretto Dichiarazione di sicurezza del prodotto: 1. Questo apparecchio non è previsto per essere utilizzato da persone (compresi i bambini) con ridotte capacità fisiche, sensoriali, o da persone prive di esperienza o di conoscenza, a meno che esse non siano controllate ed istruite relativamente all’uso... - Page 68 Accertarsi che l’apparecchio Durante il bagno, i bambini sia installato in un luogo con devono sempre essere sotto disponibilità di drenaggio la guida di una persona dell’acqua. adulta. L’apparecchio è dotato di I conduttori di terra e di valvola di sicurezza. neutro dell’alimentazione, La valvola di sicurezza non non possono essere collegati...
- Page 69 L'apparecchio contiene gas fluorurati ad effetto serra. nome chimico del gas: gas serra R134a fluorurati sono contenute nelle apparecchiature ermeticamente sigillato. Un quadro elettrico ha un comprovato tasso di perdita inferiore allo 0,1% l'anno come indicato nelle specifiche tecniche del costruttore.
-
Page 70: Trasporto E Movimentazione
Trasporto e movimentazione Alla consegna del prodotto, controllare che durante il trasporto non si siano verificati danneggiamenti visibili esternamente sull’imballaggio e sul prodotto. In caso di constatazione di danni esporre immediatamente reclamo allo spedizioniere. Assicurarsi che l’imballo sia integro e lo scaldabagno sia ben protetto, per evitare danni durante la sua movimentazione. -
Page 71: Principio Di Funzionamento
Funzionamento & principi Lo scaldabagno a pompa di calore ad aria, consiste in un nuovo tipo di apparecchiatura per riscaldare l’acqua, in modo efficiente. Principalmente è costituito da un compressore, una valvola di espansione, un filtro, un evaporatore, un condensatore, un ventilatore ed altri componenti accessori. -
Page 72: Tabella Dati Tecnici
Tabella dati tecnici Modello HP200S1 HP300S1 Modello(unità serbatoio) TS200HE-S1 TS300HE-S1 UE1.0-S1 UE1.5-S1 Modello(unità esterna) 195L 293L Volume del Serbatoio 230V/50Hz 230V/50Hz Voltaggio/Frequenza nominale Pressione nominale del Serbatoio 0.85MPa 0.85MPa Anodo magnesio(x2) Anodo magnesio(x2) Protezione da Corrosione IPX4 IPX4 Grado di protezione... -
Page 73: Descrizione Delle Parti E Dei Componenti
Struttura dell’apparecchio Uscita acqua Valvola di calda AUTO ECO+ BOOST HP HC START ERROR STOP MODE sicurezza BOOST TIMER Vano elettrico -superiore Vano elettrico -inferiore Refrigerante Refrigerante presa insenatura scarico Ingresso serbatoio acqua griglia di Air Vano elettrico HP200S1/HP300S1... - Page 74 Descrizione di parti e componenti Vista in esploso(unità serbatoio) Descrizione Cover di plastica Flangia Involucro superiore Serbatoio 5 Vano elettrico - superiore Panello di controllo Anodo Rod Anodo Rod Termosifone Vano elettrico - inferiore Coperchio inferiore Maniglia sensore di temperatura del serbatoio Mostra cavo di segnale pannello cavo di interconnessione(3*1.5mm...
- Page 75 Descrizione di parti e componenti Vista in esploso(unità esterna) 10 11 Descrizione Descrizione Griglia di Air Compressore Valvola di espansione Struttura anteriore Evaporatore Pannello di controllo Ventilatore Involucro superiore Coperchio inferiore Coperchio destro Valvola a quattro vie Vano elettrico L’imballo contiene(unità...
-
Page 76: Introduzione All'installazione
Introduzione all’installazione Scelta del locale di installazione L'installazione, i collegamenti elettrici, dei condotti di aspirazione e/scarico, così come la prima messa in funzione, devono essere realizzati esclusivamente da installatori abilitati. 1. Verificare che il luogo di installazione dell’apparecchio, consenta un’areazione ed una ventilazione naturale adeguata e senza impedimenti. - Page 77 Introduzione all’installazione Dimensioni e quote d'installazione Unità: mm Modello HP200S1 899 681 1765 1530 HP300S1 1519 1795 899 681...
- Page 78 Introduzione all’installazione Dimensioni e quote d'installazione(unità esterna) Ingresso dell’aria > 300mm > 300mm > 600mm > 1500mm Uscita dell’aria > 500mm Installation dimensions(unità serbatoio) > 500mm Cavicchi < 50mm La cinghia di serbatoio 2/3H...
- Page 79 Introduzione all’installazione Strumenti di connessione delle linee refrigeranti a) Gruppo manometro adatto per l’uso con R134a, con tubi a carico e a vuoto; b) Pompa di aspirazione; c) Chiavi dinamometriche per diametro nominale di dimensione 1/4 “ e 3/8” su entrambi i lati per rispondere alle misure di unione della tubazione;...
- Page 80 Introduzione all’installazione Collegamento dell’unità serbatoio a) Modellare le tubazioni a seconda del percorso; b) Rimuovere il filettato in ottone bocchettoni (A) sull'unità carro armato e conservarle (verificare che non ci siano impurità a sinistra); c) tagliare il tubo alla lunghezza desiderata, con un taglia-tubi, evitando ogni deformazione;...
- Page 81 Introduzione all’installazione Collegamento dell’unità esterna Nell’eseguire le connessioni, dovreste rispettare le normative e le direttive locali. Togliere il coperchio in plastica delle connessioni del gas, avvitare i dadi svasati per collegare l'unità esterna con lo stesso metodo descritto per l'unità interna. Creare il vuoto Perdite dal circuito dovrebbero verificarsi con l’assemblaggio di una pompa di aspirazione e un manometro adattoa R134a.
- Page 82 Introduzione all’installazione Ricarica del gas refrigerante Il prodotto può essere installato con la connessione refrigerante tra le unità interna ed esterna fino a 20 m. Le prestazioni dichiarate si riferiscono a tubi di connessione di 5 m; diversi tipi di installazione possono condurre a valori di prestazione differenti. Nel caso in cui aggiungiate gas R134a nel circuito, avrete bisogno: - serbatoio refrigerante R134a.
- Page 83 Introduzione all’installazione Illustrazione dell’installazione delle tubazioni Modalità 1 dell’installazione: Valvola termostatica 230V 50Hz Valv. non ritorno Uscita acqua calda Valvola di Sicurezza/scarico termico Ridutt. di Valvola Valv. non pressione manuale ritorno valvola di Carico acqua scarico Scarico Nota: - Riduttore di pressione, valvola termostatica, valvola manuale e valvola di non ritorno non sono compresi nella lista degli accessori forniti dal costruttore.
- Page 84 - La messa a terra deve essere eseguita in conformità alla normative locale. -Il Scaldacqua a pompa di calore richiede una singola fase 16A (HP200S1) / 20A (HP300S1) fornitura richiede un elettricista qualificato per il collegamento.
- Page 85 Introduzione all’installazione Connessioni elettriche Coperchio del vano elettrico Morsettiera L N L Collegamento a terra Fissaggio Sensore di temperatura Corretta del serbatoio Morsettiera Line di segnale del controllore Off-peak filo segnale Tavola di fissaggio di potenza Cavo di Cavo di alimentazione interconnessione Descrizione...
- Page 86 Introduzione all’Installazione Collegamento elettrico con contatore e/o apparecchiatura limitatrice di carichi Cavo di interconnessione(3*1.5mm² ) 123kwh Auto Alimentazione (3*1.5mm Sensore di temperatura del serbatoio Line di segnale del controllore Segnale di commutazione a bassa potenza comunale (2*0.75mm Messa in Funzione I seguenti punti vanno controllati dal personale di installazione.
- Page 87 Introduzione all’installazione Schema di collegamento Trasformatore Display CN26 Condensatore fan Marrone Nero Ventilatore Bianco Bianco Valvola a quattro vie Unità esterna sensore di temperatura sbrinamento L-OUT Condensatore rosso Sonda scarico compressore L-IN Compressore Bianco Bianco Sonda ambiente Trasformatore di corrente sensore di temperatura di aspirazione Heat_L Marrone...
- Page 88 Introduzione all’installazione Schema di collegamento AUTO BOOST ECO+ HP HC START STOP ERROR MODE BOOST TIMER Legenda simboli Simbolo Descrizione Accensione / spegnimento Quando è spento, il display visualizza l'ora e la temperatura dell'acqua reale. Quando è spento, il display mostra la modalità di funzionamento. La temperatura di default è...
-
Page 89: Messa In Funzione
Messa in funzione Legenda simboli Simbolo Descrizione Modalità Auto. Prima di utilizzare la pompa di calore. Se la pompa di calore lavora più delle 8 ore (impostazione di default) senza raggiungere il set-point, si attivano le resistenze elettriche. Il limite max. tempo di funzionamento del compressore, può essere impostato da pannello tramite il parametro "... - Page 90 Legenda simboli Simbolo Descrizione Riscaldamento rapido. Pompa di calore e resistenze elettriche vengono attivate contemporaneamente Icona di funzionamento della pompa a calore. Icona di funzionamento del riscaldamento elettrico Tempo di ore di uso o di ore di punta. In Time di modalità di utilizzo / ore di punta, viene visualizzato il simbolo corrispondente alla modalità.
- Page 91 Messa in funzione Impostazioni di installazione - Per le impostazioni di installazione, premere per spegnere il sistema, quindi premere contemporaneamente per 10 secondi. - Quando appare il relativo menù, premere per modificare il valore delle impostazioni. - Premere per confermare le impostazioni. - Premere per chiudere il menù.
-
Page 92: Controllo E Manutenzione
Controllo e Manutenzione • Installazione e manutenzione dell’apparecchio devono essere eseguiti da personale qualificato. • Spegnere la macchina e scollegare l’interruttore di alimentazione • Non toccare con le mani bagnate • Non pulire il serbatoio con acqua calda o solventi. •... -
Page 93: Guasti E Protezione
Guasto e protezione Codice Guasto e protezione Condizione di funzionamento Soluzione Errore Protezione temperatura di funzionamento Eliminare il guasto Protezione temperatura Scarico ed alimentare di Protezione di compressore compressore nuovo. Protezione temperatura di evaporazione Eliminare il guasto Protezione sovraccarico Protezione sovraccarico ed alimentare di compressore nuovo. -
Page 94: Fiche Prodotto
Profili di carico di scaldacqua, Tipo refrigerante R134a/1300g R134a/1500g Qingdao Economic & Technology Development Zone Haier Water-Heater Produttore Co.,Ltd. Haier Industry Park, Economic & Technology Development Zone, 266101 indirizzo Qingdao, PEOPLE'S REPUBLIC OF CHINA denominazione Scaldabagno Pompa di calore Destinazione d'uso Intended use... -
Page 95: Certificato Di Garanzia
Certificato di garanzia Garanzia: - garantire la tenuta del serbatoio: 5 anni - Impianto elettrico - elettronico e pompa di calore: 2 anni La sostituzione di un componente o prodotto può in nessun caso estendere il periodo iniziale della garanzia. DATA DI ACQUISTO : ........................... - Page 96 0040506618 20170622 V*****...
Need help?
Do you have a question about the HP200S1 and is the answer not in the manual?
Questions and answers