netvox RA0716 User Manual
Wireless pm2.5/temperature/humidity sensor
Hide thumbs
Also See for RA0716:
- User manual (18 pages) ,
- User manual (6 pages) ,
- User manual (12 pages)
Advertisement
Quick Links
Model: RA0716_R72616_RA0716Y
Wireless PM2.5/Temperature/Humidity Sensor
Wireless PM2.5 / Temperature /
Humidity Sensor
User Manual
Copyright©Netvox Technology Co., Ltd.
This document contains proprietary technical information which is the property of NETVOX Technology. It shall be maintained
in strict confidence and shall not be disclosed to other parties, in whole or in part, without written permission of NETVOX
Technology. The specifications are subject to change without prior notice.
Advertisement

Related Manuals for netvox RA0716


Summary of Contents for netvox RA0716
- Page 1 This document contains proprietary technical information which is the property of NETVOX Technology. It shall be maintained in strict confidence and shall not be disclosed to other parties, in whole or in part, without written permission of NETVOX Technology. The specifications are subject to change without prior notice.
-
Page 2: Table Of Contents
Table of Content 1. Introduction ....................2 2. Appearance ....................3 3. Main Feature ....................4 4. Set up Instruction ..................4 5. Data Report ....................6 6. Installation ....................8 7. Important Maintenance Instruction ............10... -
Page 3: Introduction
1. Introduction RA0716_R72616_RA0716Y is a Class A type device based on the LoRaWAN open protocol of Netvox and is compatible with the LoRaWAN protocol. RA0716_R72616_RA0716Y can be connected with the sensor of the temperature and humidity and PM2.5. The values collected by the sensor are reported to the corresponding gateway. -
Page 4: Appearance
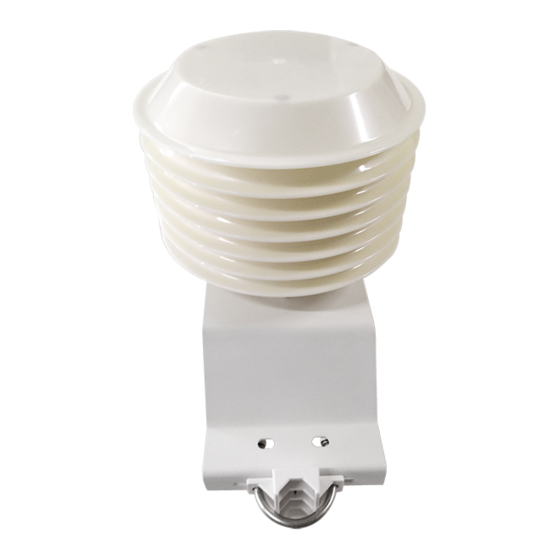
2. Appearance Built-in PM2.5 sensor Indicator Temperature & Humidity sensor DC in Function Key Figure 1 RA0716 Waterproof cover Built-in battery pack Built-in PM2.5, Temperature & Humidity Solar panel Figure 2 R72616 Built-in PM2.5, Temperature & Humidity Power Cable Figure 3 RA0716Y... -
Page 5: Main Feature
PM2.5, temperature and humidity detection Adopt SX1276 wireless communication module 4. Set up Instruction On/Off RA0716 and RA0716Y are connected to DC 12V adapter for power on. Power On R72616 applies solar and rechargeable lithium batteries. Turn On... - Page 6 Function Key Restore to the original setting / Turn off Press and Hold for 5 Seconds The green indicator flashes 20 times: success The green indicator remains off: fail The device is in the network: the green indicator flashes once and the device sends a data Press once report The device is not in the network: the green indicator remains off...
-
Page 7: Data Report
(6) It would take 35 seconds for the sensor to sample and process the collected value after pressing the button, please be patient. The device reported data parsing please refer to Netvox LoraWAN Application Command document and Netvox Lora Command Resolver http://www.netvox.com.cn:8888/page/index... - Page 8 MaxTime Reserved 0x82 ReportRsp (2bytes Unit: s) (2bytes Unit: s) (5Bytes, Fixed 0x00) (1)Configure RA0716 device parameter MinTime = 30s, MaxTime = 120s (120>30*1+10) Downlink: 0135001E00780000000000 Device Return: 8135000000000000000000 (configuration success) 8135010000000000000000 (configuration failure) (2)Read RA0716 device parameter Downlink: 0235000000000000000000...
-
Page 9: Installation
6. Installation 1. RA0716 does not have the waterproof function. After the device completes joining the network, please place it indoor. 2. R72616 has a waterproof function. After the device completes joining the network, please place it outdoors. (1) In the installed position, loosen the U-shaped screw, the mating washer and the nut at the bottom of R72617, and then make the U-shaped screw pass through the appropriate size cylinder and fix it on the fixing strut flap of R72616. - Page 10 Fig. Rechargeable Lithium Battery 3.RA0716Y is waterproof and can be placed outdoors after the device completes joining the network.. (1) In the installed position, loosen the U-shaped screw, the mating washer and the nut at the bottom of RA0716Y, and then make the U-shaped screw pass through the appropriate size cylinder and fix it on the fixing strut flap of RA0716Y.
-
Page 11: Important Maintenance Instruction
7. Important Maintenance Instruction The device is a product with superior design and craftsmanship and should be used with care. The following suggestions will help you use the warranty service effectively. • Keep the equipment dry. Rain, moisture and various liquids or water may contain minerals that can corrode electronic circuits.
Need help?
Do you have a question about the RA0716 and is the answer not in the manual?
Questions and answers