
Related Manuals for netvox R72615


Summary of Contents for netvox R72615
-
Page 1: User Manual
RA0715_R72615_RA0715Y Model: Wireless CO2/Temperature/Humidity Environment Sensor Wireless CO2/Temperature/Humidity Environment Sensor User Manual Firmware:V1.3 Hardware:V0.4... - Page 2 Introduction RA0715_R72615_RA0715Y is a ClassA type device based on the LoRaWAN open protocol of Netvox and is compatible with the LoRaWAN protocol. RA0715_R72615_RA0715Y is unmasked for indoor inspection. RA0715_R72615_RA0715Y can be connected to a variety of sensors. A variety of sensor combinations are required.
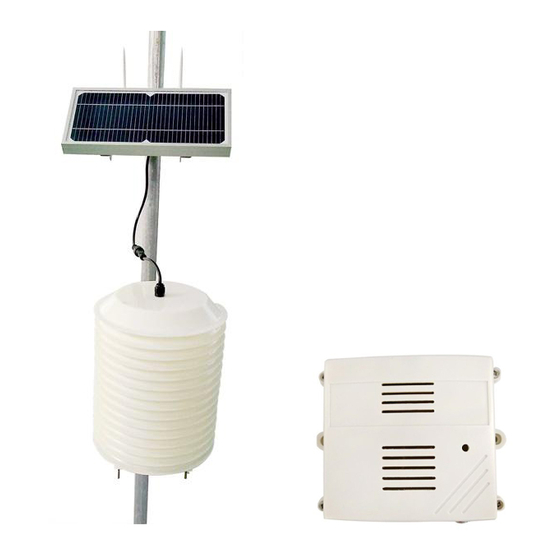
- Page 3 Fig.2. R72615 case connected to the internal CO2 and temperature and humidity Sensor (subject to the real thing), external solar power supply Fig.3. RA0715Y case connected to the internal CO2 and temperature and humidity Sensor ( subject to the real thing)
-
Page 4: Main Features
3. Main Features Compatible with LoRaWAN RA0715 and RA0715Y applies DC 12V adapters R72615 applies solar and rechargeable lithium batteries Simple operation and setting CO2 detection Adopt SX1276 wireless communication module 4.Set up Instruction On/Off RA0715 和... - Page 5 4. After pressing the button, the device needs few seconds to process the sensor information, please be patient. The data parsing reported by the device is referenced by the Netvox LoraWAN Application Command document and http://www.netvox.com.cn:8888/page/index...
- Page 6 (2) At the upper side of the fixed position of R72615, loosen the two U-shaped screws on the side of the solar panel and the mating washer nut. Fix the U-shaped screw through the appropriate size cylinder on the main bracket of the solar panel, and install the gasket in sequence. Lock nut till the solar panel is stable and does not shake.
- Page 7 7. Important Maintenance Instruction Your device is a product of superior design and craftsmanship and should be used with care. The following suggestions will help you use the warranty service effectively. • Keep the equipment dry. Rain, moisture, and various liquids or moisture may contain minerals that can corrode electronic circuits.
Need help?
Do you have a question about the R72615 and is the answer not in the manual?
Questions and answers