Table of Contents
Advertisement
Quick Links
Advertisement
Table of Contents

Related Manuals for Watec WAT-233


Summary of Contents for Watec WAT-233
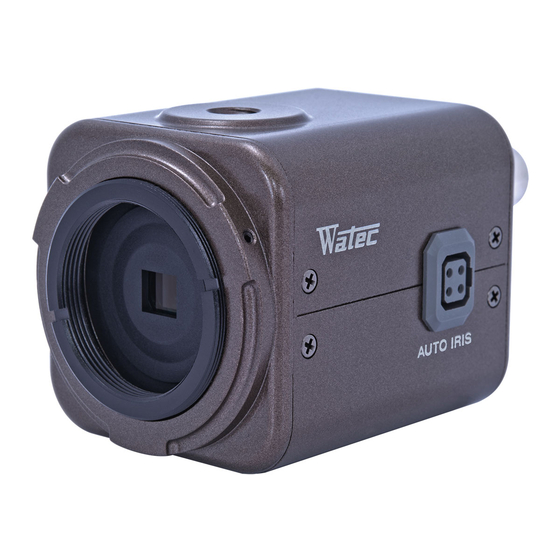
- Page 1 WAT-233 OSD User's Manual Rev. 1.10 Watec Co., Ltd. 2014/2/3...
- Page 2 Change History Rev. No. Date Changes Remarks 1.00 2014/1/23 Initial Release 1.10 2014/2/3 *Add an adjustment procedure for auto iris lens Second Release...
-
Page 3: Table Of Contents
【Contents】 Introduction ・・・・・・・・・・・・・・・・・・・・・・・・・・・・・・・・・・・・ 5 OSD Menu Operation ・・・・・・・・・・・・・・・・・・・・・・・・・・・・・ 6 MAIN MENU/SETUP MENU ・・・・・・・・・・・・・・・・・・・・・・・・ 8 OSD Menu ・・・・・・・・・・・・・・・・・・・・・・・・・・・・・・・・・・・ 8 Auto Iris Lens Control Settings (LENS) ・・・・・・・・・・・・・・・・・・・・・ 9 ・・・・・・・・・・・・・・・・・・・・・・ 9 3.2.1 Auto Iris Lens Control Mode (MODE) 3.2.2 Auto Iris Lens Speed Control (SPEED) ・・・・・・・・・・・・・・・・・・・・・・... - Page 4 3.10 Defog (DEFOG) ・・・・・・・・・・・・・・・・・・・・・・・・・・・・・・・・・・ 42 3.11 Privacy Masking (PRIVACY) ・・・・・・・・・・・・・・・・・・・・・・・・・・ 43 3.12 Motion Detection (MOTION) ・・・・・・・・・・・・・・・・・・・・・・・・・ 47 3.13 Blemish Pixel Compensation (BPC) ・・・・・・・・・・・・・・・・・・・・・・ 50 3.14 Synchronization Method Display (SYNC) ・・・・・・・・・・・・・・・・・・・ 52 3.15 Camera ID (CAMERA ID) ・・・・・・・・・・・・・・・・・・・・・・・・・・・・ 52 3.16 RS485 Communication (RS485) ・・・・・・・・・・・・・・・・・・・・・・・・・...
-
Page 5: Introduction
・The WAT-233 user's manual is subject to change by design and the specifications of the product without notice. ・The copyright of the WAT-233 user's manual shall belong to Watec Co., Ltd. Copying in whole,... -
Page 6: Osd Menu Operation
2. OSD Menu Operation The functions and parameter settings of WAT-233 can be changed by OSD (On Screen Display). When operating OSD, Controller is used. a)When using the Controller,vertically insert the connector fully until it clicks. b)When disconnecting the Controller, pull the connector while pinching the Lock. - Page 7 Please refer to the following model operation pictures on the basic Controller usage. The below pictures show the OSD operation when WB (ATW) is selected as default position. DOWN LEFT RIGHT RIGHT LEFT *Default Setting DOWN ENTER ↑ Sub Menu Switching the Menu ENTER Going to...
-
Page 8: Main Menu/Setup Menu
3. MAIN MENU/SETUP MENU 3.1 OSD Menu When pressing ENTER key, SETUP menu will appear on the screen. ENTER OSD = OFF OSD = ON OSD Menu is consist of 3 pages (SETUP MENU1/3, SETUP MENU2/3 and SETUP MENU3/3). SETUP MENU 1/3 SETUP MENU 2/3 SETUP MENU 3/3 When you change the camera setting through the OSD, you can save the changed... -
Page 9: Auto Iris Lens Control Settings (Lens)
3.2 Auto Iris Lens Control Settings (LENS) Set the mode when using auto iris lens. Move the cursor to LENS with UP/DOWN key and press the ENTER and AUTO IRIS menu will be displayed. Move the cursor up and down and adjust using LEFT / RIGHT key for the item you want to adjust. ENTER 3.2.1 Auto Iris Lens Control Mode (MODE) Set auto iris lens control mode (MODE). -
Page 10: Auto Iris Lens Speed Control (Speed)
Please note, for DC iris lens and video iris lens, adjustment method is different each other. ○DC iris lens adjustment procedure The procedure for adjusting the DC iris lens is as follows. (1) Mount the DC iris lens to the WAT-233. (1)Mount the DC iris lens (2) Set the OSD settings as follows;... - Page 11 ○Video iris lens adjustment procedure The procedure for adjusting the Video iris lens is as follows. (1) Mount the Video iris lens to the WAT-233. (1)Mount the Auto Iris Lens (2) Set the OSD settings as follows; ・Set "3.3 Shutter/Gain Settings (SHUTTER/AGC)" setting to AUTO.
-
Page 12: Shutter/Gain Settings
3.3 Shutter/Gain Settings Set the exposure control. There are two modes of exposure control: automatic exposure control (AUTO) and manual exposure control (MANUAL). When AUTO is selected, shutter speed and gain are automatically controlled according to the imaging environment. When MANUAL is selected, shutter speed and gain can be set to arbitrary fixed values. -
Page 13: Automatic Exposure Control (Auto)
3.3.1 Automatic Exposure Control (AUTO) 3.3.1.1 Shutter Speed (SHUT) Set the shutter speed (SHUTTER). Use the LEFT/RIGHT key to select the shutter mode. *Default : EI SHUTTER/AGC SHUT OPERATION 1/60s(1/50s) 1/100s(1/120s) Set the fixed shutter speed. Selectable shutter speed : 1/250s 1/60s(1/50s), 1/100s(1/120s), 1/250s, 1/500s, 1/1000s, 1/2000s, 1/4000s, 1/10000s 1/500s... -
Page 14: Low Luminance Side Exposure Control (Mode)
3.3.1.3 Low Luminance Side Exposure Control (MODE) Set the exposure control at low luminance side (MODE). The exposure control operate with gain or slow shutter at low light condition when the image can not be exposed by electronic shutter or auto iris lens. Use the LEFT / RIGHT key to select from OFF, AGC, SLOW, AGC→SLOW, SLOW→AGC *Default : AGC LEFT/RIGHT... -
Page 15: Auto Gain Control (Agc Hi/Lo)
3.3.1.4 Auto Gain Control (AGC HI/LO) Set AGC maximum gain value (AGC HI / LO). Use the LEFT / RIGHT keys to select the AGC maximum gain value. *Default : HIGH. When "OFF" is selected in Low Luminance exposure control mode (MODE), the Gain vaue is approx. 2dB. HIGH SHUTTER/AGC AGC HI/LO... -
Page 16: Brightness Settings, Low Luminance Side (Brightness)
3.3.1.5 Brightness Settings, Low Luminance Side (BRIGHTNESS) Set the brightness of exposure control at low luminance side (BRIGHTNESS). You can independently set the brightness during gain/slow shutter operation apart from "3.3.1.2 Brightness Settings, High Luminance Side (BRIGHTNESS)" Instead of darkening the picture in dark subjects, you can improve noise and dynamic resolution. -
Page 17: Manual Exposure Control (Manual)
3.3.2 Manual Exposure Control (MANUAL) 3.3.2.1 Manual Exposure Control Mode (MODE) Set manual exposure control mode (MODE). Manual exposure control has two control modes, and each shutter speed and gain value can be set to an arbitrary fixed value. Use the LEFT / RIGHT key to select from SHUT, SLOW and WDR+SHUT. *Default : SHUT. -
Page 18: Shutter Speed (Lshut/Sshut)
3.3.2.2 Shutter Speed (LSHUT/SSHUT) Set the shutter speed (SHUTTER). Depending on the manual exposure control mode (MODE) setting, the selectable shutter speed varies. Use the LEFT / RIGHT keys to select the shutter speed. MODE LSHUT/SSHUT OPERATION Selectable from; 1/60s(1/50s), 1/100s(1/120s), 1/250s, 1/500s, 1/1000s, 1/2000s, 1/4000s, 1/10000s LSHUT SHUT *(1/50s), (1/120s) : PAL... -
Page 19: Manual Gain (Mgc)
3.3.2.3 Manual Gain Control (MGC) Set manual gain value (MGC). You can set the gain value to an arbitrary value. Use the LEFT / RIGHT keys to set the manual gain value. *Default : 2dB LEFT/RIGHT MGC = 2dB MGC = 22dB MGC = 44dB SHUTTER/AGC OPERATION... -
Page 20: Picture Adjustment (Adjust)
3.4 Picture Adjustment (ADJUST) Adjust image quality. Move the cursor to ADJUST and press the ENTER key to display the ADJUST menu. Move the cursor up or down with UP / DOWN key and select the item you want to adjust. ENTER 3.4.1 Image Flip (MIRROR) Set the image flip processing (MIRROR) Use the LEFT / RIGHT key to select from normal (OFF), left / right inversion (H - FLIP), upside down (V - FLIP),... -
Page 21: Edge Enhancement (Sharpness)
3.4.3 Edge Enhancement (SHARPNESS) Set the intensity of edge enhancement (SHARPNESS). It enhances the visual effects of resolution by emphasizing the outline portion of the image. Use the LEFT / RIGHT key to set SHARPNESS. *Default : 8 LEFT/RIGHT SHARPNESS = 0 SHARPNESS = 8 SHARPNESS = 15 SHARPNESS... -
Page 22: Chroma Settings (B-Hue/R-Hue/R-Gain/B-Gain)
3.4.4 Chroma Settings (B-HUE/R-HUE/R-GAIN/B-GAIN) Set the chroma level (B-HUE, R-HUE, R-GAIN, B-GAIN). You can set your arbitrary color by adjusting color gain (R-GAIN, B-GAIN) and color hue (B-HUE, R-HUE). Use the LEFT / RIGHT keys to adjust the chroma. ○B-HUE LEFT/RIGHT B-HUE = 150 Default... -
Page 23: Γ (Gamma)
Then correct characteristics opposite to the monitor in advance to the output signal from the camera so that the output on the monitor becomes linear. This is called gamma correction. WAT-233 has nine gamma correction modes. Use the LEFT / RIGHT key to set GAMMA. -
Page 24: White Balance (Wb)
3.5 White Balance (WB) Set the white balance (WB) settings. White balance is a function to correct white colored subjects to be shown as white environments of various color temperatures. Use the LEFT / RIGHT Key to select the WB from ATW, AWB, 3200K, 4300K, 5100K, 6300, ACR, PWB. *Default : ATW LEFT/RIGHT 3200K... -
Page 25: Auto Trace White Balance (Atw)
3.5.1 Auto Trace White Balance (ATW) ATW maintains color reproducibility even when the color temperature of the light source changes. LEFT/RIGHT Light source color temperature = 3000K Light source color temperature = 4300K Light source color temperature = 6000K When ATW is selected, pressing the ENTER key will display the ATW SETUP. Move the cursor up or down with the UP / DOWN key and Use the LEFT / RIGHT keys to adjust the ATW. -
Page 26: Preset White Balance (3200K/4300K/5100K/6300K)
3.5.3 Preset White Balance (3200K/4300K/5100K/6300K) For the preset white balance, you can select the white balance correction value from predetermined color temperature of 3200K, 4300K, 5100K or 6300K. Pressing the ENTER key will display the SETUP menu for each predetermined color temperature. Move the cursor up or down with the UP / DOWN key and adjust the item you want to adjust using the LEFT / RIGHT key. -
Page 27: Push White Balance (Pwb)
3.5.5 Push White Balance (PWB) PWB adjusts the white balance under actual illumination and it can be corrected accurately even if the color temperature is unknown. ENTER 補正前 補正後 ○PWB adjustment method Take neutral object such as white paper under the actual lighting in the entire screen and press the ENTER key. Confirm the correction and release the ENTER key. -
Page 28: Wide Dynamic Range/Back Light Compensation (Wdr/Blc)
3.6 Wide Dynamic Range/Back Light Compensation (WDR/BLC) Set the wide dynamic range/Back Light Compensation function (WDR/BLC). Move the cursor to WDR/BLC、pressing ENTER key to display the WDR/BLC SETUP Menu. You can set the wide dynamic range function (WDR), highlight suppressed backlight (HSBLC), normal backlight (BLC) settings. Move the cursor up or down with the UP / DOWN key and use the LEFT / RIGHT key for the item you want to adjust and set ON / OFF of each function. -
Page 29: Wide Dynamic Range(Wdr)
3.6.1 Wide Dynamic Range(WDR) Set the Wide Dymamic Range(WDR). When you take a subject with a large contrast difference such as backlight condition, subjects look to be blackened or white-out will occur partly. The wide dynamic range function (WDR) suppresses overexposure and underexposure of the subjects under such imaging conditions and corrects it to a natural image. -
Page 30: Highlight Suppressed Backlight Compensation (Hsblc)
3.6.2 Highlight Suppressed Backlight Compensation (HSBLC) Set the Highlight Suppressed Backlight Compensation (HSBLC). The function reduces the burden on the observer's eyes by masking a strong light source in the dark place and can improve the deteriorated visibility with a strong light source. Use the LEFT / RIGHT key to select ON / OFF. *Default : OFF LEFT/RIGHT When ON is selected, pressing the ENTER key will display the HSBLC menu. -
Page 31: Back Light Compensation (Blc)
3.6.3 Back Light Compensation (BLC) Set backlight compensation (BLC) on and off. The function compensates by increasing the brightness of the entire screen so that the subject that is blackened by backlight will have the proper brightness. Use the LEFT / RIGHT key to select ON or OFF. *Default : OFF LEFT/RIGHT OPERATION... -
Page 32: Noise Reduction (3Dnr)
3.7 3D Noise Reduction (3DNR) Set the 3D noise reduction (3DNR) function. The fucntion reduce image noise to improve the image quality of the camera. Especially, it reduces noise that occurs when the gain becomes high in low illumination environment. Move the cursor to 3DNR and press the ENTER key to display the 3DNR menu. *Default : 000 ENTER Use the LEFT / RIGHT keys to move the cursor and adjust the 3D noise reduction correction level. -
Page 33: Day/Night Function(Day/Night)
3.8 Day/Night Function(DAY/NIGHT) Set the Day/Night function (DAY/NIGHT). The Day/Night function improves the sensitivity of the camera by removing the IR cut filter and taking the image including the wavelength in the infrared region when the ambient illuminance decreases at night, and it can improve the visibility at night. Also, by combining with an external infrared emitter, you can further improve the sensitivity of the camera. -
Page 34: Automatic Switching Mode (Auto)
3.8.3 Automatic Switching Mode (AUTO) Set automatic switching mode (AUTO). You can switch between Day mode and Night mopde automatically according to the ambinent brightness. When AUTO is selected, pressing the ENTER key displays the DAY /NIGHT SETUP manu. Move the cursor up or down and adjust with the LEFT /RIGHT key in the item you would like to adjust. - Page 35 ○Day⇔Night switching threshold adjustment method The procedure for adjustment DAY→NIGHT and NIGHT→DAY is as follows. (1) Set to DAY→NIGHT=42dB(maximum), NIGHT→DAY=2dB(minimum) and (1)Initial setting DELAY CTL=001. (2) Adjust the diaphragm and lighting of the lens, and reproduce the brightness which (2)DAY→NIGHT adjustment ...
-
Page 36: Burst Setting (Burst)
3.8.3.2 Burst Setting (BURST) Set the burst (BURST) setting. Use the LEFT / RIGHT key to select ON / OFF of the burst in the NIGHT mode. *Default : OFF LEFT/RIGHT DAY/NIGHT BURST OPERATION No burst signal is added. Add a burst signal. On some monitors and image capture boards, video signals without color bursts may AUTO not be accepted. -
Page 37: Ir Mode (Ir Mode)
3.8.3.3 IR Mode (IR MODE) Set IR mode (IR MODE). In the night mode of the Day / Night function, the subject may become overly light and overexposure may occur when an infrated light projector is used together. In IR mode, it is possible to suppress overexposure by optimizing exposure control in night mode. Use the LEFT / RIGHT key to select ON or OFF. - Page 38 ○Hisogram Integration Mode (AUTO) Left side of screen (proper exposure) Center of screen (proper exposure) Right side of screen (proper exposure) ○Fixed frame emphasis mode(CENTER) In order to suppress the overexposure in the set area, even if a subject with high brightness exists outside the area, it is hard to be affected, keeping the area properly exposed.
- Page 39 ○Fixed frame emphasis mode area setting When CENTER is selected, pressingthe ENTER key displays the IROPT AREA menu. Use the UP / DOWN keys to move the cursor up or down and select the item you want to adjust. Use the LEFT / RIGHT/key to make the adjustment. ENTER AREA OPERATION...
-
Page 40: Day/Night State Output Mode (D/N State Out)
3.8.3.4 Day/Night State Output Mode (D/N STATE OUT) Set the day/night status output mode (D/N STATE OUT). In the day/night status output mode, it is possible to conduct between the A2 and B2 terminals of the I/O connector in conjection with the change od day/night mode. By connecting an ifrared emitter etc. between the terminals, it is possible to turn on the infrared emitter in the night mode with the day/night function, and turn off the infrared emitter in the day mode. -
Page 41: Digital Zoom (Zoom)
3.9 Digital Zoom (ZOOM) Set the digital zoom function (ZOOM). The function allows you to magnify and display a part of the screen. Place the cursor on ZOOM and press the ENTER key to display the ZOOM SETUP menu. Move the cursor up and down and use the LEFT / RIGHT key to adjust the item you want to. ENTER Before After... -
Page 42: Defog (Defog)
3.10 Defog (DEFOG) Set the defog (DEFOG) settings. When fog or smoke occurs, the contrast of the screen decreases and the visibility deteriorates. The defog function can improve the contrast. The defog function can improve the contrast of visually impaired images with fog and or smoke and improve visibility. Selectable from OFF, LOW, MID or HIGH. -
Page 43: Privacy Masking (Privacy)
3.11 Privacy Masking (PRIVACY) Set privacy masking (PRIVACY). The privacy masking can hide areas that you do not want to display on the screen. Up to 15 masks can be displayed on the screen. You can set the display area, color, darkness and mosaic processing for each mask independently. Move the cursor to PRIVACY and select ON or OFF with LEFT / RIGHT key. - Page 44 ○AREA SELECT Settings Select the mask number to be set. LEFT/RIGHT ・・・・・・・・・ Mask No.:1/15 Mask No.:15/15 ○MODE Settings Set mask display or non-display. When MODE is ON, a mask is displayed in the center of the screen. LEFT/RIGHT MASK : OFF MASK : ON...
- Page 45 ○POSITION Settings Use the UP/DOWN/LEFT/RIGHT key to set the masking position. (6) Move the cursor to POSITION and (1) Select POSITION and press the ENTER key 画像挿入 press the ENTER key to display the mask area setting again. ENTER (2) The mask area setting is displayed. Use the UP / DOWN / LEFT / RIGHT keys to set the upper left position of the mask area and press the ENTER key.
- Page 46 ○COLOR Settings Set the color of masking. LEFT/RIGHT WHITE BLACK GREEN LEFT/RIGHT BLUE YELLOW CYAN MAGENTA ○TRANSPARENCY Settings Set the transparency of the masking. LEFT/RIGHT 0.00 0.50 0.75 1.00 ○MOSAIC Settings Set ON/OFF of mosaic processing. LEFT/RIGHT...
-
Page 47: Motion Detection (Motion)
3.12 Motion Detection (MOTION) Set motion detection (MOTION). The function allows conduction between A3 and B3 terminals of the I / O connector when a change on the screen is detected. By connecting an alarm device and others between terminals, alarm output by sound or light available. Use the UP / DOWN keys to move the cursor to MOTION and use the LEFT / RIGHT key to select ON or OFF. - Page 48 ○AREA SELECT Settings Use the UP/DOWN/LEFT/RIGHT/ENTER to set the area to be detected. (6) Move the cursor to AREA SELECT (1) Select AREA SELECT and press the ENTER key. and press the ENTER key, the detection area setting screen will be displayed again.
- Page 49 ○BLOCK DISP Settings Use the LEFT/RIGHG key to set display/non-display of motion detection result. LEFT/RIGHT When motion is detected, the block will flash within the area set by AREA SELECT. When motion is not detected, nothing will be displayed Not Detected Detected ○DETECT SENSE settings Use the LEFT/RIGHT key to set the sensitivity.
-
Page 50: Blemish Pixel Compensation (Bpc)
3.13 Blemish Pixel Compensation (BPC) Set the BPC. WAT-233 is manufactured using high-quality CCD devices selected according to strict shipping standards of CCD manufacturer though it is inevitable that blemish pixels occur after shipment. This function automatically detects and corrects the subsequent blimish pixel and keeps the image quality. - Page 51 ○Blemish pixel compensation process flow (4) Move the cursor on BPC START and press the ENTER key (1) Cover the lens completely and to execute the blemish pixel compensation again. select BPC START and press the ENTER key. ENTER (2) The screen display on the left continues for about 5 seconds.
-
Page 52: Synchronization Method Display (Sync)
Displays the synchronization method (SYNC) of the camera. This item is a menu displaying the current camera synchronization method, so you can not change the settings. As the synchronization method of WAT-233 is only the internal synchronization method, it is always displayed as "INT". 3.15 Camera ID Setting (CAMERA ID) Set camera ID (CAMERA ID). - Page 53 ○Character Entering Settings Use the UP/DOWN/LEFT/RIGHT/ENTER key to set the CAMERA ID. (4) Move the cursor to CAMERA ID and (1) Move the cursor to CAMERA ID and press the ENTER key press the ENTER key, the CAMERA ID menu will be displayed again. ENTER (2) Use the UP/DOWN/LEFT/RIGHT key to select the ENTER...
- Page 54 ○Display position setting Move the cursor to POS and pressing the ENTER key displays the display position setting menu. ENTER *Default position Use the UP/DOWN/LEFT/RIGHT key to set the display postion. After setting, press the ENTER key to return to the CAMERA ID menu. DOWN LEFT RIGHT...
-
Page 55: Rs485 Communication (Rs485)
3.16 RS485 Communication (RS485) Set the RS485 communication. WAT-233 can be controlled through OSD operation by RS485 communication. Connect a communication cable between the A5 and B5 terminals of the I/O connector and control the OSD menu by sending commands from PC or Pelco-D protocol compatible DVR / controller etc. - Page 56 ○ADDRESS Settings Use the LEFT/RIGHT key to set the camera ADDRESS. LEFT/RIGHT ADDRESS = 000 ADDRESS = 255 ○BAUDRATE Settings Use the LEFT/RIGHT key to set the BAUDRATE. LEFT/RIGHT 2400 4800 9600 19200 LEFT/RIGHT 38400 57600 115200 ○PARITY Settings Use the LEFT/RIGHT key to set the PARITY. LEFT/RIGHT EVEN...
- Page 57 ○STOP BIT Settings Use the LEFT/RIGHT key to set the STOP BIT. LEFT/RIGHT STOP BIT = 1 STOP BIT = 2...
-
Page 58: Factory Reset (Camera Reset)
3.17 Factroy Reset (CAMERA RESET) This function returns the camera setting to factory default (CAMERA RESET) state. Even after changing camera settings, you can return the camera to the factory default state by executing camera reset. Move the cursor to CAMERA RESET with UP/DOWN key and press the ENTER to excecute the camera reset. (3) Move the cursor on CAMERA RESET (1) Select the CAMERA RESET and press ENTER Key. -
Page 59: Osd Menu Tree
4. OSD Menu Tree Legend: Represents OSD menu item Represents the operation by UP, DOWN and ENTER key of the remote control Represents the operation by RIGHT, LEFT and ENTER key of the remote control Represents a selectable mode and setting value of each menu item Represents the title on the OSD and not a setting item The red letter represents the initial setting of each function. - Page 60 ○LENS(SETUP MENU 1/3) LENS MODE OPEN, CLOSE, AUTO SPEED 000-255 (055) RETURN ○SHUTTER/AGC(SETUP MENU 1/3) SHUTTER/AGC AUTO HIGH LUMINANCE 1/60(1/50), 1/100, 1/250, 1/500, SHUT 1/1000, 1/2000, 1/4000, 1/10000, BRIGHTNESS 40-130IRE (100IRE) LOW LUMINANCE MODE OFF, AGC, SLOW, AGC→SLOW, SLOW→AGC AGC HI/LO HIGH, LOW BRIGHTNESS x0.25, x0.5, x0.75,...
- Page 61 ○WB(SETUP MENU 1/3) SPEED 000-255 (005) DELAY CNT 000-255 (005) RETURN 3200K B-GAIN 000-255 (Default*) *The factory default value may vary. R-GAIN 000-255 (Default*) *The factory default value may vary. RETURN 4300K B-GAIN 000-255 (Default*) *The factory default value may vary. R-GAIN 000-255 (Default*) *The factory default value may vary.
- Page 62 ○WDR/BLC(SETUP MENU 1/3) WDR/BLC CONTRAST LOW, MIDLOW, MID, MIDHIGH, HIGH RETURN HSBLC CLIP LEVEL 000-255 SCALE 000-015 (010) RETURN OFF, ON RETURN ○3DNR(SETUP MENU 1/3) 3DNR LEVEL 000-063 RETURN...
- Page 63 ○DAY/NIGHT(SETUP MENU 2/3) DAY/NIGHT NIGHT BURST OFF, ON AUTO DAY→NIGHT 2-42dB (25dB) NIGHT→DAY 2-42dB (5dB) DELAY CTL 000-255 (003) BURST OFF, ON IR MODE AREA AUTO CENTER 001-114 (001-136) (048) *( ): the setting values of PAL 009-122 (009-144) BOTTOM (096) *( ): the setting values of PAL 001-223...
- Page 64 ○ZOOM(SETUP MENU 2/3) ZOOM ZOOM 000-255 000-1023 (512) TILT 000-511 (256) RETURN ○DEFOG(SETUP MENU 2/3) DEFOG OFF, LOW, MID, HIGH ○PRIVACY(SETUP MENU 2/3) PRIVACY AREA SELECT 1/15-15/15 MODE OFF, ON POSITION COLOR WHITE, BLACK, RED, GREEN, BLUE, YELLOW, CYAN, MAGENTA TRANSPARENCY 0.00, 0.50, 0.75, 1.00...
- Page 65 ○BPC(SETUP MENU 2/3) DETECT LEVEL 000-064 (005) BPC START RETURN ○SYNC(SETUP MENU 3/3) SYNC ○CANERA ID(SETUP MENU 3/3) CAMERA ID RETURN ○RS485(SETUP MENU 3/3) RS485 PROTOCOL PELCO-D ADDRESS 000-255 BAUDRATE 2400, 4800, 9600, 19200, 38400, 57600, 115200 DATA BIT PARITY OFF, ODD, EVEN STOP BIT 1, 2...
- Page 66 ○OSD Factory Settings ■LENS ■ZOOM Name Default setting Name Default setting MODE AUTO ZOOM SPEED TILT ■SHUTTER/AGC ■DEFOG Name Default setting SHUTTER/AGC AUTO Name Default setting SHUT DEFOG BRIGHTNESS 100IRE (HIGH LUMINANCE) ■PRIVACY MODE Name Default setting AGC HI/LO HIGH AREA SELECT 1/15 MODE...
Need help?
Do you have a question about the WAT-233 and is the answer not in the manual?
Questions and answers