Table of Contents
Advertisement
Quick Links
Advertisement
Table of Contents

Related Manuals for AL Tech MediaGate MG-350SHD

Summary of Contents for AL Tech MediaGate MG-350SHD
-
Page 2: Table Of Contents
Introduction ...3 Technical Support ... 4 Precautions ... 4 Specifications... 6 Package Content... 7 Product Overview ... 8 1. Use as External USB HDD... 11 1.1 Insert Hard Disk ... 11 1.2 Format Built-in HDD via USB ... 12 1.2.1 Windows 98SE, ME... 12 1.2.2 Windows 2000 ... - Page 3 5. Connect to External AV Device ... 45 5.1 Connect Video Cable ...45 5.2 Connect Audio Cable ...46 6. Basic Setup... 48 6.1 Video Setup ...48 6.2 Audio Setup ...50 6.3 Network Setup...51 6.4 Wireless Setup ...53 6.5 Wireless Security Setup ...53 6.6 LED Setup ...53 6.7 Photo View Setup ...54 6.8 Language Setup ...54...
-
Page 4: Introduction
Introduction MediaGate MG-350SHD fully supports HD (High Definition) files that are really clear through HDTV (LCDTV, Normal TV) and can stream the contents from a PC through wireless (802.11g) or wired LAN, and also has USB host that you can plug an external USB storage. -
Page 5: Technical Support
Technical Support Contact your local distributor in your country or AL Tech, Inc. in Korea www.airlinktek.com Precautions Please read the followings carefully and refer to [Cautions] in the manual for proper use. * We are not responsible for using illegal software, audio sources, video sources, etc and the users should take the legal Copyright responsibility. - Page 6 * Make sure to use the supplied car charger (optional) in a car. Don’t use MediaGate during driving. Cautions for use in a car MediaGate may not work properly when the engine is stopped and it may cause battery discharge. Using in a car may have video &...
-
Page 7: Specifications
Audio Output Multi I/O Working Temperature Working Humidity MediaGate MG-350SHD 12V / 3A 516g (without HDD & wireless antenna) 48 x 150 x 210 mm (without wireless antenna) USB Device Compatible: Windows 98SE/ME/2000/XP, Mac OS 9.0 higher, Linux 2.4 higher Device Port x 1ea, 480Mbps USB 2.0 (USB 1.1 compatible) -
Page 8: Package Content
Package Content ① MG-350SHD - 1ea ② Wireless Antenna -1ea ③ Stand (Cradle) – 1ea ④ Remote controller, battery – each 1ea cable (composite + stereo cable) – 1ea ⑤ cable (for connecting to PC) -1ea ⑥ ⑦ Power adapter – 1ea ⑧... -
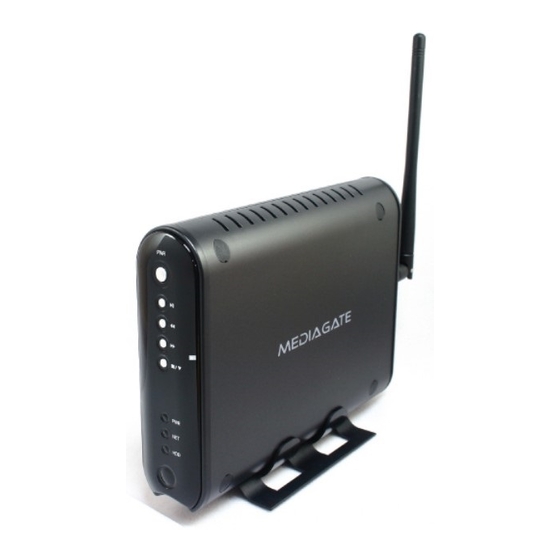
Page 9: Product Overview
Product Overview ④ NEXT / FF / RIGHT ⑤ STOP / DOWN ① POWER ② PLAY / PAUSE ③ PRE / REW / LEFT ④ NEXT / FF / RIGHT Front View STOP / DOWN ⑤ ⑥ PWR ⑦ NET ⑧... - Page 10 ⑩ ANT ⑪ COAXIAL ① USB HOST ② LAN Device ③ CVBS ④ ⑤ Y, PB, PR Back View ⑥ OPTICAL ⑦ S-VIDEO ⑧ HDMI ⑨ ⑩ COAXIAL ⑪ < Back View > ① USB HOST ② LAN ③ USB DEVICCE ④...
-
Page 11: Use As External Usb Hdd
Use as External USB HDD... -
Page 12: Insert Hard Disk
1. Use as External USB HDD 1.1 Insert Hard Disk Use 3.5” SATA Hard Disk for Desktop. ① Unscrew 4 spot and open the side cover case with pulling to the arrow direction ③ Close the side cover case. ② Connect Power and SATA connector to Hard Disk. -
Page 13: Format Built-In Hdd Via Usb
* If the hard disk drive is al ready formatted, see “1.3 Copy Data via USB”. 1.2.1 Windows 98SE, ME 1) Install Windows 98 Driver. Find the driver at Windows 98 CD>MediaGate MG-350SHD>English>Windows 98 Driver Directory. After finishing installation, Connect MG- 350SHD to PC via USB cable, and plug power cable of MG- 350SHD. - Page 14 8) Select “ 1. Create Primary DOS Partition ” and press [Enter]. 9) Wait until finishing verifying the drive integrity. 10) After finishing drive integrity verification, type “Y” at “Do you wish to use the maximum available size for a Primary DOS Partition (Y/N)”.
-
Page 15: Windows 2000
[My Computer]. Click mouse right button at the new volume and select [Format]. 1.2.2 Windows 2000 1) Connect MG-350SHD to PC via USB cable, and plug power cable of MG-350SHD. 2) Select [Start>Settings> Control Panel>Administrative Tools>Computer Management>Disk Management] on Windows. - Page 16 5) Click [Next] at the Create Partition Wizard Windows. 6) Check [Primary Partition] and click [Next]. 7) Type number that you want to use and click [Next]. 8) Assign a drive letter and click [Next]. 9) Choose FAT32 or NTFS at File system to use and click [Next].
-
Page 17: Windows Xp
1.2.3 Windows XP 1) Connect MG-350SHD to PC via USB cable, and plug power cable of MG-350SHD. 2) Click [Settings > Control Panel > Administrative Tools > Computer Management>Disk Management] on Windows. If you can not find Administrative Tools at Control Panel, click “... - Page 18 9) Choose FAT32 or NTFS at File system to use and click [Next]. FAT 32 system is available on windows 98SE/ME/2000/XP, but NTFS system is available on windows 2000/XP only. If you choose FAT32 system on Windows 2000/XP, one drive letter’s maximum size will be limited to 32GB.
-
Page 19: Copy Data Via Usb
1.3 Copy Data via USB It is possible to use as a external USB hard disk drive in case of inserting hard disk into MG-350SHD. You can copy data from your PC to built-in HDD of MG-350SHD via USB. It is possible to play media files at the hard disk on TV set. -
Page 20: Windows Me
If a new volume is not be appeared, check HDD format or not, and HDD file system. Windows ME only detect FAT32 file system. 3) After copying data, remove MG-350SHD with using remove icon at Windows right-down corner. If you don’t follow this procedure, data and MG-350SHD may have damage. -
Page 21: Windows 2000, Xp
3) After copying data, remove MG-350SHD with using remove icon at Windows right-down corner. If you don’t follow this procedure, data and MG-350SHD may have damage. When you see ‘Non High-Speed USB Hub Message’ The message will be displayed On windows XP when you plug... -
Page 22: Linux
/dev/sda /mnt/mediatest ntfs noauto, user 0 0 Do Log-in again. above example “sda” is assumed that the MG-350SHD will be detected as “sda” on your system. If not, you have to write the drive name which is detected as “USB Mass Storage”, not “sda”... -
Page 23: Connect To Pc Via Network
Connect to PC via Network... -
Page 24: Wired Lan Connection
2. Connect to PC via Network 2.1 Wired LAN Connection When connecting Computer to MG-350SHD directly Connect LAN cable to LAN port between MG- 350SHD and PC. In this case, you have to use Cross LAN cable type generally. [TIP] If the computer’s LAN card was connected to... -
Page 25: Wireless Lan Connection
√ Note Wireless AP (Infrastructure Mode) or Wireless Adapter (Ad-Hoc Mode) is needed for wireless connection. IEEE 802.11g wireless standard is recommended for better wireless environment. MG-350SHD compatibles with IEEE 802.11g & b standard. Infrastructure Mode Wireless LAN connection type with Wireless Access Point. - Page 26 √ Note: When connecting Ad-Hoc Mode, manual setting of IP Address and Subnet mask will be needed. Manual setting of IP address and Subnet mask of wireless adapter and MG-350SHD will be needed. Disable DHCP and enter “IP Address” and “Subnet mask”. IP address must be different between MG-350SHD and wireless adapter, and also subnet mask is to be same.
- Page 27 2. [Manual Setting of IP address and Subnet mask] In case of AP Mode, disable DHCP support and do manual setting of IP Address and subnet mask. At the time, each IP address is to be different and subnet mask is to be same. Ex) AP: IP address(192.168.10.1) Subnet mask (255.255.255.0) ==> MG-350SHD: IP address(192.168.10.2) Subnet mask(255.255.255.0) <Check IP address of AP...
- Page 28 √ Note: When connecting to AP with WEP wireless security If wireless station like AP or Adapter has WEP wireless security, you have to enter WEP key same as AP or wireless adapter. It is possible to enter WEP key at “Wireless-I”. Enable Security Mode and then enter WEP Key of AP or wireless adapter.
-
Page 29: Shared File Playback (Stream)
Shared File Playback (Stream) -
Page 30: Windows 98Se, Me
3. Shared File Playback (Stream) After connecting LAN cable, you have to set network configurations of both Computer and MG-350SHD. *It is possible to assign IP address and Subnet Mask of MG-350SHD as dynamic or static. 3.1 Windows 98SE, ME 1) Select a folder which you want to share. - Page 31 & Subnet mask that DHCP Server or IP Router provide. 6) Set the network configurations of MG-350SHD. You have to connect MG-350SHD to TV set for this setup. See “6.1 Connect Video Cable”. Press [SETUP] of remote control for moving to setup screen.
-
Page 32: Windows 2000
3.2 Windows 2000 1) Select a folder which you want to share. Right-click the folder and click ‘Sharing’ in pop menu. 2) Check ‘Share this folder’ and write ‘share name’. For example, “My Movie” Make sure to write ‘share name’ within 12 characters in English. - Page 33 Connections], and select Properties of ‘Local Area Connections’ by right click of mouse. If you see two or more ‘Local area connections’, select one that you will use for connecting to MG-350SHD. 8) Double click ‘Internet Protocol (TCP/IP)’ that you want to use on your computer.
- Page 34 6) Set the network configurations of MG-350SHD. You have to connect MG-350SHD to TV set for this setup. See “6.1 Connect Video Cable”. Press [SETUP] of remote control for moving to setup screen. On that screen, select ‘DHCP Support Off’ and write IP address &...
-
Page 35: Windows Xp
3.3 Windows XP 1) Select a folder which you want to share. Right-click the folder and click ‘Sharing and Security’ in pop menu. 2) Check ‘Share this folder on the network’ and write ‘Share name’. For example, “My Movie” Make sure to write ‘share name’ within 12 characters in English. - Page 36 “Switch to classic view” in left-up corner on screen. If you see two or more ‘Local area connections’, select one that you will use for connecting to MG-350SHD. 7) Double click ‘Internet Protocol(TCP/IP)’ that you want to use on your computer.
- Page 37 Click ‘Settings’ at ‘Windows Firewall’ Check ‘Off’ and click ‘OK’ 6) Set the network configurations of MG-350SHD. You have to connect MG-350SHD to TV set for this setup. See “6.1 Connect Video Cable”. Press [SETUP] of remote control for moving to setup screen.
- Page 38 Use ‘DHCP on’ or write IP address & Subnet mask that DHCP Server or IP Router provide. Check ‘IP address obtained automatically’ When you use ‘DHCP On’, you can see the IP address on information screen with pressing [INFO] button. <MG-350SHD’s IP Address>...
-
Page 39: Windows Vista
3.4 Windows Vista Before you do “folder sharing”, you need to set up 3 things for Network sharing. 1. Setup of User Accounts and Family safety a. Click Start > Settings > Control Panel > Users Accounts and Family safety b. - Page 40 2. Disable “Firewall” a. Click Start > Setting > Control Panel > Security > Windows Firewall on / off b. Click at ‘Off (not recommended)
- Page 41 3. Setup of Network and Sharing Center a. Click Start > Setting > Control Panel > Network and Internet > Network and Sharing Center b. Select “Password Protected sharing” and select “Turn off password protected sharing”. c. make a folder you want to share.
- Page 42 d. You will get a popup “Choose people to share with” then select “Everyone (All users in this list) and press “Add” button. e. After you register the user account, then click “Share” button.
-
Page 43: Use Usb Host
Use USB Host... - Page 44 It shall not be compatible with any external USB device. There are so many external USB devices, and specific products should not be compatible. We does not guarantee all kind of external USB devices. Connect your external USB device to USB host port of MG-350SHD. USB icon shall be activated on file selection screen.
-
Page 45: Connect To External Av Device
Connect to External AV Device... -
Page 46: Connect Video Cable
1. “TV “– Switch to Video Input Mode: Turn on TV, and switch to video input mode same as video connection. See TV user manual. 2. “MG-350SHD” – Switch to Video Output Mode: Press [TV OUT] button repeatedly. Whenever press [TV OUT], video output signal is changed. -
Page 47: Connect Audio Cable
Normally, TV supports stereo audio connection, and this package supplies stereo audio cable. When you can not hear sound after connecting Optical or Coaxial Cable, you have to change audio setup of MG-350SHD as Encoded Digital. See “7.2 Audio Setup”... -
Page 48: Basic Setup
Basic Setup... -
Page 49: Video Setup
6. Basic Setup 6.1 Video Setup This is guide for setting video output of MG-350SHD. You have to setup MG-350SHD’s video output mode same as TV set’s video input mode. √ When you can not see normal screen after connecting video cable, check followings, 1. - Page 50 NTSC, PAL : Standard of TV Output. Select a proper one for using in your country. ① Turn on MG-350SHD and press [SETUP] on Mode Selection screen. < Setup Procedure > Move to ‘ Video Out’ icon and press [OK]. Setup box will be ②...
-
Page 51: Audio Setup
6.2 Audio Setup This is guide for setting audio output of MG-350SHD. You can use Stereo or Digital 5.1 ch. Analogue/DCPM: Select when you connect the supplied audio cables (Red / White) to TV or Audio set directly. Encoded Digital: Select when you want to listen through 5.1Ch / DTS Dolby by connecting receiver (or amplifier) with Optical or Coaxial cable. -
Page 52: Network Setup
DHCP Off: When it is not possible to obtain IP address automatically or you connect to your PC directly without DHCP Server or IP Router, you have to use this option. Just write IP address and Subnet mask. ① Turn on MG-350SHD and press [SETUP] on Mode Selection screen. - Page 53 ① Turn on MG-350SHD and press [SETUP] on Mode Selection screen. < DHCP Support OFF Setup Procedure > ② Move to ‘Network’ icon and press [OK]. Setup box will be displayed under icon menu. ③ Select ‘DHCP Support-OFF’ and press [OK].
-
Page 54: Wireless Setup
It is possible to turn on or off a backlight LED of arrow button on the front side. When the LED disturbs you in night, turn off the LED. ① Turn on MG-350SHD and press [SETUP] on Mode Selection screen. -
Page 55: Photo View Setup
When you play one or all photo files, you can listen mp3 and see photo slide show together. However, if there is just networking computer (not built-in HDD), you cannot listen mp3. MG-350SHD just detect mp3 files at built-in HDD's music folder. -
Page 56: Screen Ratio Setup
6.9 Screen Ratio Setup This is guide for setting TV Type. You can use 4:3 Letter Box, 4:3 Pan Scan, and 16:9. ① Turn on MG-350SHD and press [SETUP] on Mode Selection screen. < Setup Procedure > ② Move to ‘Scr. Rate’ icon and press [OK]. Setup box will be displayed under icon menu. -
Page 57: Auto Play Setup
6.10 Auto Play Setup When this Auto Play function is On, MG-350SHD play the file continuously form the time of being stopped. ① Turn on MG-350SHD and press [SETUP] on Mode Selection screen. < Setup Procedure > ② Move to ‘Auto Play’ icon and press [OK]. Setup box will be displayed under icon menu. -
Page 58: Internet (How To Setup The Internet)
6.11 Internet (How to setup the Internet) This is for how to connect MG-350SHD to the Internet. ① After turn MG-350SHD on, press [SETUP] button and go to [SETUP] page. ② Go to the 2 page and select [INTERNET] icon and press [ENTER] button then you will get the above page. -
Page 59: I-Radio
6.12 i-RADIO Refer fot the below how to set up the “i-Radio” on MG-350SHD. √ [Note] It composes of Shoutcast , Inlive ( live broadcasting list scan ) ① After turn MG-350SHD on, press [SETUP] button and go to [SETUP] page. - Page 60 √ [Note] After you made “iradio” folder at the root directory in the HDD of MG-350SHD, it shows only the list saved in pls, m3u file. ◀ ① Press key at the main page, select press [ENTER] button. < In case, select [ Shoutcast / Inlive ] at the server list >...
-
Page 61: Skin
With SKIN function, you can make your own GUI of MG-350SHD. √ [Note] Save your own GUI or icon images in “skin1” folder at the root directory of MG-350SHD. ① After turn MG-350SHD on, press [SETUP] button and go to [SETUP] page. - Page 62 ① Make “skin1” folder and save “GUI” or “Images” in the folder at the root directory in a HDD of MG-350SHD ③ Now, you see the changed GUI. If you can not see the font, then change the font color.
-
Page 63: Etc
6.14 ETC You can set up for 1) effect sound, 2) screensaver 3) Loading message on or off, etc.. ① After turn MG-350SHD on, press [SETUP] button and go to [SETUP] page. < How to setup > ② Go to the 2 page and select [ETC] icon and press [ENTER] button then you will get the above page. -
Page 64: Protocol
6.15 Protocol You can set up for protocol. ① After turn MG-350SHD on, press [SETUP] button and go to [SETUP] page. < How to setup > ② Go to the 2 page and select [Protocol] icon and press [ENTER] button then you will get the above page. -
Page 65: Ftp Server / Client Setup
6.16 FTP Server / Client setup You can set up for FTP Server / Client. ① After turn MG-350SHD on, press [SETUP] button and go to [SETUP] page. < How to setup > ② Go to the 2 page and select [FTP] icon and press [ENTER] button then you will get the above page. -
Page 66: How To Play(Remote Control)
How to Play(Remote Control) -
Page 67: Basic Screen Menu
7. How to Play(Remote Control) 7.1 Basic Screen Menu 7.1.1 Mode Selection After turning on MG-350SHD, you can see mode selection screen. In this screen, you can select HDD(built-in), USB(external USB device), LAN(wired network), WIRELESS(wireless network) You can select one out of them. - Page 68 7.1.1.2 Wired & Wireless Network Following example is in case of wired network. Wireless network is same as wired network. ① [Mode Selection] Select ‘LAN’ icon and press [OK]. (In case of wireless network, select ‘WIRELESS’ icon, √ Refresh Network PC Press [STOP].
-
Page 69: File Selection
7.1.2 File Selection Select a file and press [OK] in order to play. Remote Control MENU ▲▼◀▶ Direction Key PREV I◀◀ Move by page NEXT ▶▶ Move by page SLOW ( ) ↖ Up directory DEVICE Mode Selection ▶ SELECT Register a file (Number 1) at Play-List... - Page 70 In case of Directory path information is longer than file information, press [Scr.SIZE]. All media files are displayed including movie, music and photo. Current information of MG-350SHD is displayed. When pressing this button, video output signal is changed repeatedly. (If you can not see normal screen, press this button repeatedly until returning normal screen.
-
Page 71: Play Video Files
7.2 Play Video Files Select a file and press [OK]. Remote Button Function MENU Tool Box Playback ▶ Pause Playback NEXT ▶▶ Next File Playback PREV I◀◀ Previous File Direction ▶▶▶ Fast Forward Direction ◀◀◀ Rewind When pressing [MENU] while playing a file, “Tool Box Menu” is displayed. - Page 72 SLOW Playback Slow Jump to Preferable SEARCH Playback Time VOLUME + Volume Up Direction ▲ VOLUME - Volume Down Direction ▼ MUTE Sound Off Subtitle Move & Size Subtitle Sync. SUBTITLE Subtitle Select or Hide Subtitle Language Select Specific Playback BOOKMARK Time Memory AUDIO...
-
Page 73: Play Dvd File
7.3 Play DVD File DVD manager function support to play DVD Ripping File same as original DVD. Make a folder and then save all ripping files into the folder. After connecting TV (or Monitor), select VIDEO_TS.IFO file at the folder. Make sure that all the ripping files including VIDEO_TS.IFO from one DVD title will be located at one folder. - Page 74 REPEAT Chapter, Title Repeat A-B REPEAT A-B repeat TITLE Go to Title Menu ANGLE Angle INFO Show File Information Jump to Preferable SEARCH Playback Time Control luminosity, Brt. CONT color depth, brightness NEXT Playback ▶▶ Next Chapter PREV Playback I◀◀ Previous Chapter FF ▶▶▶...
-
Page 75: Play Audio File
7.4 Play Audio File Select a file and press [OK]. Remote Control MENU ▶ NEXT ▶▶ PREV I◀◀ Previous File FF ▶▶▶ Fast Forward REW ◀◀◀ SEARCH Jump to Preferable When pressing [MENU] while playing a file, “Tool Box Menu” is displayed. - Page 76 Playback Time VOLUME + Volume Up Direction ▲ VOLUME - Volume Down Direction ▼ MUTE Sound Off INFO Show File Information Control luminosity, Brt. CONT color depth, brightness Enter your preferable playback time with [Number] and press [OK]. Volume Up. *It is not possible to use this button when manual subtitle is displayed while playing audio file.
-
Page 77: Play Photo File
7.5 Play Photo File Select a file and press [OK]. Remote Control MENU ▶ NEXT ▶▶ PREV I◀◀ Previous File INFO Show File Information Control luminosity, Brt. CONT color depth, brightness When pressing [MENU] while playing a file, “Tool Box Menu” is displayed. - Page 78 When you play one or all photo files, you can listen mp3 and see photo slide show together. However, if there is just networking computer (not built-in HDD), you cannot listen mp3. MG-350SHD just detect mp3 files at built-in HDD's music folder.
-
Page 79: Make A Play List
7.6 Make a Play List You can make your preferable play list for registering some files to play list. √ Note After rebooting MG-350SHD, registered play list will be clear. ① Select your preferable file for registering with [SELECT] or [SELECT ALL]. -
Page 80: Firmware Upgrade
Firmware Upgrade... - Page 81 8. Firmware Upgrade Download a upgrade file from local distributor in your country or visit at www.airlinktek.com. After connecting TV set, move to the upgrade file and press [OK]. Upgrade is progressed automatically. After finishing upgrade, you can check firmware version on Setup screen. Press [SETUP] button. * Current firmware version is displayed when pressing [INFO] button on file selecting screen.
Need help?
Do you have a question about the MediaGate MG-350SHD and is the answer not in the manual?
Questions and answers