
Related Manuals for Laspaziale S1 Vivaldi


Summary of Contents for Laspaziale S1 Vivaldi
- Page 1 I N S T R U C T I O N S M A N U A L F O R T H E I N S T A L L E R Vivaldi Vivaldi Vivaldi L S I 005 -UK- REV. 04...
- Page 2 CONFORMITY DECLARATION MANUFACTURER: La Spaziale SpA Via E. Duse, 8 - Casalecchio di Reno (BO) ITALIA ADDRESS: HEREBY DECLARES THAT: The espresso coffee machine S3 Via Spresso conforms to the directions in the following DIRECTIVES: 2004/108/CE (Electromagnetic Compatibility Directive) with application of the following (parts/ clauses) of harmonized standards: EMISSION: EN 55014-1 + EN 61000-3-2 + EN 61000-3-3 IMMUNITY: EN 55014-2...
-
Page 3: Table Of Contents
STARTING AND SETTING THE MACHINE ............. page. 7 SETTING OF THE MOTORPUMP PRESSURE .............. 7 HOW TO ADJUST THE OPERATING TEMPERATURE OF S1 VIVALDI ......7 HOW TO ADJUST THE OPERATING TEMPERATURE OF S1 VIVALDI II .....8 DOSES PROGRAMMING ....................9 ECONOMY MODE FUNCTION ..................9 Chap. -
Page 4: General Notes
GENERAL NOTES PLATES The appliance rating plate is located in the inner right-hand section; to have access to it , remove the drip-tray (1). La Spaziale S.p.A. - MADE IN ITALY - ( UCIMAC ) via E. Duse, 8 40033 Casalecchio di Reno BOLOGNA N.F. -
Page 5: Warnings For The Installer
WARNING! This equipment is to be used only for the purpose it was intended for. Any other use is therefore to be considered as improper and irrational. The manufacturer is not liable for any damage caused by improper, wrongful or unreasonable use. WARNING FOR THE INSTALLER Read carefully the instructions and warnings included in this manual and in the manual “USE AND MAINTENANCE”... -
Page 6: Electric Installation Scheme
ELECTRIC INSTALLATION SCHEME LEGEND Main switch (prearranged by the customer) When carrying out the electric connections, please take into consideration all warnings and indications provided so far in this manual. Furthermore, in order to avoid dangerous overheating, unwind completely the feeding cable. a) Connect the cable (A - pict 2) directly to the socket (1 - pict 2). -
Page 7: Starting And Setting The Machine
N.B. In the machine the motorpump is already set at a pressure of 9 Bar. HOW TO ADJUST THE OPERATING TEMPERATURE OF S1 VIVALDI While the appliance is operating, press and hold down the ON//OFF button (27) for about 3 seconds;... -
Page 8: How To Adjust The Operating Temperature Of S1 Vivaldi Ii
The operating temperature of the machine is changed exclusively for the purpose of improving the result in the cup, according to the coffee blend used. HOW TO ADJUST THE OPERATING TEMPERATURE OF S1 VIVALDI II 1. While the appliance is operating, press and hold down the ON//OFF button (27) for about 3 seconds;... -
Page 9: Doses Programming
DOSE PROGRAMMING When the machine is on (control light 22 on and fixed), press the ON//OFF (27) button and keep it pressed for about 3 seconds; the control light (22) and the one concerning the set temperature start flashing. Fill with ground coffee the filterholder (11) with the one cup filter (by using the provided coffeedoser), making sure not to leave coffee powder on the upper edge of the filterholder, and press it with the suitable coffee tamper provided. -
Page 10: Dose Counter (Optional)
DOSE COUNTER (optional) N. B. All appliances are equipped to operate with an additional module. To enable this function, proceed as follows: • Disconnect the appliance from the electric mains • Move the selector on the control unit box to the ON position •... -
Page 11: Programming
The letter N will flash; if the key is pressed to confirm the setting, the display will return to the previous keys, will cause the letter Y to start flashing; pressing the visualization; moving the key will reset the partial count of coffee deliveries made to go back to the previous screen and the display will then show: .P.00000 .T.05963 N. - Page 12 Confirm the letter N from the SERVICE menu and the display will read: COFFEE No. 00000 with the first zero on the left flashing. The number that will be set refers to the number of coffee deliveries to be loaded into the machine, which will be added to those remaining from the previous setting (remaining credit).
-
Page 13: Lock / Timer Module (Optional)
CLOCK / TIMER MODULE (Optional) N. B. All appliances are equipped to operate with an additional module. To enable this function, proceed as follows: • Disconnect the appliance from the electric mains • Move the selector on the control unit box to the ON position •... -
Page 14: Language Setting
LANGUAGE SETTING Confirming the “Select Language” function with the will open the choice of language from those available: Italiano – English – Français – Deutsch – Español. Pressing the buttons will scroll through the various languages; stop at the required one, which will start to flash and select it by pressing the button. -
Page 15: On/Off Timer Setting
Pressing the buttons will select the current hour and the button will confirm the selection; at this point the minutes (18) will start to flash; pressing the buttons will select the minutes and the button will confirm the selection; at this point the display will read: Daylight saving NO / YES The word YES will flash;... - Page 16 After setting the first day and confirming the OFF time for the third time period with the button, the display will read: Tuesday Copy The day (Tuesday) will flash. For the same time settings as the previous day, hold down the button for 3 seconds to copy all of the settings and the display will move to the next day.
-
Page 17: Alarms Description
ALARMS DESCRIPTION DAMAGED FLOWMETER This alarm indicates the malfunction of the flowmeter or a too fine coffee grinding. This is shown by the turning on of the lights 14-15-16 if you are making one coffee dose and of the lights 17-18-19 if you are making a two coffee dose. -
Page 18: Diagrams
DIAGRAMS ELECTRIC DIAGRAM INSTRUCTIONS MANUAL FOR THE INSTALLER LSI 005 -UK- REV. 04... -
Page 19: Control Board Diagram
CONTROL BOARD DIAGRAM SER1 EV A.L. EV H PUMP EV GR PHASE DISPLAY NEUTRUM NEUTRUM TRIAK DIAGRAM F1 in F1 out F2 in F2 out LED CIRCUIT DIAGRAM SER 2 INSTRUCTIONS MANUAL FOR THE INSTALLER LSI 005 -UK- REV. 04... -
Page 20: Diagram List
DIAGRAM LIST EV GR Coffee brewing group electrovalve EV H Hot water delivery electrovalve EV AL Automatic refill system electrovalve Connection on control board of the triak feeding the boiler heating element Connection on control board of the triak feeding the group heating element Connection of the control board on the triak feeding the boiler heating element Connection of the control board on the triak feeding the group heating element SER1... -
Page 21: Components
COMPONENTS Vivaldi Vivaldi Vivaldi Vivaldi Vivaldi Vivaldi 14 15 16 17 18 19 20 21 Vivaldi Vivaldi Vivaldi 14 15 16 17 18 19 20 21 91 92 93 94 95 96 97 INSTRUCTIONS MANUAL FOR THE INSTALLER LSI 005 -UK- REV. 04... -
Page 22: List Of Components
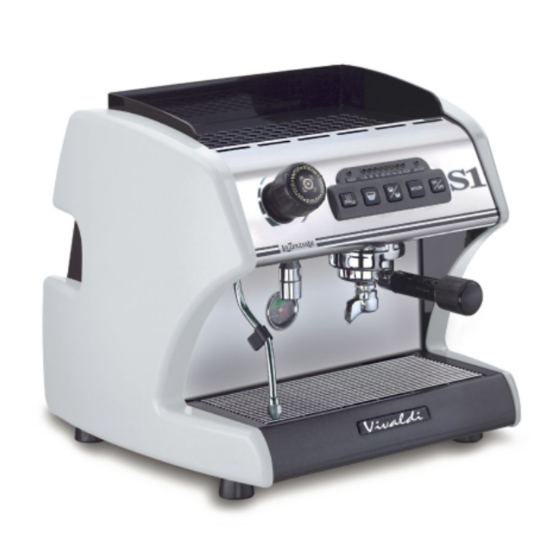
LIST OF COMPONENTS Drip Tray Steam Wand Foot Boiler pressure manometer (steam and hot water delivery) Side Knob for steam delivery Upper grid Cup guard Control panel Brewing group Filterholder Drip Tray grid Boiler state led Water temperature led for coffee 85 °C (91°C on the VIVALDI II version) Water temperature led for coffee 90 °C (92°C on the VIVALDI II version) Water temperature led for coffee 95 °C (93°C on the VIVALDI II version) Water temperature led for coffee 100 °C (94°C on the VIVALDI II version) - Page 23 05/2009 Graphics and Printing: “ X TYPE ENGINEERING S.r.l.” for “LA SPAZIALE S.p.A.“ INSTRUCTIONS MANUAL FOR THE INSTALLER LSI 005 -UK- REV. 04...
- Page 24 La Spaziale S.p.A. Via E. Duse, 8 40033 Casalecchio di Reno Bologna - (Italy) Tel. +39 051 611.10.11 Fax +39 051 611.10.40 E-mail: info@laspaziale.com Web Site: www.laspaziale.com...
Need help?
Do you have a question about the S1 Vivaldi and is the answer not in the manual?
Questions and answers