Table of Contents
Advertisement
Quick Links
Advertisement
Table of Contents

Related Manuals for Laspaziale Mini Vivaldi


Summary of Contents for Laspaziale Mini Vivaldi
- Page 1 LA SPAZIALE MINI VIVALDI INSTRUCTION MANUAL...
-
Page 2: Table Of Contents
Group Pressure Adjustment ................24 External Mini VII Surface Cleaning ..............25 Routine Group Cleaning .................. 25 Optional Accessories ....................26 Other LaSpaziale Mini VII Resources ..............30 Page 1... - Page 3 Quick Setting Guide ....................31 Page 2...
-
Page 4: Feature Overview
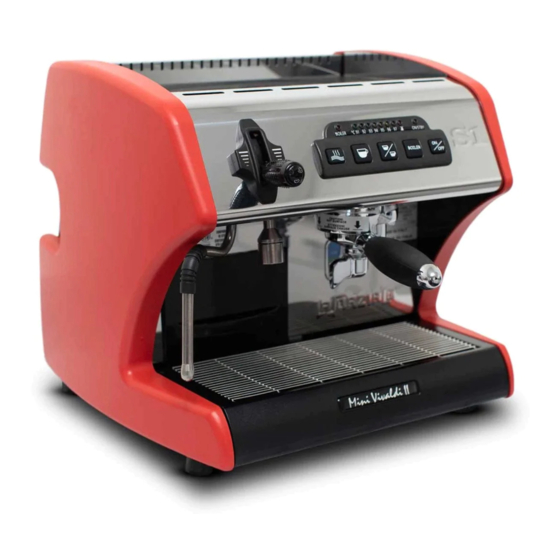
1 Feature Overview Dual Boiler Steam Boiler 1.2 liter Comes with NEW .9 mm 4-Hole Steam Tip Steam Boiler Element 1250 Watts Group Boiler .45 liter Group Boiler Element 800 Watts Programmable Offset Differential Swivel Stainless Steel Steam Arm Two 53 mm Portafilters: One Single and One Double Manual Fill 3 liter Water Tank Vibratory Pump (Extremely Quiet) Volumetric Dosing... -
Page 5: Reference Photos
2 Reference Photos These numbered photos will be referenced throughout the document; i.e. (13) Page 4... -
Page 6: Document Scope - Caveats And Clarifications
Rev.00 or later, is considered included in this document by reference. The official LaSpaziale S1 Mini Manual covers the Mini Vivaldi I and the Mini Vivaldi II plus one option not currently offered or required in the consumer market. That option, as well as material intended specifically for the Mini Vivaldi I, has been omitted from this document. -
Page 7: Optional On/Off Timer Accessory - Overview And Warning
Most modern kitchens have 20 amp circuits so if you're looking for a machine to run in 20 amps you may want to consider the Spaziale Dream T instead. The advantage of using it in 20 amps is that both boilers can reheat simultaneously therefore giving you better recovery and less concern for running out of steam power. -
Page 8: Initial Installation Before Connecting Power
The S1 Power Retain Timer is installed the same way the factory timer is. It plugs into a pre-wired connector inside the machine. The S1 power cable is then plugged into a smart plug outlet. A smart plug outlet (not provided) is what controls the power to the machine. -
Page 9: Filling The Water Tank
Important Tip: Your Mini VII dealer may request that you check that your water hardness is below a certain level to ensure long life and trouble free operation. Hardness test strips may be included for this purpose. If your water fails this test, contact your Mini VII dealer and discuss the available options. -
Page 10: Turning On And Heating The Machine
4.5 Turning On and Heating the Machine 1) Place the desired coffee basket (Single or Double) into one of the portafilter handles and attach it to the group. 2) Insert the plug into the 110V AC socket, the On/STBY light (22) starts flashing. (Stand-by mode). -
Page 11: Espresso Brewing
continues until the machine has reached its operating temperature (light from flashing to fixed). 8) When the group has reached the set temperature, the boiler heating starts (BOILER light (13) flashing), once it reaches the set temperature the light becomes fixed. 9) Every time the group temperature or the boiler temperature drops under the set value, the respective light starts flashing (heating phase) until the set temperature is reached. -
Page 12: Hot Water Delivery
portafilter handle, and press it with the included plastic tamper or, more optimally, a high quality 53mm coffee tamper. 3. Fasten the portafilter handle (11) to the brewing group (10), placing a cup under the portafilter handle. 4. By pressing the Single Cup button (24) the delivery starts and the lights 14-15-16 turn on to show that the one shot espresso dose is being programmed. -
Page 13: Boiler Operational Modes
4.10 Boiler Operational Modes Both boilers are completely independent, turning on and off according to the needs of each. Both can be on at the same time. The BOILER button can toggle the Boiler on and off. This mode is useful for those that only drink espresso and do not need steam or hot water and want to conserve energy. -
Page 14: Espresso Group Water Temperature Regulation
4.11 Espresso Group Water Temperature Regulation 4.11.1 Standard Temperature Adjustment 1. When the machine is On (ON/STBY solid green), press the button ON/OFF and keep it pressed for 3 seconds, the control light (22) and the one concerning the set temperature start flashing. For example, if the set temperature is 95°C, light (18) starts flashing. -
Page 15: Offset Temperature Adjustment
Ideally, most users would prefer that the temperature indicated by the temperate lamps exactly matches the water temperature exiting the group. LaSpaziale has partially accounted for this in its basic design. However, there are too many machine to machine electrical and mechanical variances for this to be completely effective. - Page 16 4.11.2.1 Standard Temperature Offset Adjustment With the machine in Standby (only ON/STBY green lamp blinking), press the BOILER button until the green ON/STBY lamp and the red BOILER lamp are blinking (about 10 seconds). If the Offset = 0ºC, then no other lamps are lit. Assuming a start with Offset = 0ºC , each press of the BOILER button, changes the offset by -1ºC and lights an additional...
-
Page 17: Steam Pressure Adjustment
To enter a negative temperature offset between 0˚C and -8˚C mode push the Double button. Each press will change the offset by -1˚C. An offset of 0˚C is designated by all temperature lamps off. A -8˚C offset is designated by all temperature lamps plus EMPTY on. - Page 18 bar. In reality this adjustment is changing the steam boiler temperature in increments of 1ºC and you get the resulting pressure change. This adjustment starts with the S2V2 Mini in Standby mode (ON/STBY light flashing). • Press and hold the One Cup button for 3 seconds.
-
Page 19: Extreme Temperature Set Function
4.11.4 Extreme Temperature Set Function Standard temperature programming described in section 4.10.1 allows a range from 91ºC to 97ºC in 1ºC increments. There may be times when the user desires a temperature outside of this range. While the Offset mode described in section 4.10.2 could be used for this purpose, it is best to use the offset as intended. -
Page 20: Alarm Handling
by 3ºC to yield 88 ºC, then later change the temperature to 93C, the next time you select 91ºC, you will get 91ºC, not 88 ºC. If you wish to obtain 88ºC again you will need to follow the above instructions to reprogram in the 3 ºC decrease. -
Page 21: Damaged Group Heating Element Triac / Ssr
5.5 Damaged Group Heating Element Triac / SSR This alarm is a blocking one, and occurs when the group triac always remains in conduction (temperature >140°C). The lights 20-21 are flashing. Turn off the Mini V2 and request service. Note: new machines use a dual Solid State Relay (SSR) rather than the triac. -
Page 22: Connection Diagrams
6 Connection Diagrams 6.1 Electrical Connection Diagram Page 21... -
Page 23: Control Board Connection Diagram
6.2 Control Board Connection Diagram 6.3 Triac Board Connection Diagram Note these two boards and the fan have been replaced with a single – dual Solid State Relay module (SSR) on new models. BOILER TRIAC BD GROUP TRIAC BD (Cooling Fan is below this board and runs only when boiler is heating) Page 22... -
Page 24: Control Panel Connection Diagram
6.4 Control Panel Connection Diagram 6.5 Wiring Diagram Definitions EV GR Coffee brewing group solenoid valve EV H Hot water delivery solenoid valve EV AL Automatic refill system solenoid valve Connection on control board of the triac that feeds the boiler heating element Connection on control board of the triac that feeds the group heating element Connection of the control board on the triac that feeds the boiler heating element... -
Page 25: Mini Vii Water Flow Diagram
7 Mini VII Water Flow Diagram The information below is provided strictly as a reference for Mini VII owners who are curious about the function of their Mini VII Dual Boiler design. 8 Adjustments and Maintenance 8.1 Group Pressure Adjustment Conventional espresso guidelines call for group pressure in the range of 8.25-9.5 Bars. -
Page 26: External Mini Vii Surface Cleaning
The extra pair of shower screens was not included with your Mini VII so you'd have an extra set. They are included as part of LaSpaziale’s recommended cleaning regimen which is targeted at light commercial use where there is no time for a complete detergent based back flush routine. -
Page 27: Optional Accessories
The Way Most Mini V2 Users Actually Do It: As noted above the official LaSpaziale method was developed assuming the machine is in light commercial use. This is certainly not the target market for the Mini V2. Here is... - Page 28 Pre-Infusion Chamber Click the link below for the Installation Guide: http://s1cafe.com/s1v2/images/LaSpazialeProgressionPreinfusionInstallationManual.pdf Drain Kit Optional Bluetooth Digital Timer - On/Off Capabilities The S1 Power Retain Timer is installed the same way the factory timer is. It plugs into a pre-wired connector inside the machine. The S1 power cable is then plugged into a smart plug outlet.
- Page 29 Longer Steam Arm (Shown next to stock arm) Page 28...
- Page 30 Optional “No Burn” Steam Arm (shown next to stock steam arm) Optional 4 Hole Tip for “No Burn” Steam Arm This tip is available on the Chris Coffee website: http:// www.chriscoffee.com Pictured below side-by-side are the stock 2 hole tip and the new 4 hole tip.
-
Page 31: Other Laspaziale Mini Vii Resources
- Here you will find lively debate on all things coffee and Mini VII information, including reviews by owners. http://www.s1cafe.com/s1v2 – Website devoted solely to the LaSpaziale VII and Mini VII with links to one dedicated to the VI and to the forum below http://www.s1cafe.com - an on-line forum for VI, Mini VII, and Mini VII Mini owners to share information and ask questions. - Page 32 11 Quick Setting Guide Page 31...
Need help?
Do you have a question about the Mini Vivaldi and is the answer not in the manual?
Questions and answers