Table of Contents
Advertisement
Advertisement
Table of Contents

Subscribe to Our Youtube Channel
Related Manuals for Laspaziale S1 Armonia


Summary of Contents for Laspaziale S1 Armonia
- Page 1 espresso coffee machines INSTRUCTION MANUAL LSC 021 - Rev. 00 - Ed. 02/2013...
- Page 2 espresso coffee machines WEEE Disposal of the equipment by the users within the European Community ( WEEE) in compliance with the article 13 of the legislative decree is- sued on 25 July 2005, nr151 ”Implementation of the directives 2002/95/CE,2002/96/CE e 2003/108/CE, concerning the decrease in the usage of dangerous substances in the electrical and electronic equipment and the disposal of waste”.
-
Page 3: Table Of Contents
espresso coffee machines INDEX GENERAL DESCRIPTION OF THE MACHINE ......... 3 7. PROGRAMMING ................16 1.1 DESCRIPTION OF THE CONTROL PANEL (EK VERSION) ..4 7.1 PROGRAMMING DOSES (EK )........16 VERSION 1.2 DESCRIPTION OF THE CONTROL PANEL (EP VERSION) ..5 7.2 PROGRAMMING DOSES ( ). - Page 4 espresso coffee machines LSC 021 - Rev. 00 - Ed. 02/2013...
-
Page 5: General Description Of The Machine
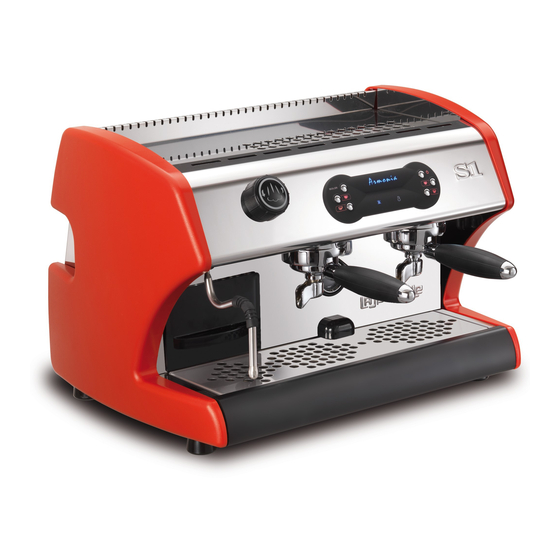
espresso coffee machines 1 GENERAL DESCRIPTION OF THE MACHINE Fig. 1 1. Top cup grid 7. Water drip tray 13. Work surface lighting LED 2. Steam delivery knob 8. Foot 3. 1st coffee delivery group* 9. Gauge 4. Control panel 10. -
Page 6: Description Of The Control Panel (Ek Version)
espresso coffee machines 1.1 DESCRIPTION OF THE CONTROL PANEL (EK VERSION) Fig. 2 a. ON/OFF button boiler f. Autolevel symbol m. One coffee button light (1st gr) b. Armonia logo g. Water tank empty light n. One coffee button light (2nd gr) h. -
Page 7: Description Of The Control Panel (Ep Version)
espresso coffee machines 1.2 DESCRIPTION OF THE CONTROL PANEL (EP VERSION) Fig. 3 a. ON/OFF button boiler g. Water tank empty light P. Coffee dispensing button (2nd gr) b. Armonia logo h. Boiler status light c. ON/OFF button i. Line power light m. -
Page 8: Description Of The Control Panel Pod/Capsule Version
espresso coffee machines 1.3 DESCRIPTION OF THE CONTROL PANEL POD/CAPSULE VERSION Fig. 2 a. ON/OFF button boiler f. Autolevel symbol m. One short coffee button light (1st gr) b. Armonia logo g. Water tank empty light n. One short coffee button light (2nd gr) h. -
Page 9: General Advice For The Installer
espresso coffee machines 2. GENERAL ADVICE FOR THE INSTALLER Read carefully the instructions and warnings contained in this manual, since they provide important indications concerning the instal- lation of the appliance. Attention! The client must prepare the wiring system so that it is in an ideal position for the correct installation of the machine. The instal- lation engineer cannot change the existing system put in place by the customer. - Page 10 espresso coffee machines Danger! The electrical safety of the appliance is fully achieved only after it has been correctly connected to an earthing system as required by the laws in force. It is necessary to have the earthing connection checked by professionally qualified personnel. The manufacturer cannot be held liable for any damage caused by the lack or inefficiency of the system’s earthing connection.
-
Page 11: Installation
espresso coffee machines • The noise emitted by the appliance during normal operation is less than 70 dB. • The appliance is supplied without water in the boiler to prevent that exposure to cold temperatures can cause irreparable damage. • The unit should be operated only with cold water intended for human consumption. Attention! Failure to comply with the above regulations could jeopardise the correct operation and safety of the appliance as well as its useful lifetime. 2.2 INSTALLATION • This appliance is not for built-in installation. • The appliance needs to be installed so that the plug to disconnect it from the mains power supply remains accessible. • This appliance must only be used for the purpose for which it was designed. -
Page 12: Warning/Technical Data Labels And Nameplates Applied To The Machine
espresso coffee machines 2.3 WARNING/TECHNICAL DATA LABELS AND NAMEPLATES APPLIED TO THE MACHINE In the figure below are shown the warning/technical data labels and nameplates positioned on the machine. Warning! Dedicate the time necessary to familiarise yourself with these labels. Ensure that they are readable and keep them clean or replace those that have deteriorated or illegible (both the text and the graphics). -
Page 13: Removing The Packaging
espresso coffee machines 3. REMOVING THE PACKAGING After unpacking the machine, please check its integrity; in case of doubt, do not use it and consult the manufacturer. Packaging materials must not be left within children’s reach since they are potentially dangerous. Attention! The appliance weight is more than 30 kg and therefore, it cannot be moved by a single person alone. -
Page 14: Standard Equipment Of The Machine In Coffee Pods Configuration
espresso coffee machines 3.2 STANDARD EQUIPMENT OF THE MACHINE IN COFFEE PODS CONFIGURATION A. Two filter holders B. One spout for one coffee C. Two pod filters 3.3 STANDARD EQUIPMENT OF THE MACHINE IN COFFEE CAPSULES CONFIGURATION A. Two filter holders B. -
Page 15: Starting Up The Appliance
espresso coffee machines 4. STARTING UP THE APPLIANCE 4.1 FILLING THE WATER TANK A. Remove the drip tray (7). B. Then take out the container (10) and fill it with cold drinking water. C. Refit the water container (10), pushing it all the way down to the bottom and then refit the tray (7). 4.2 FIRST-TIME APPLIANCE INSTALLATION Attention! When the appliance is installed for the first time, carry out the steps listed below. -
Page 16: Switching On And Heating The Machine
espresso coffee machines 4.3 SWITCHING ON AND HEATING THE MACHINE A. Press and hold down the ON/OFF button (c) for about 3 seconds; the light (i) will flash and then stay lit to show that the appliance is on. All of the appliance LEDs will switch on for 1 second. B. -
Page 17: Making Coffee
espresso coffee machines 5. MAKING COFFEE 5.1 MAKING COFFEE WITH GROUND COFFEE POWDER A. Remove the filter holder (5) from the delivery groups (3-12). B. Fill it with ground coffee (using the measure provided), taking care not to leave coffee residues on the top rim of the filter holder (5), and then press the coffee with the presser provided. -
Page 18: Dispensing Steam
espresso coffee machines 6. DISPENSING STEAM Warning! This is only possible with the boiler switched on, light h on. A. Insert the steam wand (11) into a jug containing the drink to be heated. B. Turn the steam dial (2) anticlockwise. C. - Page 19 espresso coffee machines E. When the amount of coffee in the cup has reached the required level, press the button (e) again to stop delivery. F. The display will automatically return to the initial programming screen. G. Fill the filter holder with the two coffee filter (5) with ground coffee (using the measure provided), taking care not to leave coffee resi- dues on the top rim of the filter holder (5), and then press the coffee with the presser provided.
-
Page 20: Programming Doses (Pod/Capsule Version)
espresso coffee machines 7.2 PROGRAMMING DOSES (pod/capsule version). 1st COFFEE DELIVERY GROUP: A. While the appliance is operating (light on and not flashing), press and hold down the ON/OFF button (c) for about 3 seconds; the power light I will flash, as will the LEDs (l-m-n-o). B. -
Page 21: Counter (Optional)
espresso coffee machines 8. COUNTER (optional) This additional module serves to store the total number of cups poured by the ma- chine. When the machine is switched on, the display will show the LA SPAZIALE logo, then the software version, followed by the date. Fig. - Page 22 espresso coffee machines Where T is the total number of deliveries made during the whole working lifetime of the machine, while P is the partial number of deliveries made by the machine. It is possible to reset the partial number of deliveries by pressing and holding down the OK key for 3 seconds.
-
Page 23: Alarms Operation
espresso coffee machines 9 ALARMS OPERATION INSUFFICIENT WATER IN THE TANK: When there is insufficient water in the tank (10), this is signalled by the flashing red light (g) on the control panel (4). Top up the tank with cold drinking water (the tank can hold a maximum of 3 litres). Take note! If there is not enough water in the tank, the heat regulation function is enabled but it is not possible to deliver from the coffee groups. - Page 24 espresso coffee machines BOILER AUTOFILL SYSTEM FAILURE (with boiler enabled only): This alarm blocks the function and it is signalled with the lights (f) flashing and (i) fixed. This alarm intervenes when the boiler filling system has been enabled for over 90 seconds from the first switch on or over 60 seconds in normal operating mode.
-
Page 25: Routine Appliance Maintenance To Be Performed By The User
espresso coffee machines 10 ROUTINE APPLIANCE MAINTENANCE TO BE PERFORMED BY THE USER Take note! To grant the efficiency of the appliance and to maintain correct operation, it is necessary to follow the manufacturer’s instructions as to cleaning and regular maintenance. Attention! Cleaning and routine maintenance operations must be carried out by the user according to the manufacturer’s instructions given here below. - Page 26 espresso coffee machines Every 3 days After turning off the machine, remove the shower heads using the wrench provided; brush them carefully, making sure that all the holes are clean. Then reassemble the parts following the sequence shown in the figure 10. A.
-
Page 27: Technical Section
espresso coffee machines 11 TECHNICAL SECTION Attention! The operations in this chapter must only be carried out by qualified persons. LSC 021 - Rev. 00 - Ed. 02/2013... -
Page 28: Adjustment Of Appliance Operating Temperature
espresso coffee machines 11.1 ADJUSTMENT OF APPLIANCE OPERATING TEMPERATURE This device serves to adjust the temperature of each delivery group (3-12) using two mechanical thermostats inside the appliance. To access the two thermostats, remove the top cup rack and the fastening screw. Fig. - Page 29 espresso coffee machines The default temperature for the coffee delivery groups is factory set to 100 °C. Turn the dial for the 1st mechanical thermostat on the right (A) clockwise to increase the temperature of the 1st delivery group. Turn the dial for the 1st mechanical thermostat on the right (A) anticlockwise to reduce the temperature of the 1st delivery group. Repeat the same operations for the mechanical thermostat on the left (B) to change the temperature of the 2nd delivery group.
-
Page 30: Vibration Pump Pressure Calibration
espresso coffee machines 11.2 VIBRATION PUMP PRESSURE CALIBRATION The appliance is fitted with two vibration pumps: one for each delivery group. The two pumps are factory set to 9 bar when the delivery groups are set to deliver ground coffee and 12 bar for coffee delivery groups configured to delivery coffee in pod or capsule format. -
Page 31: Power Control Unit Connection Diagram
espresso coffee machines 11.4 POWER CONTROL UNIT CONNECTION DIAGRAM Fig. 14 = Phase = Triak group = Neutral Ser1 = Connection to button pad EV1 = Control for vibration pump 1 + 1st delivery group solenoid valve = 1st GR volumetric counter EV2 = 2nd delivery group solenoid valve = 2nd GR volumetric counter P2 = 2nd group vibration pump... -
Page 32: Button Pad Connection Diagram
espresso coffee machines 11.5 BUTTON PAD CONNECTION DIAGRAM Fig. 15 M1 = Control board flat connector M2 = 12 Volt input M3 = 12 Volt output (delivery counter power) M4 = LED connection LSC 021 - Rev. 00 - Ed. 02/2013... -
Page 33: Water Supply Diagram
espresso coffee machines 11.6 WATER SUPPLY DIAGRAM EK Version Fig. 16 TANK = Tank = 1st group volumetric counter = Check valve (EK version machine only) = Group 1 expansion valve = 2nd group volumetric counter = Group 1 vibration pump (EK version machine only) = Group 2 expansion valve = 1st coffee group... -
Page 34: Wiring Diagram
espresso coffee machines 11.7 WIRING DIAGRAM PHASE CONTROL NEUTRAL PANEL CONTROL UNIT FUSE 5 A GROUPS TRIAK EXTERNAL DISPLAY BOILER TRIAK Fig. 17 LSC 021 - Rev. 00 - Ed. 02/2013... - Page 35 espresso coffee machines P1 = 1st group vibration pump P2 = 2nd group vibration pump EV1 = 1st group solenoid EV2 = 2nd group solenoid EVA = autolevel solenoid TS1 = 1st coffee group safety thermostat TS2 = 2nd coffee group safety thermostat TSB = steam boiler safety thermostat TM1 = 1st coffee group temperature adjustment thermostat TM2 = 2nd coffee group temperature adjustment thermostat...
-
Page 36: Technical Data
espresso coffee machines 12 TECHNICAL DATA Fig. 18 DIMENSIONS AND WEIGHT POWER SUPPLY RATING AND ABSORPTION L (mm) P (mm) H (mm) VOLT 50/60 1200/800/800 LSC 021 - Rev. 00 - Ed. 02/2013... - Page 38 La Spaziale S.p.A. Via E. Duse, 8 40033 Casalecchio di Reno Bologna - (Italy) +39 051 611.10.11 +39 051 611.10.40 info@laspaziale.com www.laspaziale.com...
Need help?
Do you have a question about the S1 Armonia and is the answer not in the manual?
Questions and answers