Table of Contents
Advertisement
Quick Links
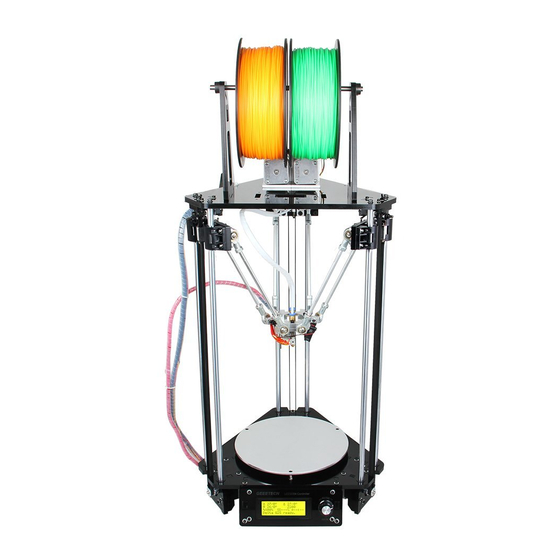
Rostock mini Hardware Build Manual
Some printed parts may have unsmooth edge, you can scrape them with
the file. Some screw holes also have to be expanded for assembly.
I.
Pre-Assembly of extruder
1 / 31
http://www.geeetech.com
Advertisement
Table of Contents

Summary of Contents for Geeetech Rostock mini
- Page 1 Rostock mini Hardware Build Manual Some printed parts may have unsmooth edge, you can scrape them with the file. Some screw holes also have to be expanded for assembly. Pre-assembly of extruder 1 / 31 http://www.geeetech.com...
- Page 2 1. Extruder block Use the file to remove spare parts. Enlarge the hollow and smooth the edge. 2 / 31 http://www.geeetech.com...
- Page 3 Mount the 608 bearing inside the hollow. Use the file to rub the hollow again if it is difficult to fit the bearing. 3 / 31 http://www.geeetech.com...
- Page 4 Mount another 608 bearing on the other side of the Extruder block. 4 / 31 http://www.geeetech.com...
- Page 5 2. Big drive gear Enlarge the hole and smooth the edge. 5 / 31 http://www.geeetech.com...
- Page 6 Put the M8 Hobbed bolt inside the hole, then add several(3 to 4) M8 washers. 6 / 31 http://www.geeetech.com...
- Page 7 Mount the Big drive gear and Extruder block together with M8 Hobbed Bolt passing through the two 608 bearings. 7 / 31 http://www.geeetech.com...
- Page 8 Make sure the middle of the filament feeding channel aligning with the middle of the Hobbed Bolt’s W tooth by increasing or decreasing the M8 washers. 8 / 31 http://www.geeetech.com...
- Page 9 Add several(1 or 2) M8 washers, then mount the M8 lock nut by pliers or screw key. 9 / 31 http://www.geeetech.com...
- Page 10 4.Small drive gear & stepper motor 10 / 31 http://www.geeetech.com...
- Page 11 Use the M3 headless screw to fix the Small drive gear. 11 / 31 http://www.geeetech.com...
- Page 12 Mount the stepper motor to the Extruder block. 12 / 31 http://www.geeetech.com...
- Page 13 Use three M3*10 Bolt to fix the stepper motor 13 / 31 http://www.geeetech.com...
- Page 14 14 / 31 http://www.geeetech.com...
- Page 15 6.Extruder idler block 15 / 31 http://www.geeetech.com...
- Page 16 7.Mount the Extruder idler block to Extruder block Use M3*30 Bolt to fix the Extruder idler block. 16 / 31 http://www.geeetech.com...
- Page 17 17 / 31 http://www.geeetech.com...
- Page 18 18 / 31 http://www.geeetech.com...
- Page 19 Put the filament into the feeding channel and turn the big gear to make sure it is feeding fluently. 19 / 31 http://www.geeetech.com...
- Page 20 2 x M3 screw). The diagonal supporting arm is fixed on universal joint (1 x M3*10 inner hexagon screw + 1 x M3 rubber-washer screw). When the free joint can be assured, the gap should be as small as possible. 20 / 31 http://www.geeetech.com...
- Page 21 2. Pre-assembly of stepper motor Fix motor to support with 4 x M3*10 screw + 4 x M3 washer; then Assemble deep groove ball bearing onto motor spindle, and fix it with 2 x M3*6 set screw. 21 / 31 http://www.geeetech.com...
- Page 22 Assembly (numbers in the bracket represent quantity) Assemble polish rod, upper/lower support plate, and linear bearing LM8UU. 22 / 31 http://www.geeetech.com...
- Page 23 Assemble the fan. 23 / 31 http://www.geeetech.com...
- Page 24 3. Assemble controller board. 4. Assemble the printing support plate. 24 / 31 http://www.geeetech.com...
- Page 25 5. Assemble the synchronous belt. 25 / 31 http://www.geeetech.com...
- Page 26 6. Tighten the polish rods. 7. Assemble the nozzle. 26 / 31 http://www.geeetech.com...
- Page 27 8. Assemble the end stop. 27 / 31 http://www.geeetech.com...
- Page 28 9. Fix the extruder. 28 / 31 http://www.geeetech.com...
- Page 29 10. Assemble the LCD controller 29 / 31 http://www.geeetech.com...
- Page 30 11. Wiring 30 / 31 http://www.geeetech.com...
- Page 31 12. Complete machine 31 / 31 http://www.geeetech.com...


Need help?
Do you have a question about the Rostock mini and is the answer not in the manual?
Questions and answers