Table of Contents
Advertisement
Advertisement
Table of Contents

Subscribe to Our Youtube Channel
Related Manuals for Geeetech A10M


Summary of Contents for Geeetech A10M
- Page 1 Geeetech A10M Desktop 3D Printer ——USER MANUAL——...
- Page 2 Never leave your A10M 3D printer unattended while powered on or printing. Disconnect your A10M 3D printer from the power supply and computer when not in use. Do not print using materials that have not been approved by GEEETECH for use with the A10M 3D printer.
-
Page 3: Table Of Contents
Content About A10M 3D Printer ................................1 Preparation ....................................2 1. Check Power Supply ................................2 2. Software Resources ................................3 2.1 Arduino IDE ................................3 2.2 Firmware ..................................3 3. USB Driver Installation ................................. 3 3.1 USB Driver Installation for Win7 OS .......................... 3 3.2 USB Driver Installation for Mac OS ........................... -
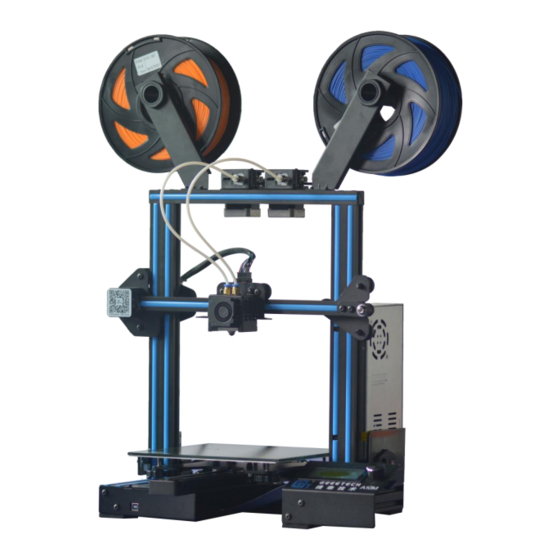
Page 4: About A10M 3D Printer
Keeping Prusa I3 3D printers’ gantry structure and with its build volume as 220*220*260mm³, A10M makes the best of the building platform and gives you a full view of the printing details. Its well-designed extruder greatly reduces the risk of clogging or leaking. -
Page 5: Preparation
Step 3. Checking accessories Please check the accessories based on the items in the assembly paper. 1. Check Power Supply The power supply unit and control board of A10M are installed in the bottom of the printer, saving space, as... -
Page 6: Software Resources
3.1 USB Driver Installation for Win7 OS Power the A10M up and connect it to computer with the USB cable, the driver will be installed automatically. After installation, please enter Device manager and find the USB Serial Port which is the... -
Page 7: Usb Driver Installation For Mac Os
4. Function Test via LCD Display The firmware of A10M is already uploaded to the new printer, and we have done debugging to make sure that every part of it can work normally. However, there may be unpredictable factors during transportation . -
Page 8: Lcd Menu Introduction
SHENZHEN GETECH TECHNOLOGY CO,.LTD LCD Menu Introduction Functions of LCD rotary knob: 1. Press the knob: confirm or enter sub-menu 2. Rotate the knob: roll to choose options or change parameters LCD homepage: 1. Extruder temperature: current temperature/target temperature 2. Hotbed temperature: current temperature/target temperature 3. - Page 9 SHENZHEN GETECH TECHNOLOGY CO,.LTD Main functions of Prepare menu: 1. Move axis: manually move each axis and each extruder 2. Auto home: automatically homing of each axis 3. Disable steppers: unlock the motor so that you can move them freely. 4.
- Page 10 SHENZHEN GETECH TECHNOLOGY CO,.LTD Main functions of Control menu: 1. Temperature: you can change the temperature of the hotbed and the extruder in real time in printing process. Meanwhile you can set the temperature of Preheat PLA and Preheat ABS. 2.
- Page 11 SHENZHEN GETECH TECHNOLOGY CO,.LTD Main function of the Mixer Menu Constant mixing rate Flexible mixing rate The mixer menu is mainly for setting the mixing rate of two filaments.The following is detailed info of each sub-menu. a. Set the constant mixing rate...
- Page 12 SHENZHEN GETECH TECHNOLOGY CO,.LTD Choose “Mixer” and press the knob. Rotate the knob to Filament R/ Filament L, press the knob to set the specific data. Then press the knob to save your setting. b. Set the flexible mixing rate Read the current Z axis coordinate...
- Page 13 SHENZHEN GETECH TECHNOLOGY CO,.LTD Chosse “Mixer<template” to set the flexible mixing rate. Start Z: the starting position of mixing filament (Z axis coordinate) End Z: the ending position of mixing filament (Z axis coordinate)
-
Page 14: Use Lcd For Motor Test
SHENZHEN GETECH TECHNOLOGY CO,.LTD Choose “ Start Z & End Z” and press the knob. Rotate the knob to set the Z axis coordinates. For instance: Choose “Mix percent” to adjust the feeding value when the extruder motor starts to load or stop loading filament. - Page 15 SHENZHEN GETECH TECHNOLOGY CO,.LTD Prepare: Choose Auto home in menu to do home operation: If you want to move the motor, choose Move axis: Choose Move 1mm: Note: We recommend you to use move 1mm to test each axis.
- Page 16 SHENZHEN GETECH TECHNOLOGY CO,.LTD Choose “Extruder”. Rotating the knob can adjust the position of the extruder After testing each axis, if you want to unlock the motors, choose Prepare>Disable steppers:...
-
Page 17: Slicing & Printing Via Cura
Connect A10M 3D printer with your computer via USB cable. Make reference to the following steps to transform .stl files into g.code format. a. Click “Setting < Printer< Add printer”. b. Choose “Custom” to add A10M to the printer list. Besides, it is convenient to set the printer parameters here. Click “finish” to save your settings. - Page 18 SHENZHEN GETECH TECHNOLOGY CO,.LTD...
- Page 19 SHENZHEN GETECH TECHNOLOGY CO,.LTD c. You can also adjust the printer parameters by “Manage printer”.
- Page 20 SHENZHEN GETECH TECHNOLOGY CO,.LTD d. After successfully adding the new printer, the printer will be automatically connected with your computer. e. It is convenient to control the printer in the “control” interface.
- Page 21 SHENZHEN GETECH TECHNOLOGY CO,.LTD f. Load 3D model files to Cura. Assign extruders to each part and merge models.
- Page 22 SHENZHEN GETECH TECHNOLOGY CO,.LTD...
- Page 23 SHENZHEN GETECH TECHNOLOGY CO,.LTD...
- Page 24 SHENZHEN GETECH TECHNOLOGY CO,.LTD g. Before slicing, you can set the printing parameters according to your need. Note: Please set the parameters for each extruder. To a great extent, the default settings are optimal for your printing.
- Page 25 SHENZHEN GETECH TECHNOLOGY CO,.LTD...
- Page 26 SHENZHEN GETECH TECHNOLOGY CO,.LTD h. Then click “prepare” to slice the .stl files and transform them into g.code format. i. Click “save to file” to save the g.code file.
-
Page 27: Build Platform Leveling
SHENZHEN GETECH TECHNOLOGY CO,.LTD Note: A10M supports stand-alone printing via SD card. Just copy the g.code file into the SD card to start your printing journey. 6. Build platform leveling Before printing, it is necessary check whether the moving path of the extruder is parallel with the heatbed or not, which is called leveling. - Page 28 SHENZHEN GETECH TECHNOLOGY CO,.LTD b. Disable the motors. Use a piece of A4 paper to measure the distance between the nozzle and the building platform. Move the printing head to the first corner and slide the paper back and forth. When the nozzle grabs the paper a little, it indicates the distance is proper.
-
Page 29: Faq
If you have any problem when you use the printer, you can visit our forum There http://www.geeetech.com/forum/ are detailed solutions on the forum. Or join our Facebook “Geeetech 3D Printer User Club” https://www.facebook.com/groups/315127105604393/ FAQ are as follows. 7.1 How to upload the firmware? 7.1.1 Upload the firmware in Win7 OS... -
Page 30: Upload The Firmware In Mac Os
USB cable, then open arduino1.0.1 software to upload the firmware. Choose corresponding control board and COM port, and click upload button to upload the firmware. For detailed uploading process, please refer to: http://www.geeetech.com/forum/viewtopic.php?f=13&t=17181 7.1.2 Upload the firmware in Mac OS... -
Page 31: Change The Motor Direction
The way of installing driver and uploading firmware in Mac OS is similar with that in Win 7 OS. For detailed method please refer to this link: http://www.geeetech.com/forum/viewtopic.php?f=21&p=27952#p27952 7.2 Change the motor direction In the configuration.h tab of firmware, find the following codes. Change the true of corresponding axis into false or false into true, and save the firmware and upload it into the printer. -
Page 32: Motors Can't Work
SHENZHEN GETECH TECHNOLOGY CO,.LTD For detailed method, please refer to: http://www.geeetech.com/forum/viewtopic.php?f=13&t=17037 7.3 Motors can’t work When your are testing the motors, if the motor of an axis has no response or can not work normally (the extruder can work when it is above 170℃), you need check whether the motor, motor driven board or voltage of this axis can work normally or not. -
Page 33: Printing Quality Optimization
7.5 Printing quality optimization If there are problems such as stringing, warped edge, the first layer not sticking to the bed, and poor surface quality, you can refer to following link to do adjustment for parameters: http://www.geeetech.com/forum/viewtopic.php?f=26&t=17183... - Page 34 SHENZHEN GETECH TECHNOLOGY CO,.LTD Control software: EasyPrint 3D, Repetier-Host, Simplify 3D, Cura, Slic3r, etc. Remote App: EasyPrint 3D App (with an optional 3D WiFi module) File format: .STL, G.code Electrical Power supply: Input: 115V/230V Output: DC 24V, 360W Connectivity: Wi-Fi (with an optional 3D WiFi module), USB cable, SD card (support stand-alone printing) Display screen: LCD 2004 Mechanical:...
-
Page 35: Contact Us
SHENZHEN GETECH TECHNOLOGY CO,.LTD 9. Contact us 1. There are lots of documents and troubleshooting for A10M on our website. They are good resources if you would like to quickly solve problems by yourself. Technical support 2.If you still can not solve problems yourself even with the help of above files, you can send e-mail to technical@geeetech.com,we will reply to you within... - Page 36 www.geeetech.com...
Need help?
Do you have a question about the A10M and is the answer not in the manual?
Questions and answers