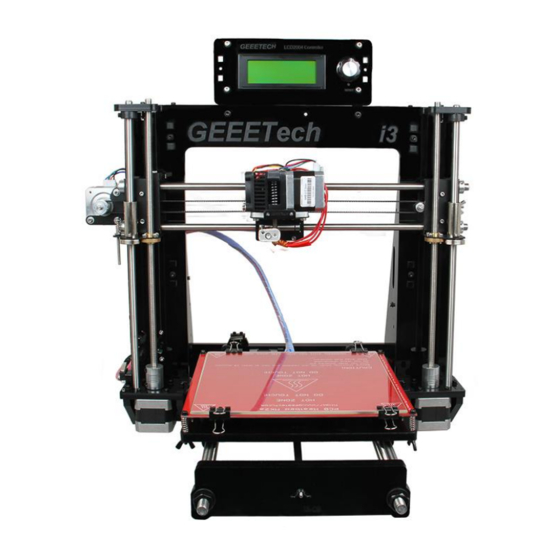
Geeetech Prusa I3 pro W User Manual
Hide thumbs
Also See for Prusa I3 pro W:
- Building instruction (114 pages) ,
- Assemble instruction (100 pages) ,
- Assembly manual (24 pages)
Table of Contents
Advertisement
Advertisement
Table of Contents

Related Manuals for Geeetech Prusa I3 pro W


Summary of Contents for Geeetech Prusa I3 pro W
- Page 1 Geeetech Prusa I3 pro W User Manual...
-
Page 2: Safety Instructions
Safety Instructions Building the printer will require a certain amount of physical dexterity, common sense and a thorough understanding of what you are doing. We have provided this detailed instruction to help you assemble it easily. However ultimately we cannot be responsible for your health and safety whilst building or operating the printer, with that in mind be sure you are confident with what you are doing prior to commencing with building or buying. -
Page 3: Table Of Contents
Content 1. Software Resources ........................1 1.1 Driver ..........................1 1.2 Arduino IDE ............Pogreška! Knjižna oznaka nije definirana. 1.3 EasyPrint 3D Installation and Configuration ............... 1 2. Hotbed Leveling .......................... 5 2.1Homing ..........................5 2.2 Coarse Tuning of distance between the nozzle and the hotbed..........6 2.3 Fine Tuning ........................ - Page 4 5.8 No information or displaying black square on LCD ............31 5.9 Time.h/endstop hit or other abnormalities ................. 31...
-
Page 5: Software Resources
If the driver cannot be automatically installed, please download the FTDI or find it in the SD card and then manually install it. 1.2 EasyPrint 3D Installation and Configuration EasyPrint 3D is a piece of 3D printing software, engineered for Geeetech products. In addition, it is... - Page 6 ShenZhen GETECH CO.,LTD www.geeetech.com also compatible with other printers. Step1. Install EasyPrint 3D. You can download it here: http://www.geeetech.net/firmware/EasyPrint.msi Step2. After the installing is finished, find the icon EasyPrint 3D. Double click it to start the software. Then you can choose English in Config>Language.
- Page 7 ShenZhen GETECH CO.,LTD www.geeetech.com Step 4. Select the COM Port Click the Printer menu, and then select the corresponding COM Port. * The COM Port refers to the port that can be used for connecting the printer and your computer, identical to the USB serial in the device manager.
- Page 8 ShenZhen GETECH CO.,LTD www.geeetech.com Step 5. Select the Printer Click the Printer menu, and then choose the proper printer type: Pro W Click the Connect button on the top right. You could observe the real-time status of the printer on the bottom of the software interface.
-
Page 9: Hotbed Leveling
ShenZhen GETECH CO.,LTD www.geeetech.com 2. Hotbed Leveling Before printing, we need to do hotbed leveling. Only after this step can the quality of printed parts get improved. Otherwise the un-leveling gap between the hotbed and extrusion head will affect the filament adhesion to the hotbed, which would cause poor print quality or even not printing. -
Page 10: Coarse Tuning Of Distance Between The Nozzle And The Hotbed
ShenZhen GETECH CO.,LTD www.geeetech.com 2.2 Coarse Tuning of distance between the nozzle and the hotbed *If the nozzle is far from the surface of hotbed, loosen the M3x35mm screw to decrease the distance between the nozzle and the hotbed. *If the nozzle is too close to the surface of hotbed, tighten the M3x35mm screw to increase the distance between the nozzle and the hotbed. -
Page 11: Fine Tuning
ShenZhen GETECH CO.,LTD www.geeetech.com 2.3 Fine Tuning After the initial adjustment, home the printer. Disable the stepper motors via LCD control panel, manually move the extruder to the four corners of the hot bed and fine-tune the wing nut at each corner to level the distances between the extrusion head and four corners. -
Page 12: Print Settings
ShenZhen GETECH CO.,LTD www.geeetech.com 3. Print Settings EasyPrint 3D provides two print setting modes: quick mode and custom mode. The [quick] mode is designed for entry-level users, while the [custom] mode is tailored for expert user with finer printing parameters. -
Page 13: Custom Mode
ShenZhen GETECH CO.,LTD www.geeetech.com Extruder temperature: Different filament requires different temperature for extruders; please refer to the suggested temperature. Layer height: the thickness of each layer. You can leave it as default. Supports Select this checkbox to have your object printed with support structures. EasyPrint 3D will automatically generate supports for any overhanging sections of your object. -
Page 14: Print Settings
ShenZhen GETECH CO.,LTD www.geeetech.com 3.2.2 Print settings Choose the [custom] tab to enjoy the sophisticated print settings. 1) Accuracy: a. Layer Height:... - Page 15 ShenZhen GETECH CO.,LTD www.geeetech.com The layer height is one of the most often adjusted settings. It is the thickness of one printed layer (in mm). With a thinner layer height you will increase the quality of the print, leading to a smoother surface and more detail visible in the Z-direction (height) of the model.
- Page 16 ShenZhen GETECH CO.,LTD www.geeetech.com model proper. a. Loops: The number of skirt lines printed around the model. One loop is usually sufficient. b. Distance from object: The distance between the object and the skirt. The default of 6mm is usually sufficient.
- Page 17 ShenZhen GETECH CO.,LTD www.geeetech.com Retraction is used at the places in a print where the printer has to do a travel move between two printed parts. Without retraction extruded material will hang between the parts. This means that the filament is pulled back by the feeder, so that it doesn’t leak from the nozzle during the travel moves.
- Page 18 ShenZhen GETECH CO.,LTD www.geeetech.com a. Fill Density: The infill density defines the amount of plastic used inside the print. A higher infill density means that there is more plastic on the inside of your print, leading to a stronger object.
- Page 19 ShenZhen GETECH CO.,LTD www.geeetech.com ones. The numbers on the right of each figure are a rough estimate of material used and time taken for a simple 20mm cube model. Note that this is only indicative, as model complexity and other factors will affect time and material.
- Page 20 ShenZhen GETECH CO.,LTD www.geeetech.com 332.82mm /5m: 28s 5. Archimedean Chords 333.66mm /5m: 27 s 6. Octagram Spiral 318.63mm/5m: 15 s 7. Honeycomb 362.73mm /5m: 39s...
- Page 21 ShenZhen GETECH CO.,LTD www.geeetech.com 5) Filament: Diameter: In this field you can enter the diameter of the filament, so that EasyPrint 3D could calculate the extrusion rate correctly. The most commonly used filament diameters are 1.75mm and 3mm, but it might be necessary to change this setting when using filament from other suppliers.
- Page 22 ShenZhen GETECH CO.,LTD www.geeetech.com The print speed defines at which speed (in mm/s) the print head moves while printing. Based on this setting, EasyPrint 3D will also calculate how fast the filament must be extruded. A higher print speed will lead to a shorter print time. But keep in mind that increasing the print speed means that you might have to increase the temperature as well, to ensure the plastic is properly melted.
- Page 23 ShenZhen GETECH CO.,LTD www.geeetech.com d. Perimeter feed rate: The speed at which the walls are printed. You can also set the speed for the outer and inner wall separately. Printing the outer wall a bit slower usually results in a better surface finish.
- Page 24 ShenZhen GETECH CO.,LTD www.geeetech.com Generally, most 3D models will print with overhanging parts by up to a certain degree. The angle is determined by several factors, most notably layer height and extrusion width, and is usually around 45°. For models with larger overhangs, a support structure may have to be printed below it.
-
Page 25: Begin Printing
ShenZhen GETECH CO.,LTD www.geeetech.com checkbox to have your object printed with support structures. b. Extruder If you are printing with dual extruder, you can select one of them to print the support material. c. Pattern There are different patterns available for printing support structures, resulting in sturdiness or the easiness to remove the support. -
Page 26: Load A Model File
ShenZhen GETECH CO.,LTD www.geeetech.com objects for printing. Here we print a simple plate. Load a Model File Click [load] to load a.stl file from your computer, or you can drag it to the 3D view window. Now you would see your model at the center of a gray rectangle, the representation of your 3D printer’s build plate. -
Page 27: Slicing
ShenZhen GETECH CO.,LTD www.geeetech.com 4.3 Slicing After loading the model file and adjusting printing parameters, you can click the [slicer] icon to slice. It will take a while; the slicing time depends on the size of the model. Upon slicing, you get the sliced .gcod file. -
Page 28: Stand-Alone Print With Sd Card
ShenZhen GETECH CO.,LTD www.geeetech.com When you are ready to print your model, click [Run job] to embark on your printing journey. 4.4 Stand-alone print with SD Card If you want to print stand-alone , you can save the .gcode file in SD card for printing. -
Page 29: Print
ShenZhen GETECH CO.,LTD www.geeetech.com 4.4.2 Print Insert the SD card into the SD card slot at the back of the LCD control panel, and choose the corresponding .gcode to print. Press the knob on LCD, rotate the knob to enter the main menu and choose Print from SD option. - Page 30 ShenZhen GETECH CO.,LTD www.geeetech.com Heating When heating is completed, it begins printing automatically.
-
Page 31: Faq
EasyPrint 3D provides all the users with online service of upgrading firmware to guarantee perfect printing performance. The specific method is as follows: 1. Connect your GEEETECH 3D printer to the computer with the USB cable. 2. Turn the printer on. 3. In EasyPrint 3D, choose the COM port and the printer type. - Page 32 ShenZhen GETECH CO.,LTD www.geeetech.com printer type and port, the current firmware version installed, the available version and the update summary of the latest firmware. Take the printer D200 as an example: Click update and confirm updating, the progress bar will turn green, the firmware will be updated automatically.
- Page 33 ShenZhen GETECH CO.,LTD www.geeetech.com Click ‘ok’ and ‘Close’ on the windows to complete the firmware upgrade. OR you can upgrade firmware by the following ways: The way of uploading firmware, please refer to: http://www.geeetech.com/forum/viewtopic.php?f=13&t=17181 Firmware download address, please refer to:...
-
Page 34: How To Change The Motor Direction In Firmware
ShenZhen GETECH CO.,LTD www.geeetech.com Common parameters settings of firmware, please refer to: http://www.geeetech.com/forum/viewtopic.php?f=13&t=17194 5.2 How to change the motor direction in firmware? In the configuration.h tab of firmware, find the following codes. Change the true of corresponding axis into false or false into true, and save the firmware and burn into the printer. ( Because you don’t know the firmware which has been burned by mother board is true or false, it may be necessary to burn both of the two parameters.) -
Page 35: User Manual Of Repetier Host
ShenZhen GETECH CO.,LTD www.geeetech.com 5.3 User manual of Repetier Host For detailed user manual of Repetier Host, please refer to Wiki: http://www.geeetech.com/wiki/index.php/Repetier-Host 5.4 Possible causes for motor’s non-action http://www.geeetech.com/forum/viewtopic.php?f=13&t=17038 5.5 Extruder does not work normally http://www.geeetech.com/forum/viewtopic.php?f=13&t=17097 5.6 The hotbed or extruder can not be heated http://www.geeetech.com/forum/viewtopic.php?f=13&t=17039...
Need help?
Do you have a question about the Prusa I3 pro W and is the answer not in the manual?
Questions and answers