Table of Contents
Advertisement
Quick Links
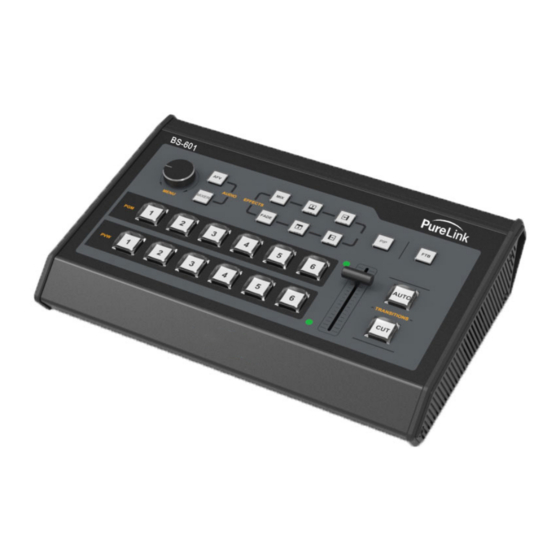
6x1 FULL HD BROADCAST SWITCHER
BS-601
USER MANUAL
For technical support, please contact us at support@purelinkav.com
E-mail: sales@purelinkav.com
For order support, please contact your local dealer.
PureLink™
22-10 State Route 208
Fair Lawn, NJ 07410 USA
Tel: +1.201.488.3232
Fax: +1.201.621.6118
BS-601 USER MANUAL
VERSION 1.0
Advertisement
Table of Contents

Related Manuals for PureLink BS-601


Summary of Contents for PureLink BS-601
- Page 1 BS-601 6x1 FULL HD BROADCAST SWITCHER USER MANUAL PureLink™ 22-10 State Route 208 Fair Lawn, NJ 07410 USA Tel: +1.201.488.3232 Fax: +1.201.621.6118 E-mail: sales@purelinkav.com For order support, please contact your local dealer. For technical support, please contact us at support@purelinkav.com BS-601 USER MANUAL VERSION 1.0...
- Page 2 Do not remove covers, panels, casing, or access circuitry with power applied to the unit! Turn power off and disconnect power cord prior to removal. Internal servicing / adjustment of unit should only be performed by qualified personnel. Turn off the unit if an abnormality or malfunction occurs. Disconnect everything before moving the unit. BS-601 USER MANUAL VERSION 1.0...
-
Page 3: Table Of Contents
MENU SETTING ......................11 6.1. SDI PGM/ AUX and Multiview Output Format ............11 Audio Setting ......................12 6.2. 6.2.1. Mixing Mode ......................12 6.2.2 AFV Mode ........................ 12 PIP Mode ........................13 6.3. 6.4. Main Menu Setting ....................13 6.4.1. System Settings ..................... 14 WARRANTY ........................14 BS-601 USER MANUAL VERSION 1.0... -
Page 4: Introduction
Inputs signal is auto-detected while for PGM output can be scaled, which can be compatible with more different equipment and more flexible. With cost effective price, it will be your perfect choice for various events production applications etc. BS-601 USER MANUAL VERSION 1.0... -
Page 5: Main Features
GPIO for Tally, LAN for update FTB for emergency situation 2. INTERFACES 2.1. Rear Interfaces GPIO (for tally) LAN (for update) 3.5mm AUDIO IN/OUT AUDIO OUT AUDIO IN HDMI PGM OUT HDMI &SDI MULTIVEW OUT SDI AUX OUT BS-601 USER MANUAL VERSION 1.0... -
Page 6: Tally Pin Definition
SDI PGM OUT SDI IN HDMI IN DC 12V Power Switch 2.2. Tally PIN Definition Definition Definition PGM-IN1 PVW-IN1 PGM-IN2 PVW-IN2 PGM-IN3 PVW-IN3 PGM-IN4 PVW-IN4 PGM-IN5 PVW-IN5 PGM-IN6 PVW-IN6 BS-601 USER MANUAL VERSION 1.0... -
Page 7: Specifications
Audio Input 1×3.5mm Stereo audio; 1×RCA(L/R) Audio Audio Output 1×3.5mm Stereo audio; 1×RCA(L/R) GPIO Tally RJ45 Power DC 12V, 1.8A Consumption ≤ 22W Others Operation Temperature -20 ~60 Storage Temperature -30 ~70 Operation Humidity 20%~70%RH Dimension 330×243.5×67mm Weight BS-601 USER MANUAL VERSION 1.0... -
Page 8: Front Control Panel
NOTE: Specifications are subject to change without notice. 4. FRONT CONTROL PANEL PVW:1-6 Select source for Preview. PGM:1-6 Select source for Program MENU Menu Setting MIXER 2-ch audio mixing Audio follow video mode FADE Fade transition effect Mix transition effect BS-601 USER MANUAL VERSION 1.0... -
Page 9: Operations Instructions
Wipe transition effect Picture in Picture Fade to Black, used for emergency situation AUTO automated switch between Program and Preview. immediate switch between Program and Preview. T-bar T-bar Manual Transition 5. OPERATIONS INSTRUCTIONS 5.1. Multiview Output Layout BS-601 USER MANUAL VERSION 1.0... -
Page 10: Pgm Pvw Switching
The following 6 windows come from the 6 input signals. The lower right two sections display time, menu and status information. The CH1,CH2 are the channel selection of the 2 audio sources for audio mixer. 5.2. PGM PVW Switching 5.2.1. PGM, PVW Channel Selection BS-601 USER MANUAL VERSION 1.0... -
Page 11: Transition Control
There are two transition control types for this video switcher: Transition without effects and Transition with effects. 1) Transition without Effects CUT performs a simple immediate switch between Preview and Program views. This is no delay seamless switching and the selected transition effect WIPE, MIX or FADE is not used. BS-601 USER MANUAL VERSION 1.0... -
Page 12: Ftb (Fade To Black)
& one(1) channel RCA(L/R) analog audio input & output and four (4) channel 3G-SDI embedded audio. 5.5. Transition Effects 5.5.1. MIX Transition Pressing the MIX button selects a basic A/B Dissolve for the next transition. When button LED turns BS-601 USER MANUAL VERSION 1.0... -
Page 13: Wipe Transition
The output format of multiview is fixed at 1080p60, and for PGM output can be set by the knob. Except PVW and PGM output, there is an AUX choice, you can quickly select the auxiliary output between PVW and PGM BS-601 USER MANUAL VERSION 1.0... -
Page 14: Audio Setting
Press AFV button to enable the audio follow video mode. When the audio is in follow mode the audio is coming from the embedded audio of Program video source. User can control the audio volume by adjusting the master fader (the left one BS-601 USER MANUAL VERSION 1.0... -
Page 15: Pip Mode
When STATUS menu is not selected, press the MENU button to enter into main menu directly. In case one of the items is selected(see below), rotate the MENU button rotate anticlockwise to exit the choice, then press the MENU button to enter into main menu. BS-601 USER MANUAL VERSION 1.0... -
Page 16: System Settings
Entering system settings from the menu to switch the system language between English and Chinese. Clock Entering system settings from the menu to switch the real-time clock shown in Analog or Digital. 7. WARRANTY PureLink Three (3) Year Limited Warranty for HDTOOLS™ Branded Products Only Dtrovision, LLC. (hereinafter “PureLink”) warrants its HDTools branded products (hereinafter “Product”) purchased BS-601 USER MANUAL VERSION 1.0... - Page 17 Any warranty service on Products must be arranged through Dealer. Authorized returns must be shipped freight prepaid and fully insured to PureLink, Ramsey, NJ USA, with the RMA number clearly marked on the outside of all shipping boxes and containers. PureLink reserves the right at its sole discretion to refuse any shipments arriving freight collect or without an RMA number. Any authorized returned merchandise must be accompanied by a note...
- Page 18 Most problems can be corrected over the phone through close cooperation between Customer and a PureLink technician. To better enable PureLink to address a warranty claim, please have the Product’s serial and model numbers. If PureLink, in its sole discretion, determines that an on-site visit or other remedial action is necessary, PureLink may send a representative to Customer’s site.
Need help?
Do you have a question about the BS-601 and is the answer not in the manual?
Questions and answers