Table of Contents
Advertisement
Quick Links
Advertisement
Table of Contents

Related Manuals for Harken B 1140 Series


Summary of Contents for Harken B 1140 Series
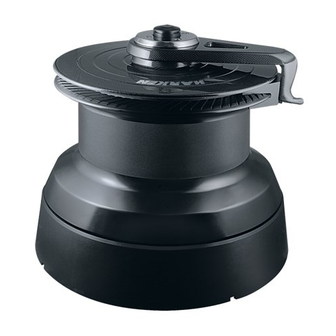
- Page 1 WINCH MANUAL WINCH MANUAL B1140...
-
Page 2: Table Of Contents
Index INTRODUCTION ............................p. 3 SAFETY INFORMATION ..........................p. 5 TECHNICAL INFORMATION AND CHARACTERISTICS .................. p. 6 Exploded view of winch B 1140 ST ASA HY (F 840000 00) ..........p. 6 Parts list winch B 1140 ST ASA HY (F 840000 00) ............... p. -
Page 3: Introduction
Introduction B 1140 winches are used as primary winches on mega yachts. They are produced in a self-tailing version and, together with the B 1150, are the only non Top-Drive winches we make (that is, they cannot be operated by a winch handle). This limitation is due to the fact that they are designed for use on very big boats, where human strength alone would not be enough to operate them. - Page 4 Introduction The gears and pawls of B 1140 winches are made in 17-4 PH stainless steel, the drum support in high resistance aluminium. The steel used is tempered by thermal processes carried out under our close supervision. There is also a “Racing” version of the B 1140 winch. To reduce weight, it is made from materials different from those of the preceding versions (table 3): Winch model Code...
-
Page 5: Safety Information
➤ when using any Harken equipment to hoist a person, you must have a safety factor of 10:1 with respect to the actual ➤... -
Page 6: Technical Information And Characteristics
Technical information and characteristics Exploded view WINCH B 1140 ST ASA HY (F 840000 00) Fig. 2 B1140 Winch... - Page 7 Technical information and characteristics Exploded view Fig. 3 B1140 Winch...
- Page 8 Technical information and characteristics Exploded view Fig. 4 B1140 Winch...
-
Page 9: Parts List Winch B 1140 St Asa Hy (F 840000 00)
Technical information and characteristics Parts list WINCH B 1140 ST ASA HY (F 840000 00) POS. Q.TY CODE DESCRIPTION MATERIAL A94000200 Aluminium base A 731464 00 Roller bearing 35x45x22 AISI 630 - 17/4 Ph Tr. M 06121 97 Seal 35x50x7 ELASTOMERO S 40047 00 04 Central shaft... - Page 10 Technical information and characteristics Parts list S 40031 00 04 Planet carrier - lower 17-4 PH S 40033 00 04 Gear 17-4 PH S 44008 00 41 Washer 38x21x1,5 UNI 5275 XANTAL B M 06238 03 Screw M 10x45 U5739 DIN933 A4 AISI 316 S 40036 00 04 Inner planet gear shaft...
- Page 11 Technical information and characteristics Parts list The different configurations of the 1140 ST HY winch have bases and tops in different materials. Table 5 (below) shows the codes of the parts that are different in the various configurations referring to the exploded views and the parts list of the B 1140 ST ASA HY winch: B 1140 ST ASA HY B 1140 ST SSS HY...
-
Page 12: Exploded View Of B 1140 St Asa E 380 V (F 842438 00)
Technical information and characteristics Exploded view WINCH B 1140 ST ASA E 380 V (F 842438 00) Fig. 6 B1140 Winch... -
Page 13: Parts List Winch B 1140 St Asa E 380 V (F 842438 00)
Technical information and characteristics Parts list WINCH B 1140 ST ASA E 380 V (F 842438 00) POS. Q.TY CODE DESCRIPTION MATERIAL F84317400 Winch 1140 ST Vertical Gear Motor Box G043175000 MAS 45 F15.83 P132 B5 NO MATERIAL Al UNI 9006-4 6082 S 43166 00 52 Flange S 42440 00 04... -
Page 14: Exploded View Of Winch B 1140 St Racing (F 843037 00)
Technical information and characteristics Exploded view WINCH B 1140 ST RACING (F 843037 00) Fig. 8 B1140 Winch... - Page 15 Technical information and characteristics Exploded view Fig. 9 B1140 Winch...
- Page 16 Technical information and characteristics Exploded view Fig. 10 B1140 Winch...
-
Page 17: Parts List Winch B 1140 St Racing (F 843037 00)
Technical information and characteristics Parts list WINCH B 1140 ST RACING (F 843037 00) POS. Q.TY CODE DESCRIPTION MATERIAL A94270100 Aluminium base AISI 630 - 17/4 Ph A 731464 00 Roller bearing 35x45x22 M 06121 97 Seal 35x50x7 ELASTOMERO S 44009 00 41 Washer 80x58,5x3 UNI 5275 XANTAL B M 06307 02... - Page 18 Technical information and characteristics Parts list A72931800 Roller bearing 20x26x19 (x W.1140) S 40033 00 04 Gear 17-4 PH S400340004 Gear ring 17-4 PH M 06205 02 Ball 3/8” AISI 304 AISI 304 M 06103 41 Ball 3/8” BRONZE UNI 5275 XANTAL B S400300004 Planet carrier - upper 17-4 PH...
- Page 19 Technical information and characteristics Parts list The left-hand version of the B 1140 LH RACING winch has some parts that are different from those of the right-hand B 1140 ST RACING winch. Table 6 (below) shows the codes of the parts that differ in the two versions. For the position of the various parts refer to the exploded view of the B 1140 ST RACING winch.
-
Page 20: Characteristics
Characteristics Power ratio Speed ratio speed 4 : 1 2,9 : 1 speed 16,4 : 1 11,6 : 1 speed 60,1 : 1 42,6 : 1 Table 7 The theoretical power ratio was obtained by ignoring friction. The third speed gives the lowest rotation speed, recovering little line but permitting the maximum working load. The second speed recovers a reasonable amount of line with medium load, while the first speed recovers a lot of line with very low load. -
Page 21: Dimensions
Dimensions Drawing with overall dimensions of hydraulically powered 1140 winch F 840000 00. Fig. 12 B1140 Winch... - Page 22 Dimensions Drawing with overall dimensions of 1140 winch F 84243800 powered by 380 V vertical electric motor. Fig. 13 B1140 Winch...
-
Page 23: Weights
Dimensions The outline of the various versions is available in DWG format and can be requested from Harken Italy Tech Service by techservice@harken.it. e-mail: Electrically powered winches take up far more space below decks than their hydraulically operated equivalents. This is... - Page 24 Technical information on hydraulic motor Characteristics of the Parker hydraulic motors installed to operate the 1140 winch (table 9): Capacity Maximum Recommended flow recommended range pressure From 15 to 60 Lt/min Backwind motor 116 c.c. 160 bar (2400 psi) (Parker 111A-071 AS-O) (from 4 to 16 gal/min) From 15 to 60 Lt/min Main motor...
-
Page 25: Performance Graphs
Technical information on hydraulic motor Performance graphs Pressure-line load graph for main motor: Winch 1140 - Line Load with 111A-129 AS-OSW Fig. 14 Oil flow - line speed graph for main motor: Winch 1140 - Line speed with 111A-129 AS-OSW @ no load on the line Fig. - Page 26 Technical information on hydraulic motor Performance graphs Oil flow- pressure graph for main motor: Winch 1140 - max Hydraulic power input Fig. 16 Hydraulic connections diagram for main motor and backwind of winch 1140: BLACK BUTTON ELECTRIC BUTTONS BACKWIND MAIN HIDRAULIC MOTOR * SEE NOTE 1...
- Page 27 Technical information on hydraulic motor Performance graphs Fig. 18 Indicative diagram of electric button and electrical valve connections: 1° 2° 3° B. W. = First/third speed button = Second speed button = Backwind button EL 1 = First, second and third speed electrical valves EL B.W.
-
Page 28: Information On Electric Motor
Technical information on electric motor Performance graphs The electric version of winch B 1140 has a 380 V, 50 Hz main motor delivering 5.5 KW. This is connected to the winch by an endless thread reduction gear. In this case too, the backwind motor will be hydraulically powered. Performance graphs of winch 1140 with 380 V electric motor. -
Page 29: Installation
Installation The winch needs to be disassembled before being installed. Follow the disassembling procedure described in the chapter on Maintenance, using the tools specified there. Remove the drum assembly and the drum support. Once the drum support has been removed and the base of the winch can be accessed, installation on the deck can begin. DANGER!: When deciding how to place the winch, make sure the entry angle of the sheet is not parallel to the base of the winch, for this would lead to turns of the sheet overlapping, risking serious damage to the winch itself... - Page 30 Installation 0° Incorrect angle of entry with sheet parallel to base of winch. Turns of the sheet round the drum risk overlapping. Fig. 24 Photograph of turns of the sheet overlapping on the drum because the sheet entered parallel to the base of the winch. Fig.
- Page 31 1. Position the drilling cut-out template in the position you have selected for the winch. This manual contains a printed copy of the drilling cut-out template for the right-hand winch 1140. You can e-mail a request to Harken Italy Tech Service (techservice@harken.it)
- Page 32 Installation WARNING!: Before reassembling the winch make sure that the drainage holes in the base are not obstructed. Below is a scale drawing of the right-hand winch 1140 drilling cut-out template: Right-hand winch 1140 drilling cut-out template. Fig. 27 B1140 Winch...
-
Page 33: Use
To work, the winch 1140 needs two hand- or foot-operated electric buttons (BRS 102 P). To activate backwind, a further hand- or foot-operated electric button needs to be installed on the deck. 68.00 mm Harken BRS 102 P button Fig. 28 ENGAGING FIRST SPEED... - Page 34 ENGAGING SECOND SPEED The winch rotates The black button disengages at second speed automatically Press the second button Scene 2 Fig. 30 To engage second speed: • Press the second of the three electrical buttons mounted on the deck • The black button on top of the winch disengages automatically •...
- Page 35 To engage backwind: • Press the third of the three electrical buttons mounted on the deck • The black button on top of the winch will remain in the disengaged position • The winch will rotate in the reverse direction. Right-hand winches will rotate anti-clockwise, allowing the load on the line to be lightened before the sheet is eased.
-
Page 36: Maintenance
If for any reason you cannot carry out this maintenance, e-mail the Harken Italy Tech Service (techservice@harken.it). They will provide you with the Special Project Team list of authorised technicians who can do a professional job on your equipment. -
Page 37: Disassembling
Maintenance Disassembling procedure To identify the various parts refer to the exploded view on page 6. Unscrew the two Remove the logo ring screws (n° 78). (n° 76). To make the stripper arm support easier to remove, tap it a few times anti- clockwise... - Page 38 Maintenance Disassembling procedure Remove the winch Unscrew the stripper top (n° 72). arm support (n° 71). Remove washer Unscrew the 8 (n° 85) (n° 30) and screws. washer (n° 32). Remove washer (n° 30) and Remove the drum thrust bearing (n° 11). (n°...
- Page 39 Maintenance Disassembling procedure At the point you can disassemble, check and carry out maintenance on the Remove the drum gearing, bearings support and housing and pawls in the (n°29 and n°28). base of the winch. Remove the unit Remove the roller connected to gear bearing (n°...
- Page 40 Maintenance Disassembling procedure Remove the unit Remove roller connected to the bearing (n° 7) and ring gear (n° 42). washer (n° 52). Remove roller bearing (n° 7), washer (n° 45) and check the Remove the final pinion drive (n° 41). pawls (n°...
-
Page 41: Maintenance Products
Maintenance Disassembling procedure Once the winch is completely disassembled, clean the parts in an ultrasound bath. If this is not available, immerse the parts in a basin of naphtha. If this is not possible, clean the parts with a rag. Once cleaning is finished, dry the parts with a cloth that leaves no residue. - Page 42 Fig. 36 SYNTHETIC GREASE HARKEN BK 4513. Apply a film of grease with a brush to all the parts indicated, and make sure that the film is visible. Take special care when greasing the teeth of the ring gears, the gears and the roller bearings.
-
Page 43: Exploded View For Maintenance
Maintenance Esploded view Showing products to use for correct maintenance: Symbols: = oil = anti seize = grease = anti corrosive lubricant = strong threadlocker = medium threadlocker Note 1: On the screws in position 61 of the exploded view in fig. - Page 44 Maintenance Esploded view Fig. 41 B1140 Winch...
- Page 45 Maintenance Esploded view Once maintenance is finished, reassemble the winch following the sequence described above in reverse order. Before closing the winch, make sure the drainage holes in the base of the winch are not obstructed. If you use self-locking nuts to fix the base of the winch and they have already been unscrewed more than one, they must be replaced.
-
Page 46: Backwind Maintenance
Fig. 46 For any doubts over the maintenance procedure, contact the Harken Tech Service. Maintenance Maintenance products Check the oil level on the indicator on the side of the backwind:... -
Page 47: Troubleshooting
71). If it is, contact the Harken Italy Tech Service Team. • Check the height of the first speed button by adjusting how far it is screwed on to the control rod (n°... -
Page 48: Warranty
Finishes in carbon are excluded from warranty for damage caused by wear and by ultraviolet radiation due to long exposure to sunlight. Contact Harken for information on what materials to use to renew the damaged finish. For the classification of events and for more details on the custom products and high performance installation warranty, contact Harken Italy. - Page 49 APPENDIX A Base Sheave B1140 Winch...
- Page 50 Introduction The following paragraphs describe the technical characteristics of the 1140 Winch Base Sheave. Technical information and characteristics Exploded view and parts list BASE SHEAVE KIT FOR WINCH B 1140 Fig. 1 POS. Q.TY CODE DESCRIPTION MATERIAL A 947597 00 Base of base sheave assembly S 47599 00 52 Base sheave cover...
- Page 51 Technical information and characteristics Exploded view and parts list DETAIL OF THE ASSEMBLY OF THE WINCH B 1140 BASE SHEAVE Fig. 2 POS. Q.TY CODE DESCRIPTION MATERIAL S 47600 00 52 Ratchet base pulley Al UNI 9006-4 6082 T6 M 06097 01 Heli-coil M5x7,5 AISI 302 S 47602 00 04...
- Page 52 Installation To install the winch 1140 with base sheave follow the indications in the chapter on installation in the winch 1140 Manual. In case of doubt, contact the Harken Italy Tech Service (techservice@harken.it). WARNING!: The drilling cut-out template of the right-hand winch 1140 with base sheave differs from that of the winch 1140 without base sheave in the winch manual.
- Page 53 Installation Fig. 4 Drilling cut-out template of the right-hand winch 1140 with base sheave. B1140 Winch...
- Page 54 Maintenance Disassembling procedure: To identify the various components refer to the exploded view in figs. 1 and 2 of this appendix A. Unscrew the 7 n°6 nuts. Lightly tap with a plastic headed hammer to break the Duralac film and then slide off the base sheave cover (n°...
- Page 55 Maintenance Esploded view Showing the products to use for correct maintenance of the base sheave: Symbols: = oil = anti seize = grease = anti corrosive lubricant = strong threadlocker = medium threadlocker Fig. 5 Note: Oil all the pawls in position n°4 of fig.2 of this Appendix and apply medium threadlocker on all the screws in position n°5.
- Page 56 Maintenance Esploded view Fig. 6 Note 1: Apply the anti corrosive lubricant on the upper and lower surfaces of toothed ring n°4 in fig.1 of this Appendix. B1140 Winch...
Need help?
Do you have a question about the B 1140 Series and is the answer not in the manual?
Questions and answers