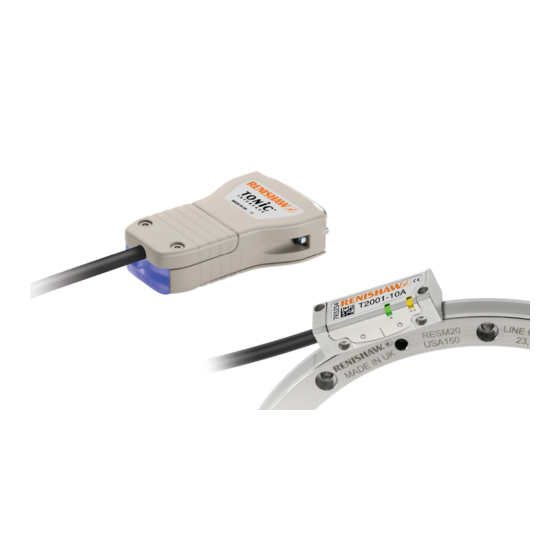
Renishaw TONiC RESM20 Installation Manual
T20x1 resm angle encoder system
Hide thumbs
Also See for TONiC RESM20:
- Functional safety manual (27 pages) ,
- Installation manual (60 pages)
Table of Contents
Advertisement
Quick Links
Advertisement
Table of Contents

Related Manuals for Renishaw TONiC RESM20


Summary of Contents for Renishaw TONiC RESM20
- Page 1 Installation guide M-9653-9161-04-A TONiC T20x1 RESM angle encoder system ™...
-
Page 2: Table Of Contents
TONiC quick-start guide System connection T20x1 readhead and RESM20 compatibility Readhead mounting and alignment System calibration Restoring factory defaults Enabling disabling AGC Output signals Speed Electrical connections Output specifications General specifications RESM20 ring specifications TONiC RESM20 angle encoder system installation guide... -
Page 3: Legal Notices
Renishaw. including interference that may cause undesired operation. Trade marks The user is cautioned that any changes or modifications not expressly approved by Renishaw plc or authorised representative could void the user’s authority to operate the equipment. RENISHAW and the probe symbol are registered trade marks of Renishaw plc. -
Page 4: Storage And Handling
Humidity +70 °C +70 °C 95% relative humidity −20 °C 0 °C (non-condensing) to Chlorinated Chlorinated COCH COCH IEC 60068-2-78 Solvents Solvents UHV readhead Bakeout +120 °C Propan-2-ol Methylated Methylated CHOHCH Spirits Spirits TONiC RESM20 angle encoder system installation guide... -
Page 5: Tonic T20X1 Readhead Installation Drawing
0.25 and 0.4 Nm. 11.5 (Pitch tol. ±1°) Rideheight 2.1 ±0.15 Forward direction of ring (increasing count) Extent of mounting faces. † UHV cable 3.0 approx. ‡ Dynamic bend radius not applicable for UHV cables. TONiC RESM20 angle encoder system installation guide... -
Page 6: Ti Interface Drawing
Push and release (> 3 seconds) - Automatic Gain Control (AGC) enable/disable Push and hold during power ‘Off/On’ cycle - Restore factory defaults Refer to readhead LED functionality chart for CAL LED indications Dynamic bend radius not applicable for UHV cables. TONiC RESM20 angle encoder system installation guide... -
Page 7: Resm20 Installation Drawing ('A' Section)
NOTE: θ is the angle between one tapped hole and the adjacent 549.80 510.00 clearance hole. The angle between two clearance holes is 2θ. There are no tapped holes on the 489 mm ring. TONiC RESM20 angle encoder system installation guide... -
Page 8: Resm20 Installation Drawing ('B' Section)
180.00 θ Section A–A 2.5 × 45° R0.5 ØDI ØDH ØDO NOTE: θ is the angle between one tapped hole and the adjacent clearance hole. The angle between two clearance holes is 2θ. TONiC RESM20 angle encoder system installation guide... -
Page 9: Select A Resm20 Ring Mounting Option
Enables simplest adjustment. Will not correct eccentricity of the Offers highest accuracy. supporting shaft. Enables eccentricity to be compensated. Offers excellent mechanical stability against thermal cycling, shock and vibration. Minimises cost of substrate preparation. TONiC RESM20 angle encoder system installation guide... -
Page 10: Equipment For Taper Mounting
(‘RESM20 installation drawing (‘A’ section)’, page 5) Lint-free cloth NOTE: Recommended screw type M3 × 0.5: ISO 4762/DIN 912 grade 10.9 minimum/ANSI B18.3.1M. Dial Test Indicator (DTI) Appropriate cleaning solvents (‘Storage and handling’, page 2) Hex key TONiC RESM20 angle encoder system installation guide... -
Page 11: Taper Mount Method
83.85 238.85 83.65 238.65 98.85 283.85 98.65 283.65 DO = Nominal external diameter. Recommended surface finish ≤ Ra 1.2. NOTE: It is recommended that the mounting surface is a turned, rather than ground finish. TONiC RESM20 angle encoder system installation guide... - Page 12 6 equally spaced M3 screws. more details. • For RESM20 rings with 20 mounting holes, insert Clean ring using Renishaw scale cleaning wipes or a 8 equally spaced M3 screws (in four groups of two) clean, dry, lint-free cloth. between existing screws.
-
Page 13: Equipment For Interference Fit Mounting
(‘RESM20 installation drawing (‘A’ section)’, page 5) (‘RESM20 installation drawing (‘B’ section)’, page 6) NOTE: Recommended screw type M3 × 0.5: ISO 4762/DIN 912 grade 10.9 minimum/ANSI B18.3.1M. Appropriate cleaning solvents (‘Storage and handling’, page 2) Hex key TONiC RESM20 angle encoder system installation guide... -
Page 14: Interference Fit Method
Insert required number of screws into all mounting holes 95.045 95.023 Tighten all screws. 130.052 Clean ring using Renishaw scale cleaning wipes or a clean, dry, lint-free cloth. 130.027 NOTES: 180.052 Ensure that all screws are tightened to 1.6 Nm 180.027... -
Page 15: Tonic Quick-Start Guide
CAL values and AGC status are stored in readhead non-volatile memory at power down. NOTE: If calibration fails, restore factory defaults by pressing and holding the CAL button whilst switching on (‘Restoring factory defaults’, page 18) Then repeat the installation and calibration routine. TONiC RESM20 angle encoder system installation guide... -
Page 16: System Connection
Refit the cover plate. Refit the cover plate ensuring the cable ferrule is located in the recess on the inside and no wires are trapped under the cover plate. TONiC RESM20 angle encoder system installation guide... -
Page 17: T20X1 Readhead And Resm20 Compatibility
™ mounting hole to the left of the ‘Renishaw’ logo within ±0.5 mm. No external actuators or physical adjustment are required. TONiC RESM20 angle encoder system installation guide... -
Page 18: Readhead Mounting And Alignment
Alarm may result in axis position error, re-datum to continue. See the product nomenclature for interface configuration in the TONiC encoder system Data sheet (Renishaw part no. L-9517-9337). This can be downloaded from our website at www.renishaw.com/tonicdownloads and is also available from your local representative. -
Page 19: System Calibration
(> 100 mm/s or exceeding the readhead maximum speed), exit the calibration routine, restore factory defaults (‘Restoring factory defaults’, page 18) and check the readhead installation and system cleanliness before repeating the calibration routine. TONiC RESM20 angle encoder system installation guide... -
Page 20: Restoring Factory Defaults
Press and hold the CAL button on the interface for > 3 seconds to switch AGC on or off. The CAL LED on the readhead will be illuminated when AGC is active. NOTE: The system must be calibrated before switching AGC on. TONiC RESM20 angle encoder system installation guide... -
Page 21: Output Signals
P and Q limit actuators are not suitable for ring encoder (RESM) installation. Sine − Green Limit switch signal detail is included here for information only. Reference mark Violet Analogue Please contact your local Renishaw representative if you require limits on your rotary installation. − Grey Limits Pink Open collector Black Set-up... -
Page 22: Speed
Angular speed depends on ring diameter – use the following equation to convert to rev/min. Angular speed (rev/min) = V × 1000 × 60 Where V = maximum linear speed (m/s) and D = external diameter of RESM20 ring (mm) π TONiC RESM20 angle encoder system installation guide... -
Page 23: Electrical Connections
Ti0000 interfaces. For applications where no interface is used, remote operation of CAL /AGC is essential. 100R E− 100nF TD interface resolution switching Analogue outputs Pin 10 Connect pin 10 to 0 V to switch to lower resolution. 120R − TONiC RESM20 angle encoder system installation guide... -
Page 24: Output Specifications
> 15 ms when alarm conditions valid. At > 70% signal level V is nominal 3.3 V. * Set-up signals as shown are not present during calibtation routine. † Inverse signals not shown for clarity TONiC RESM20 angle encoder system installation guide... -
Page 25: General Specifications
Maximum cable length (m) 40 to 50 < 40 analogue CAUTION: Renishaw encoder systems have been designed to the relevant EMC standards, but must be correctly integrated to achieve EMC compliance. In particular, attention to shielding arrangements is essential. RESM20 ring specifications Material... - Page 26 New Mills, Wotton-under-Edge uk@renishaw.com Gloucestershire, GL12 8JR United Kingdom www.renishaw.com *M-9653-9161-04* For worldwide contact details, visit www.renishaw.com/contact Renishaw plc. Registered in England and Wales. Company no: 1106260. Part no.: M-9653-9161-04-A Registered office: New Mills, Wotton-under-Edge, Gloucestershire, GL12 8JR, UK. Issued: 09.2020...
Need help?
Do you have a question about the TONiC RESM20 and is the answer not in the manual?
Questions and answers