Table of Contents
Advertisement
Quick Links
Advertisement
Table of Contents

Subscribe to Our Youtube Channel
Related Manuals for CLIMASTAR SILICIUM HYBRID INVERTER


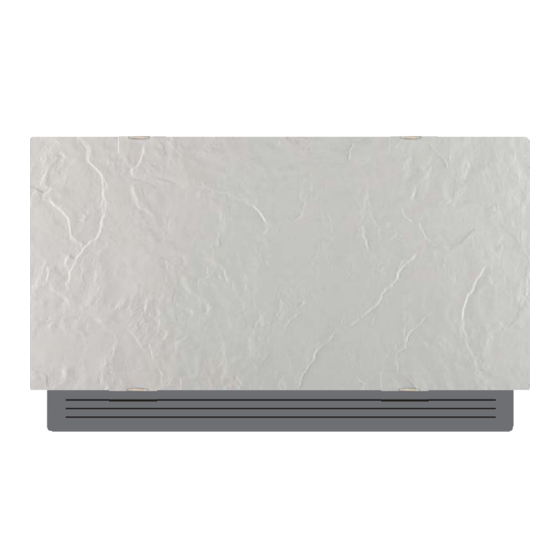
Summary of Contents for CLIMASTAR SILICIUM HYBRID INVERTER
- Page 1 INSTALLATION MANUAL SILICIUM HYBRID INVERTER...
-
Page 2: Table Of Contents
Congratulations on your purchase of your SILICIUM HYBRID INVERTER UNIT!! The product you have just purchased has undergone numerous tests and inspections to guarantee the highest quality. We hope it will give you entire satisfaction. We are sure you will be happy with it because it represents the state of the art in the technology of home air conditioning. -
Page 3: General
Please, read carefully this guide before installing the device. After unpacking, make sure that all the components are present. If not, please contact to the CLIMASTAR distributor who sold you the appliance. CLIMASTAR appliances must be installed by an authorized installer... -
Page 4: Fundamental Safety Rules
If it is lost or damaged, please contact the local CLIMASTAR technical service center to get a new one. All repair or maintenance interventions must be performed by the CLIMASTAR technical service department or by professionally qualified personnel as foreseen in this booklet. -
Page 5: Product Range
It is forbidden to open the doors which access the internal parts of the appliance without first turning the system master switch to "OFF". It is forbidden to dispose of or leave in the reach of children the packaging materials which could become a source of danger. It is forbidden to climb onto the appliance or rest any object on it. -
Page 6: Installation
Miss-respecting the rules indicated not only can cause malfunctions of the appliance but it will also invalidate the warranty and hence CLIMASTAR shall not respond for any damage to persons, animals or property. -
Page 7: Minimum Installation Distances
2.3. Minimum installation distances Figure below shows the minimum clearance distances between the wall mounted device and furniture present in the room. 2.4. Side opening. Without the front panel fitted, you can find on the left-hand side a cover that protects one screw, lift the upper cover and loosen the screw. -
Page 8: Wall Installation
2.5. Wall installation Using the paper template, you can find on the device packaging, trace the position of the two fixing brackets on the wall. Use a suitable drill to make the holes with and insert the toggle bolts (2 for each bracket); fix the two brackets. Do not over-tighten the screws so that the brackets can be adjusted with a spirit level. - Page 9 -Do not over-tighten to avoid damaging the insulation. -Use hemp and green paste to seal the threaded connections; the use of Teflon is highly recommended when there is anti-freeze in the hydraulic circuit. Hydraulic connections lay out: Water inlet Eurokonus 3/4 Water return Eurokonus 3/4 Condensation...
-
Page 10: Condensation Discharge
2.7. Condensation discharge The condensation discharge network must be suitably sized (minimum inside pipe diameter 16 mm) and the pipeline positioned in such a way that it keeps a constant inclination, never lower than 1%. In the appliance, the discharge pipe is connected directly to the discharge tray, positioned at the bottom of the side panel underneath the hydraulic connections. -
Page 11: Filling The System
2.8. Filling the system. When starting up the system, make sure that the hydraulic unit lockshield is open. If there is no electric power and the thermo-valve has already been powered use the special cap to press the valve stopper to open it. 2.9. -
Page 12: Electrical Connections
2.10. Electrical connections. 2.10.1. Connecting the control board. This control board is a panel with 8 capacitive keys and the display shows function AUTO ventilation adjustment step. The thermostat is adjustable from 5 to 40 ° C, it has a summer and winter selector through the water temperature probe (10 k) positioned in the cockpit on the battery of the device. -
Page 13: Connections On Electronic Board
- Make the electrical connections following the instructions in chapter “Connections on electronic board 2.10.2”, sort the cables, fix the cables with the help of 3 jumpers supplied; - Close the box by fixing 4 screws; - Reassemble the side aesthetic panel of the unit 2.10.2. -
Page 14: Error Signals On Display
2.11. Error signals on Display. Failure on room temperature sensor Failure on fan motor, due to external particle or rotation sensor Failure on water temperature sensor (H2), check sensor has 10kΩ Failure in heating element (overheat). Automatic rearm < 35ºC Failure in heating element, (H4) blocked or not connected. -
Page 15: Maintenance
3. MAINTENANCE Periodic maintenance is essential to keep Hybrid INV always efficient, and safe over time. These operations can be carried out every six months or annually by the Technical Assistance Service, who is technically qualified and prepared and has the necessary original spare parts. 3.1. - Page 16 - Remove the dust from the filter using a vacuum cleaner - Wash the filter with running water without using any detergents or solvents and then let it dry. - Remount the filter on the cooler-radiator, paying particular attention to introduce the lower flap in its housing.
-
Page 17: Energy Saving Tips
To finish insert the two tabs in the appropriate slots, turn them and hook them giving them a slight hit on the top. 3.3. Energy saving tips -Always keep the filters clean; - Keep the doors and windows in the rooms fitted with air conditioning systems closed as much as possible. -
Page 18: Table Of Anomalies And Remedies
4.1. Table of anomalies and remedies The interventions must be carried out by a qualified installer or by a specialized service center. Effect Cause Remedy A delayed activation of The circuit valve needs some the ventilation respect to time to open and as a result Wait for 2 or 3 minutes to open the the new temperature or the hot or cold water takes... - Page 19 Effect Cause Remedy The condensation bowl is Slowly pour a bottle of water in the blocked. low part of the battery to check the The appliance leaks drainage; if necessary, clean the water only during the bowl and/or increase the The condensation discharge cooling function.
- Page 20 CLIMASTAR GLOBAL COMPANY S.L. Carretera AS-266 OVIEDO-PORCEYO/ Km.7 Pruvia 33192 - Llanera (Asturias)- SPAIN Tel: +34 985 66 80 80 / Fax: +34 985 264 751 www.climastar.es HYBRID INVERTER Installation Rev. 270320...
Need help?
Do you have a question about the SILICIUM HYBRID INVERTER and is the answer not in the manual?
Questions and answers