Table of Contents
Advertisement
Quick Links
Advertisement
Table of Contents

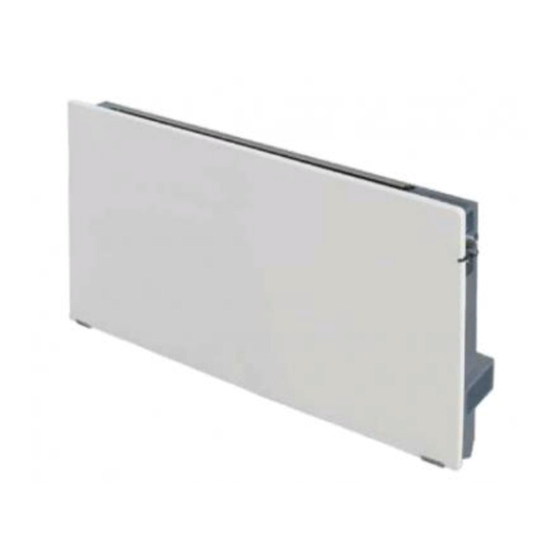
Summary of Contents for CLIMASTAR SILICIUM HYBRID ECO
- Page 1 USER’S GUIDE SILICIUM HYBRID ECO...
-
Page 3: Table Of Contents
INDEX 1.-INTRODUCTION ..................... 4 2.-GENERAL INFORMATION ................4 2.1.- GENERAL WARNINGS ................4 2.2.- SECURITY WARNINGS ................4 2.3.- MANUFACTURER’S WARNINGS ............5 3.-BEFORE CONNECTING THE DEVICE ............5 4.-WALL SUPPORT ....................6 5.-HYDRAULIC CONNECTION ............... 8 5.1.- PIPE CONNECTION ................8 5.2.- FITTINGS .................... -
Page 4: Introduction
Also due to the fact that CLIMASTAR units use Dual Kherr® as an accumulator and also as a radiating element, you will obtain the perfect balance between thermal inertia and temperature management, avoiding sudden temperature changes typical of other units when disconnected. -
Page 5: Manufacturer's Warnings
• The device should be kept in an environment clean of dust or any kind of dirt. This will avoid spots or stains from appearing on the walls behind the unit. Our units do not have any combustible element inside and the appearance of spots is consequence of environmental reasons. -
Page 6: Wall Support
4.-WALL SUPPORT • The device is supplied with an assembly kit that includes: 2 rawlplugs, 2 screws, 2 wall anchors and 2 insulating profiles. • Wall anchors supplied in the assembly kit are not valid for plasterboard walls. These types of walls require specific rawlplugs. - Page 7 Before hanging the device, in order to avoid vibrations, locate the insulating tape in the back of the device as shown below:...
-
Page 8: Hydraulic Connection
5.-HYDRAULIC CONNECTION To connect the unit to the mains, first remove the front of the unit. Use a screwdriver to loosen the 2 support screws and withdraw the Dual Kherr. 5.1.- PIPE CONNECTION The following picture shows the inlet and return of the water. OULET INLET Inlet intake is closer to the side of the device, being identified by a red cable tie;... -
Page 9: Fittings
5.2.- FITTINGS Find below fittings to perform the installation: Option A Triaxial valve, lockshield and the corresponding union pieces. If you use this option, cut the sticker on the right side of the device to facilitate the valve extraction. Option B Triaxial valve, lockshield, corresponding union pieces and thermostatic valve. -
Page 10: Connecting The Heating Element
CONNECTING THE HEATING ELEMENT Once the hydraulic connections have been performed, connect the heating element as shown below: Replace the Dual Kherr and place the wall anchors. 5.4.- AIR VENTING Once the unit is installed, we should air vent the internal air the unit may have. To do so, insert a flat screwdriver into the slats until you find the air vent valve of the heat exchanger;... -
Page 11: Setting Up
6.-SETTING UP 6.1 STARTING THE DEVICE First, plug in the power cord to a mains power outlet, and click the switch on the right. SWITCH Press to turn on the device. First time we start the device, test mode starts –light PLUS and 8 h. -
Page 12: Warm Mode
6.2 WARM MODE The user selects this mode in winter. This mode enables or disables the fan, only when the boiler is working. To do so, the unit is provided with a probe that measures the temperature of the heating circuit and stops the fan when water is below 32ºC. How can we know if the winter mode is set? Press and ... - Page 13 • ECO. The fan works until room temperature is above 20ºC; it will start again once temperature decreases one degree. The unit will work by natural convection whenever the boiler is working. Press to select any option below, corresponding light will activate PLUS CONFORT 3- Should you need extra heat, press the switch corresponding to the heating element:...
-
Page 14: Free Cooling Mode
Timer OFF → ON. The fan stops working during the time the user selects. Press to select the mode –plus, eco or comfort- we want to set when the device starts again. Press during 2 seconds to set OFF mode. Press to select the time we want the device to be disconnected. -
Page 15: Block The Device
6.5 BLOCK THE DEVICE This function enables to block the controls. To set this function, press simultaneously during 5 seconds. Lights will be off in 10 minutes- To unblock, do the same. 6.6 SWITCH OFF THE LED’S. If you do not want the LED’s keep on, use the block option above. 7.-RECOMMENDATIONS OF USE Do not cover the air exits. -
Page 16: Technical Details
9.-TECHNICAL DETAILS Description: HYBRID 500 x 500 Measures: 500 x 500 x 118(mm) Dry weight: 20 Kg Volume of water: 0,8L Description HYBRID 1000 x 500 Measures: 1000 x 500 x 118(mm) Dry weight: 30 Kg Volume of water: 1,6L Voltage: 230 V Frequency:... -
Page 17: Faqs
10.-FAQs PROBLEM PROBABLE CAUSE SOLUTION Incorrect setting of the set temperature Check the set temperature on the display to verify it is the desired temperature. Improper sizing The power is not the adequate for the place where it has been installed Avoid placing the device near areas of movement of air (windows, doors,..) and/or Equipment placement is not correct places that make difficult heat transfer. -
Page 18: Guarantee
11.-GUARANTEE CLIMASTAR guarantees that in the moment of its purchase the product is free of any defect in the materials and in the work force (limited guarantee). CLIMASTAR offers a commercial and voluntary guarantee; conditions included are similar to those of the legal guarantee, being CLIMASTAR responsible for the non-conformities arisen in the terms and conditions mentioned below. - Page 20 CLIMASTAR GLOBAL COMPANY S.L. Carretera AS-266 OVIEDO-PORCEYO/ Km.7 Pruvia 33192 - Llanera (Asturias)- SPAIN Telf: 985 66 80 80 / Fax: 985 264 751 www.climastar.es HYBRID ECO Rev. 270120...


Need help?
Do you have a question about the SILICIUM HYBRID ECO and is the answer not in the manual?
Questions and answers