Advertisement
Quick Links
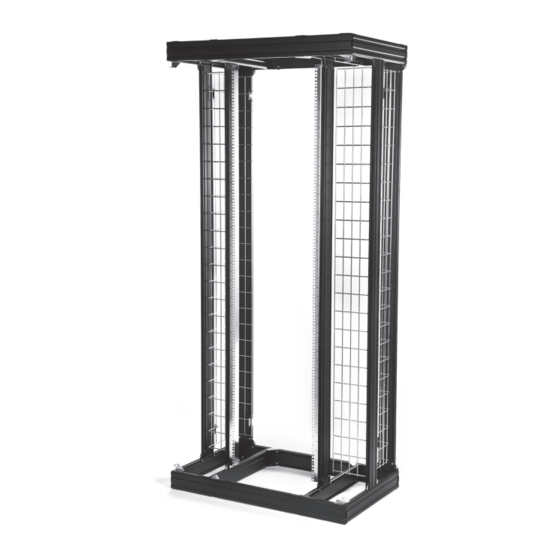
NETpodium Rack (1-1671405-1 & 1-1671405-2)
INSTRUCTION SHEET 411-117000 Jan 2017 Rev B
1-1671405-1
1. Kit Content
Bottom Frame Assembly
Top Frame Assembly
Carboard Stencil
Vertical Profile Assembly
Wire Basket
Bracket Wire Baskets
15U Cable Managers
(only for 1-1671405-1)
Mounting Hardware
1 pc
1 pc
1 pc
6 pc
2 pcs
8 pcs
6 pcs
1-1671405-2
Advertisement

Subscribe to Our Youtube Channel
Summary of Contents for CommScope NETpodium 1-1671405-1
- Page 1 NETpodium Rack (1-1671405-1 & 1-1671405-2) INSTRUCTION SHEET 411-117000 Jan 2017 Rev B 1-1671405-1 1-1671405-2 1. Kit Content Bottom Frame Assembly 1 pc Top Frame Assembly 1 pc Carboard Stencil 1 pc Vertical Profile Assembly 6 pc Wire Basket 2 pcs Bracket Wire Baskets 8 pcs 15U Cable Managers...
-
Page 2: Instruction Sheet
NETpodium Rack INSTRUCTION SHEET 2. Prefix: Installing the brackets with screws and 2.3. Mounting a bracket or accessory with Tool-less Tool-less Fastener (TF) Fastener (TF) 2.1. The profile T-Channel - Insert the TF into the T-Channel Groove 2.2. Mounting a bracket or accessory with screws & washers - Quarter turn clockwise - Insert the bracket or accessory into the groove - TF is ASSEMBLED in the T-Channel, you can... - Page 3 NETpodium Rack INSTRUCTION SHEET TWO WAYS TO USE IT (A or B) • • • - Push - Insert the accessory or bracket - TF is FIXED , you can NOT slide it - Line-up the holes - A bracket or accessory can be slid with the slotted hole - Slide the fastener if necessary over the fastener pin into the groove - Push...
- Page 4 NETpodium Rack INSTRUCTION SHEET 2.4. Removing a bracket or accessory with Tool-less 3. Assembly instruction Fastener (TF) PULL 3.1. Mount the frame to the floor PULL - Pull to release the accessory or bracket The previous step can also be done using a small, flat head screwdriver: - Use the enclosed stencil to indicate the mounting positions on the floor, use the holes with references...
- Page 5 NETpodium Rack INSTRUCTION SHEET 3.2. Assemble the profiles - Put the stencil on top of the bottom frame. - The result. - Assemble all the Vertical Profiles. To position the vertical profiles look at the pictures on the stencil. Pay attention to the brackets assembled on the profiles.
- Page 6 NETpodium Rack INSTRUCTION SHEET - The result. - ATTENTION: Fix the brackets in the corner of the Top Frame assembly on the Vertical profiles. - Assemble the Top Frame on the Vertical profiles. - Remove the TF's (See paragraph 2.4) and slide the stencil back downwards.
- Page 7 NETpodium Rack INSTRUCTION SHEET 3.3. Assemble the wire baskets - To mount the 4 wire basket brackets on the bottom side: 1. First mount a TF in the channel (position indicated on stencil) and fix it in the 6th available hole above the screw on the bottom side of the (See paragraph 2.3).
- Page 8 NETpodium Rack INSTRUCTION SHEET - To fix each wire basket use only ONE screw and washer per wire basket. - Tear the stencil apart, use the holes indicated by PULL. You don’t need it anymore. Shortest side - To ground each wire basket use only ONE screw and washer per wire basket.
- Page 9 INSTRUCTION SHEET Contact us: Technical Support This product is covered by one or more U.S. patents or their foreign equilvalents. For patents, see www.commscope/ProductPatent/ProductPatent.aspx Technical Assistance Center (TAC) Greensboro, North Carolina To obtain more information on CommScope® products visit our website at www.commscope.com/supportcenter/TechnicalSupport.aspx www.commscope.com...


Need help?
Do you have a question about the NETpodium 1-1671405-1 and is the answer not in the manual?
Questions and answers