Table of Contents
Advertisement
Customer Service Information
■
Technical support
Call: 1-800-255-1479 (Option3 / Wireless Products) – Web: www.commscope.com/wisupport.
Safety Agency Statements and Safety Precautions
Safety Agency Statements:
■
Only qualified personnel are to install and maintain the cabinet.
■
Install cabinet within a restricted access location where access is by use of a tool, lock and key or
other means of security; and controlled by the authority responsible for the location.
■
The cabinet is only suitable for mounting on a concrete or other noncombustible surface.
■
Maximum ambient temperature (Tma) of 46º C (115º F) permitted by manufacturer specification.
■
All conduit hubs must be of Type 3R or equivalent to maintain the cabinet as Rainproof.
■
It is essential to connect the cabinet to earth ground before connecting supply, high leakage current.
■
All cabinet equipment cabling is to meet applicable NEC
Safety Precautions:
Note:
In areas that utilize joint buried plant, and per company practice, test and verify that voltage is not
present on the cable shield. If voltage is present on the shield, stop work and notify supervision.
■
Follow all product warnings and instructions as specified in this document, cabinet and equipment
labels inside the cabinet to reduce risk of fire, electric shock, and injury.
■
Install all equipment and supplied hardware as specified in this document.
— Install only approved devices in the cabinet and do not drill, saw, or cut inside the cabinet.
— Never install cable, connectors, jacks in a wet location unless designed for wet locations.
— Never install electrical equipment during a thunderstorm, there is risk of electric shock.
— Never touch uninsulated live power wires or terminals, always disconnect from power first.
— It is mandatory to use insulated tools using power and hand tools.
■
Do not transport or lift cabinet with the batteries installed, or store batteries inside cabinet.
■
All personnel must wear standard safety headgear, eye protection, and insulated gloves (if required).
■
At all times, keep bystanders away from all work operations.
Warning:
Do not drill or punch any holes in the cabinet. Use only the provided
knockouts in the cabinet for cable ingress and cable egress.
Drilling or punching holes in any other location will immediately void
the warranty. No exemptions.
1
Registered trademark of the National Fire Protection Association.
Installation Instruction Guide for
CMC-21, CMC-28, CMC-35
Compact Modular Cabinets (CMC)
© 2022 CommScope, Inc., Confidential and Proprietary,
For Customer Use Only, All Rights Reserved
Material ID 860647713
and network communications standards.
1
Rev B, V.05,
February 2022
Page 1
38 Pages
Advertisement
Table of Contents

Related Manuals for CommScope CMC-21


Summary of Contents for CommScope CMC-21
- Page 1 Compact Modular Cabinets (CMC) February 2022 Customer Service Information ■ Technical support Call: 1-800-255-1479 (Option3 / Wireless Products) – Web: www.commscope.com/wisupport. Safety Agency Statements and Safety Precautions Safety Agency Statements: ■ Only qualified personnel are to install and maintain the cabinet.
-
Page 2: Table Of Contents
► Cabinet Weights (approximate) ....................3 ► CMC-21, 28, and 35 Configuration Format and Definition ............4 ► CMC-21, 28, and 35 Cabinet Rack Unit (RU) Configurations ..........5 ► Field Replacement Units (FRU) and Aftermarket Kits (AMK) ..........5 ►... -
Page 3: Section 1. Overview And Specifications
Rev B, V.05, February 2022 Section 1. Overview and Specifications This guide provides instruction on how to install a CMC-21, CMC-28, or CMC 35 cabinet onto a concrete pad or steel structure, pole or wall / H-frame mounting, and battery installation. Common Features ■... -
Page 4: Cmc-21, 28, And 35 Configuration Format And Definition
Format: SxxBx-Tx-AxxDxx-xx (18 characters max) ■ Example: 21B1-T1-A02D01-01 per Table A CMC-21 with 1 battery string – T1 Thermosiphon, A02 AC System, D01 Power System - Variant-01 Table A: Format with Size and Configuration, Cooling, AC and DC Power Definitions... -
Page 5: Cmc-21, 28, And 35 Cabinet Rack Unit (Ru) Configurations
Table B shows RU space allocated to a cabinet based on number of battery strings with remaining RU space dedicated to cabinet equipment. Note 1: The bottom two battery shelves for CMC-21 and CMC-28 cabinets are adjustable from 7 or 8RU, and for a CMC-35 the bottom three battery shelves are adjustable from 7 or 8RU. -
Page 6: Cabinet Views
CommScope Instruction Guide 860647713, Rev B, V.05 ► Cabinet Views Figure 1. Front Views – CMC-21 Example Figure 2. Left, Rear, and Right Views – CMC-21 Example Page 6 38 Pages... - Page 7 Rev B, V.05, February 2022 Figure 3: Compartment Views – CMC-21 Example Figure 4. Right Side Views with Optional 100 or 200-Amp AC Load Center, CMC-21 Example Figure 5. Equipment Cabinet with Solar Shield On or Off – CMC-21 Example...
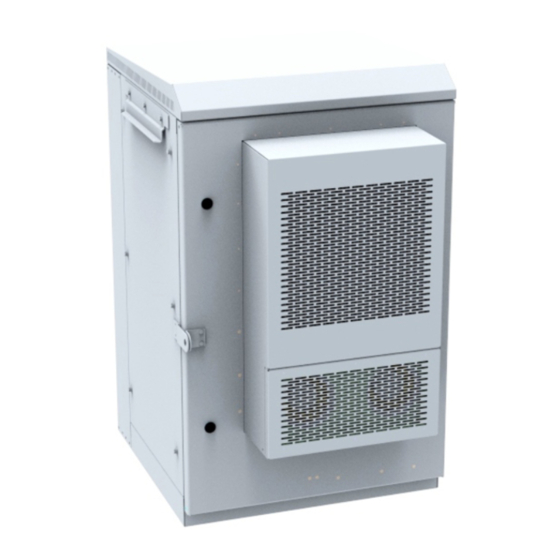
- Page 8 CommScope Instruction Guide 860647713, Rev B, V.05 ► Door View Examples with Thermosiphon and Air Conditioner Units Note: See Table A for CMC cooling configurations and cooling unit manual provided with the cabinet for power, alarm, and network connections; operation, settings, and maintenance.
-
Page 9: Door Clearances
However, AC load center should not be installed on the left side for wall / H-frame mounting. Figure 8. Top View, Door at 90º and 110º for CMC-21, 28 and 35 Cabinets Page 9... -
Page 10: Rear Panel Removal And Installation
CommScope Instruction Guide 860647713, Rev B, V.05 ► Rear Panel Removal and Installation Prior to panel removal or installation, use door key (Figure 11) that ships with cabinet to open or close 1/4-turn latches when removing or installing a panel, Figure 9. -
Page 11: Section 2. Cmc Cabinet Concrete Pad Installation
2. Open door with door key, remove the installation kit, and close the door, Figure 3. Note: Retain the pad gasket set between pallet and cabinet (required installation), Figure 14. Table E: CMC-21 Cabinet Installation Kit (860463686) Item Description Door Key Shim Screw, Hex HD 1/2-13 X 1.50 SS... -
Page 12: Step 2. Remove Pad Gasket From Cabinet And Prepare Pad
CommScope Instruction Guide 860647713, Rev B, V.05 ► Step 2. Remove Pad Gasket from Cabinet and Prepare Pad Caution: ■ Do not install batteries in cabinet prior to cabinet installation on pad (structure). ■ Install cabinet on a pad six inches above the grade to prevent water intrusion and install all cable connections, including ground cable, above the pad (structure);... - Page 13 Material ID 860647713 Rev B, V.05, February 2022 Figure 14. Gasket (Template) Required Between Cabinet without Plinth and Pad or Structure Figure 15. Gasket (Template) Required Between Cabinet with Plinth and Pad or Structure To prepare the pad: 1. Place gasket (template) onto pad in location where cabinet will be installed and mark front and rear anchor locations per Figure 14 for cabinet without plinth and Figure 15 for cabinet with plinth, then remove the gasket.
-
Page 14: Step 3. Place Cabinet Onto Concrete Pad Or Steel Structure
CommScope Instruction Guide 860647713, Rev B, V.05 Figure 16. Drill Anchor Holes and Remove Debris 3. Place and align the gasket into position over the anchors. ■ Cabinet without plinth, Figure 14 and Figure 18; cabinet with plinth Figure 15 and Figure 19. -
Page 15: Step 4. Fasten Cabinet To Concrete Pad Or Steel Structure
1. Fasten cabinet to a concrete pad or structure from cabinet pad mount holes per Figure 14 and Figure 20. CommScope requires use of six mounting holes. For some pad applications, install a steel structure onto the pad and fasten cabinet to structure (recommended). - Page 16 CommScope Instruction Guide 860647713, Rev B, V.05 Figure 21. Plinth Mounting Footprint, Bottom and Top Views, CMC-21/28/35 2. Obtain bolts and washers from installation kit. ■ Concrete Pad—Thread bolts with washers into anchors or inserts, 1.5" bolts with 1/2" lock and flat washers, along with the rubber washers, Figure 22.
-
Page 17: Step 5. Route And Connect Cables
Use door key to open and remove rear panel for cable access, Figure 9. ■ Use knockouts on cabinet topside only for stacking two cabinets (CMC-21 only), Figure 17. Figure 24. Cabinet Base Knockout Locations, CMC-21, 28, 35 Figure 25. Cabinet Knockout Locations, CMC-21... - Page 18 CommScope Instruction Guide 860647713, Rev B, V.05 Figure 26. Cabinet Knockout Locations, CMC-28 Figure 27. Cabinet Knockout Locations, CMC-35 Page 18 38 Pages...
-
Page 19: Step 6. Connect Cabinet To Main Earth Ground
Material ID 860647713 Rev B, V.05, February 2022 ► Step 6. Connect Cabinet to Main Earth Ground Connect cabinet to earth ground with at least one ground lug at bottom rear of cabinet, Figure 28. ■ Use a 2 AWG ground wire (customer provided) to site ground ring per local requirements. ■... -
Page 20: Section 3. Pole And Wall / H-Frame Mounting
/ H-frame. CMC-35 cabinets are not suitable for pole or wall / H-frame mounting. Note: Pole mount kits allow installation only for CMC-21/28 cabinets onto a pole from rear and left sides of cabinet. Pole or wall / H-frame mounting a cabinet with batteries is limited to two battery strings. - Page 21 Material ID 860647713 Rev B, V.05, February 2022 Figure 29. Pole Hanging Brackets with Upper and Lower Mounting Brackets, Kit 760242250 Figure 30. Fasten Wall Support Bracket to Cabinet Page 21 38 Pages...
- Page 22 You may also vertically position the pole mount brackets on poles larger than eight inches per Figure 33. Figure 31. Pole Mount Bracket Positions for CMC-21/28/35 Cabinets, 8-Inch Pole ► Pole Mount Kit 760242250 – Pole Mount Clearances, 8-Inch Figure 32.
- Page 23 Material ID 860647713 Rev B, V.05, February 2022 ► Pole Bracket Mounting Installation, Kit 760242250 Important: ■ The hardware in Table F supports weight of cabinet with batteries and equipment installed per Table C on an eight-inch pole; hole size for upper and lower brackets is 7/16". Plan installation per Figure 31.
-
Page 24: Wall / H-Frame Mounting Kit 760242247
Use the guidelines in Figure 35 to correctly position the upper and lower mounting brackets to mount CMC-21/28 cabinets onto an H-frame struts for wall or pole mounting; Figure 37, Figure 38. Figure 35. Bracket Positions for CMC-21/28 Cabinets, Back View... - Page 25 Material ID 860647713 Rev B, V.05, February 2022 Figure 36. CMC-21 Example Per Figure 35, Mounting Brackets Fastened to H-Frame Struts ► H-Frame Bracket Mounting Installation, Kit 760242247 Use aftermarket kit 760242247 only to mount the cabinet in areas of limited space. Kit 760242250 is the primary and preferential kit to pole mount the cabinet.
- Page 26 2. Mark position of hole-to-hole distance between upper and lower struts and set hole distance between upper and lower struts plus or minus 0.30" C-C as given per Figure 35. ■ For CMC-21 at 38.62" per example in Figure 38 ■ For CMC-28 at 50.87" per example in Figure 38 3.
-
Page 27: Install Cabinet Onto Upper And Lower Mounting Brackets
Material ID 860647713 Rev B, V.05, February 2022 Figure 38. Fasten Upper and Lower Mounting Brackets to Pole Mounted H-Frame ► Install Cabinet onto Upper and Lower Mounting Brackets Caution ■ If a ceiling or surface is over the cabinet, leave at least 2" to 6" of headroom to lift and place the cabinet onto the top bracket without obstruction or interference from ceiling or surface. - Page 28 Slot M10 screws through cabinet floor per Figure 40 and fasten screws from inside cabinet with a hex nut from kit. 5. Tighten M10 screws to fasten cabinet to the lower bracket. Figure 40. Hole-Mount Usage, CMC-21/28 Rear and Side Mounting Page 28 38 Pages...
-
Page 29: Section 4. Cabinet Battery Installation
■ Follow all battery and cabling instructions to reduce risk of fire, electric shock, and injury. Important Safety Precautions: ■ For only one battery string, CommScope recommends loading battery shelf #1 first. ■ The customer shall incorporate a containment system within the battery compartment of the cabinet to capture electrolyte in the case of a flooded battery. -
Page 30: Required Tools
Apply battery dimensions as required toward use of battery tray design in the CMC cabinet. ► 7RU or 8RU Battery Tray Spacing Options – Battery Recommendations CMC-21/28/35 Equipment and Battery Cabinets (mixed) – 7RU or 8RU Spacing Options ■ 7RU Battery Recommendations: —... -
Page 31: Battery Voltage And Battery Supply Resistance
Material ID 860647713 Rev B, V.05, February 2022 ► Battery Voltage and Battery Supply Resistance Nominal battery system circuit voltage, float (charging) voltage, and battery supply resistance is in accordance with PS-E.1.6.100.1 where the: ■ Nominal battery system circuit voltage is -48 VDC ■... -
Page 32: Battery Installation
CommScope Instruction Guide 860647713, Rev B, V.05 ► Battery Installation Battery installation consists of: ► Step 1 – Cabinet Preparation Prior to Installation, VRLA ► Step 2 – VRLA Battery Installation ► Step 1 – Cabinet Preparation Prior to Installation, VRLA Prior to installing VRLA batteries: 1. - Page 33 Material ID 860647713 Rev B, V.05, February 2022 To install VRLA batteries: 1. Read the voltage for each battery, at least 12.5 VDC or higher. If reading is less than 12.5 VDC, consult manufacturer. DO NOT install batteries that measure less than 12.5 VDC. 2.
-
Page 34: Battery Interconnect Kit 860651309, Installation - Cmc-28/35
CommScope Instruction Guide 860647713, Rev B, V.05 Figure 44. Battery String Cable Connections, Example with Lugs 6. Dress the battery cables and thermal probe wires as required. 7. Reinstall the battery front retainer bracket on each shelf, Figure 41. ■... - Page 35 Material ID 860647713 Rev B, V.05, February 2022 ► To install kit 860651309: Note: Have battery and power cabinet SDs in hand for reference and details. This procedure shows how to install a CMC-28/35 battery cabinet on the right side of the power cabinet. 1.
- Page 36 CommScope Instruction Guide 860647713, Rev B, V.05 Figure 47. Conduit Locations, CMC Matching and Non-Matching Cabinets 5. Route and connect power and alarm cables from battery cabinet to power cabinet using upper or lower conduit. All cables are coiled and stored on the top shelf of battery cabinet.
- Page 37 Material ID 860647713 Rev B, V.05, February 2022 Figure 49. Route Interconnect Cable (item 7) to Bottom String #1 of Power/Battery Cabinet 8. Remove master busbar cover, Figure 50. a. Connect DC load cables (item 8) to busbar and torque lug nuts to 30 FT-LBs, Figure 51. b.
- Page 38 CommScope Instruction Guide 860647713, Rev B, V.05 Figure 51. DC Load (Interconnect) Cable Connection to Power Cabinet 9. Turn up power: a. Verify that power shelf controller recognizes thermal probes from battery cabinet. ■ Perform a probe failure alarm test from controller. If needed, refer to the manual provided with the cabinet.
Need help?
Do you have a question about the CMC-21 and is the answer not in the manual?
Questions and answers