Table of Contents
Advertisement
Quick Links
Advertisement
Table of Contents

Subscribe to Our Youtube Channel
Related Manuals for Xilinx Avnet Ultra96-PYNQ


Summary of Contents for Xilinx Avnet Ultra96-PYNQ
- Page 1 Ultra96-PYNQ Documentation Release v2.4 Avnet, Xilinx Oct 23, 2020...
-
Page 3: Table Of Contents
Contents 1 Getting Started Getting Started Video ......... . Ultra96 Setup Guide . - Page 5 Ultra96-PYNQ Documentation, Release v2.4 This documentation is for the release of PYNQ targetting the Avnet Ultra96 Board. Specifically, a getting started guide is included here and information on the included boot overlay. For more information on PYNQ, please see the PYNQ readthedocs pages: https://pynq.readthedocs.io Contents...
- Page 6 Ultra96-PYNQ Documentation, Release v2.4 Contents...
-
Page 7: Getting Started
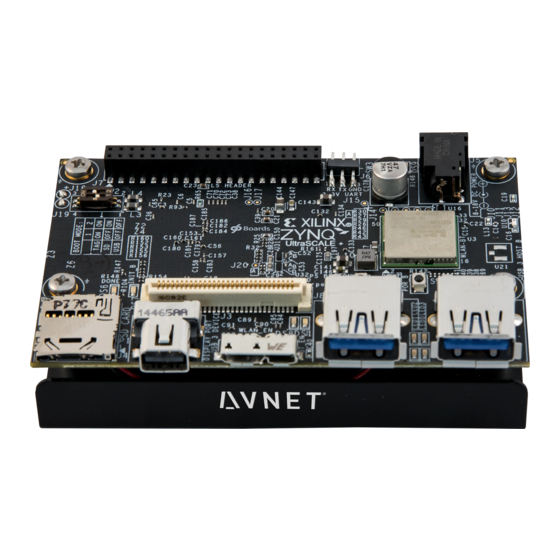
CHAPTER Getting Started This guide will show you how to setup your computer and Ultra96 board to get started using PYNQ. For information on the Ultra96 board, see the Avnet page: http://zedboard.org/product/ultra96 1.1 Getting Started Video You can watch the getting started video guide, or follow the instructions below. 1.2 Ultra96 Setup Guide The PYNQ environment can be accessed using a web browser over a network connection. - Page 8 Ultra96-PYNQ Documentation, Release v2.4 1.2.1 USB cable board setup 1. Insert the Micro-SD card 2. Connect the Mirco USB cable from your PC to the board 3. Connect the power supply to the board 4. Press the SW3 power button to power on the board 1.2.2 Turning on the Ultra96 The green power LED (beside the power switch), and the red Init LED (near the SD Card socket) will turn on when the power button is pressed.
-
Page 9: Connecting To Jupyter Notebooks
Ultra96-PYNQ Documentation, Release v2.4 When the USB cable is connected, an Ethernet device should be detected automatically on the host computer (Win- dows/Linux). A driver should already be available in Windows 10 and Linux. In Windows 7 a driver should start to install automatically when the board is connected. - Page 10 The board will have a different IP for each connection, and you can choose to use any of the available connections. If your board is configured correctly you will be presented with a login screen. Enter the password as xilinx After logging in, you should see the following screen: 1.3.1 Example Notebooks...
- Page 11 Ultra96-PYNQ Documentation, Release v2.4 When you open a notebook and make any changes, or execute cells, the notebook document will be modified. It is recommended that you “Save a copy” when you open a new notebook. If you want to restore the original versions, you can download all the example notebooks from Avnet’s Ultra96 Github Repository.
-
Page 12: Configuring Pynq
# If connected via USB Ethernet If prompted, the username is xilinx and the password is xilinx. The following screen should appear: To access the home area in Ubuntu, open a file browser, click Go -> Enter Location and type one of the following in the box: smb://192.168.3.1/xilinx... - Page 13 • 1 stop bit • No Parity • No Flow Control Hit Enter in the terminal window to make sure you can see the command prompt: xilinx@pynq:/home/xilinx# You can check the IP address of the board using ifconfig: ifconfig 1.4. Configuring PYNQ...
- Page 14 Ultra96-PYNQ Documentation, Release v2.4 Chapter 1. Getting Started...
-
Page 15: Sensors96B Overlay
CHAPTER Sensors96b Overlay 96boards is an open set of hardware specifications for ARM based boards to allow manufacturers to provide a common set of features for developers. The Ultra96 follows this specification. 2.1 Sensors96 Mezzanine board Grove starter kit for 96boards is a mezzanine board that provides interfaces that can be used to connect sensors to the 40 pin header on the Ultra96. -
Page 16: Ultra96 Overlay Diagram
Ultra96-PYNQ Documentation, Release v2.4 The following pins are connected to the Ultra96, and available for use with PYNQ: • Pins 3,5,7-34 on the 40-pin header • Pins D0, D1 on the Arduino interface (5V) • I2C0 (5V) and I2C1 • GPIO AB (5V), EF, GH, IJ, KL Grove connectors 2.2 Ultra96 overlay diagram The sensors96b overlay is an overlay designed to support the 96boards Sensors mezzanine... -
Page 17: 96Boards Sensors Kit
2.4 Rebuilding the Overlay The project files for the overlay can be found here: https://github.com/Avnet/Ultra96-PYNQ/tree/master/Ultra96/sensors96b 2.4.1 Linux To rebuild the overlay, source the Xilinx tools first. Then assuming Ultra96-PYNQ has been cloned: cd <Ultra96-PYNQ>/Ultra96/sensors96b make 2.4.2 Windows To rebuild from the Vivado GUI, open Vivado. In the Vivado Tcl command line window, change to the correct directory, and source the Tcl files as indicated below. - Page 18 Ultra96-PYNQ Documentation, Release v2.4 cd <Ultra96-PYNQ>/Ultra96/sensors96b source ./sensors96b.tcl To build from the command line, open the Vivado 2018.3 Tcl Shell, and run the following: cd <Ultra96-PYNQ>/Ultra96/sensors96b vivado -mode batch -source sensors96b.tcl Note that you must change to the overlay directory, as the .tcl files has relative paths that will break if sourced from a different location.
-
Page 19: For More Information
CHAPTER For More Information For more information on PYNQ and Ultra96, please see the following links. 3.1 PYNQ • http://www.pynq.io • https://pynq.readthedocs.io • https://www.hackster.io/pynq • https://groups.google.com/forum/#!forum/pynq_project 3.2 Ultra96 • http://zedboard.org/product/ultra96 • https://www.96boards.org/product/ultra96 • https://www.xilinx.com/products/boards-and-kits/1-vad4rl.html...
Need help?
Do you have a question about the Avnet Ultra96-PYNQ and is the answer not in the manual?
Questions and answers