
Related Manuals for ZyXEL Communications 1


Summary of Contents for ZyXEL Communications 1
- Page 1 NetAtlas Enterprise 1.00 Element Management System User’s Guide Version 1.00 8/2005...
-
Page 3: Copyright
ZyXEL Communications Corporation. Published by ZyXEL Communications Corporation. All rights reserved. -
Page 4: Federal Communications Commission (Fcc) Interference Statement
Certifications Go to www.zyxel.com 1 Select your product from the drop-down list box on the ZyXEL home page to go to that product's page. 2 Select the certification you wish to view from this page. Federal Communications Commission (FCC) Interference Statement... -
Page 5: Safety Warnings
• Do NOT obstruct the device ventilation slots, as insufficient airflow may harm your device. • Do NOT store things on the device. • Connect ONLY suitable accessories to the device. Safety Warnings NetAtlas Enterprise 1.00 User’s Guide Safety Warnings... -
Page 6: Zyxel Limited Warranty
NetAtlas Enterprise 1.00 User’s Guide ZyXEL Limited Warranty ZyXEL warrants to the original end user (purchaser) that this product is free from any defects in materials or workmanship for a period of up to two years from the date of purchase. During... -
Page 7: Customer Support
NORTH AMERICA sales@zyxel.com support@zyxel.no NORWAY sales@zyxel.no support@zyxel.es SPAIN sales@zyxel.es support@zyxel.se SWEDEN sales@zyxel.se Customer Support NetAtlas Enterprise 1.00 User’s Guide Customer Support TELEPHONE WEB SITE FTP SITE +886-3-578-3942 www.zyxel.com www.europe.zyxel.com +886-3-578-2439 ftp.zyxel.com ftp.europe.zyxel.com +420 241 091 350 www.zyxel.cz +420 241 091 359 +45 39 55 07 00 www.zyxel.dk... - Page 8 NetAtlas Enterprise 1.00 User’s Guide METHOD SUPPORT E-MAIL SALES E-MAIL LOCATION support@zyxel.co.uk UNITED KINGDOM sales@zyxel.co.uk a. “+” is the (prefix) number you enter to make an international telephone call. TELEPHONE WEB SITE FTP SITE +44 (0) 1344 303044 www.zyxel.co.uk 08707 555779 (UK...
-
Page 9: Table Of Contents
1.7 Using SNMP ...36 1.8 Configuring MySQL ODBC Driver ...39 Chapter 2 EMS Main Window... 44 2.1 Introducing the EMS Main Window ...44 2.2 Device Icon Colors ...45 2.3 System Message Panel Alarm Status ...45 2.4 System Message Panel Port Status ...46 Table of Contents NetAtlas Enterprise 1.00 User’s Guide... - Page 10 Chapter 5 Status ... 60 5.1 Hardware Status ...60 5.2 STP Status ...62 5.2.1 Introduction to Spanning Tree Protocol (STP) ...62 5.2.1.1 STP Terminology ...62 5.2.2 How STP Works ...63 5.2.3 STP Port States ...64 5.2.4 View STP Status ...64 5.3 VLAN Status ...65...
- Page 11 7.3 Network Element Configuration Backup and Restore ...78 7.4 Load Factory Default ...79 7.5 Scheduled Network Element Configuration Backup ...80 7.5.1 Scheduled Network Element Configuration Backup Add ...81 7.5.2 Scheduled Network Element Configuration Backup Remove ...82 Chapter 8 Tools ... 84 8.1 Accessing the switch ...84...
- Page 12 11.10 MAC Forwarding ...110 11.10.1 Introduction to Static MAC Forward Setup ...110 11.10.2 Configuring Static MAC Forwarding ...110 11.10.2.1 Adding and Editing Static MAC Forwarding Rules ... 111 11.11 Filtering ...112 11.11.1 Introduction to Filtering ...112 11.11.2 Configuring Filtering ...112 11.11.2.1 Adding and Editing Static Filtering Rules ...113...
- Page 13 Chapter 14 Routing Configuration ... 138 14.1 Static Route ...138 14.1.1 Configuring Static Routing ...138 14.1.2 Add or Modify a Static Route ...139 14.2 Switch Manager ...140 14.2.1 Access Log ...141 14.2.2 Database Backup and Restore ...143 14.2.3 Database Scheduled Backup Configuration ...143 14.2.4 Database Log Storage Configuration ...144...
- Page 14 NetAtlas Enterprise 1.00 User’s Guide 15.3.2 Chart Format Display Variable ...154 15.3.3 Graph Labels ...155 Chapter 16 Troubleshooting ... 158 16.1 General Installation Problems ...158 16.2 EMS Installation Problems ...158 16.3 Uninstalling the EMS ...158 16.4 Problems Finding a Device ...159 16.5 Problems Accessing the EMS ...160...
-
Page 15: List Of Figures
NetAtlas Enterprise 1.00 User’s Guide List of Figures Figure 1 Installing MySQL: Welcome ... 23 Figure 2 Installing MySQL: Information ... 24 Figure 3 Installing MySQL: Choose Destination Location ... 24 Figure 4 Installing MySQL: Setup Type ... 25 Figure 5 Installing MySQL: Setup Complete ... 25 Figure 6 Installing EMS: Welcome ... - Page 16 NetAtlas Enterprise 1.00 User’s Guide Figure 39 Configuration: Switch System Configuration ... 49 Figure 40 Configuration: Save ... 50 Figure 41 Submaps and Device Mapping ... 52 Figure 42 Map: Add Submap/Device ... 53 Figure 43 Map: Edit Node ... 54 Figure 44 Map: Find Object ...
- Page 17 NetAtlas Enterprise 1.00 User’s Guide Figure 82 Configuration: Switch Configuration: MAC Forwarding: Add ... 112 Figure 83 Configuration: Switch Configuration: Filtering ... 113 Figure 84 Configuration: Switch Configuration: Filtering: Add ... 114 Figure 85 Selecting a VLAN Type ... 117 Figure 86 Configuration: VLAN Configuration: 802.1Q ...
- Page 18 NetAtlas Enterprise 1.00 User’s Guide List of Figures...
-
Page 19: List Of Tables
NetAtlas Enterprise 1.00 User’s Guide List of Tables Table 1 System Requirements ... 22 Table 2 Map Object Properties: General ... 36 Table 3 Required Map Object Properties ... 37 Table 4 EMS Main Screen Overview ... 45 Table 5 Device Icon Colors ... 45 Table 6 System Message Panel Alarm Status ... - Page 20 NetAtlas Enterprise 1.00 User’s Guide Table 39 Configuration: Switch Configuration: RADIUS ... 109 Table 40 Configuration: Switch Configuration: MAC Forwarding ... 111 Table 41 Configuration: Switch Configuration: MAC Forwarding: Add ... 112 Table 42 Configuration: Switch Configuration: Filtering ... 113 Table 43 Configuration: Switch Configuration: Filtering: Add ...
-
Page 21: Syntax Conventions
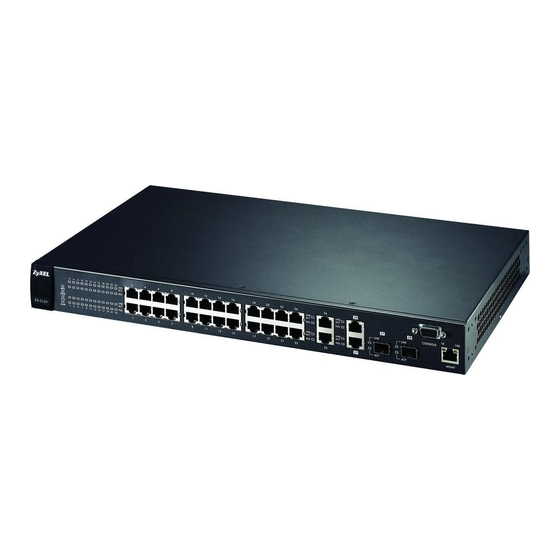
Congratulations on your purchase of the NetAtlas Enterprise 1.00 Element Management System (EMS) for the ES-3124 Series. Note: Register your product online to receive e-mail notices of firmware upgrades and information at North American products. About This User's Guide This manual is designed to guide you through the configuration of your EMS for its applications. -
Page 22: User Guide Feedback
Help us help you. E-mail all User Guide-related comments, questions or suggestions for improvement to techwriters@zyxel.com.tw or send regular mail to The Technical Writing Team, ZyXEL Communications Corp., 6 Innovation Road II, Science-Based Industrial Park, Hsinchu, 300, Taiwan. Thank you. -
Page 23: Chapter 1 Introducing The Ems
These are the system requirements for the Windows version of the EMS. Table 1 System Requirements HARDWARE CPU: Intel Pentium IV, 1.6 GHz or above Memory (RAM): 1 GB or more Hard Disk free space: 20 GB Screen Resolution: 1024x768 pixels Chapter 1 Introducing the EMS NetAtlas Enterprise 1.00 User’s Guide... -
Page 24: Ems Installation Overview
1.3.1 Installing the EMS Follow the steps below to install the EMS server on a computer. 1 Install SNMPc if it is not already installed. See the appendices for futher information. 2 Install MySQL. If it is already installed skip to step 11. -
Page 25: Figure 2 Installing Mysql: Information
7 Click Browse if you want to install MySQL to a destination folder other than the destination shown. Figure 3 Installing MySQL: Choose Destination Location 8 You must select a setup type to install MySQL. Select Typical and click Next to continue. Chapter 1 Introducing the EMS NetAtlas Enterprise 1.00 User’s Guide... -
Page 26: Figure 4 Installing Mysql: Setup Type
NetAtlas Enterprise 1.00 User’s Guide Figure 4 Installing MySQL: Setup Type 9 Click Finish to complete the MySQL installation. Figure 5 Installing MySQL: Setup Complete 10 You must restart Windows to activate MySQL. 11 Find and double-click NetAtlasEnterprise_S100.exe on your EMS CD. -
Page 27: Figure 6 Installing Ems: Welcome
13 Read the license agreement. Click Yes to accept the agreement. Figure 7 Installing EMS: License Agreement 14 Type your name, company name and product serial number in the following screen. Click Next to continue. Chapter 1 Introducing the EMS NetAtlas Enterprise 1.00 User’s Guide... -
Page 28: Figure 8 Installing Ems: Customer Information
NetAtlas Enterprise 1.00 User’s Guide Figure 8 Installing EMS: Customer Information 15 You must select the same directory where you installed SNMPc. Click Browse if it’s different from the destination folder shown. Figure 9 Installing EMS: Choose Destination Location 16 You must select the directory where you installed MySQL. Click Browse if you did not install MySQL database in the default folder shown. -
Page 29: Figure 10 Installing Ems: Specify Mysql Directory
17 In the next screen, click Next to begin the installation and start copying files. Figure 11 Installing EMS: Start Copying Files 18 When a Welcome screen displays. Click Next to install the MySQL ODBC driver. Chapter 1 Introducing the EMS NetAtlas Enterprise 1.00 User’s Guide... -
Page 30: Figure 12 Installing Ems: Mysql Odbc: Welcome
NetAtlas Enterprise 1.00 User’s Guide Figure 12 Installing EMS: MySQL ODBC: Welcome 19 Read the license agreement. Click Next to accept the agreement. Figure 13 Installing EMS: MySQL ODBC: License Agreement 20 Click Next again to begin the MySQL ODBC driver installation. -
Page 31: Figure 14 Installing Ems: Mysql Odbc: Start Installing
21 Click Finish to complete the MySQL ODBC installation. Figure 15 Installing EMS: MySQL ODBC: Finish 22 In the final screen of the EMS wizard, click Finish to complete the EMS installation. Chapter 1 Introducing the EMS NetAtlas Enterprise 1.00 User’s Guide... -
Page 32: Snmpc Network Manager
NetAtlas Enterprise 1.00 User’s Guide Figure 16 Installing EMS: Finish 1.4 SNMPc Network Manager Start the SNMPc Network Manager manually or have it start automatically each time you turn on your computer. 1.4.1 Manual SNMPc Startup Manually starting SNMPc depends on your operating system. In Windows 2000, click Start, Programs, SNMPc Network Manager, Startup System to start the SNMPc Network Manager. -
Page 33: Adding Mibs
The Management Information Base (MIB) is designed for holding management information on systems such as the MSC that the standard MIB does not include. 1 From the SNMPc Network Manager main screen, click Config, MIB Database. Figure 18 Config: MIB Database 2 Click Add in the Compile Mibs screen. -
Page 34: Figure 19 Compile Mibs (First Screen)
NetAtlas Enterprise 1.00 User’s Guide Figure 19 Compile Mibs (First Screen) 3 Scroll down the Add Mibs dialog box and select the MIB: rfc2674.mib (P-BRIDGE- MIB). Click OK. Figure 20 Add Mib Files 4 Click Compile in the Compile Mibs screen. -
Page 35: Finding Your Switch
(enabled by default) or you will have to add device(s) manually. 1.6.1 Device Auto-Discovery 1 To enable auto-discovery and then find your device, click Config, Discovery/Polling. Figure 23 Config, Discovery Agents 2 Select the Enable Discovery check box and click OK. -
Page 36: Add Device(S) Manually
1.6.2 Add Device(s) Manually If you have disabled auto-discovery, follow the steps below to add your device(s) manually. 1 Click Insert, MAP Object, Device. Figure 25 Insert, MAP Object, Device 2 Fill in the MAP Object Properties screen and then click OK. -
Page 37: Using Snmp
SNMPv2c. Refer to RFC 1901 for more information on SNMP Version 2c (SNMPv2c). Follow this procedure to use SNMPv2c. 1 Right-click the Device icon and select Properties. 2 Click the Access tab. Chapter 1 Introducing the EMS DESCRIPTION Type a device name for identification purposes. -
Page 38: Figure 27 Map Object Properties
NetAtlas Enterprise 1.00 User’s Guide Figure 27 Map Object Properties 3 Follow the instructions in the table below to set the specified fields in the Map Object Properties screen. Table 3 Required Map Object Properties FIELD Read Access Mode Read/Write Access Mode... -
Page 39: Figure 28 Network Manager Shortcuts
NetAtlas Enterprise 1.00 User’s Guide Figure 28 Network Manager Shortcuts 6 Make sure the MySQL database is running. You must restart windows after you install MySQL. MySQL should start automatically when you restart Windows. If it does not, click start, Programs, Startup and then click WinMySQLadmin. -
Page 40: Configuring Mysql Odbc Driver
Follow the steps below to configure the ODBC driver in Windows XP. Steps may be similar for Windows NT4.0. Click Start, Settings and Control Panel to open the Control Panel screen. Double-click Administrative Tools. 1 Click start, Settings, Control Panel, Administrative Tools and click Data Sources (ODBC). Chapter 1 Introducing the EMS... -
Page 41: Figure 30 Data Sources (Odbc)
Sources list. 3 Click Configure. Figure 31 ODBC Data Source Administrator 4 The MySQL ODBC DSN Configuration screen displays as shown next. Specify your MySQL database settings and click OK. Chapter 1 Introducing the EMS NetAtlas Enterprise 1.00 User’s Guide... -
Page 42: Figure 32 Mysql: Connection Setup
NetAtlas Enterprise 1.00 User’s Guide Figure 32 MySQL: Connection Setup 5 Double-click the switch icon to view the Switch Manager. Figure 33 Switch Device List Icon 6 Double-click the Switch Manager icon. Figure 34 Switch Manager Chapter 1 Introducing the EMS... -
Page 43: Figure 35 Switch Graphic Display
NetAtlas Enterprise 1.00 User’s Guide Note: For information on the Window, Admin and Help options in the Switch Manager screen, see Section 14.2 on page 140. The EMS polls for all the available switch cards. Select a device icon to display a graphic of the switch in the Device Panel. - Page 44 NetAtlas Enterprise 1.00 User’s Guide Chapter 1 Introducing the EMS...
-
Page 45: Chapter 2 Ems Main Window
This chapter describes the EMS main window. 2.1 Introducing the EMS Main Window After you have logged into the EMS, double-click the switch device icon in the Device List Panel to display the EMS main screen (shown next). The EMS retrieves device information from the switch (using SNMP protocol). -
Page 46: Device Icon Colors
NetAtlas Enterprise 1.00 User’s Guide The following table describes the elements in the EMS screen. Table 4 EMS Main Screen Overview ELEMENT Menu Shortcut Bar Device Panel Device List Panel System Message Panel 2.2 Device Icon Colors The colors of the device icons (in the Device List Panel) indicate the real-time status of the represented devices. -
Page 47: System Message Panel Port Status
If an alarm turns on, click the Port Status tab in the System Message Panel or proceed to Section 5.1 on page 60 2.4 System Message Panel Port Status Proceed to Section 5.4 on page 66 2.5 Menu Shortcut Buttons The following is a brief overview of the menu shortcut buttons. -
Page 48: Table 8 Ems Navigation Panel Sub-Link Descriptions
NetAtlas Enterprise 1.00 User’s Guide The following table summarizes these sub-links in the navigation panel. Table 8 EMS Navigation Panel Sub-link Descriptions DESCRIPTION MAP Screens Add Submap/Device Edit Node Search Node Delete Refresh Template VLAN Template Status Screens Hardware Status... -
Page 49: Common Ems Command Buttons
Figure 38 Switch View 2.9 Switch Information Follow the steps to display information on a switch. 1 Right-click on the switch icon in the Device List Panel. 2 Click Configuration, System and then System Info. The switch information window displays as shown next. -
Page 50: Figure 39 Configuration: Switch System Configuration
NetAtlas Enterprise 1.00 User’s Guide 3 Choose a switch from the list located on the left-hand side of the screen. Figure 39 Configuration: Switch System Configuration The following table describes the labels in this screen. Table 10 Configuration: Switch System Configuration... -
Page 51: Configuration Save
Note: Do not turn off the switch during the updating process, as it may corrupt the firmware and make your switch unusable. 1 To save the current switch configuration, right-click on the switch icon in the Device List Panel. 2 Click Configuration Save. - Page 52 NetAtlas Enterprise 1.00 User’s Guide Chapter 2 EMS Main Window...
-
Page 53: Managing Device Maps In Ems
Figure 41 Submaps and Device Mapping Note: You cannot create, edit or delete the Root Map. 3.1.1 Adding a Submap or Device To add a new submap or a new device, select the Root Map or a submap icon in the Device List Panel. -
Page 54: Edit A Node
NetAtlas Enterprise 1.00 User’s Guide Figure 42 Map: Add Submap/Device The following table describes the labels in this screen. Table 11 Map: Add Submap/Device LABEL Properties Name IP Address Password Description Get Community Set Community Trap Community Cancel 3.1.2 Edit a Node Select a submap icon in the Device List Panel and then click Map and Edit Node. -
Page 55: Find An Object
3.1.4 Delete a Submap To delete a submap, select the submap icon in the Device List Panel and click Map and then Delete. Chapter 3 Managing Device Maps in EMS NetAtlas Enterprise 1.00 User’s Guide for the field descriptions. -
Page 56: Delete A Device
NetAtlas Enterprise 1.00 User’s Guide Figure 45 Map: Delete Warning Note: If you delete a submap, all devices under a submap will be removed. 3.1.5 Delete a Device To remove a device from the Device List Panel, select the device icon and click Map and then Delete. -
Page 57: Chapter 4 Vlan Template
VLAN settings for each device. See the VLAN Configuration chapter for more information on the template upload. 4.1.1 Configuring a VLAN Template Click Template and then click VLAN to display the screen as shown. -
Page 58: Figure 46 Template: Vlan
NetAtlas Enterprise 1.00 User’s Guide Figure 46 Template: VLAN The following table describes the labels in this screen. Table 12 Template: VLAN LABEL Device Type VLAN Identity VLAN ID VLAN Name Egress Ports Forbidden Ports Untag DESCRIPTION Select a device type from the drop-down list box to view the device’s VLAN configuration. - Page 59 This fields displays all available ports that are participating in a VLAN. A tagged port is marked T while an untagged port is marked U. Click Close to close the screen. NetAtlas Enterprise 1.00 User’s Guide...
- Page 60 NetAtlas Enterprise 1.00 User’s Guide Chapter 4...
-
Page 61: Chapter 5 Status
Follow the steps below to view fan speeds, voltage levels and temperatures of a switch. 1 To view the hardware status of a switch, click Status and then Hardware Status. 2 Choose a switch from the list located on the left-hand side of the screen as shown next. -
Page 62: Figure 47 Status: Hardware Status
NetAtlas Enterprise 1.00 User’s Guide Figure 47 Status: Hardware Status The following table describes the labels in this screen. Table 13 Status: Hardware Status LABEL DESCRIPTION Fan RPM A properly functioning fan is an essential component (along with a sufficiently ventilated, cool operating environment) in order for the device to stay within the temperature threshold. -
Page 63: Stp Status
Click Close to close the screen. 5.2 STP Status 5.2.1 Introduction to Spanning Tree Protocol (STP) STP detects and breaks network loops and provides backup links between switches, bridges or routers. It allows a switch to interact with other STP-compliant switches in your network to ensure that only one route exists between any two stations on the network. -
Page 64: How Stp Works
NetAtlas Enterprise 1.00 User’s Guide Path cost is the cost of transmitting a frame onto a LAN through that port. It is assigned according to the speed of the link to which a port is attached. The slower the media, the higher the cost - see the next table. -
Page 65: Stp Port States
5.2.4 View STP Status Follow the steps below to view the STP status of a switch. 1 Click Status and then STP Status. 2 Choose a switch from the list located on the left-hand side of the screen. Figure 48 Status: STP Status The following table describes the labels in this screen. -
Page 66: Vlan Status
5.3 VLAN Status Follow the steps below to view the VLAN status of a switch. 1 Click Status and then VLAN Status. 2 Choose a switch from the list located on the left-hand side of the screen. Chapter 5 Status... -
Page 67: Port Status
Polling Close 5.4 Port Status Follow the steps below to view the port status of a switch. 1 Click Status and then Port Status to display the following screen. Chapter 5 Status NetAtlas Enterprise 1.00 User’s Guide DESCRIPTION This field displays the identification number of the VLAN. -
Page 68: Figure 50 Status: Port Status
NetAtlas Enterprise 1.00 User’s Guide 2 To view the port status of a switch choose a switch from the list located on the left-hand side of the screen. Figure 50 Status: Port Status The following table describes the labels in this screen. -
Page 69: D: Mac Table
The switch uses the Filtering Database to determine how to forward frames. See the following figure. 1 The switch examines a received frame and learns the port on which this source MAC address came. 2 The switch checks to see if the frame's destination MAC address matches a source MAC address already learned in the Filtering Database. -
Page 70: Figure 52 Status: 802.1D: Mac Table
NetAtlas Enterprise 1.00 User’s Guide 1 Click Status and then 802.1d. 2 To view the MAC table of a switch choose a switch from the list located on the left-hand side of the screen and click the MAC Table tab. -
Page 71: D: Arp Table
5.5.5 View the ARP Table Follow the steps below to view the ARP table. 1 Click Status and then 802.1d. 2 To view the ARP table of a switch choose a switch from the list located on the left-hand side of the screen and click the ARP Table tab. -
Page 72: Figure 53 Status: 802.1D: Arp Table
NetAtlas Enterprise 1.00 User’s Guide Figure 53 Status: 802.1d: ARP Table The following table describes the labels in this screen. Table 20 Status: 802.1d: ARP Table LABEL Index IP Address MAC Address Type Polling Close DESCRIPTION This is the ARP table entry number. -
Page 73: Chapter 6 Fault Menus
Table 21 Fault: Event Log LABEL Alarm Filter Port Chapter 6 Fault Menus NetAtlas Enterprise 1.00 User’s Guide H A P T E R Fault Menus DESCRIPTION To display event logs of a port, select the port from the drop-down list box. -
Page 74: Loopback Test
Close 6.2 Loopback Test Follow the steps below to perform an internal loopback test. 1 Click Fault and then Loopback Test. DESCRIPTION Select the type of logs from the drop-down list box. Choices are All, Communication, QualityOfService, ProcessingError, Equipment and Environmental. -
Page 75: Figure 55 Fault: Loopback Test
NetAtlas Enterprise 1.00 User’s Guide 2 Choose a switch from the list located on the left-hand side of the screen. 3 Choose a port from the list located on the right-hand side of the screen. 4 Click Apply to start the loopback test. - Page 76 NetAtlas Enterprise 1.00 User’s Guide Chapter 6 Fault Menus...
-
Page 77: Chapter 7 Maintenance
Note: Do not turn off the switch during the updating process, as it may corrupt the firmware and make your switch unusable. 1 Click Maintenance and then Firmware Upgrade. 2 Type the path and file name of the firmware file you wish to upload to the switch in the FW Image text box or click Browse to locate it. -
Page 78: Device Reset
NetAtlas Enterprise 1.00 User’s Guide Figure 56 Maintenance: Firmware Upgrade The switch(es) automatically restarts when the firmware upload is complete. 7.2 Device Reset Reboot System allows you to restart a switch without physically turning the power off. Select a device from the list and click Apply. -
Page 79: Network Element Configuration Backup And Restore
A Network Element is a piece of telecommunications equipment that provides support or services to the user. Follow the steps below to backup or restore a switch configuration file. 1 Click Maintenance and then NE (Network Element) Configuration Backup and Restore. 2 Select a switch from the drop-down list box. -
Page 80: Load Factory Default
7.4 Load Factory Default Follow the steps below to reset a switch configuration to the factory defaults. 1 Click Maintenance and then Load Factory Default. 2 Select a switch from the list of devices shown. 3 Click Apply to clear all configuration information and return the switch to the factory defaults. -
Page 81: Scheduled Network Element Configuration Backup
7.5 Scheduled Network Element Configuration Backup Perform configuration backups according to a schedule. Set the frequency, time and date of the backup and the location where you want to backup the configuration file. Chapter 7 Maintenance NetAtlas Enterprise 1.00 User’s Guide... -
Page 82: Scheduled Network Element Configuration Backup Add
Password Remove Apply Close 7.5.1 Scheduled Network Element Configuration Backup Add Follow the steps below to add a device to the list of devices in the Scheduled NE Configuration Backup screen. DESCRIPTION Scheduled backups can be performed on a Daily, Weekly or Monthly basis. -
Page 83: Scheduled Network Element Configuration Backup Remove
1 Click the Add button in the Scheduled NE Config Backup screen. 2 Click the OK button. Figure 61 Maintenance: Scheduled NE Config Backup Add 7.5.2 Scheduled Network Element Configuration Backup Remove To remove a device from the Scheduled NE Configuration Backup screen, click the Remove button in the Scheduled NE Config Backup screen. - Page 84 NetAtlas Enterprise 1.00 User’s Guide Chapter 7 Maintenance...
-
Page 85: Chapter 8 Tools
Telnet access as shown next. 1 Select a switch from the list of devices shown in the Device List Panel. 2 Click Tool and then Telnet to open a console session for Telnet access to the switch. -
Page 86: Ping
Ping the host to see if the links and TCP/IP protocol on both your computer and the switch is working. Follow the steps below: 1 Select a switch from the list of devices shown in the Device List Panel. 2 Click Tool and then Ping to have the switch ping the IP address of the selected device. -
Page 87: Device Menu Overview
H A P T E R SUBMENU SUBMENU TABS Edit Device System Configuration System Info SNMP Conf. Remote Mgmt. Time Setup Switch Configuration Switch Setup Priority Queue STP Conf. Link Aggregation DHCP Relay GARP Timer RADIUS MAC Forwarding NetAtlas Enterprise 1.00 User’s Guide... -
Page 88: Property Configuration
NetAtlas Enterprise 1.00 User’s Guide Table 24 Device Menu Summary MENU Configuration Save 9.2 Property Configuration Section 3.1.2 on page 53 9.3 Introducing the EMS Configuration Window The following example screen displays the main features used to configure EMS managed devices. -
Page 89: Port List Multiple Port Configuration
Apply Close 9.3.1 Port List Multiple Port Configuration Configure more than one port at the same time by pressing the [CTRL] key and clicking at the same time in the Port List Panel. Click Apply when you are satisfied with the configuration changes. -
Page 90: Copy To
The Copy to.. button allows you to copy the configuration from the switch you are currently configuring to one or more switches. 1 In the Device Panel list, select a device that you want configure. 2 Select a tab in the Switch Configurator Panel. -
Page 91: Figure 68 Copy Port Screen
Copy Port List Panel Cancel 7 Click OK to display the following screen. Chapter 9 Device Menu Overview NetAtlas Enterprise 1.00 User’s Guide Port List Panel DESCRIPTION Select a device to which you want to copy from the switch you are currently configuring. -
Page 92: Figure 69 Copy Successful
NetAtlas Enterprise 1.00 User’s Guide Figure 69 Copy Successful 8 Click Done to close the screen. Chapter 9 Device Menu Overview... -
Page 93: Chapter 10 System Configuration
Figure 70 SNMP Management Model An SNMP managed network consists of two main components: agents and a manager. Chapter 10 System Configuration NetAtlas Enterprise 1.00 User’s Guide H A P T E R System Configuration for information about the switch. -
Page 94: Configuring Snmp
See the switch User’s Guide for a list of supported Traps. 10.2.2 Configuring SNMP Follow the steps below to configure SNMP. 1 In the Device Panel list, select a device and then right-click. 2 Click Configuration, System Configuration and then the SNMP Conf. tab. DESCRIPTION Allows the manager to retrieve an object variable from the agent. -
Page 95: Remote Management
IP address to enhance security and flexibility. 10.3.1 Configuring Remote Management Follow the steps below to configure remote management. 1 In the Device Panel list, select a device and then right-click. 2 Click Configuration, System Configuration and then the Remote Mgnt. tab. Chapter 10 System Configuration NetAtlas Enterprise 1.00 User’s Guide... -
Page 96: Figure 72 Configuration: System Configuration: Remote Management
NetAtlas Enterprise 1.00 User’s Guide Figure 72 Configuration: System Configuration: Remote Management The following table describes the labels in this screen. Table 29 Configuration: System Configuration: Remote Management LABEL Services Port Apply Secured Clients Start DESCRIPTION This panel displays the services that you may use to remotely manage the switch. -
Page 97: Time Setup
10.4.1 Configuring Time Setup Follow the steps below to configure your system time. 1 In the Device Panel list, select a device and then right-click. 2 Click Configuration, System Configuration and then the Time Setup tab. Chapter 10 System Configuration NetAtlas Enterprise 1.00 User’s Guide... -
Page 98: Figure 73 Configuration: System Configuration: Time Setup
NetAtlas Enterprise 1.00 User’s Guide Figure 73 Configuration: System Configuration: Time Setup The following table describes the labels in this screen. Table 30 Configuration: System Configuration: Time Setup LABEL Use Time Server When Time Server IP Address Current Time New Time (hh:mm:ss) -
Page 99: Chapter 11 Switch Configuration
Use the switch setup screen to set a VLAN type, a queuing method and enable or disable features in the Active Control panel. 1 In the Device Panel list, select a device and then right-click. 2 Click Configuration, Switch Configuration and then the Switch Setup tab. -
Page 100: Figure 74 Configuration: Switch Configuration: Switch Setup
NetAtlas Enterprise 1.00 User’s Guide Figure 74 Configuration: Switch Configuration: Switch Setup The following table describes the labels in this screen. Table 31 Configuration: Switch Configuration: Switch Setup LABEL VLAN Type Queuing Method MAC Address Learning Active Control STP Configuration... -
Page 101: Priority Queue
Q5 and so on. If higher priority queues never empty, then traffic on lower priority queues never gets sent. SP does not automatically adapt to changing network requirements. Chapter 11 Switch Configuration NetAtlas Enterprise 1.00 User’s Guide DESCRIPTION Select the check box to enable IGMP snooping. See for more information on IGMP snooping. -
Page 102: Weighted Fair Scheduling
This queuing mechanism is highly efficient in that it divides any available bandwidth across the different traffic queues. By default, the weight for Q0 is 1, for Q1 is 2, for Q2 is 3, and so on. Guaranteed bandwidth is calculated as follows:... -
Page 103: Stp Configuration
Refer to the user’s guide that comes with your switch for more information. Chapter 11 Switch Configuration NetAtlas Enterprise 1.00 User’s Guide DESCRIPTION IEEE 802.1p defines up to 8 separate traffic types by inserting a tag into a MAC-layer frame that contains bits to define class of service. Frames without an explicit priority tag are given the default priority of the ingress port. -
Page 104: Configuring Stp Parameters
This is the time interval in seconds between BPDU (Bridge Protocol Data Units) configuration message generations (by all devices in RSTP or the root device in STP). The allowed range is 1 to 10 seconds (2 is the default). Chapter 11 Switch Configuration... -
Page 105: Link Aggregation
Forward Delay Apply 11.6 Link Aggregation 11.6.1 Introduction to Link Aggregation Link aggregation (trunking) is the grouping of physical ports into one logical higher-capacity link. You may want to trunk ports if for example, it is cheaper to use multiple lower-speed links than to under-utilize a high-speed, but more costly, single-port link. -
Page 106: Link Aggregation Id
MAC address 11.6.4 Configuring Link Aggregation 1 In the Device Panel list, select a device and then right-click. 2 Click Configuration, Switch Configuration and then the Switch Setup tab. 3 Select the Link Aggregation check box and then click Apply. -
Page 107: Dhcp Relay
DHCP headers of client TCP/IP configuration request frames that the switch relays to a DHCP server. The following lists the DHCP relay agent option 82 information that the switch sends to the DHCP server: • Slot ID (1 byte) • Port ID (1 byte) • VLAN ID (2 bytes) Chapter 11 Switch Configuration NetAtlas Enterprise 1.00 User’s Guide... -
Page 108: Configuring Dhcp Relay
• System name (up to 32 bytes, this is optional) 11.7.3 Configuring DHCP Relay 1 In the Device Panel list, select a device and then right-click. 2 Click Configuration, Switch Configuration and then the Switch Setup tab. 3 Select the DHCP Relay check box and then click Apply. -
Page 109: Garp Timer
VLAN setup for more background information. 11.8.1 Configuring GARP Timer 1 In the Device Panel list, select a device and then right-click. 2 Click Configuration, Switch Configuration and then the Switch Setup tab. 3 Select the GARP Timer check box and then click Apply. -
Page 110: Radius
Authentication Dial In User Service, RFC 2138, 2139) for centralized user profile management on a network RADIUS server. 11.9.2 Configuring RADIUS 1 In the Device Panel list, select a device and then right-click. 2 Click Configuration, Switch Configuration and then the RADIUS tab to display the following screen. -
Page 111: Mac Forwarding
This may reduce unicast flooding. 11.10.2 Configuring Static MAC Forwarding 1 In the Device Panel list, select a device and then right-click. 2 Click Configuration, Switch Configuration and then the MAC Forwarding tab to display the following screen. -
Page 112: Adding And Editing Static Mac Forwarding Rules
Port Delete 11.10.2.1 Adding and Editing Static MAC Forwarding Rules To add a new rule, click the Add button in the previous screen. To change the settings of a rule, select a rule and and click Add in the previous screen. -
Page 113: Filtering
Filtering means sifting traffic going through the switch based on the source and/or destination MAC addresses and VLAN group (ID). 11.11.2 Configuring Filtering 1 In the Device Panel list, select a device and then right-click. 2 Click Configuration, Switch Configuration and then the Filtering tab to display the following screen. -
Page 114: Adding And Editing Static Filtering Rules
Select the rule(s) that you want to remove in the Filtering table and then click the Delete button. 11.11.2.1 Adding and Editing Static Filtering Rules To add a new rule, click a the Add button in the previous screen. To change the settings of a rule, select a rule and and click Add in the previous screen. -
Page 115: Figure 84 Configuration: Switch Configuration: Filtering: Add
Enter the VLAN group identification number. Click OK to save the new rule to the switch. It then displays in the summary table at the bottom of the screen. Close Click Close to close the screen. Chapter 11 Switch Configuration NetAtlas Enterprise 1.00 User’s Guide... - Page 116 NetAtlas Enterprise 1.00 User’s Guide Chapter 11 Switch Configuration...
-
Page 117: Chapter 12 Vlan
12.2 Configuring 802.1Q VLAN Follow the steps below to set the 802.1Q VLAN Type on the switch. 1 In the Device Panel list, select a device and then right-click. 2 Click Configuration, Switch Configuration and then the Switch Setup tab. -
Page 118: Figure 85 Selecting A Vlan Type
NetAtlas Enterprise 1.00 User’s Guide Selecting a VLAN Type Figure 85 4 Click Configuration and then VLAN Configuration to display the screen as shown next. Figure 86 Configuration: VLAN Configuration: 802.1Q The following table describes the labels in this screen. -
Page 119: Modify An 802.1Q Vlan
Close Click Close to close the screen. 12.2.1 Modify an 802.1Q VLAN Ports are assigned membership in a VLAN by associating a VLAN ID with the ports. In the VLAN screen, click New or Modify to display the following screen. -
Page 120: Figure 87 Configuration: Vlan Configuration: 802.1Q: Modify
NetAtlas Enterprise 1.00 User’s Guide Figure 87 Configuration: VLAN Configuration: 802.1Q: Modify The following table describes the labels in this screen. Table 45 Configuration: VLAN Configuration: 802.1Q: Modify LABEL VLAN Identity VLAN ID VLAN Name Static VLAN Egress Ports Forbidden Ports... -
Page 121: Removing A Vlan
12.3.1 Configuring Port Based VLAN Follow the steps below to set the Port Based VLAN Type on the switch. 1 In the Device Panel list, select a device and then right-click. 2 Click Configuration, Switch Configuration and then the Switch Setup tab. -
Page 122: Figure 88 Configuration: Vlan Configuration: Port Based
NetAtlas Enterprise 1.00 User’s Guide Figure 88 Configuration: VLAN Configuration: Port Based The following table describes the labels in this screen. Table 47 Configuration: VLAN Configuration: Port Based LABEL DESCRIPTION Setting Wizard Choose from All connected or Port isolation. All connected means all ports can communicate with each other, that is, there are no virtual LANs. - Page 123 Table 47 Configuration: VLAN Configuration: Port Based (continued) LABEL DESCRIPTION Apply Click Apply to save the changes, including the “wizard settings”. Cancel Click Cancel to start configuring the screen again. Chapter 12 VLAN NetAtlas Enterprise 1.00 User’s Guide...
- Page 124 NetAtlas Enterprise 1.00 User’s Guide Chapter 12 VLAN...
-
Page 125: Ethernet Port Configuration
13.1.1 Configuring Port Setup Follow the steps below to configure the Port Setup screen. 1 In the Device Panel list, select a device and then right-click. 2 Click Configuration, Ethernet Port and then the Port Setup tab. 3 Select the ports from the Port List Panel that you want to apply this configuration. -
Page 126: Figure 89 Configuration: Ethernet Port Configuration: Port Setup
NetAtlas Enterprise 1.00 User’s Guide Figure 89 Configuration: Ethernet Port Configuration: Port Setup The following table describes the fields in this screen. Table 48 Configuration: Ethernet Port Configuration: Port Setup LABEL Port Active Type Port Name Speed/Duplex DESCRIPTION Select a port index number from the list of ports on the device you want to configure. -
Page 127: Port Vlan
13.2.1 Configuring Port VLAN Follow the steps below to configure the Port VLAN screen. 1 In the Device Panel list, select a device and then right-click. 2 Click Configuration, Switch Configuration and then the Switch Setup tab. 3 Select the VLAN Port GVRP check box and then click Apply. -
Page 128: Port Link Aggregation
VLAN-aware switch, the switch first decides where to forward the frame, and then inserts a VLAN tag reflecting the default ingress port's VLAN ID, the PVID. The default PVID is VLAN 1 for all ports, but this can be changed to any number between 1 and 4094. -
Page 129: Configuring Port Link Aggregation
13.3.1 Configuring Port Link Aggregation Follow the steps below to configure the Port Link Aggregation screen. 1 In the Device Panel list, select a device and then right-click. 2 Click Configuration, Switch Configuration and then the Switch Setup tab. 3 Select the Link Aggregation check box and then click Apply. -
Page 130: Bandwidth Control
13.5.1 Configuring Bandwidth Control Follow the steps below to configure the Bandwidth Control screen. 1 In the Device Panel list, select a device and then right-click. 2 Click Configuration, Switch Configuration and then the Switch Setup tab. DESCRIPTION Select this check box to activate STP on this port. -
Page 131: Broadcast Storm Control
13.6.1 Configuring Broadcast Storm Control Follow the steps below to configure the Broadcast Storm Control screen. 1 In the Device Panel list, select a device and then right-click. 2 Click Configuration, Switch Configuration and then the Switch Setup tab. 3 Select the Broadcast storm control check box and then click Apply. -
Page 132: Queue Method
13.7.1 Configuring Queue Method Follow the steps below to configure the Queue Method screen. 1 In the Device Panel list, select a device and then right-click. 2 Click Configuration, Switch Configuration and then the Switch Setup tab. 3 Select a Queuing Method from the drop-down list box and then click Apply. -
Page 133: Port 802.1X
13.8.1 Configuring Port 802.1x Follow the steps below to configure the Port 802.1x screen. 1 In the Device Panel list, select a device and then right-click. 2 Click Configuration, Switch Configuration and then the Switch Setup tab. 3 Select the 802.1x check box and then click Apply. -
Page 134: Port Security
13.9.2 Configuring Port Security Follow the steps below to configure the Port Security screen. 1 In the Device Panel list, select a device and then right-click. DESCRIPTION Select this checkbox to permit 802.1x authentication on this port. You must first allow 802.1x authentication on the switch before configuring it on each... -
Page 135: Port Mirroring
(the port you copy the traffic to) without interference. Chapter 13 Ethernet Port Configuration NetAtlas Enterprise 1.00 User’s Guide DESCRIPTION Select this check box to enable the port security feature on selected ports. -
Page 136: Configuring Port Mirroring
After you select a monitor port, configure a mirroring rule in the related fields. Follow the steps below to configure the Port Mirroring screen. 1 In the Device Panel list, select a device and then right-click. 2 Click Configuration, Switch Configuration and then the Switch Setup tab. -
Page 137: Configuring Vlan Stacking
+ 4 Bytes for the second tag) to pass through it. SPVID is the service provider’s VLAN ID (the outer VLAN tag). Enter the service provider ID (from 1 to 4094) for frames received on this port. See the chapter on VLANs for more background information on VLAN ID. - Page 138 NetAtlas Enterprise 1.00 User’s Guide Table 58 Configuration: Ethernet Port Configuration: VLAN Stacking (continued) TABLE Priority Apply DESCRIPTION On the switch, configure priority level of inner IEEE 802.1Q tag in the Port Setup screen. "0" is the lowest priority level and "7" is the highest.
-
Page 139: Routing Configuration
14.1.1 Configuring Static Routing Follow the steps below to view the Routing Configuration screen. 1 In the Device Panel list, select a device and then right-click. 2 Click Configuration, Routing Configuration and then the tab. Figure 100 Configuration: Routing Configuration... -
Page 140: Add Or Modify A Static Route
Metric Modify Delete 14.1.2 Add or Modify a Static Route Click the Add button or select a static route and click the Modify button in the Routing Configuration screen to display the following screen. Figure 101 Configuration: Routing Configuration: Add or Modify DESCRIPTION This field displays the index number of the route. -
Page 141: Switch Manager
The metric represents the “cost” of transmission for routing purposes. IP routing uses hop count as the measurement of cost, with a minimum of 1 for directly connected networks. Enter a number that approximates the cost for this link. -
Page 142: Access Log
NetAtlas Enterprise 1.00 User’s Guide Figure 102 Switch Manager Menus The following table describes the options in the switch manager screen. Table 61 Switch Manager Menus Overview LABEL MENU Window Exit Admin Access Database Management Help On-line Help 14.2.1 Access Log Click Admin and then Access Log in the switch manager to display the following screen. -
Page 143: Figure 103 Switch Manager: Admin: Access Log
Log Time Login User Slot Chapter 14 Routing Configuration NetAtlas Enterprise 1.00 User’s Guide DESCRIPTION Select a port or All Ports for which you want to view switch login data via the EMS. Select the type of logs which you want to view for the selected switch and port(s). -
Page 144: Database Backup And Restore
NetAtlas Enterprise 1.00 User’s Guide Table 62 Switch Manager: Admin: Access Log LABEL Port Description Delete Close 14.2.2 Database Backup and Restore Click Admin, Database Management and then Backup/Restore in the switch manager to display the following screen. Figure 104 Switch Manager: Database Management: Backup/Restore The following table describes the fields in this screen. -
Page 145: Database Log Storage Configuration
Click Admin, Database Management and then Log Storage Configuration in the switch manager to display the following screen. Chapter 14 Routing Configuration NetAtlas Enterprise 1.00 User’s Guide DESCRIPTION Scheduled backups can be performed on Daily, Weekly or Monthly. Select a radio button to schedule firmware backups starting from the date and time specifed below. -
Page 146: Figure 106 Switch Manager: Database Management: Log Storage
NetAtlas Enterprise 1.00 User’s Guide Figure 106 Switch Manager: Database Management: Log Storage The following table describes the fields in this screen. Table 65 Switch Manager: Database Management: Log Storage LABEL Storage Configuration Cleared Records Backup Backup the cleared records... - Page 147 NetAtlas Enterprise 1.00 User’s Guide Chapter 14 Routing Configuration...
- Page 148 NetAtlas Enterprise 1.00 User’s Guide Chapter 14 Routing Configuration...
-
Page 149: Chapter 15 Performance
This section shows you how to configure what you want to display in a performance table or graph. 15.1.1 View Interface Performance Click Performance and then Interface in the EMS main menu. Chapter 15 Performance NetAtlas Enterprise 1.00 User’s Guide H A P T E R Performance... -
Page 150: Figure 107 Performance: Interface
NetAtlas Enterprise 1.00 User’s Guide Figure 107 Performance: Interface The following table describes the labels in this screen. Table 66 Performance: Interface LABEL Interface Rx Counters Tx Counters Octets Unicast Pkts Non-unicast Pkts Discard Pkts Error Pkts Multicast Pkts Broadcast Pkts... -
Page 151: Editing A Table Entry
Controls Names Pause Switch Show Save to Polling Axis 15.2.1 Editing a Table Entry Note: You can edit a table entry in all screens that display information in tabular format. In any tabulated screen display, click the Edit icon Edit Table Entry screen and edit any field in a table. There is a set of variable names, value and set button controls that operate on the fields of the selected table. -
Page 152: Figure 109 Edit Table Entry
NetAtlas Enterprise 1.00 User’s Guide Figure 109 Edit Table Entry Variable Name Variable Values Variable Set Button Previous and Next Page Buttons The following table describes the labels in this screen. Table 67 Edit Table Entry COMMAND Variable Names Variable Values... -
Page 153: Expand Dialog Box
GetNext by entering index values. You do not need to enter all index values, but if you enter the Nth index value, you must also enter the 1st through (N-1)th index values. Click the Stop button to abort the current SNMP operation. This button can be used to stop a command when a node is not responding and you don't want to wait for the timeout period. -
Page 154: Graph Menu Bar Icons
22 3E 44 A1 10. OBJECT IDENTIFIER. Data is formatted in MIB dot format, optionally with a leading text identifier, for example sysObjectID.0 or 1.3.6.1.2.1.1.2.0. This is OCTET PRIM TYPE with printable (ASCII string) data (DisplayString). -
Page 155: Graph Styles
Choose which variables to display in chart format by doing one of the following: 1 Click a variable cell in a table and click the bar chart icon. 2 Display the chart menu and then deselect variables (all are displayed by default). -
Page 156: Graph Labels
NetAtlas Enterprise 1.00 User’s Guide Figure 113 Chart Color Codes and Line Styles You may also edit the color code and line style for a variable in the dialog box as described in the following table. Table 70 Edit Style Dialog Box... - Page 157 LABEL Scale Total Baseline Chapter 15 Performance NetAtlas Enterprise 1.00 User’s Guide DESCRIPTION This is the scaling multiplier. This is the current value of the variable. This is the minimum value of the variable. This is the maximum value of the variable.
- Page 158 NetAtlas Enterprise 1.00 User’s Guide Chapter 15 Performance...
-
Page 159: Chapter 16 Troubleshooting
Uninstalling the EMS If the problem still persists, try re-installing the EMS. 16.3 Uninstalling the EMS 1 Click Start, settings, Control Panel, Add/Remove Programs. The Add or Remove Programs dialog box opens. Chapter 16 Troubleshooting NetAtlas Enterprise 1.00 User’s Guide... -
Page 160: Problems Finding A Device
NetAtlas Enterprise 1.00 User’s Guide Figure 115 EMS: Remove 2 Select ZyXEL NetAtlas Enterprise V1.00 and then click Change/Remove (or Add/ Remove depending on your version of Windows). 3 Click Yes when asked to confirm removal. The Uninstall Shield now runs. -
Page 161: Problems Accessing The Ems
When I click the Shutdown and restart both MySQL and the SNMPc manager. Switch Manager The EMS may already be running. Check your Windows task bar. icon, I cannot access the EMS Chapter 16 Troubleshooting NetAtlas Enterprise 1.00 User’s Guide... - Page 162 NetAtlas Enterprise 1.00 User’s Guide Chapter 16 Troubleshooting...
-
Page 163: Appendix Asnmpc Network Manager
This is the default location of the SNMPc network manager. Automatic Startup To automatically start the SNMPc network manager each time you turn on your computer: 1 In SNMPc main window, click Config, System Startup. 2 Select the Auto Startup check box and click Done. Appendix A NetAtlas Enterprise 1.00 User’s Guide... -
Page 164: Snmpc Main Window
NetAtlas Enterprise 1.00 User’s Guide Figure 116 Automatic Startup SNMPc Main Window The following figure and table show the elements of the SNMPc main window. Figure 117 SNMPc Main Windows Selection Tool Main Button Bar View Window Area Event Log Tool... -
Page 165: Selection Tool
• Double-click an event entry to display a Map View window with the corresponding device icon visible. Appendix A NetAtlas Enterprise 1.00 User’s Guide FUNCTION Buttons and controls to execute common commands quickly. Hold the cursor over an icon to see a tool tip. -
Page 166: View Window Area
NetAtlas Enterprise 1.00 User’s Guide • To quickly view events for a particular device, first select the device and then use one of the View Events buttons (or the View, Active Events and View, History Events menus). This will show the device events in a separate window in the View Windows area. -
Page 167: Figure 118 Snmpc Main Button Bar Icons
NetAtlas Enterprise 1.00 User’s Guide Figure 118 SNMPc Main Button Bar Icons Figure 119 SNMPc Edit Button Bar Icons Note: For more detailed information, please see www.castlerock.com. Appendix A... - Page 168 NetAtlas Enterprise 1.00 User’s Guide Appendix A SNMPc Network Manager...
-
Page 169: Appendix B Alarm Types And Causes
Heating/ventilation/cooling system problem • Fire detected • Flood detected • Toxic leak detected Appendix B Alarm Types and Causes NetAtlas Enterprise 1.00 User’s Guide Alarm Types and Causes • Degraded signal • Communications subsystem failure • Communications protocol error •... - Page 170 NetAtlas Enterprise 1.00 User’s Guide Appendix B...
-
Page 171: Index
Cables, Connecting Certifications Changes or Modifications Charge Circuit Class B Communications Compliance, FCC Components Condition Connecting Cables Index NetAtlas Enterprise 1.00 User’s Guide Consequential Damages Contact Information Contacting Customer Support Copyright Correcting Interference Corrosive Liquids Covers Customer Support Damage Dampness Danger... - Page 172 NetAtlas Enterprise 1.00 User’s Guide Compliance Rules, Part 15 Federal Communications Commission Finland, Contact Information Fitness France, Contact Information Functionally Equivalent Gas Pipes Germany, Contact Information God, act of Hardware Harmful Interference High Voltage Points Indirect Damages Install MySQL Install SNMPc...
- Page 173 Restore Return Material Authorization (RMA) Number Returned Products Returns Rights Rights, Legal Risk Safety Warnings Index NetAtlas Enterprise 1.00 User’s Guide Separation Between Equipment and Receiver Serial Number Service 4, 5 Service Personnel Shipping Shock, Electric SNMP SNMPc Network Manager...
- Page 174 NetAtlas Enterprise 1.00 User’s Guide Voltage, High Wall Mount Warnings Warranty Warranty Information Warranty Period Water Water Pipes Web Site Wet Basement Workmanship Worldwide Contact Information Written Permission Zero configuration Internet access ZyNOS ZyXEL Communications Corporation ZyXEL Home Page ZyXEL Limited Warranty...
Need help?
Do you have a question about the 1 and is the answer not in the manual?
Questions and answers