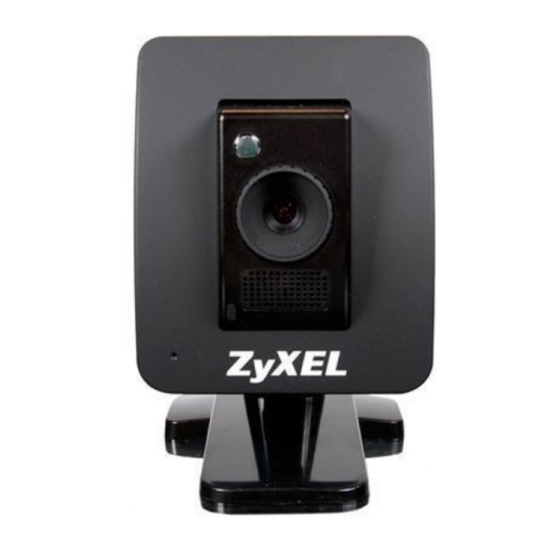
ZyXEL Communications IPC3605N - ISECURITY+ Manual
Hide thumbs
Also See for IPC3605N - ISECURITY+:
- User manual (91 pages) ,
- Specifications (2 pages) ,
- Quick start manual (1 page)
Subscribe to Our Youtube Channel
Summary of Contents for ZyXEL Communications IPC3605N - ISECURITY+
- Page 1 Android Guide Edition 1, 2/2012 us.zyxel.com Copyright © 2011...
- Page 2 ZyXEL Communications Corporation...
-
Page 3: Login Screen
Login Screen After opening the iSecurity+ app, you will be brought to the login screen. If you already have an account, enter your username and password here, then press the Login button. If you don’t have an account, press Register to navigate to the Registration screen. - Page 4 Registration To register an iSecurity+ account: 1) Navigate to the Registration screen by selecting Register from the Login screen. 2) Enter your desired username. 3) Enter your desired password. 4) Confirm your password. The contents of the Confirm Password field must be identical to the Password field.
- Page 5 Managing Your Camera The main iSecurity+ interface is split into 5 tabs at the bottom of your screen: Mine, Friends, Events, Settings, and Buy Cameras. When you first log in, you’ll be brought to the Mine tab. On this screen, you’ll see a list of all cameras you’ve linked to your iSecurity+ account. At the top of the screen, you can select All to see all linked cameras, or Online to only view cameras that are currently broadcasting.
- Page 6 From this menu, you can Configure camera viewing settings, change your camera’s status, or share video feeds with friends. Configure The Configure Camera screen allows you to change infrared light, rotation, audio, video, and iSecurity+ settings. To access this screen, tap Configure when looking at the Camera menu.
- Page 7 Audio: Turns the camera’s microphone on/off. Infrared Lights: Infrared lighting (Night vision) can be toggled to on, off, or automatic. Rotation: This field allows you to select the video’s orientation. Select VFlip to reorient the screen if the camera is hanging upside-down, otherwise, leave this field set to Regular.
- Page 8 Change Camera Status The Change Camera Status screen allows you to set your camera’s privacy settings. To access this screen, tap Change Status on the Camera Menu. Status Effect You and everyone you’ve shared your camera with can view Set Camera Online your camera’s video feed.
- Page 9 Share The Share screen allows you to choose who is able to view video feeds from your camera. To access this screen, tap Share while on the Camera Menu. To add or remove friends from being able to view your camera’s video feed, tap the checkboxes next to their names.
-
Page 10: Viewing Your Camera
Viewing your camera To view your camera’s video feed, tap the name of your camera while on the Mine tab. The following table describes the functions available on this screen. Label Function Zoom In/Out Pan or Tilt your camera in real time (IPC4605N only.) Turn video stream Off/On Take a snapshot of current image Record video... - Page 11 Friends Tab The Friends tab allows you to view the shared cameras of people on your Friends list. Much like the Mine screen, you can use the buttons at the top of the screen to change whether all friends’ cameras are displayed, or only the ones online. Tap a friend’s name to view their camera.
- Page 12 Events The Events tab utilizes a paid iSecurity+ Cloud Recording service to automatically respond to motion, immediately alerting you and recording video to the cloud. These recorded videos can then be viewed and shared at any time. The first time you access the Events tab, you will be prompted to upgrade to the iSecurity+ Cloud Recording service.
- Page 13 Event Recording and Notification Options Motion Sensitivity: This slider controls how sensitive to motion the camera will be. Email Notify: When set to ‘On,’ this option will send an e-mail to the e-mail address on file with your iSecurity+ account. iPhone/Android Notify: When set to ‘On,’...
- Page 14 Events are organized by camera name. To view events, select the camera you wish to view, then the time of the event. The following table describes the functions available on this screen. Label Function Save or e-mail the current image. Previous image Begin slideshow` Next image...
- Page 15 Settings The settings tab will allow you to change the general configurations of the iSecurity+ app. Auto Login: iSecurity+ will remember your login information so you don’t have to input it every time you open the app. Account Info: Your stored account information. About: Displays information about the iSecurity+ app.
- Page 16 connects to a central server, but video will time out after a predetermined time. If experiencing connection issues with TCP/UDP, set iSecurity+ to Server. Build Number: Displays the current version of the iSecurity+ software. Current IP Address: Displays your device’s current IP.


Need help?
Do you have a question about the IPC3605N - ISECURITY+ and is the answer not in the manual?
Questions and answers