
Related Manuals for Puretec ROS2700


Summary of Contents for Puretec ROS2700
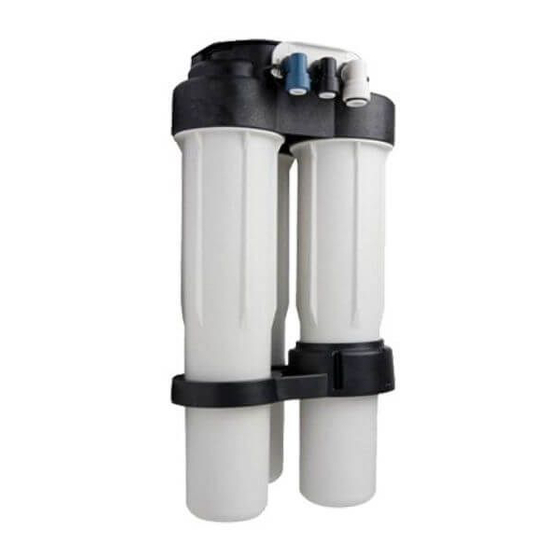
- Page 1 User Guide ROS2700 Reverse Osmosis Water Treatment System For correct operation & installation, it is essential to observe these instructions. SEPT2020...
-
Page 2: Table Of Contents
The preservative is not harmful but makes the product water taste objectionable. Rinsing the membrane also acts a performance conditioner. All new membranes will reach their stable maximum performance after 8 hours of rinsing. Reverse Osmosis Water Treatment System Copyright © Puretec Pty Ltd 2020... -
Page 3: Installation Guide
INSTALLATION SHOULD BE COMPLETED BY QUALIFIED TRADESPEOPLE. FAULTY OPERATION DUE TO UNQUALIFIED PERSONS WILL RESULT IN VOIDED WARRANTY COVERAGE. Copyright © Puretec Pty Ltd 2020 Reverse Osmosis User Guide... - Page 4 • Electric drill and bits for cutting the faucet mounting hole Note: Note that some sinks will have a pre-drilled hole with a plug for the faucet. Fig. 1 Reverse Osmosis Water Treatment System Copyright © Puretec Pty Ltd 2020...
- Page 5 In restricted under-sink areas, it may be easier to install the faucet first. Allow adequate tubing lengths for final system placement. Copyright © Puretec Pty Ltd 2020 Reverse Osmosis User Guide...
- Page 6 Carbon Postfilter Feed Water Valve Cold Water Line Only Inlet-1/2" Natural Drain - 3/8" Black RO Assembly 1.5" Air Gap Required Figure 3 Typical Basement Installation Typical Basement Installation Reverse Osmosis Water Treatment System Copyright © Puretec Pty Ltd 2020...
- Page 7 1.5" Air Gap Required Vented to Atmosphere Liquid level float sensor to control feed solenoid valve To Point of Use Product Storage Tank Figure 4 Typical Light Commercial Installation Typical Light Commercial Installation Copyright © Puretec Pty Ltd 2020 Reverse Osmosis User Guide...
- Page 8 Installation Guide Installation Step 1: Install cold water supply valve ater supply valve Step 2: Install drain adapter dapter Step 3: Install faucet Step 4: Make tubing connections connections embly Step 5: Install RO assembly to operation Step 6: Put system into operation sed plumber if you are not familiar with Note: Consult a licensed plumber if you are not familiar with plumbing procedures.
- Page 9 Horseshoe Clip ned around the threaded pipe under doff. This clip should engage the Standoff gap. Washer lip to hold the faucet in position. Locking Washer Water In Connection Figure 6 Copyright © Puretec Pty Ltd 2020 Reverse Osmosis User Guide...
- Page 10 For proper system performance, the ssure must be between 40 psi (2.76 bar) and 80 psi Reverse Osmosis Water Treatment System Copyright © Puretec Pty Ltd 2020 e system is in operation.
- Page 11 First Position ricated. The following s for lubrication. Second Position packet should be t surfaces in the 3 Figure 9 System Positions Figure 10). Follow Copyright © Puretec Pty Ltd 2020 Reverse Osmosis User Guide at surface below the...
- Page 12 Warning: Be sure to lubricate the manifold ports with silicone lubricant, prior to inserting the fittings into manifold. Warning: Do not turn the incoming water valve on until the locking bar is in place. Figure 11 Reverse Osmosis Water Treatment System Copyright © Puretec Pty Ltd 2020...
- Page 13 The RO system is now ready for use. pressure. ater feed valve slowly. Run at 1/2 open for a minute, lly. until water runs. aks. Copyright © Puretec Pty Ltd 2020 Reverse Osmosis User Guide e faucet is initially turned on, water may temporarily...
-
Page 14: Ro Installation Guide
The support leg functions as a wrench to loosen the terile/latex gloves is recommended. sump, Figure 12. mbrane elements: membrane sumps. Remove and discard used Reverse Osmosis Water Treatment System Copyright © Puretec Pty Ltd 2020 new elements from packaging. - Page 15 See . Ensure gaskets are ening on manifold. Prefilter Center Opening bricant. Figure 14 rew the sump into s out. Copyright © Puretec Pty Ltd 2020 Reverse Osmosis User Guide push down on the...
- Page 16 Note: If the two RO membrane elements were replaced the system must be flushed according to Step 6 the system startup procedure as stated above. The RO system is now ready for use. Reverse Osmosis Water Treatment System Copyright © Puretec Pty Ltd 2020...
-
Page 17: Operating Conditions
1 NTU Dimensions Dimensions (140) 5.51 (84.3) 3.32 (242.5) (243.9) 9.55 (50.8) (25.4) (89.8) (130.4) 3.53 5.13 (59.4) (383.5) 2.34 15.10 (114.3) (508.9) 4.50 20.03 (261) (268.2) 10.27 10.56 Figure 15 Copyright © Puretec Pty Ltd 2020 Reverse Osmosis User Guide... -
Page 18: Troubleshooting
Increase tubing diameter for longer distances. Plugged prefilter. Replace plugged prefilter. Consider sediment prefilter for non-chlorinated applications. Scaled, fouled, or damaged RO Replace RO membranes. membrane. Reverse Osmosis Water Treatment System Copyright © Puretec Pty Ltd 2020... -
Page 19: Installation Information
Installation Information Copyright © Puretec Pty Ltd 2020 Reverse Osmosis User Guide... -
Page 20: Warranty
3 years from date of purchase. To make a claim under the warranty, take the product and proof of purchase to place where you purchased the product, and they will lodge a Warranty Request with Puretec. 3 year warranty is 1 year parts and labour plus 2 years parts only. Excludes consumables.
Need help?
Do you have a question about the ROS2700 and is the answer not in the manual?
Questions and answers