
Subscribe to Our Youtube Channel
Related Manuals for Puretec ROS2700


Summary of Contents for Puretec ROS2700
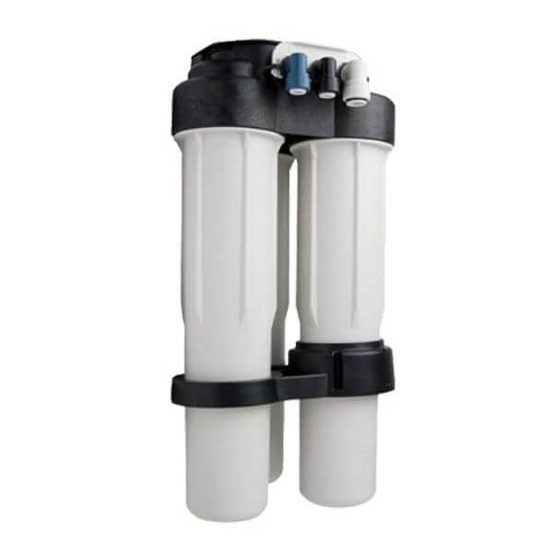
- Page 1 ROS2700 Reverse Osmosis Water Treatment System User Guide For correct operation & installation it is essential to observe these instructions. JAN2018...
-
Page 2: Table Of Contents
The reverse osmosis membranes contain a food grade preservative for storage and shipment. All new membranes require a minimum 2 hour rinse to properly rinse out the preservative. The preservative is not harmful but makes the product water taste objectionable. Rinsing the Installation & Operation Manual Copyright © Puretec Pty Ltd 2018... -
Page 3: Installation Guide
Installation Guide membrane also acts as a performance conditioner. All new membranes will reach their stable maximum performance after 8 hours of rinsing. The Basic Reverse Osmosis System Your Reverse Osmosis System is a water treatment unit. It uses water pressure to reverse a natural physical process called osmosis. - Page 4 Installation Guide Installation & Operation Manual Copyright © Puretec Pty Ltd 2018...
- Page 5 Installation Guide Location of System The Reverse Osmosis system is designed for installation under a sink, usually in the kitchen or bathroom. The RO assembly can be placed on the cabinet floor in any position that does not apply pressure on the disconnect elbows. The RO product water faucet installs on the sink or on the countertop next to the sink.
- Page 6 Carbon Postfilter Feed Water Valve Cold Water Line Only Inlet-1/2" Natural Drain - 3/8" Black RO Assembly 1.5" Air Gap Required Figure 3 Typical Basement Installation Figure 2 Typical Basement Installation Installation & Operation Manual Copyright © Puretec Pty Ltd 2018...
- Page 7 Installation Guide THE BASIC REVERSE OSMOSIS SYSTEM cont. Feed Pressure Gauge Feed Water Valve Cold Water Line Only Feed Solenoid Valve External Prefilter Inlet-1/2" Natural Drain - 3/8" Black RO Assembly 1.5" Air Gap Required Vented to Atmosphere Liquid level float sensor to control feed solenoid valve To Point of Use...
- Page 8 This can be done above the sink. ve ring over the tubing connections and up to aucet. Installation & Operation Manual Copyright © Puretec Pty Ltd 2018 ver the tubing connections and up to the bottom...
- Page 9 Installation Guide Step 4: Make Tubing Connections The connections to the faucet should be complete, the remaining connections are: • Feed connection—clear tubing from feed valve to white elbow connector. • Drain connection—either red tubing from the air gap or black tubing from grey elbow connector will attach to the drain adaptor.
- Page 10 First Position . The following brication. Figure 7 Second Position should be ces in the 3 Figure 9 System Positions 10 Installation & Operation Manual Copyright © Puretec Pty Ltd 2018 10). Follow ace below the...
- Page 11 Second Position Six packets of silicone lube are supplied. One packet should be completely used to lubricate the O-ring contact surfaces in the 3 Figure 9 System Positions manifold ports and 2 RO membrane locations (Figure 10). Follow Figure 11 and lubricate the filter seat and the flat surface below the threads for the 3 sump locations.
- Page 12 The RO system is now ready for use. ure. eed valve slowly. Run at 1/2 open for a minute, water runs. 12 Installation & Operation Manual Copyright © Puretec Pty Ltd 2018 cet is initially turned on, water may temporarily...
-
Page 13: Care & Maintenance
e replaced on a regular schedule. erformance the system should be flushed for 2 minutes if ctivity extend past six hours. Care & Maintenance MENT OF PREFILTER AND POSTFILTER ediment prefilter reduces sediment and certain uch as chlorine, from the water. Depending on water use To Care for the RO System nt of impurities, this filter should be replaced every six nths for point-of-use applications. - Page 14 See Ensure gaskets are ning on manifold. Prefilter Center Opening ricant. Figure 12 Figure 14 ew the sump into out. ush down on the 14 Installation & Operation Manual Copyright © Puretec Pty Ltd 2018...
- Page 15 Care & Maintenance Install prefilter. Remove new prefilter from packaging. Ensure gaskets are secure. Insert prefilter into proper opening on manifold. Lubricate sump O-ring with silicone lubricant. With the prefilter element in place, screw the sump into the connection. Tighten until it bottoms out.
-
Page 16: Operating Conditions
(50.8) (25.4) (89.8) (130.4) 3.53 5.13 (59.4) (383.5) 2.34 15.10 (114.3) (508.9) 4.50 20.03 (261) (268.2) 10.27 10.56 Figure 15 Figure 13 All dimensions provided in mm and inches 16 Installation & Operation Manual Copyright © Puretec Pty Ltd 2018... -
Page 17: Troubleshooting
Troubleshooting Troubleshooting Issue Possible Cause Corrective Action Low product flow rate. Low driving pressure. Increase feed pressure. Consider pump for low pressure locations. Use short tubing runs to decrease flow restriction. Increase tubing diameter for longer distances. Low water temperature or high total Increase feed water temperature or dissolved solids (TDS). -
Page 18: Appendix
Appendix 18 Installation & Operation Manual Copyright © Puretec Pty Ltd 2018... -
Page 19: Warranty
(or otherwise) or delays caused or faulty manufacturing except as excluded by law. Applicable to all above, is that the warranties need to be approved by Puretec to ensure product was not incorrectly used, installed or claimed. False and incorrect claims will be pursued at Puretec’s discretion, including chargeable inspection and labour costs incurred.
Need help?
Do you have a question about the ROS2700 and is the answer not in the manual?
Questions and answers