Huawei NetCol8000-A Series User Manual
In-room air cooled smart cooling product
Hide thumbs
Also See for NetCol8000-A Series:
- User manual (215 pages) ,
- Maintenance and troubleshooting manual (53 pages) ,
- Quick manual (41 pages)

Related Manuals for Huawei NetCol8000-A Series


Summary of Contents for Huawei NetCol8000-A Series
- Page 1 NetCol8000-A(050, 100) In-room Air Cooled Smart Cooling Product User Manual Issue Date 2019-01-15 HUAWEI TECHNOLOGIES CO., LTD.
- Page 2 Notice The purchased products, services and features are stipulated by the contract made between Huawei and the customer. All or part of the products, services and features described in this document may not be within the purchase scope or the usage scope. Unless otherwise specified in the contract, all statements, information, and recommendations in this document are provided "AS IS"...
-
Page 3: About This Document
Cooling Product User Manual About This Document About This Document Purpose This document applies to the following NetCol8000-A series in-room air cooled smart cooling product: NetCol8000-A100: NetCol8000-A100 in-room air cooled smart cooling product that uses the downflow mode. ... - Page 4 Updated the manual name and so on. Issue 09 (2018-08-05) Modified the section of environmental requirements. Issue 08 (2018-04-18) Add the description for low-temperature component. Issue 07 (2018-01-29) Modified the charge of refrigerant. Issue 10 (2019-01-15) Copyright © Huawei Technologies Co., Ltd.
- Page 5 Modified the procedure for replacing an indoor fan. Issue 03 (2014-10-10) Modified the electric control box. Issue 02 (2014-07-30) Updated the document description. Issue 01 (2013-12-10) This issue is the first official release. Issue 10 (2019-01-15) Copyright © Huawei Technologies Co., Ltd.
-
Page 6: Table Of Contents
3.1.4 Structural Specifications ............................30 3.1.5 Installation Layout ..............................31 3.1.6 Installation Requirements ............................34 3.2 Installation Process ..............................35 3.3 Unpacking ................................... 36 3.3.1 Removing the Package ............................36 3.3.2 Checking Fittings ..............................37 Issue 10 (2019-01-15) Copyright © Huawei Technologies Co., Ltd. - Page 7 4.4 Check After the Commissioning ..........................85 5 ACC Introduction ........................86 5.1 Home Screen ................................86 5.2 Menu Hierarchy ................................87 5.3 Quick Settings ................................89 5.4 Initial Configuration ..............................89 Issue 10 (2019-01-15) Copyright © Huawei Technologies Co., Ltd.
- Page 8 5.18 Rectifying Faults of the E-label Identification Board ..................... 132 5.19 How to Import a Certificate and Key ........................133 6 System Operation and Maintenance ..................135 6.1 Routine Maintenance ..............................135 6.1.1 Routine Maintenance Overview ..........................135 Issue 10 (2019-01-15) Copyright © Huawei Technologies Co., Ltd.
- Page 9 B Electrical Control Boxes ......................180 C Acronyms and Abbreviations ....................182 D Electrical Schematic Diagram (NetCol8000-A050)............. 183 E Electrical Schematic Diagram (NetCol8000-A100) ............. 184 F Controller Menu Structure ...................... 185 Issue 10 (2019-01-15) Copyright © Huawei Technologies Co., Ltd. viii...
-
Page 10: Safety Precautions
1 Safety Precautions Safety Precautions 1.1 General Safety Declaration Huawei shall not take responsibility for any damage caused by any of the following: Operation under severe environments which are not specified in this document. Usage under installation and operating environments which are not specified in related international specifications. - Page 11 Only trained and qualified personnel are allowed to install, operate, and maintain the equipment. Only personnel certified or authorized by Huawei are allowed to replace or modify the equipment or components (including software). Any fault or error that might cause safety problems must be reported immediately to a supervisor.
-
Page 12: Electrical Safety
Contact intervals must be provided between different levels so that a circuit can be disconnected under class III overvoltage conditions. Cables for the mechanism must be incorporated into the fixed wiring based on the wiring rules. Fuse Issue 10 (2019-01-15) Copyright © Huawei Technologies Co., Ltd. -
Page 13: Mechanical Safety
Metal shavings from drilling may block pipes and cause short circuits in circuit boards if they enter the cabinet. Only drill with the approval of the customer, contractor, and Huawei. Remove interior cables before drilling holes into a cabinet. -
Page 14: Operating Safety
1.4 Operating Safety High Temperature and High Pressure Incorrect operations may cause excessive pressure, which may result in breakage or exploration of the cooling system. Issue 10 (2019-01-15) Copyright © Huawei Technologies Co., Ltd. -
Page 15: Others
To avoid explosion or refrigerant leaks, keep sources of ignition and high-temperature objects far away from the equipment. This is especially important for equipment containing high-pressure nitrogen or refrigerant. Issue 10 (2019-01-15) Copyright © Huawei Technologies Co., Ltd. - Page 16 The retailer can recycle this product in a safe and environmentally friendly way. Manual Loss If you lose this manual, contact Huawei technical support to obtain the electronic document or download it from http://www.huawei.com. Issue 10 (2019-01-15)
-
Page 17: Product Description
This topic describes the NetCol8000-A in terms of its model description, positioning, benefits, composition, typical application scenarios, environment specifications, and performance specifications. 2.1 Model Description The naming rule for the NetCol8000-A series products is as follows. Issue 10 (2019-01-15) Copyright © Huawei Technologies Co., Ltd. -
Page 18: Composition
NetCol8000-A(050, 100) In-room Air Cooled Smart Cooling Product User Manual 2 Product Description Figure 2-1 Naming rule for the NetCol8000-A series products 2.2 Composition The NetCol8000-A consists of an indoor unit, a controller, and an outdoor unit. Composition of the NetCol8000-A050 is shown in Figure 2-2. -
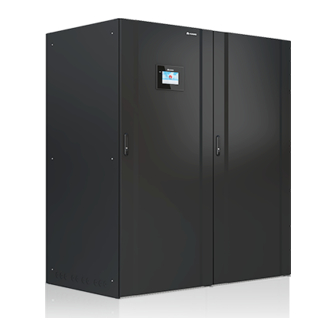
Page 19: Indoor Unit
The NetCol8000-A100 has four front doors and the NetCol8000-A050 has two front doors. The rear panel and side panels are secured by screws. Figure 2-3shows the NetCol8000-A100 indoor unit, and Figure 2-4 shows the NetCol8000-A050 indoor unit. Issue 10 (2019-01-15) Copyright © Huawei Technologies Co., Ltd. - Page 20 Figure 2-3 NetCol8000-A100D indoor unit Figure 2-4 NetCol8000-A050D indoor unit Composition An indoor unit consists of a cabinet, compressor, evaporator, thermostatic expansion valve, infrared humidifier, indoor fan (EC), electrical heater, dry filter and air filter. Issue 10 (2019-01-15) Copyright © Huawei Technologies Co., Ltd.
- Page 21 The dry filter absorbs the water in the refrigerant pipes and filters the foreign matter, which reduces damage rates of the components and ensures the efficient and reliable operating. Air filter The G4 air filter meets requirements for equipment room cleanness. Issue 10 (2019-01-15) Copyright © Huawei Technologies Co., Ltd.
-
Page 22: Controller
Buzzer The device is operating properly, or a Green No buzzing warning is generated. There is an unacknowledged major Yellow Intermittent buzzing alarm. There is an unacknowledged critical Constant buzzing alarm. Issue 10 (2019-01-15) Copyright © Huawei Technologies Co., Ltd. - Page 23 Insert the USB flash drive, import and export the configuration file, export run logs, and upgrade software. restart switch for the display Reserved SW1-4 Dual in-line package (DIP) switch on LCD Issue 10 (2019-01-15) Copyright © Huawei Technologies Co., Ltd.
-
Page 24: Functions And Features
It can connect to your monitoring system over a northbound port (RS485) for remote management. The NetCol8000-A series products can be networked over a controller area network (CAN) bus to perform the teamwork, which efficiently save energy and prolongs the service life. -
Page 25: Ports
Cooling Product User Manual 2 Product Description Figure 2-7 Network diagram for the monitoring system 2.2.4 Ports The following table lists NetCol8000-A series product ports. Table 2-3 Ports of the NetCol8000-A series product Ports name Specifications Liquid pipe of refrigerant Inside diameter 5/8 in. -
Page 26: Environmental Requirements
0 m to 1000 m. The refrigerating capacity is derated when the altitude is above 1000 m. For details, see Table 2-6. Water requirements to the The sum of calcium and magnesium cannot exceed 600 humidifier mg/L. Issue 10 (2019-01-15) Copyright © Huawei Technologies Co., Ltd. -
Page 27: Performance Parameters
0.815 0.784 0.753 capacity coefficient 2.4 Performance Parameters The following table lists the performance parameters of the NetCol8000-A series product. Table 2-7 Performance parameters of the NetCol8000-A series product Parameter NetCol8000-A100D NetCol8000-A050D Power 380 V to 415 V AC, 3Ph, 50 Hz (Single power supply) Voltage tolerance Rated voltage ±... - Page 28 The customer is advised to add a dehumidifier (unconfigured). The test condition is that the indoor dry-bulb temperature is 24° C, condensing temperature is 45° C, and relative humidifier is 50%. Issue 10 (2019-01-15) Copyright © Huawei Technologies Co., Ltd.
-
Page 29: Installation Guide
3.1.2 Tools Table 3-1 Table 3-5 list the tools for installing the NetCol8000-A. Add or delete tools as required. Table 3-1 General tools Appearance, Parameter, and Name Issue 10 (2019-01-15) Copyright © Huawei Technologies Co., Ltd. - Page 30 The waterproof sealant must withstand high temperature higher than 85° C. Table 3-2 Transportation and unpacking tools Appearance, Parameter, and Name Electrical pallet Manual pallet truck Crowbar Hanging rope truck Issue 10 (2019-01-15) Copyright © Huawei Technologies Co., Ltd.
- Page 31 Glycol solution resistance, adapting to the thread size with pipeline. Maximum seal gap is less than 0.5 mm. The maximum pressure is greater than 3 MPa. Conforms to JB/T7311-2008 engineering mechanical the anaerobic adhesive Issue 10 (2019-01-15) Copyright © Huawei Technologies Co., Ltd.
- Page 32 The pressure gauge and leather hose should be used especially for R410A and the measurement range must be equal to and greater than 4.0 MPa. The size of needle valve in Issue 10 (2019-01-15) Copyright © Huawei Technologies Co., Ltd.
-
Page 33: Material Preparations
Unconfigured: This material is unconfigured by Huawei and must be prepared by yourself. (Optional) Refrigerant Oil Danfoss 160SZ refrigerant oil is recommended. You can purchase it through Huawei or other vendors. (Optional) Refrigerant R410A Do not use inferior refrigerant. Otherwise, Huawei has no responsibility for the damage caused by the inferior refrigerant. - Page 34 1.60 2.63 0.93 1.65 0.96 1.69 2.76 0.99 1.74 2.83 1.02 1.79 1.05 1.84 2.97 1.09 1.89 3.04 1.12 1.94 3.11 1.16 1.99 3.19 1.19 2.04 3.26 1.23 3.34 1.27 2.15 Issue 10 (2019-01-15) Copyright © Huawei Technologies Co., Ltd.
- Page 35 Figure 3-2 Specifications for oil traps and inverted traps (unit: mm) Issue 10 (2019-01-15) Copyright © Huawei Technologies Co., Ltd.
- Page 36 Hose: Prepare hoses and pagoda connectors same as parts 4 and 6 in B of Figure 3-3. The sum of calcium and magnesium cannot exceed 600 mg/L. Drainpipes must be able to withstand temperatures higher than 85° C. Otherwise, the pipes may be deformed. Issue 10 (2019-01-15) Copyright © Huawei Technologies Co., Ltd.
- Page 37 Figure 3-4 Pipeline support Height of the U-shaped clamp H = Pipe diameter (with thermal insulation foam) -5 mm. The pipe support is unconfigured by default. Issue 10 (2019-01-15) Copyright © Huawei Technologies Co., Ltd.
- Page 38 3 pcs 25 mm , M6, tin plating, naked ring terminal Water sensor Water sensor Power cable-5 m-22AWG-(2 x signal cable signal cable T0.5 mm )-(2 x 22UL1007)-(2 x T0.5 mm Issue 10 (2019-01-15) Copyright © Huawei Technologies Co., Ltd.
-
Page 39: Structural Specifications
Before installation, check that all needle valves have valve plugs. If a needle valve has no valve plug, install an R410A valve plug and tighten the plug. 3.1.4 Structural Specifications Figure 3-5 NetCol8000-A100D indoor unit structural specifications (unit: mm) Issue 10 (2019-01-15) Copyright © Huawei Technologies Co., Ltd. -
Page 40: Installation Layout
NetCol8000-A. Figure 3-7 Cooling system components of the NetCol8000-A (1) Compressor (2) Service valve (3) Discharge temperature switch (4) Discharge pipe (5) High pressure switch (6) Exhaust pipe needle Issue 10 (2019-01-15) Copyright © Huawei Technologies Co., Ltd. - Page 41 The pipes in dash are to be routed onsite by technical personnel. Huawei does not provide the inverted trap (component 11) and oil traps (component 9) used in the scenario where the outdoor unit is placed higher than the indoor unit. However, to ensure the normal operating and easy maintenance of the NetCol8000-A, it is recommended that you use these two components.
- Page 42 (2) Tilted liquid pipeline The gradients of the liquid pipeline and the discharge pipeline are at least 1: 200. The graphic in dotted box shows the installation layout for NetCol8000-A050. Issue 10 (2019-01-15) Copyright © Huawei Technologies Co., Ltd.
-
Page 43: Installation Requirements
The indoor fan should be lowered under the raised floor, if the NetCol8000-A100D and NetCol8000-A50D adopt downward supply mode. Therefore, the shelter should be equipped with a raised floor, and the support for the raised floor should be at least 400 mm in height. Issue 10 (2019-01-15) Copyright © Huawei Technologies Co., Ltd. -
Page 44: Installation Process
NetCol8000-A(050, 100) In-room Air Cooled Smart Cooling Product User Manual 3 Installation Guide 3.2 Installation Process Figure 3-11 Process of installing an indoor unit Issue 10 (2019-01-15) Copyright © Huawei Technologies Co., Ltd. -
Page 45: Unpacking
The NetCol8000-A050 is fixed onto the pallet with three M12x120 bolts, you can use an M19 socket wrench to remove the bolts. Figure 3-13 Removing the bolts that secure the NetCol8000-A050 to the pallet Issue 10 (2019-01-15) Copyright © Huawei Technologies Co., Ltd. -
Page 46: Checking Fittings
A support is optional for the NetCol8000-A. You can configure a support in the following two ways: Prepare the support according to the drawings obtained from Huawei. Specify the support as a mandatory item for the NetCol8000-A in the contract. - Page 47 Step 1 Secure the support to the ground by using M12 expansion bolts. Figure 3-15 Installing a support Step 2 Secure an indoor unit onto a support. Place the indoor unit on the support. Use three M12 bolts to secure the NetCol8000-A050. Issue 10 (2019-01-15) Copyright © Huawei Technologies Co., Ltd.
-
Page 48: Lowing An Indoor Fan
Prerequisites Before lowering an indoor fan, lay indoor raised floors around the support. Before lowering an indoor fan, open the front doors, and remove screws and then internal panels. Issue 10 (2019-01-15) Copyright © Huawei Technologies Co., Ltd. - Page 49 When lowering the indoor fan, avoid pressing the condensate water pipe. You need to lower two fans when lowering the NetCol8000-A100D indoor fan. Figure 3-18 Lowering a NetCol8000-A050D indoor fan (1) Indoor raised floor (2) Indoor concrete floor Issue 10 (2019-01-15) Copyright © Huawei Technologies Co., Ltd.
- Page 50 Figure 3-20 Removing the bolts on the cover plate of the flow deflecting ring Step 3 Install the tooling beam onto the cover plate of the flow deflecting ring by using two M8x20 bolts. Issue 10 (2019-01-15) Copyright © Huawei Technologies Co., Ltd.
- Page 51 Step 4 Remove the capstan components from the tooling body by removing the four M6x16 bolts. Figure 3-22 Removing the capstan components Step 5 Separate the tooling support and the capstan components. Issue 10 (2019-01-15) Copyright © Huawei Technologies Co., Ltd.
- Page 52 Step 6 Reinstall the capstan components onto the support by using four M6x16 bolts. Figure 3-24 Installing the capstan components Step 7 Install the capstan components of the indoor fan to the front beam of the indoor unit by using two M6x16 bolts. Issue 10 (2019-01-15) Copyright © Huawei Technologies Co., Ltd.
- Page 53 Figure 3-26. Ensure that the hook is secured to the tooling beam by using a steel wire. Figure 3-26 Connecting the hook to the tooling beam Issue 10 (2019-01-15) Copyright © Huawei Technologies Co., Ltd.
- Page 54 Step 10 Slowly rotate the handle of the capstan to lower the indoor fan to the bottom of the indoor unit. Secure the indoor fan to the bottom of the indoor unit by using four M8x20 bolts. Issue 10 (2019-01-15) Copyright © Huawei Technologies Co., Ltd.
- Page 55 Step 11 Remove the two bolts at the front of the tooling body and loose the two bolts at the rear of the tooling body to remove the tooling body of the indoor fan on. Issue 10 (2019-01-15) Copyright © Huawei Technologies Co., Ltd.
-
Page 56: Connecting Pipelines
(Remove the bonnet from the needle valve and press the valve plug to check whether there is a sound of air flow.) Context Before connecting refrigerant pipes, exhaust nitrogen used for avoiding explosion and injury. Issue 10 (2019-01-15) Copyright © Huawei Technologies Co., Ltd. - Page 57 Step 1 Open the bonnet on the needle valve, connect the hose end with an ejector to the needle valve, and expel nitrogen. Figure 3-31 Position for exhausting nitrogen without configuring low-temperature component (1) Low pressure needle valve (2) High pressure needle valve Issue 10 (2019-01-15) Copyright © Huawei Technologies Co., Ltd.
-
Page 58: Pipeline Ports On The Indoor Unit
If it is difficult to route pipes or cables through the bottom plate, route them through side panels. Ensure that pipes, power cables, and signal cables are routed correctly and through separate holes. Determine the number of the holes to avoid performance degradation due to unused holes. Issue 10 (2019-01-15) Copyright © Huawei Technologies Co., Ltd. - Page 59 Figure 3-33 Ports on the bottom plate (unit: mm) (1) Drainpipe outlet Φ50.0 (2) Waterpipe inlet Φ50.0 (3) Cable port Φ50.0 (4) Port for liquid pipe of (5) Port for discharge pipe of refrigerant Φ80.0 refrigerant Φ80.0 Issue 10 (2019-01-15) Copyright © Huawei Technologies Co., Ltd.
-
Page 60: Routing Refrigerant Pipes
When the direction of the refrigerant pipe is changed, add a support at the position that is 500 mm away from the changing point. When the refrigerant pipe is straight, add a support every 1500 mm. Onsite personnel prepare the required materials and install the supports. Issue 10 (2019-01-15) Copyright © Huawei Technologies Co., Ltd. - Page 61 You are advised to select the pipes based on the total length of the pipes connecting the indoor unit and the outdoor unit, because different pipe diameters influence the pressure drop and performance of the cooling system. For details, see Table 3-11. Issue 10 (2019-01-15) Copyright © Huawei Technologies Co., Ltd.
- Page 62 L ≤ 30 30 < L ≤ 60 If the pipe is longer than 60 m, contact Huawei. The refrigerant pipes connecting the indoor unit and the outdoor unit are copper. Ball valves are reserved for the discharge pipes and liquid pipes.
-
Page 63: Connecting Water Pipes
The humidifier water inlet pipe connects to running water or other water supply systems, and the drainpipe connects to the drainage system. Context Figure 3-38 shows the water pipes in the cooling system. Issue 10 (2019-01-15) Copyright © Huawei Technologies Co., Ltd. - Page 64 Lay the drainpipe with gradient. No traps are allowed. Take appropriate thermal insulation and antifreeze measures for outdoor water pipes to avoid poor drainage and insufficient water supply caused by freezing. ----End Issue 10 (2019-01-15) Copyright © Huawei Technologies Co., Ltd.
-
Page 65: Charge Nitrogen
If no low-temperature component is installed on the outdoor side, charge nitrogen into the system from the high pressure needle valve and low pressure needle valve at the same time. Issue 10 (2019-01-15) Copyright © Huawei Technologies Co., Ltd. - Page 66 If low-temperature component is installed on the outdoor side, charge nitrogen into the system from the high pressure needle valve, low pressure needle valve, and liquid pipe needle valve at the same time. Issue 10 (2019-01-15) Copyright © Huawei Technologies Co., Ltd.
-
Page 67: Electric Cable Connections
3.6.1 Cables to be Connected and Precautions The following cables are to be connected onsite: Power cable for the indoor unit Issue 10 (2019-01-15) Copyright © Huawei Technologies Co., Ltd. -
Page 68: Electrical Ports Of An Indoor Unit
Figure 3-41 NetCol8000-A050 external ports of the electrical control box (1) Main control board (2) Voltage jumper (3) External cable port terminal (4) General circuit breaker (power (5) Main PE bar Issue 10 (2019-01-15) Copyright © Huawei Technologies Co., Ltd. - Page 69 Route cables from the left holes with the rubber ring on the floor and to be fixed with cable ties. Cables inside the electrical control box should be fixed in cable trough. Cables outside the electrical control box should be fixed with cable ties. Issue 10 (2019-01-15) Copyright © Huawei Technologies Co., Ltd.
-
Page 70: Connecting The Power Cable To The Indoor Unit
The maximum operating currents of the NetCol8000-A100 and NetCol8000-A050 are 84 A and 42 A respectively. The specifications of the general power cables for the two models are 5x25 mm and 5x16 mm respectively. Issue 10 (2019-01-15) Copyright © Huawei Technologies Co., Ltd. -
Page 71: Connecting The Voltage Jumper
Ensure that the voltage labeled on the voltage jumper is the same as of the local power supply. Then connect the two voltage jumpers. Figure 3-45 shows the voltage jumpers. 4 in Figure 3-42 shows the interconnection position. Figure 3-45 Voltage jumper Issue 10 (2019-01-15) Copyright © Huawei Technologies Co., Ltd. -
Page 72: Connecting Signal Cables
(7) Smoke sensor port (reserved) Figure 3-47 NetCol8000-A100 control ports (1) Control port to (2) Control port to outdoor (3) Port for remote shutdown outdoor unit 1 unit 2 Issue 10 (2019-01-15) Copyright © Huawei Technologies Co., Ltd. - Page 73 NetCol8000-A generates an alarm. Reserved Terminals 42 and 43 are for the reserved functions. port a: Make sure that the switch is off when the customer monitoring system or the screen is triggered. Issue 10 (2019-01-15) Copyright © Huawei Technologies Co., Ltd.
-
Page 74: Connecting Outdoor Unit On/Off Signal Cable
Teamwork communication ports 1 and 2 are used to enable the teamwork networking communication over CAN and EMS monitoring communication over RS485. Figure 3-48 shows the communications cable ports on the main control board. Issue 10 (2019-01-15) Copyright © Huawei Technologies Co., Ltd. - Page 75 1 of the second unit, and connect the teamwork communication port 2 of the second unit to the teamwork communication port 1 of the third unit. All units that require teamwork can be connected in this way, as shown in Figure 3-50. Issue 10 (2019-01-15) Copyright © Huawei Technologies Co., Ltd.
- Page 76 Figure 3-52 defines the pins of a Y-split cable. Figure 3-53 shows the Y-split cable connection for teamwork control. Figure 3-51 Y-split cable Figure 3-52 Pin definition of a Y-split cable Issue 10 (2019-01-15) Copyright © Huawei Technologies Co., Ltd.
- Page 77 Table 3-13. Table 3-13 Operation description of the toggle switches Toggle Default Operation Switch Value Remaining "OFF". Remaining "OFF". Remaining "ON". Issue 10 (2019-01-15) Copyright © Huawei Technologies Co., Ltd.
-
Page 78: Removing The Protective Device From The Netcol8000-A
NetCol8000-A100 lamp before connection. Procedure Step 1 Remove the screws, and slowly take out the sheet metal without damaging the cables, as shown in Figure 3-54. Issue 10 (2019-01-15) Copyright © Huawei Technologies Co., Ltd. -
Page 79: Connecting The Signal Cable To The Hwa Cable Terminal
Step 1 Connect the signal cable to the HWA cable terminal routed over the high level detection switch through cable holes. Then arrange cables and bind them on the fix base of cable ties. Only NetCol8000-A100 needs to be connected onsite, NetCol8000-A050 has been connected before delivery. Issue 10 (2019-01-15) Copyright © Huawei Technologies Co., Ltd. - Page 80 25 mm above the water pan bottom. However the automatic overfall gap may become loose or deviated from the water pan. Therefore, secure the automatic overfall gap to the bottom of the water pan bottom. Issue 10 (2019-01-15) Copyright © Huawei Technologies Co., Ltd.
-
Page 81: Removing The Sheet Metals For Transporting The Compressor
3.7.3 Removing the Sheet Metals for Transporting the Compressor Prerequisites Remove the sheet metals for transporting the compressor. Procedure Step 1 Remove the sheet metals for transporting the compressor by using a 13# solid wrench. Issue 10 (2019-01-15) Copyright © Huawei Technologies Co., Ltd. -
Page 82: Installation Verification
The foreign matter inside the cabinet such as cable ties and stubs is cleaned up. Electric The electrical heater is secured. heater Infrared The humidifier is secured. humidifier The protective device for the infrared humidifier is removed Issue 10 (2019-01-15) Copyright © Huawei Technologies Co., Ltd. - Page 83 The drainpipes have gradients, but no trap is allowed. All pipes are fastened with heat insulation cotton. Check that the needle valve plug is secured (torque of 0.45±0.05 N•m), and valve bonnet is tightened. Issue 10 (2019-01-15) Copyright © Huawei Technologies Co., Ltd.
- Page 84 The power cables to the indoor and outdoor units and the signal cables between the indoor and outdoor units are connected properly. The rated values of circuit breakers are correct. All cables, connectors, and bolts are secured. Issue 10 (2019-01-15) Copyright © Huawei Technologies Co., Ltd.
-
Page 85: Power-On Commissioning
4.2 Vacuumization and Partially Charging in Refrigerant 4.2.1 Charging the Refrigerant and Refrigerant Oil Table 4-1 Charge of refrigerant and refrigerant oil Total One-way Item NetCol500-072 NetCol500-072 NetCol500-088 Length (including low-temperature component) Issue 10 (2019-01-15) Copyright © Huawei Technologies Co., Ltd. -
Page 86: Vacuumization
Figure 3-36. When vacuumization is interrupted, please close the pressure gauge. Vacuumizing the cooling system for 20s and then open the pressure gauge when go on to vacuumization. Issue 10 (2019-01-15) Copyright © Huawei Technologies Co., Ltd. - Page 87 If low-temperature component is installed on the outdoor side, vacuumizing the cooling system from the high pressure needle valve, low pressure needle valve, and liquid pipe needle valve at the same time. Issue 10 (2019-01-15) Copyright © Huawei Technologies Co., Ltd.
- Page 88 Step 6 Close the pressure gauge and vacuum pump. Preserve the pressure for 1 hour. The pressure should not be restored over 80 Pa. If the pressure gauge is restored obviously, locate the leakage and repair it. ----End Issue 10 (2019-01-15) Copyright © Huawei Technologies Co., Ltd.
-
Page 89: Procedure To Partially Charging In Refrigerant
If the R410A refrigerant is provided by Huawei, put the refrigerant steel vessel upside down when charging in the refrigerant. If the refrigerant is not provided by Huawei, check with the refrigerant provider whether the steel vessel has a siphon. If the vessel has a siphon, put it upside up when charging in refrigerant. - Page 90 If low-temperature component is installed on the outdoor side, charging refrigerant into the system from the high pressure needle valve, low pressure needle valve, and liquid pipe needle valve at the same time. Issue 10 (2019-01-15) Copyright © Huawei Technologies Co., Ltd.
- Page 91 The remaining refrigerant needs to be charged in during power-on commissioning. Step 5 Close the pressure gauge and the valve of the refrigerant cylinder after charging in refrigerant. ----End Issue 10 (2019-01-15) Copyright © Huawei Technologies Co., Ltd.
-
Page 92: Commissioning
(1) Compressor 1 circuit (2) Compressor 2 circuit (3) Electrical heater circuit breaker QF1 breaker QF2 breaker QF5 (4) Humidifier circuit (5) Fan 1 circuit breaker (6) Fan 2 circuit breaker QF4 breaker QF6 Issue 10 (2019-01-15) Copyright © Huawei Technologies Co., Ltd. -
Page 93: Commissioning Procedure
When checking the high water level switch, lift the high water level float manually, and check whether a high water level alarm is generated for the humidifier water pan. If an alarm is generated the high water level detection switch works properly. Issue 10 (2019-01-15) Copyright © Huawei Technologies Co., Ltd. -
Page 94: Check After The Commissioning
Table 4-2 Commissioning checklist Check Item Expected Result The controller exits the diagnostic mode. All alarms are correctly set. The temperature, humidity, and control precision are properly set. All circuit breakers are on. Issue 10 (2019-01-15) Copyright © Huawei Technologies Co., Ltd. -
Page 95: Acc Introduction
If is displayed in this position in the status bar, the communication fails. USB status in the status bar indicates that the USB flash Issue 10 (2019-01-15) Copyright © Huawei Technologies Co., Ltd. -
Page 96: Menu Hierarchy
Admin, Engineer, or Operator, and can tap the icon to log out. 5.2 Menu Hierarchy Figure 5-2 shows the hierarchy of the controller menu. Issue 10 (2019-01-15) Copyright © Huawei Technologies Co., Ltd. - Page 97 Manually diagnoses each component. − Calibrates the sensor/touch screen. − Exports data and upgrades the system. About Checks the model, manufacturer, monitoring version, detail version information, and electronic label of the ACC. Issue 10 (2019-01-15) Copyright © Huawei Technologies Co., Ltd.
-
Page 98: Quick Settings
Step 3 Set system parameters and tap Finish, as shown by (3) in Figure 5-3. Step 4 The system displays a dialog box for confirming the rated voltage. Tap Yes after confirmation, as shown by (4) in Figure 5-3. ----End 5.4 Initial Configuration Issue 10 (2019-01-15) Copyright © Huawei Technologies Co., Ltd. -
Page 99: User Right Authentication
To prevent misoperation, log in as Operator users first before modifying parameters. Obtain permission from Huawei before modifying any parameter that you are not allowed to modify, otherwise, Huawei will not be liable for any consequences of the modification. ... -
Page 100: Start And Shutdown
In shutdown mode, the Shutdown button is green (unavailable) and the Start button is gray (available). ----End 5.4.3 Setting Temperature and Humidity Values Procedure Step 1 On the home screen, choose Settings > System Settings > T/H Sensor. Figure 5-6 displayed. Issue 10 (2019-01-15) Copyright © Huawei Technologies Co., Ltd. -
Page 101: Setting Communications Parameters (Ip Settings)
Context To set communications parameters, log in as the Admin, or Engineer user. Procedure Step 1 On the home screen, choose Settings > Comm Settings > IP Settings. Figure 5-7 displayed. Issue 10 (2019-01-15) Copyright © Huawei Technologies Co., Ltd. -
Page 102: Setting Communications Parameters (Modbus Settings)
EMS clients and connect to the EMS with the corresponding IP address at the same time. Figure 5-8 shows the screen for setting the Modbus communications parameters. Issue 10 (2019-01-15) Copyright © Huawei Technologies Co., Ltd. - Page 103 If you set Link mode to Client, the smart cooling product, as a client, can connect to a remote server and Issue 10 (2019-01-15) Copyright © Huawei Technologies Co., Ltd.
-
Page 104: Setting Communications Parameters (Snmp Settings)
One smart cooling product supports concurrent access of up to 10 EMSs through SNMP. Procedure Step 1 On the home screen, choose Settings > Comm Settings > SNMP Settings. Figure 5-9 displayed. Issue 10 (2019-01-15) Copyright © Huawei Technologies Co., Ltd. - Page 105 , and then tap Submit. Figure 5-10 Setting read community Tap the text box after Write Community, as shown in Figure 5-11. Set Write Community as planned, tap , and then tap Submit. Issue 10 (2019-01-15) Copyright © Huawei Technologies Co., Ltd.
- Page 106 A password must be different from the corresponding user name or inverted user name. A password must not be a string containing duplicate sections, such as 12a12a12a. Set SHA Password and Confirm Password, and tap , as shown in Figure 5-13. Issue 10 (2019-01-15) Copyright © Huawei Technologies Co., Ltd.
- Page 107 Step 5 Tap the text box after SNMP Port, as shown in Figure 5-15. Set SNMP Port to the actual port number, tap , and then tap Submit. Figure 5-15 Setting SNMP port Issue 10 (2019-01-15) Copyright © Huawei Technologies Co., Ltd.
- Page 108 If SNMP Version is set to SNMPv3, select an SNMPv3 user name, and then tap as shown in Figure 5-17. Figure 5-17 Setting SNMP trap parameters Tap Submit under SNMP Trap. ----End Issue 10 (2019-01-15) Copyright © Huawei Technologies Co., Ltd.
-
Page 109: Setting Teamwork Control Parameters
Total number of units in this group. Context The parameters in this section are for reference only. Set actually parameter values as required. To change teamwork settings, log in as the Admin or Engineer user. Issue 10 (2019-01-15) Copyright © Huawei Technologies Co., Ltd. - Page 110 If the teamwork function is enabled, this device works in harmony with others that in the same Issue 10 (2019-01-15) Copyright © Huawei Technologies Co., Ltd.
- Page 111 In When the one teamwork, the requirement control temperature and is Enable, the humidity control type master device and temperature and Issue 10 (2019-01-15) Copyright © Huawei Technologies Co., Ltd.
- Page 112 . If the teamwork control succeeds, the teamwork topology of the smart cooling product in the group is displayed, as shown in Figure 5-19. Table 5-7 describes the note for the screen. Issue 10 (2019-01-15) Copyright © Huawei Technologies Co., Ltd.
- Page 113 A device with green frame indicates the device green/non-green itself, as shown in A non-green frame indicates the other device in the group, as shown in Ground color: red, Red indicates that a critical alarm is generated, as Issue 10 (2019-01-15) Copyright © Huawei Technologies Co., Ltd.
- Page 114 Check whether the number of online devices on the topology is the same as the actual device number. − If yes, the check is complete. − If no, check the cable connection and the settings of teamwork control parameters. Issue 10 (2019-01-15) Copyright © Huawei Technologies Co., Ltd.
-
Page 115: Optional) Setting Alarm Parameters
Be careful when configuring alarms. Only professional maintenance personnel can change alarm settings. Procedure Step 1 Choose Settings > Alarm Settings > T/H Sensor on the home screen. Figure 5-20 displayed. Issue 10 (2019-01-15) Copyright © Huawei Technologies Co., Ltd. -
Page 116: Commissioning Guide
If you need to manually turn on or off system components in diagnostic mode, log in as the Admin or Engineer user. Ensure that the smart cooling product is started before operation. Issue 10 (2019-01-15) Copyright © Huawei Technologies Co., Ltd. -
Page 117: Commissioning Smart Cooling Product Components
If you need to manually turn on or off system components in diagnostic mode, log in as the Admin or Engineer user. Ensure that the smart cooling product is started before operation. Issue 10 (2019-01-15) Copyright © Huawei Technologies Co., Ltd. -
Page 118: Querying Parameters
You can choose to display the curves showing data changes of recent one hour, one day, seven days, or 30 days. Procedure Step 1 On the home screen, tap T/H Curve. Figure 5-24 is displayed. Issue 10 (2019-01-15) Copyright © Huawei Technologies Co., Ltd. -
Page 119: Querying Alarms
Common Functions > Query Hist. Alarms or Alarms > Query Hist. Alarms. Procedure To query the active alarm, choose Alarms > Query Act. Alarms. Figure 5-25 displayed. Issue 10 (2019-01-15) Copyright © Huawei Technologies Co., Ltd. - Page 120 5.13 How to Manually Clear Alarms. To query historical alarms, choose Common Functions > Query Hist. Alarms or Alarms > Query Hist. Alarms on the home screen. Figure 5-27 is displayed. Issue 10 (2019-01-15) Copyright © Huawei Technologies Co., Ltd.
-
Page 121: Querying Logs
To query logs, log in as the Admin, Engineer, or Operator user. Procedure Step 1 On the home screen, choose Maint > Log Maint > Query Logs. Figure 5-28 is displayed. Figure 5-28 Query logs screen ----End Issue 10 (2019-01-15) Copyright © Huawei Technologies Co., Ltd. -
Page 122: Querying Device Runtime
When viewing the component status through Status, choose Common Functions > Status or Running > Status on the home screen. The general component status screen is displayed. Figure 5-30 shows the screen displayed after choosing Running > Status. Issue 10 (2019-01-15) Copyright © Huawei Technologies Co., Ltd. -
Page 123: Querying System Parameters
Enter the Operating Info screen that displays the major system parameters such as the current detected temperature, humidity, voltage, and power frequency. Enter the Device Details screen and then enter the menu of a specific component. All parameters for the component are displayed. Issue 10 (2019-01-15) Copyright © Huawei Technologies Co., Ltd. -
Page 124: Querying Version Details
Running > Device Details > Compressor on the home screen to view the compressor parameters, as shown in Figure 5-33. Figure 5-33 Compressor parameters ----End 5.6.7 Querying Version Details Procedure Step 1 On the home screen, select About. Figure 5-34 is displayed. Issue 10 (2019-01-15) Copyright © Huawei Technologies Co., Ltd. -
Page 125: Changing Parameters
Info screen, or T/H Board on the About > E-label screen does not show the information of these T/H boards. ----End 5.7 Changing Parameters 5.7.1 Deleting Historical Alarms Context To delete historical alarms, log in as the Admin user. Issue 10 (2019-01-15) Copyright © Huawei Technologies Co., Ltd. -
Page 126: Deleting Logs
If you perform this operation, all logs will be deleted, and device maintenance will be affected. Exercise caution when doing this operation. Procedure Step 1 On the home screen, choose Maint > Log Maint > Delete Logs > Yes to delete all the logs. Issue 10 (2019-01-15) Copyright © Huawei Technologies Co., Ltd. -
Page 127: Exporting Data
Step 2 Tap the file where the user saves active alarms in the Select Path dialog box and tap Next. Then tap Yes in the displayed dialog box shown in Figure 5-38. Enter the Processing Info screen shown in Figure 5-39. Issue 10 (2019-01-15) Copyright © Huawei Technologies Co., Ltd. - Page 128 Tap OK. Figure 5-40 Screen showing that data export has succeeded Step 4 Tap Maint > USB Operations > Remove USB to remove the USB flash drive in safe mode. ----End Issue 10 (2019-01-15) Copyright © Huawei Technologies Co., Ltd.
-
Page 129: Clearing The Runtime
–2° C. To calibrate a sensor, log in as the Admin or Engineer user. Procedure Step 1 On the home screen, choose Maint > Sensor Adjust. Figure 5-42 is displayed. Issue 10 (2019-01-15) Copyright © Huawei Technologies Co., Ltd. -
Page 130: Calibrating The Screen
When calibrating the screen by tapping the screen, on the home screen, tap Maint > Screen Calib to enter the following screen, as shown in Figure 5-43. Figure 5-44 displayed when the screen calibration is complete. Issue 10 (2019-01-15) Copyright © Huawei Technologies Co., Ltd. - Page 131 After 15 seconds, a dialog box indicating Are you sure you want to calibrate the screen? If you do not click Yes or No, calibration will start automatically 10 seconds later. is displayed, as shown in Figure 5-45. Issue 10 (2019-01-15) Copyright © Huawei Technologies Co., Ltd.
-
Page 132: How To Perform Quick Settings
Password. You can also set LCD contrast, LCD saturation, LCD brightness and LCD backlight off delay on the screen. To set the preceding parameters, log in as the Admin, Engineer, or Operator user. Issue 10 (2019-01-15) Copyright © Huawei Technologies Co., Ltd. -
Page 133: How To Change A Password
Step 1 On the home screen, choose Settings > User Settings to enter the User Settings screen, as shown in Figure 5-47. Figure 5-47 User settings screen Step 2 Tap Password to enter the password changing screen, as shown in Figure 5-48. Issue 10 (2019-01-15) Copyright © Huawei Technologies Co., Ltd. -
Page 134: How To Restore The Initial Password
To ensure device security, operate the DIP switch after powering off the main power supply of the device. Procedure Step 1 Disconnect the main power supply of the device. Issue 10 (2019-01-15) Copyright © Huawei Technologies Co., Ltd. -
Page 135: How To Troubleshoot The Fault When The System Is In Upgrade Mode
LCD and control board are incompatible: The model cannot be identified. Entering upgrade mode... The model does not match. Entering upgrade mode... Failed to obtain the version information. Entering upgrade mode... Issue 10 (2019-01-15) Copyright © Huawei Technologies Co., Ltd. -
Page 136: How To Manually Clear Alarms
Step 2 If The e-label board is not connected or the e-label is incorrect. Please connect or replace the e-label board. is displayed, power off the system, reconnect or replace the E-label board, and then power on the system. Step 3 If the fault persists, contact Huawei technical support. ----End 5.13 How to Manually Clear Alarms Context ... -
Page 137: How To Enable A Humidity And Temperature Sensor
Figure 5-51 Enabling a humidity and temperature sensor ----End 5.15 How to View Teamwork Control Information Procedure Step 1 On the home screen, choose > . The teamwork control information is displayed, as shown in Figure 5-52. Issue 10 (2019-01-15) Copyright © Huawei Technologies Co., Ltd. -
Page 138: Which Parameters Are Restored To Default Values After Default Settings Are Operated
After default settings are restored, all communication addresses are changed to 1 and the communication between all devices and the EMS is disconnected. The communication addresses must be reset to recover the communication. Issue 10 (2019-01-15) Copyright © Huawei Technologies Co., Ltd. -
Page 139: How To Change The Ssh Access Password
Step 2 Specify User name and Password. The preset user name and password are enspire and Changeme respectively, as shown in Figure 5-53. Figure 5-53 Entering the user name and password The new password should meet the following requirements: Issue 10 (2019-01-15) Copyright © Huawei Technologies Co., Ltd. - Page 140 Figure 5-54 Switching to the root user Step 4 Enter passwd (the password change command) to change the password. In the displayed window, enter a new password and confirm it, as shown in Figure 5-55. Issue 10 (2019-01-15) Copyright © Huawei Technologies Co., Ltd.
-
Page 141: Rectifying Faults Of The E-Label Identification Board
If the information shown in Figure 5-56 is displayed on the controller LCD, the smart cooling product can run properly. To remove this tip, perform Step Figure 5-56 Message 1 Issue 10 (2019-01-15) Copyright © Huawei Technologies Co., Ltd. -
Page 142: How To Import A Certificate And Key
If yes, continue with Step Step 4 Check whether cables are properly connected. If yes, contact Huawei technical support to replace the E-label identification board. If no, reconnect or replace cables and perform Step Step 5 Reconnect the main power supply of the smart cooling product. - Page 143 Step 3 Select CA certificate file to be imported. Step 4 Upload local certificate file and key file in turn in the same way. Step 5 Enter Key password and Confirm key password. Step 6 Tap Submit. ----End Issue 10 (2019-01-15) Copyright © Huawei Technologies Co., Ltd.
-
Page 144: System Operation And Maintenance
Pay attention to the safety symbols on the equipment and all safety instructions in this document. The safety precautions given in this document do not cover all safety precautions. Huawei will not be liable for any consequence caused by violation of the safety operation regulations and design, production, and usage standards. -
Page 145: Filters
If the air filter blocking alarm is generated, the differential pressure sensor is working properly. If the air filter blocking alarm is not generated, check whether the differential pressure tube is correctly connected. Issue 10 (2019-01-15) Copyright © Huawei Technologies Co., Ltd. -
Page 146: Indoor Fans
Check that the angle valves on the Clean no oil stain Perform the compressors have no oil stain. operations with the power off. Check that the oil sight glass has no If many air bubbles Perform the Issue 10 (2019-01-15) Copyright © Huawei Technologies Co., Ltd. -
Page 147: Infrared Humidifier
Perform the be injected to less operations than 1/3 of the with the power on. humidifier, refer 6.4.4 Replacing the Infrared Humidifier Lamps to remove the water inlet valve to check whether Issue 10 (2019-01-15) Copyright © Huawei Technologies Co., Ltd. - Page 148 The following figures show the infrared humidifier structure and its components. Figure 6-1 NetCol8000-A050 infrared humidifier structure (1) Water inlet (2) Ceramic lamp holder (3) Water pan (4) Infrared (5) Topside overheat (6) Manual reset temperature Issue 10 (2019-01-15) Copyright © Huawei Technologies Co., Ltd.
- Page 149 (7) Infrared humidifier lamp (8) Topside overheat (9) High water level temperature switch detection switch Figure 6-3 Cleaning a Y-shaped strainer Issue 10 (2019-01-15) Copyright © Huawei Technologies Co., Ltd.
-
Page 150: Electrical Heaters
The following table lists the reasonable discharge pressure ranges. Table 6-6 Reasonable discharge pressure ranges Ambient Temperature Discharge Pressure Range Issue 10 (2019-01-15) Copyright © Huawei Technologies Co., Ltd. - Page 151 It is recommended that you do not adjust the thermostatic expansion valve onsite because it has been adjusted before delivery. If the superheat degree is too low or high, adjust the thermostatic expansion value as follows at your deliberation or after consulting Huawei technical support: Unscrew the valve bonnet at the bottom.
-
Page 152: Electric Control System
Use a brush or compressed dry air to clean Perform the various electric components, control operations Issue 10 (2019-01-15) Copyright © Huawei Technologies Co., Ltd. - Page 153 Keep the sensors far away from drain traps or floor drains and 2 m to 2.5 m away from the NetCol8000-A. Do not install the sensors directly under the NetCol8000-A. Issue 10 (2019-01-15) Copyright © Huawei Technologies Co., Ltd.
-
Page 154: Alarm Reference
1. The load is high or the 1. Add more smart a002 Return-air Critical refrigeration capacity is cooling product Issue 10 (2019-01-15) Copyright © Huawei Technologies Co., Ltd. - Page 155 5.7.5 Calibrating the return air Sensor. temperature reading is valid and less than the low temperature alarm threshold when the alarm detection delay expires. Issue 10 (2019-01-15) Copyright © Huawei Technologies Co., Ltd.
- Page 156 6. The high press switch is faulty. 6. Maintain or replace the high press 7. The solenoid valve is switch. faulty. 7. Maintain or replace 8. The refrigerant is the solenoid coil or overfilled. Issue 10 (2019-01-15) Copyright © Huawei Technologies Co., Ltd.
- Page 157 Reference to the lock generated frequently. has triggered solutions for the a010 six low comp LP alarm. pressure protections within one consecutive hour, or a compressor low pressure alarm has not cleared within Issue 10 (2019-01-15) Copyright © Huawei Technologies Co., Ltd.
- Page 158 2. The load is low, which support. times during leads to the comp starting the monitored and stopping frequently. period, and each running period is less than 1.5 times of the shortest configured running period. Issue 10 (2019-01-15) Copyright © Huawei Technologies Co., Ltd.
- Page 159 2. The manual reset temperature temperature switch has not 2. Reset the manual switch for the been reset. reset temperature infrared switch. 3. Cables to the humidifier humidifier Issue 10 (2019-01-15) Copyright © Huawei Technologies Co., Ltd.
- Page 160 Issue 10 (2019-01-15) Copyright © Huawei Technologies Co., Ltd.
- Page 161 When a restart is initiated, the main control board checks NetCol8000-A state. If a cold reset is required, this alarm is generated. If a hot reset is required, this alarm is not Issue 10 (2019-01-15) Copyright © Huawei Technologies Co., Ltd.
- Page 162 2. If a voltage jumper is used, the voltage jumper. V and less possibly it is incorrectly 3. Correctly set the than the low connected. toggle switch. voltage alarm 3. If a toggle switch is used, threshold Issue 10 (2019-01-15) Copyright © Huawei Technologies Co., Ltd.
- Page 163 1. The power grid is unstable. 1. Check the power a037 Power Critical The surge grid. phase protection and 2. The surge protection board Issue 10 (2019-01-15) Copyright © Huawei Technologies Co., Ltd.
- Page 164 1. The refrigerant leaks. 1. Check for any a046 Comp Critical The antifreeze leakages. Fill freeze low pressure 2. The solenoid valve is refrigerant after point protection faulty. Issue 10 (2019-01-15) Copyright © Huawei Technologies Co., Ltd.
- Page 165 2. The loop B fuse is loose, fuse reports aged, or disconnected. 2. Maintain or replace that the switch the fuse. polarity is different from the preset polarity when the alarm detection Issue 10 (2019-01-15) Copyright © Huawei Technologies Co., Ltd.
- Page 166 3. The low humidity alarm humidity alarm thres. alarm thres is inappropriate. 4. Calibrate or replace threshold 4. The humidity displayed is the abnormal T/H when the different from the actual sensors. Issue 10 (2019-01-15) Copyright © Huawei Technologies Co., Ltd.
-
Page 167: Troubleshooting
The high pressure switch Check the high pressure switch work. reacts. status. The low pressure switch reacts. Check the low pressure switch status. The exhaust temperature Check the exhaust temperature switch reacts. switch status. Issue 10 (2019-01-15) Copyright © Huawei Technologies Co., Ltd. - Page 168 The sensing bulb of the Check the sensing bulb of the thermostatic expansion valve thermostatic expansion valve. has fallen off. Issue 10 (2019-01-15) Copyright © Huawei Technologies Co., Ltd.
- Page 169 The infrared humidifier lamp Measure the current of is burnt out. humidifier. If no current exists, the lamp of humidifier is damaged. Replace the lamp. Circuit breakers, fuses, or Check the infrared humidifier Issue 10 (2019-01-15) Copyright © Huawei Technologies Co., Ltd.
-
Page 170: Parts Replacement
After replacing any part, verify that the new part works properly. 6.4.1 Replacing the Filters Context Figure 6-5 shows the positions of filters in the indoor unit. They are numbered 1 and 2. Issue 10 (2019-01-15) Copyright © Huawei Technologies Co., Ltd. -
Page 171: Replacing An Indoor Fan
Pay attention to the filters installation direction. Step 4 Install new filters in an inverse order. Step 5 Tap Maint > Performance Maint to clear the filters total runtime. ----End 6.4.2 Replacing an Indoor Fan Prerequisites Issue 10 (2019-01-15) Copyright © Huawei Technologies Co., Ltd. - Page 172 Step 8 Drag the indoor fan outwards and pay out more steel wire until the fan tooling beam approaches to the compressor beam. Step 9 Lift the indoor fan and remove the fan tooling beam. Issue 10 (2019-01-15) Copyright © Huawei Technologies Co., Ltd.
- Page 173 Figure 6-7 Replacing an indoor fan Step 11 Remove the eight screws on the fan cover using a Phillips screwdriver and remove the cover. After removing the fan cover, turn the fan upside down with caution. Issue 10 (2019-01-15) Copyright © Huawei Technologies Co., Ltd.
- Page 174 (PE cable) in the area marked yellow in using a 5 x 200 mm flat-head screwdriver. Issue 10 (2019-01-15) Copyright © Huawei Technologies Co., Ltd.
- Page 175 Step 16 Power on the unit and tap Maint > Diagnostic Mode > Enter. Set the indoor unit to lower speed, make sure they work properly, and then exit the Diagnostic Mode. Step 17 Tap Maint > Performance Maint to clear the indoor fan total runtime. ----End Issue 10 (2019-01-15) Copyright © Huawei Technologies Co., Ltd.
-
Page 176: Replacing A Compressor
Remove the suction and discharge angle valves. Seal the air intake and exhaust vents to ensure that the system is clean and moisture does not enter the pipes. Issue 10 (2019-01-15) Copyright © Huawei Technologies Co., Ltd. - Page 177 Step 6 Blow away dirt with nitrogen, check the dry filter, and replace it if necessary to protect pipes from foreign matter. Remove the interfaces at both ends of the dry filter with a welding gun, and take out the dry filter and its pipe sections. Issue 10 (2019-01-15) Copyright © Huawei Technologies Co., Ltd.
- Page 178 Install a new dry filter in reverse order. And solder new the dry filter to the original position on the pipe. Step 7 Install a new compressor, vacuumize the system, and partially inject refrigerant. Issue 10 (2019-01-15) Copyright © Huawei Technologies Co., Ltd.
-
Page 179: Replacing The Infrared Humidifier Lamps
Step 1 Disconnect the power supply, close the water inlet for the infrared humidifier. Step 2 Pull out the self-overflow vent to drain water out of the water pan, and remove the drainpipe. Issue 10 (2019-01-15) Copyright © Huawei Technologies Co., Ltd. - Page 180 Figure 6-17 Removing the float sheet metal Step 5 Remove the four wiring terminals connecting the manual and automatic reset switches at the bottom of the water pan using combination pliers. Issue 10 (2019-01-15) Copyright © Huawei Technologies Co., Ltd.
- Page 181 Remove the two screws that secure the sheet metal. Loosen the bolts of the damaged lamp tube from the ceramic terminal block by using hex key while holding the ends of the lamp tube with hands. Issue 10 (2019-01-15) Copyright © Huawei Technologies Co., Ltd.
- Page 182 Figure 6-20 Removing drainpipe and screws on the right side of infrared humidifier Step 4 Remove the two butterfly buts on the left, and pull out the water pan horizontally from the left side. Issue 10 (2019-01-15) Copyright © Huawei Technologies Co., Ltd.
- Page 183 Step 2 Pull out the wiring terminals on the solenoid valve control cable using combination pliers, and remove the screws that secure the water injection solenoid valve to the baffle plate. Issue 10 (2019-01-15) Copyright © Huawei Technologies Co., Ltd.
- Page 184 Then remove the water injection solenoid valve. Keep the connection nuts aside for reinstallation purpose. Apply yellow glue to the nut of the water inlet pipe, and install the solenoid valve. Issue 10 (2019-01-15) Copyright © Huawei Technologies Co., Ltd.
-
Page 185: Replacing Electrical Heaters
NetCol8000-A when the rack is out of position. The electrical heater rack is inside the NetCol8000-A. Exercise caution during maintenance to prevent internal components from scratches or damage. Procedure Step 1 Disconnect the power supply. Issue 10 (2019-01-15) Copyright © Huawei Technologies Co., Ltd. - Page 186 Make sure they work properly. Exit the Diagnostic Mode. Step 6 Tap Maint > Performance Maint to clear the electric heater total runtime. Figure 6-24 Replacing an electrical heater (bottom view) (1) Temperature switch (2) Electrical heater ----End Issue 10 (2019-01-15) Copyright © Huawei Technologies Co., Ltd.
-
Page 187: A Support Specifications
Please note that to control the welding process and avoid excessive error. Φ = 43 mm appeared in the above figures indicate the inside diameter with the rubber ring. Figure A-1 Figure A-2 show the support specifications. Issue 10 (2019-01-15) Copyright © Huawei Technologies Co., Ltd. - Page 188 NetCol8000-A(050, 100) In-room Air Cooled Smart Cooling Product User Manual A Support Specifications Figure A-1 Support specifications of NetCol8000-A050 (unit: mm) Figure A-2 Support specifications of NetCol8000-A100 (unit: mm) Issue 10 (2019-01-15) Copyright © Huawei Technologies Co., Ltd.
-
Page 189: B Electrical Control Boxes
(15) Transformer TC contactor QC4 (16) Electronic label (17) Voltage jumper (18) Control terminals (19) Surge protection and (20) General power (21) Ground bar PE filtering board Filter circuit breaker QS Issue 10 (2019-01-15) Copyright © Huawei Technologies Co., Ltd. - Page 190 (25) Fan 2 power supply (26) Control terminals (27) Water pump, N wire contactor QC11 transfer terminal of the transformer (28) Ground bar PE (29) Power cable clamp (30) General power circuit breaker QS Issue 10 (2019-01-15) Copyright © Huawei Technologies Co., Ltd.
-
Page 191: C Acronyms And Abbreviations
C Acronyms and Abbreviations Acronyms and Abbreviations Alternating Current Control Area Network Computational Fluid Dynamics Electronic Commutation GPRS General Packet Radio Service Liquid Crystal Display LCD User Interface Thin Film Transistor Positive Temperature Coefficient Issue 10 (2019-01-15) Copyright © Huawei Technologies Co., Ltd.
Need help?
Do you have a question about the NetCol8000-A Series and is the answer not in the manual?
Questions and answers