Table of Contents
Advertisement
Quick Links
Advertisement
Chapters
Table of Contents

Related Manuals for Yamaha PortaTone PSR-8000


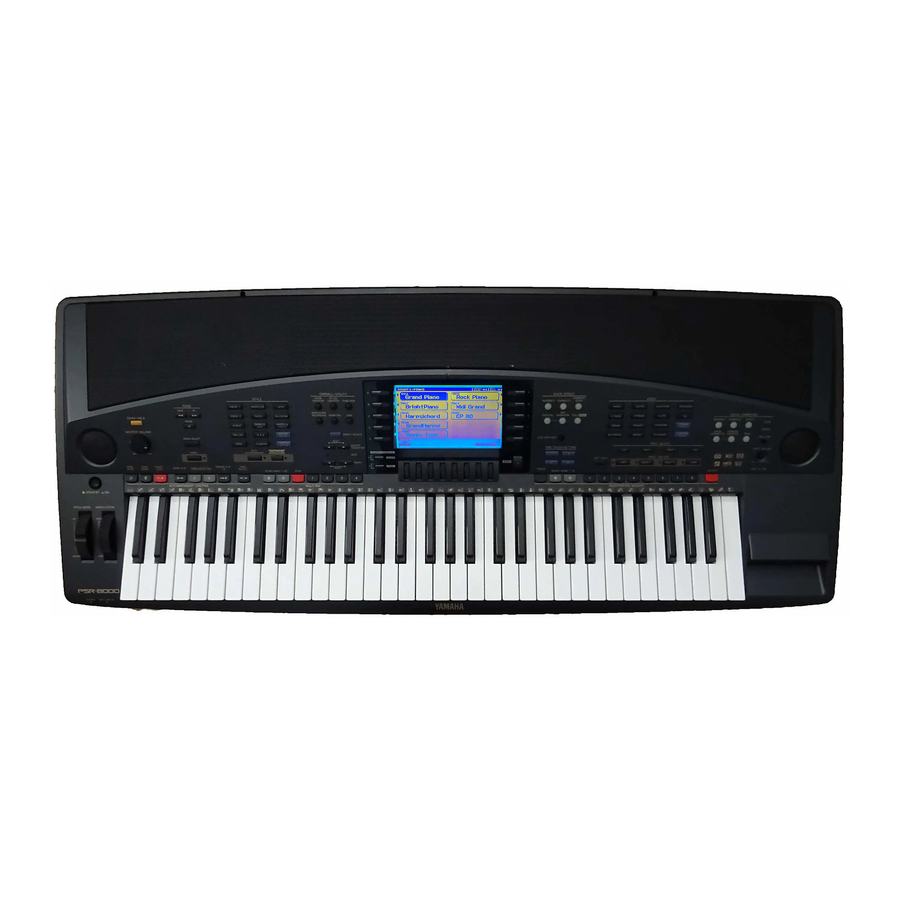
Summary of Contents for Yamaha PortaTone PSR-8000
-
Page 2: Special Message Section
SPECIFICATIONS SUBJECT TO CHANGE: The information contained in this manual is believed to be correct at the time of printing. However, Yamaha reserves the right to change or modify any of the specifications without notice or obligation to update existing units. -
Page 3: Important Safety Instructions
Some of these items are de- signed to be dealer assembled or installed. Please make sure that benches are stable and any optional fixtures (where applicable) are well secured BEFORE using. Benches supplied by Yamaha are designed for seating only. No other uses are recommended. - Page 4 1. Before changing the battery be sure to save any important data to disk by using the SAVE TO DISK function described on page 141. 2. Turn the PSR-8000 power OFF and unplug the power cord from both the AC wall socket and the instrument’s rear panel. Turn the instrument up- side down and rest it on a blanket or other soft surface.
- Page 5 * If SIMM memory, or hard disk fails to work properly, consult the item’s dealer or manufacturer for advice. * Yamaha will not be held responsible for any damage or injury resuting from improper installation. will pick up a layer of magnetic particles from the disks used that will eventually cause read and write errors.
-
Page 6: Packing List
• All other trademarks are the property of their respective holders. The Panel Logos The logos printed on the PSR-8000 panel indicate standards/formats it supports and special features it includes. GM System Level 1 “GM System Level 1” is an addition to the MIDI standard which... -
Page 7: Main Features
Main Features Main Features The PSR-8000 is a sophisticated electronic keyboard which offers a comprehensive range of features for extensive musical versatility and expressive control: a touch-sensitive 61-key keyboard, an outstanding range of voices (including XG voices), top quality auto-accompani- ment with an extensive range of styles, song recording and playback capability, registration memory, and a built-in floppy disk for convenient data storage and retrieval, and more. -
Page 8: Table Of Contents
The 5-language Help Function ... 20 Display Messages ... 21 Name Entry ... 21 Playing the PSR-8000 Before You Begin ... 22 The PSR-8000 Parts & Voices ... 22 Part Poly/Mono Modes & Mono Note Priority ... 22 The XG Voices ... 23 The Organ Flute Voice ... - Page 9 Editing the Vocal Harmony Parameters ... 84 The Vocal Harmony Modes ... 85 Sampling PSR-8000 Waves & Waveforms ... 88 Setting Up for Sampling ... 89 Connecting the Source ... 89 Setting Levels ... 89 Sampling & File Import ... 90 Sampling New Material ...
-
Page 10: Panel Controls
Panel Controls Panel Controls PITCH BEND DOWN PHONES STAND BY/ON Button ... page 17 DEMO/HELP Button ... pages 17, 20 MASTER VOLUME Control ... page 17 SONG Buttons ... page 100 REW, FF, PAUSE, SONG SELECT, SONG STYLE Buttons ... pages 28, 36 8BEAT1, 8BEAT2, 16BEAT, BALLAD, ROCK, DANCEFLOOR, DISCO, SWING &... - Page 11 & VOICE EFFECT HARMONY/ REVERB(1) CHORUS(2) ECHO PIANO DSP(4-6) VARIATION POLY/ E.PIANO ORGAN ACCORDION LCD CONTRAST ONE TOUCH SETTING LEFT HOLD FREEZE REGIST BANK 1~16 REGISTRATION MEMORY LCD dials ... page 19 EXIT Button ... page 20 & VOICE EFFECT Buttons ... page 26 REVERB (1), CHORUS (2), HARMONY/ECHO, DSP (4—6), DSP VARIATION, POLY/MONO LCD CONTRAST Control ...
-
Page 12: Connections & Music Stand
• Turn the INPUT VOLUME control all the way down when connecting or disconnecting a microphone. • Placing a microphone which is connected to the PSR-8000 too close to the PSR-8000 speakers (or those of an external sound system connected to the PSR-8000) can cause feedback. - Page 13 The rear-panel AUX IN L/L+R and R jacks accept input from an external instrument or audio source, or the processed signal returned from an external effect unit fed by the PSR-8000 LOOP SEND jacks, below. The signal received at the AUX IN/ LOOP RETURN jacks is mixed with PSR-8000 sound and delivered via the speaker system.
- Page 14 PSR-8000 (e.g. note and velocity data produced by playing the keyboard). More details on MIDI are provided on pages 132, 177. The PSR-8000 can also be connected directly to a personal computer via the TO HOST connector, described below, with- out the need for a MIDI interface.
-
Page 15: Connecting To An Apple Macintosh Series Computer
• When using the [TO HOST] terminal of the PSR-8000, first turn the power off on both the PSR-8000 and the computer before connecting the cable. After connecting the cable, turn the power of the computer on first, then the PSR-8000. -
Page 16: The Music Stand
Check your software operation manual and if it requires a 31,250 bps. data transfer rate, set the HOST SELECT switch to “PC-1”. • When using the TO HOST terminal to connect to a personal computer using Windows, a Yamaha MIDI driver must be installed in the personal computer. -
Page 17: The Demonstration
The Demonstration The Demonstration To give you an idea of the PSR-8000’s sophisticated capabilities, it is programmed with a number of demonstration sequences which can be played in a number of ways. Switch ON Plug the AC power cord into the AC INLET on the rear panel of the PSR-8000, and a convenient AC outlet, then press the [STANDBY] button to turn the PSR-8000 ON. -
Page 18: Select A Song
The Demonstration Select a Song Press the LCD button corresponding to the category containing of demo song you want to play, then use the same LCD button to select a demo song in that group. You can also use either of the LCD dials under SONG SELECT on the display to select any of the demo songs. -
Page 19: The Psr-8000 Display & Display-Based Controls
The PSR-8000 Display & Display-based Controls The PSR-8000 Display & Display-based Controls The PSR-8000 makes general operation and programming easier than ever with a large backlit LCD display panel and multi-function controls. The 10 LCD (A—J) buttons — five on either side of the display panel — and 8 LCD dials below the display perform the function indicated by the adjacent section of the display. -
Page 20: The [Exit] Button
[FADER] or [FULL] button. Pressing the [EXIT] button causes the mixer controls to disappear. The [EXIT] Button No matter where you are in the PSR-8000 display hierarchy, the [EXIT] button will return you to the next highest level, or to the normal play mode display. -
Page 21: Display Messages
Name Entry A number of PSR-8000 functions allow you to enter a name for, for example, a file you will be saving to disk, a custom voice or style, etc. The name entry procedure is essentially the same in all cases (only the maximum number of characters which can be entered will vary). -
Page 22: Playing The Psr-8000
The PSR-8000 Parts & Voices The PSR-8000 allows you to individually select and play up to four “parts” at the same time in a number of ways. A range of voices can be assigned to each part. -
Page 23: The Xg Voices
The XG Voices Yamaha’s XG format is a major new enhancement to the GM (General MIDI) System Level 1 format. It provides a larger number of voices as well as greater expressive control and a wide range of effects. -
Page 24: Keyboard Percussion And Special Effects
Playing the PSR-8000 Keyboard Percussion and Special Effects When one of the Drum Kit or SFX Kit voices in the [PERCUS- SION] group is selected, you can play 61 different drums and percussion instruments or SFX (special effects) sounds on the keyboard. -
Page 25: Select A Voice
Use the [MASTER VOLUME] control to adjust the overall volume level, and the MIXING CONSOLE MAIN VOLUME LCD dials to set the desired balance between the parts. Playing the PSR-8000 P A R T O N / O F F LEFT RIGHT 1... -
Page 26: Voice Effects
Playing the PSR-8000 The PSR-8000 features a sophisticated multi-processor effect system which can add extraordinary depth and expression to your sound. 7 independent digital signal processing (DSP) blocks are provided for effects, plus the Vocal Harmony processor and 5-band Master EQ. Each DSP block applies to a specific part or portion of the PSR- 8000 sound. -
Page 27: Octave Change
FULL MIXING CONSOLE TUNING display (page 44). The type of modulation applied by the MODULATION wheel is preset for each of the PSR-8000’s preset voices. You can assign your own modulation effects when creating CUS- TOM VOICE (page 51). The MODULATION wheel can be... -
Page 28: Using The Accompaniment Section
Using the Accompaniment Section Using the Accompaniment Section The PSR-8000 has 214 different preset accompaniment “styles” that can be used to provide fully-orchestrated or rhythm-only accompaniment. You can also create your own “custom” and “groove” styles, as described on pages 62 and 76, respec- tively. - Page 29 STYLE] and [GROOVE STYLE] buttons can be created as described on pages 62 and 76, respectively, or loaded from disk. • Styles loaded from the floppy disk provided with the PSR-8000 or optional SFF (Style File Format) disks can also be used as CUSTOM STYLES.
-
Page 30: Auto Accompaniment Fingering Modes
“ritardando” ending — i.e. the tempo gradually slows down during the ending. SYNC STOP Auto Accompaniment Fingering Modes The PSR-8000 AUTO ACCOMPANIMENT feature has six different fingering modes which can be selected via the SPLIT POINT/FINGERING FUNCTION display described on page 123. Operation of each mode is described below. - Page 31 FINGERED 1 The FINGERED 1 mode lets you finger your own chords on the AUTO ACCOMPANIMENT section of the keyboard, while the PSR-8000 supplies appropriately orchestrated rhythm, bass, and chord accompaniment in the selected style. The FINGERED 1 mode will accept the following chord types:...
- Page 32 1 mode the root of the chord is always used as the bass root). FULL KEYBOARD When this advanced auto-accompaniment mode is engaged the PSR-8000 will automatically create appropriate accompani- ment while you play just about anything, anywhere on the keyboard using both hands. You don’t have to worry about specifying the accompaniment chords.
-
Page 33: Auto Accompaniment Start Modes
Start with an introduction followed by the MAIN A or MAIN B variation In addition to two MAIN variations, “A” and “B”, each PSR-8000 style has two intro variations which can be followed by either the MAIN A or MAIN B variation. -
Page 34: The Main A And Main B Sections And Fill-Ins
Whenever you press the MAIN/AUTO FILL [A] or [B] button during playback, the PSR-8000 will generate an appropriate “fill-in” (one of four types: AA, AB, BA, and BB) which will smoothly connect the current section to the selected section —... -
Page 35: Tempo Control
Tempo Control When you select a different style while the accompaniment is not playing, the “default” tempo for that style is also selected, and the tempo is displayed on the display in beats per minute. If the accompaniment is playing, the same tempo is maintained even if you select a different style. -
Page 36: Accompaniment Volume
Using the Accompaniment Section Accompaniment Volume Use the various LCD dials in the MIXING CONSOLE [FADER] ACMP VOLUME display to set the best balance between the corresponding accompaniment parts. The MAIN VOLUME and ACMP VOLUME displays can be used to set the balance between the keyboard and accompaniment sound (use the [FADER] button to toggle between the MAIN VOLUME and ACMP VOLUME displays). -
Page 37: Harmony/Echo
F5: HARMONY/ECHO function page described on page 129. The PSR-8000 Harmony/Echo effect is engaged by pressing the VOICE EFFECT [HARMONY/ECHO] button so that its indicator lights. To turn Harmony/Echo off press the [HAR- MONY/ECHO] button a second time so that the indicator goes out. -
Page 38: One Touch Setting
(C-E-G), then “C” will be played by the R1 voice, “E” by the R2 voice, and “G” by the LEAD voice. One Touch Setting The PSR-8000 One Touch Setting function provides 4 preset “setups” (i.e. sets of panel settings, including voices, effects, etc.) for each of the 214 preset accompaniment styles. You can also create your own One Touch Setting setups for up to 8 styles (4 setups per style). -
Page 39: The Mixing Console
The Mixing Console The Mixing Console A full-screen mixing console which provides access to a wide range of controls for each main and accompaniment part can be selected by pressing the MIXING CONSOLE [FULL] button (the simpler FADER mixing console is described in appropriate sections of this manual). -
Page 40: Volume/Pan/Eq
PART] and [ACMP PART] displays. When the [MAIN PART] display is selected, the controls in this display page affect the PSR-8000’s main parts: SONG, ACMP, M.PAD, LEFT, R1, R2, LEAD, and MIC. When the [ACMP PART] display is selected, the controls in this display page affect the PSR-8000’s AUTO ACCOMPANI-... -
Page 41: Filter
The REVERB controls set the reverb depth for the correspond- ing parts. CHORUS (DSP2) The CHORUS(2) block applies to the overall PSR-8000 sound. The CHORUS controls set the chorus depth for the corresponding parts. Main part display Accompaniment part display... -
Page 42: Dsp3
TYPE or PARAMETER LCD button to switch between these sub-pages. Type Page The TYPE page allows you to assign individual effects to the any of the PSR-8000’s effect (DSP) blocks. EFFECT BLOCK & TYPE This window lists all 8 DSP processors (including Vocal Har- mony) and the effect type currently assigned to each. -
Page 43: Parameter
When set to “insertion” a “part” parameter becomes available, allowing the effect to be applied to a specific part. • See the PSR-8000 EFFECT PARAMETER LIST on page 191 in the appendix for details on the parameters available for each effect, value ranges, etc. The Vocal Harmony effect types and parameters are described in the “Vocal Harmony”... -
Page 44: Tuning
The MASTER TRANSPOSE parameter duplicates the function of the MASTER TRANSPOSE [<] and [>] buttons on the PSR-8000 panel. Use the MASTER TRANSPOSE dial to set overall PSR-8000 transposition in semitone increments over a 24 semitone range. “0” is standard pitch. Adjusting the MAS- TER TRANSPOSE parameter automatically adjusts the SONG TRANSPOSE parameter by the same amount. -
Page 45: Master Eq
QQQQQQQQQQQQQQQQQQ The Mixing Console MASTER EQ The PSR-8000 features a digital 5-band equalizer that can be used to “shape” the overall frequency characteristics of the instrument to create a wide range of tonal variations. Two preset equalizer curves and two programmable “USER” curves are provided. -
Page 46: Registration Memory
Registration Memory Registration Memory In a sophisticated instrument with as many controls and functions as the PSR- 8000, the Registration Memory is a vital feature. It can be used to memorize 128 complete control-panel setups (16 banks, 8 setups each) that you can recall whenever needed simply by pressing a single button. -
Page 47: Recalling The Registered Panel Settings
Recalling the Registered Panel Settings Simply select the appropriate bank using the REGIST BANK 1-16 [–] or [+] button and press the desired REGISTRATION MEMORY button ([1] … [8]) at any time to recall the memorized settings. The memorized settings are actually recalled only when a REGISTRATION button ([1] … [8]) is pressed — selecting a different bank does not change the settings. -
Page 48: Organ Flute Voice Editing
Organ Flute Voice Editing Organ Flute Voice Editing In addition to the many organ voices in the [ORGAN] voice category, the PSR- 8000 has an ORGAN FLUTE voice which can be assigned to the currenty se- lected part and edited by pressing the VOICE [ORGAN FLUTE] button. The main ORGAN FLUTE editing display will appear when the [ORGAN FLUTE] button is pressed. -
Page 49: Volume & Attack
component of the voice. Use the LCD dials to increase or reduce the amount of the corresponding footages to create the desired overall sound. The longer a graphic footage bar, the greater the amount of the corresponding footage added to the sound. VOLUME &... - Page 50 Organ Flute Voice Editing 2: DSP EFFECT The DSP TYPE dials specify the DSP effect type to be applied to the ORGAN FLUTE voice. Normally this will be one of the six available Rotary Speaker effects. If any other type of effect is selected the Rotary SP Speed LCD button in the main ORGAN VOICE editing display will not control rotary speaker speed.
-
Page 51: Custom Voice Creator
ON and a disk containing the appropriate waveform data is loaded, the waveform data for the custom voices will automatically be loaded into the wave RAM memory when the PSR-8000 is turned on. If the AUTO LOAD function is off or the appropriate waveform data is not found when the PSR-8000 is turned on, the corresponding custom voices will automatically be erased. -
Page 52: Edit
Custom Voice Creator The EASY EDIT Mode has the following display pages: EDIT... 52 STORE/CLEAR ... 53 LCD buttons to the right of the display to select the EDIT and STORE/CLEAR display pages. Use the Use the buttons to the left of the display to select the various parameters within each page. The COMPARE LCD button can be used during editing to compare the sound of the original voice with the edited voice. -
Page 53: Vibrato
VIBRATO Use the DEPTH, SPEED and DELAY LCD dials to set up the vibrato effect. DELAY produces a delay between the time a key is pressed and the beginning of the vibrato effect. “0” is the preset value for all parameters. “+” settings increase while “–” settings decrease the range of the effect. -
Page 54: Clear Custom Voice
ELEMENT SELECTION PSR-8000 voice can have up to four “elements”. An element is a “layer” of sound which can have an independent waveform, envelope generator settings, and other parameters. When editing in the E1:WAVEFORM, E2:EG, E3:FILTER, or E4:LFO pages you can select the element to be edited, set the maximum number of elements to be used by the voice, and mute individual elements via the ELEMENT page accessed by the upper right LCD button (“... -
Page 55: Voice
SENS LCD dial adjust initial touch sensitivity. SCALE CURVE Use the SCALE CURVE LCD dials to select the desired scale (pitch) curve for the PSR-8000 keyboard: FLAT, PIANO 1, or PIANO 2. MODULATION The FILTER and AMPLITUDE LCD dials set the amount of filter and volume control applied via the PSR-8000 MODULA- TION wheel, respectively. -
Page 56: E1:Waveform
Custom Voice Creator E1:WAVEFORM WAVEFORM (INSTRUMENT for the Drum Kits) Use the CATEGORY, VOICE, and WAVEFORM LCD dials to select a waveform for the custom voice: the raw sound on which the voice is based. Waveforms created by the SAM- PLING feature (page 88) are also available for selection in the “SAMPLING”... -
Page 57: E2:Eg
E2:EG • The RESET LCD button resets the currently selected EG parameters to their most basic settings. AMP RATE (Amplitude Envelope Rate) These parameters set the rate of output level variation. Higher values produce faster variation. ATTACK Sets the rate of variation from key-on to the maximum attack level. -
Page 58: Pitch Rate (Pitch Envelope Rate)
Custom Voice Creator PITCH RATE (Pitch Envelope Rate) These parameters set the rate of pitch variation. Higher values produce faster variation. DECAY1, Set the rate of variation between the initial pitch envelope level and the levels set by the PITCH DECAY2, LEVEL DECAY1, DECAY2, and DECAY3 param- DECAY3... -
Page 59: E3:Filter
E3:FILTER • The RESET LCD button resets the currently selected FILTER parameters so that no filter effect is applied. FILTER1 & FILTER2 These parameters allow you to specify two separate touch- sensitive (dynamic) filter types. The available types are LPF (Low Pass Filters —... -
Page 60: Delay (Delay Vibrato)
Custom Voice Creator DELAY (Delay Vibrato) Delay Vibrato is a vibrato effect based on LFO modulation which has a variable delay between the time a key is played and the beginning of the vibrato effect. TIME Sets the delay between key-on and the beginning of LFO PMOD (pitch) modulation. No delay is produced when TIME is set to its minimum value. -
Page 61: Store/Clear
STORE/CLEAR NAME An original name can be entered for each custom voice. Name entry is described on page 21. STORE Stores the edited custom voice data in the specified custom voice memory location. When this function is selected the size of the current voice and the remaining memory capacity avail- able for voice storage are displayed to the right of the display. -
Page 62: The Custom Style Creator
The Custom Style Creator The STYLE CREATOR mode allows you to create original accompaniment styles that can be later recalled and played at any time, just like the presets. PSR-8000 accompaniment styles comply with Yamaha SFF (Style File Format) specifica- tions. - Page 63 Select the section you want to record, and change the pattern length, time signature, & tempo, as required. Perform these operations in the BASIC parameter display (page 66). Press the SETTING LCD button to access the SECTION, PATTERN LENGTH, BEAT and TEMPO param- eters if the PART RECORD parameters are showing.
- Page 64 The Custom Style Creator Record the selected part. You can now add new notes to the selected part by playing the keyboard at the appropriate timing. The default chord for data entry is C major 7. A different chord can be specified as required via the PARA.
- Page 65 Source Chord Type List The source chord types which can be used for Custom Style recording are listed below. A “C” on a key indicates a chord/scale note, while an “S” on a key indicates a scale note. [Maj] [Maj6] C S C C S C [M7(9)]...
-
Page 66: Custom Style Creator Parameters
The Custom Style Creator CUSTOM STYLE CREATOR Parameters The CUSTOM STYLE CREATOR has the following display pages: BASIC ... 66 SETUP ... 67 EDIT... 68 STORE/CLEAR ... 70 PARAMETER EDIT ... 71 These pages are selected via the in each display page can be accessed via the via the appropriately labeled or positioned LCD dials. -
Page 67: Part Copy
cleared. If any data remains in any section “All sections must be cleared to set beat. Clear all sections?” will appear. A new time signature can be selected after pressing the YES LCD button. Use the TEMPO LCD dials to set the default tempo for the new style. -
Page 68: Setup Copy
The Custom Style Creator SETUP COPY Copies all SETUP parameter settings (VOICE and FULL MIX- ING CONSOLE ACMP PART settings, etc.) from the SOURCE PART in the currently selected section to the specified DESTI- NATION SECTION and PART. The SOURCE PART LCD dials select ALL to copy from all parts in the currently selected section to all corresponding parts in the destination section, or CURRENT to copy from the current record part in the currently selected section to the... -
Page 69: Velocity Change
VELOCITY CHANGE Boosts or cuts the velocity of all notes in the specified part by the specified percentage. Use the BOOST/CUT LCD dials to specify the percentage by which you want the note velocities to be boosted or cut. MEASURE COPY This function allows data to be copied from one measure or group of measures to another location within the same part. -
Page 70: Remove Duplicate Notes
21. STORE Stores the recorded custom accompaniment data for use with the PSR-8000 accompaniment feature. When this function is selected the size of the current style and the remaining memory capacity available for style storage are displayed to the right of the display. -
Page 71: Parameter Edit
The AUTO ACCOMPANIMENT feature works by automatically re-harmonizing the “source pattern” to match the specified chords. This is done on the basis of NTR (Note Transposition Rule) and NTT (Note Transposition Table) settings that, in the PSR-8000, can be individually set for each part and each section. PART/SOURCE ROOT/SOURCE CHORD These settings determine the original key of the source pattern (i.e. -
Page 72: High Key/Note Limit
The Custom Style Creator MELODIC This table lowers the third scale degree by a semitone when changing from a major to a minor chord, MINOR or raises the minor third scale degree a semitone when changing from a minor to a major chord. Other notes are not changed. -
Page 73: Custom Style Recording Via An External Sequence Recorder
Custom Style Recording via an External Sequence Recorder It is possible to create custom styles for the PSR-8000 using an external sequencer (or personal computer with sequencing software) rather than the PSR-8000’s STYLE CREATOR function. Connections Connect the PSR-8000 MIDI OUT to the sequencer MIDI IN, and the sequencer MIDI OUT to the PSR-8000 MIDI IN. - Page 74 The Custom Style Creator A template which is handy for creating style data is included on the supplied floppy disk (TEMPLATE.MID). The Initial Setup area from 1|2|000 through 1|4|479 is used for voice and effect settings. Do not include note event data.
-
Page 75: Saving And Loading The Sequence Data
“.STY” suffix. Save the file using Standard MIDI File Format 0. Refining the Style Once the new style has been loaded, use the PSR-8000 STYLE CREATOR to refine it as required. Set up the NOTE LIMIT, NTT, and NTR parameters to ensure that the style plays properly with the widest possible range of chords. -
Page 76: The Groove Style Creator
The Groove Style Creator The Groove Style Creator The GROOVE STYLE CREATOR mode allows you to modify the timing, velocity, and other parameters of the preset styles to create original “groove” styles that can be later recalled and played at any time, just like the presets. Up to 20 groove styles can be maintained in internal memory at the same time, and any number can be saved to disk for later reloading and use. -
Page 77: Groove Style Creator Parameters
Start playback. Press the [START/STOP] button to start playback of the selected style (be sure to use AUTO ACCOMPANIMENT and play a chord in the auto accompaniment section of the keyboard in order to hear all parts of the style). The style will loop (play) continuously. -
Page 78: Setup
The Groove Style Creator SETUP PART ON/OFF/TEMPO Turns the specified part in the specified section ON or OFF. Use the SECTION LCD dials to select the section: MAIN A, MAIN B, INTRO A, INTRO B, FILL IN AA, FILL IN BB, FILL IN AB, FILL IN BA, ENDING A and ENDING B. -
Page 79: Groove
GROOVE GROOVE The parameters in this display are used to change the timing of the style to create the required “groove”. Use the SECTION LCD dials to select the section you want to apply groove timing to. The BEAT dial specifies the beats to which groove timing is to be applied (i.e. -
Page 80: Dynamics
The Groove Style Creator DYNAMICS DYNAMICS The parameters in this display are used to change the velocity of certain notes to complement the required “groove” feel. Use the SECTION LCD dials to select the section contain- ing the part you want to apply groove dynamics to, and the PART dial to select the specific part. -
Page 81: Store
STORE Stores the recorded groove style data for use with the PSR- 8000 accompaniment feature. When this function is selected the size of the current groove style (groove data only) and the remaining memory capacity available for style storage are displayed to the right of the display. -
Page 82: Drum Exchange
The Groove Style Creator DRUM EXCHANGE DRUM EXCHANGE Changes the specified original drum instrument in the RHY1 or RHY2 part to the specified exchange instrument. Use the PART dial to select the RHY1 or RHY2 part for drum exchange. This applies to all sections. The ORIGINAL INSTRUMENT dials specify the drum instrument you want to change, and the EXCHANGE to dials specify the drum instrument that will be used in place of the... -
Page 83: Vocal Harmony
• Turn the INPUT VOLUME control all the way down when connecting or disconnecting a microphone. • Placing a microphone which is connected to the PSR-8000 too close to the PSR-8000 speakers (or those of an external sound system con- nected to the PSR-8000) can cause feedback. -
Page 84: Selecting A Vocal Harmony Type
The vocal harmony effect will be added to your voice. Depending on the selected VOCAL HARMONY type, you may also have to use the AUTO ACCOMPANIMENT feature and/or play the PSR-8000 keyboard to produce appropriate harmony (see “The Vocal Harmony Modes”, page 85). -
Page 85: The Vocal Harmony Modes
When “ON” the lead vocal sound “plays” the PSR-8000 tone generator system (dynamics, however, are not applied). Pitch to Note Part Determines which of the PSR-8000 parts will be controlled by the lead vocal when the Pitch to Note parameter is “ON”. Harmony Reverb Sets the depth of the reverb effect for the harmony sound. - Page 86 Unison 3Unison Unison+OctaveAbove Unison+OctaveBelow Vocoder When a Vocoder Type is selected, the pitch of the harmony notes is directly controlled via the PSR-8000 keyboard or a Vocal Harmony Track included in a song. “VocoderType” Parameter Settings Type Name abbrevi- ation...
- Page 87 • Received MIDI note data can also be used to specify the Vocoder mode harmony notes when the MIDI receive mode is set to “VOCAL HARMONY” (page 136). The volume, pan, detune, modulation, and pitch bend of any Vocal Harmony type can be adjusted via control change or pitch bend data.
-
Page 88: Sampling
• No MIDI or TO HOST transmission or reception occurs in the SAMPLING mode. PSR-8000 Waves & Waveforms The terms “wave” and “waveform” have distinct meanings in PSR-8000 sampling terminology, as follows: WAVE A “wave” is the raw audio data created whenever you sample a new sound or import a WAV or AIFF format wave file. -
Page 89: Setting Up For Sampling
• Turn the INPUT VOLUME control all the way down when connecting or disconnecting a microphone. • Placing a microphone which is connected to the PSR-8000 too close to the PSR-8000 speakers (or those of an external sound system connected to the PSR-8000) can cause feedback. Adjust the microphone position, and the MIXING CONSOLE MIC volume level or MASTER VOLUME control level if necessary, so that feedback does not occur. -
Page 90: Sampling & File Import
• The PSR-8000 records at a sample rate of 44.1 kHz. • Although the wave memory of the PSR-8000 can be expanded to 33 megabytes (page 152), the maximum size of a single sample recording is 32 megabytes. - Page 91 To import previously-saved waveform files or standard WAV or AIFF format files from disk, insert the appropriate disk into the PSR-8000 floppy disk drive (not necessary if the file to be loaded is on the optional internal hard disk), then press the FILE IMPORT LCD button in the SAMPLING/FILE IMPORT display.
-
Page 92: Name/Clear
Sampling Monitor Selection Use the LCD button to switch between the currently selected wave and the currently selected panel voice. The LCD button is only available when at least one wave is in the sample memory. Defragmenting the Sample Memory If you’ve been sampling for a while, and/or loading and manipu- lating a number of waves, the wave RAM memory can become “fragmented”... -
Page 93: Wave Edit
The name of the selected wave and waveform appear at the top of the display. 2: RESAMPLING The PSR-8000 originally records waves at 44.1 kHz. WAV and AIFF files are also imported as 44.1 kHz waves. The RESAMPLING function lets you reduce the sampling fre- quency of waves, thus reducing the amount of memory they occupy. - Page 94 Sampling PRE LISTEN LCD button to hear how the resampled wave will sound before actually resampling the wave. Press the EX- ECUTE LCD button to actually resample the selected wave. • Resampling can cause the loop points (see LOOP POINT, below) to shift, resulting unwanted noise.
- Page 95 4: NORMALIZE This function increases the overall level of the selected wave to ensure that it uses the full range of digital values. Press the EXECUTE LCD button to normalize the selected wave. No change will occur if the selected wave already uses the full range of digital values.
-
Page 96: Name/Clear/Disk
FILE LIST LCD dials to select the target file and then pressing the OVERWRITE LCD button. • Since this function saves the wave in standard WAV format, param- eters unique to the PSR-8000 are not saved. 4: DELETE Use this function to delete unwanted wave or waveform files from disk. -
Page 97: Waveform Edit
Waveform Edit The WAVEFORM EDIT display is accessible from the SAMPLING MENU when at least one wave is in the wave memory. The WAVEFORM EDIT mode includes the following functions: EDIT 1: SELECT WAVEFORM ... 97 2: ADD WAVE ... 97 3: MOVE START NOTE/VOLUME/DELETE WAVE ... -
Page 98: Name/Clear/Disk
Sampling added waveform will play from C3 up. Press the ADD LCD button to actually add the selected wave. • The same wave cannot be added for use in multiple keyboard ranges. • When the ADD WAVE function is selected the switches between the source wave, destination wave, and panel voice. -
Page 99: Store As Custom Voice
EXECUTE LCD button. • The corresponding waveform must also be saved to disk in order to use the stored custom voice the next time the PSR-8000 is turned on. If the corresponding waveform has not been saved to disk, an alert will appear following the SAVE AS CUSTOM VOICE operation. -
Page 100: Song Playback
Song Playback Song Playback The PSR-8000 SONG mode allows song data to be played back from a floppy disk or the optional hard disk. The song file types which can be played by the PSR-8000 are: songs recorded on the PSR-8000, Yamaha DOC files, PianoSoft type files and GM/XG/XF song (SMF formats 0 and 1) files. -
Page 101: Enter Next Song
Select a play mode. Use the MODE LCD dials to select a play mode: SINGLE Plays only the selected “CURRENT” song, or the “CURRENT” and “NEXT” songs if a “NEXT” song has been entered (see below). Plays all songs in the SONG SELECT display song list in order, beginning with the currently selected song. -
Page 102: Pause, Fast Forward & Reverse
SONG mode display will become available. Press the LYRIC LCD button to display the song lyrics. • The PSR-8000 is compatible with XF and most SMF song files containing Lyric Meta-Event data. • If an XF song which includes chord data is selected, the chords will be displayed below the song name in the main display and in the lyrics display. -
Page 103: Setting The Song Playback Order
The number of volume parameters in the TRACK VOLUME display will depend on the type of song being played. If an original song recorded on the PSR-8000 using the QUICK RECORD mode is being played, two volume part parameters will be available: MANUAL and ACMP. If an original song... -
Page 104: Full
16 tracks will be available: TR1 through TR16 (track groups TR1—TR8 and TR9—TR16 will be selected in se- quence when the [FADER] button is pressed). If a Yamaha DOC song is being played use the RHY, BASS, ORCH., LEFT, and RIGHT part LCD dials to set the volume of the corresponding tracks. -
Page 105: Song Recording
• Songs recorded using the XG category voices are XG compatible. Insert a recordable disk. Insert a properly formatted disk in the PSR-8000 disk drive. This step is not necessary if you will be recording to an internal hard disk (optional). -
Page 106: Procedure: Quick Record
Song Recording Select a record mode. To record a new song, press the QUICK RECORD NEW SONG or MULTI TRACK RECORD NEW SONG button to select the corresponding record mode. If you want to add to an existing song, select the QUICK RECORD CURRENT SONG or MULTI TRACK RECORD CURRENT SONG option. -
Page 107: Start Recording
ING CONSOLE EFFECT TYPE, TUNING, and MASTER EQ displays). In the FADER MIXING CONSOLE both the VOLUME and PART SWITCH displays are available. In the FULL MIXING CONSOLE the VOLUME/PAN/ EQ, FILTER, EFFECT DEPTH, EFFECT TYPE, and TUNING displays include recordable parameters. •... -
Page 108: The Track Indicators
Song Recording THE TRACK INDICATORS The track indicators above the track mode selectors indicate which tracks contain data, which are set to REC, and which are muted, as shown to the right. TRACK DELETE When the DEL. LCD button is pressed DELETE will appear for tracks which contain data. -
Page 109: Procedure: Chord Step Recording
Procedure: The CHORD STEP recording feature makes it possible to record accompaniment chord changes one at a time with precise timing. Since the changes don’t have to be entered in real time, it is easy to create even complex accompaniments before recording the melody. Select the CHORD STEP display via the mode. -
Page 110: Deleting Events
Song Recording Repeat until done. Repeat steps 1 through 3, above, until the required number of chord changes and other accompaniment events have been entered. The end of the sequence is automatically set at the end of an ENDING pattern, FADE OUT, one measure after the last measure containing data, or the insert point of an END event (available at the bottom of the CHORD TYPE list). -
Page 111: Quick Record Mode Edit Functions111
Quick Record Mode Edit Functions The QUICK RECORD mode EDIT display includes the RENAME SONG and SONG DELETE functions. Select the EDIT display via the of the display. RENAME SONG This function allows you to enter an original name for the current song. - Page 112 Note data recorded in this way only affects the VOCAL HARMONY sound, and does not actually play the PSR-8000 voices. The recorded volume, pan, detune, modulation, and pitch bend data will also affect the harmony notes for any VOCAL HARMONY type during playback.
-
Page 113: The Track Indicators
rameters. In the MULTI TRACK RECORD mode the initial values for the independent tracks can also be changed as required after recording via the SET UP display (page 118). Use the metronome-icon LCD button to turn the metronome ON if you want to record while monitoring the metronome sound (the metronome sound is not recorded), or OFF if you don’t want to hear the metronome while recording. -
Page 114: Track Delete
RECORDING MENU display. Procedure: In addition to the normal recording procedure described above, the PSR-8000 also has a REPLACE record mode which allows normal recording to be carried out from a specified measure, and a PUNCH IN record mode which allows only a section of a recorded track to be re-recorded without having to redo the entire track. - Page 115 when the first key is played on the keyboard. When FOOT SW 1 or FOOT SW 2 is selected recording will begin when a footswitch connected to the corresponding rear-panel FOOT SWITCH jack is pressed. When AUTO SET is selected, the punch-in and punch-out measures are specified by the IN and OUT LCD dials (i.e. recording begins automatically at the IN measure and ends at the OUT measure).
-
Page 116: Multi Track Record Mode Edit Functions
Song Recording Multi Track Record Mode Edit Functions The MULTI TRACK RECORD mode EDIT display includes the following functions: RENAME SONG ... 116 QUANTIZE ... 116 TRACK MIX ... 117 NOTE SHIFT ... 117 SONG DELETE ... 117 Select the EDIT display via the to the left of the display to select the desired function. -
Page 117: Track Mix
TRACK MIX This function allows data from two tracks can be mixed and the results placed in a different track , or data to be copied from one track to another. Use the SOURCE1 and SOURCE2 LCD dials to specify the tracks to be mixed, and the DESTINATION LCD dials to select the track into which the results will be placed. -
Page 118: Multi Track Record Set Up
Song Recording Multi Track Record Set Up The MULTI TRACK RECORD mode SET UP display includes the VOICE function, and other parameters can be set up as required via the MIXING CONSOLE displays. Select the SET UP display via the VOICE This function can be used to change the voices assigned to any of the current song’s tracks. -
Page 119: The Multi Pads
The Multi Pads The Multi Pads The PSR-8000 features 4 “MULTI PADs” that can be used to record and play back short sequences of notes and chords. The multi pads can be used to add phrases and sound effects as you play, they can be used to supplement the... -
Page 120: Select A Style
The Multi Pads Select a bank and pad. Make sure the RECORDING/CLEAR display page RECORD- ING function is selected. Use the BANK and PAD SELECT LCD dials to select the bank/pad you want to record (only banks 51 through 60 are recordable). You can also use the panel M.PAD BANK [–] and [+] buttons to select the desired bank, and the MULTI PAD buttons —... -
Page 121: Multi Pad Name
MULTI PAD NAME The MULTI PAD RECORD RECORDING/CLEAR display includes NAME parameters which can be used to enter names for any of the user MULTI PAD banks (51 through 60). Enter the name as described on page 21. MULTI PAD CLEAR While in the MULTI PAD RECORD RECORDING/CLEAR display press the LCD button to the left of the display to... -
Page 122: The Psr-8000 "Functions
The PSR-8000 “Functions” The PSR-8000 “Functions” The PSR-8000 “FUNCTION” mode includes 9 groups of functions that access a number of parameters related to overall PSR-8000 operation. Here’s a list of the functions and the manual page numbers on which they are described in detail. -
Page 123: F1: Master Tune/Scale
Both master tuning and Arabic scale tuning functions are included in the F1 function group. MASTER TUNE Tunes the overall pitch of the PSR-8000 referenced to the A3 key from 414.6 Hz to 466.8 Hz. A3 = 440 Hz is standard “concert”... -
Page 124: Fingering
F3: CONTROLLER The F3 function group includes a range of functions that affect how the PSR-8000 responds to control via a foot controller plugged into the rear-panel FOOT PEDAL VOLUME jack, footswitches plugged into the rear-panel FOOT PEDAL SWITCH jacks, the MODULATION wheel, initial keyboard touch response, and aftertouch response. - Page 125 While the accompaniment is stopped, or during the SYNCHRO START mode before the accom- paniment is started, the footswitch can be used to start the accompaniment at any desired tempo (within the PSR-8000’s 32 to 280 beats per minute range) by simply tapping on the switch at the required tempo.
-
Page 126: Panel Controller
The PSR-8000 “Functions” PANEL CONTROLLER MODULATION WHEEL Determines to which of the PSR-8000 voices the MODU- LATION wheel will apply. Use the LEFT, R1, R2, and LEAD LCD dials to turn MODULATION wheel control for the corresponding parts ON or OFF as required. -
Page 127: F4: Registration/One Touch Setting/Voice Set
CUSTOM OTS setup. The DELETE LCD button deletes the selected CUSTOM OTS setup. When a CUSTOM OTS setup is deleted the original preset setup is restored. LCD dials can be used to The PSR-8000 “Functions”... -
Page 128: Voice Set
The PSR-8000 “Functions” The OVERWRITE LCD button can be used to overwrite existing custom setup data when this display appears after the [MEMORY] button and a ONE TOUCH SETTING button are pressed simultaneously to create a new setup and the number of customizable setups is exceeded (page 38). -
Page 129: F5: Harmony/Echo
• Changing the VOLUME setting may have no effect with some voices. F6: CUSTOMIZE LIST This function allows you to customize the PSR-8000 VOICE and STYLE list displays within each category for convenient access to the voices and styles you use the most. -
Page 130: F7: Talk Setting
The PSR-8000 “Functions” list category. The PAGE and USER LCD dials specify the voice or style to be exchanged with that selected by the PRESET2 LCD dial in the next step. The PRESET2 LCD dials specify the voice or style to be exchanged with that specified by the PAGE and USER LCD dials. -
Page 131: F8: Utility
OFF. • The data backed up (retained in memory even when the power is turned off) by the PSR-8000 are listed on page 171. When memory backup is turned OFF, the initial factory settings are automatically recalled whenever the power is turned on. -
Page 132: F9: Midi
“systems” of MIDI instruments and equipment that offer far greater versatility and control than is available with isolated instruments. The PSR-8000 offers a range of MIDI functions that allow it to be used in even sophisticated MIDI systems. - Page 133 Enter a name for the template via the NAME LCD dials as described on page 21. Press the EXECUTE LCD button and then the OK LCD button to actually store the template. Tx STORE display The PSR-8000 “Functions” Rx RECALL display Rx STORE display...
-
Page 134: System
Local con- trol can be turned off, however, so that the PSR-8000 does not play the specified voices, but the appropriate MIDI information is still transmitted via the MIDI OUT connector. -
Page 135: Transmit
ON or OFF. TRANSMIT This display page allows you to specify which PSR-8000 voices and parts will be transmitted via which MIDI channels (there are 16 MIDI channels), and to specify which types of data will be transmitted for each channel. -
Page 136: Receive
Turns transmission of keyboard aftertouch data on or off. (After-touch) RECEIVE This display page allows you to specify the MIDI receive mode for each PSR-8000 MIDI channels, and to specify which types of data will be received via each channel. RECEIVE MONITOR... - Page 137 LEFT The LEFT part is controlled by the MIDI data received on the corresponding channel. KEYBOARD MIDI note data received by the PSR-8000 plays the corresponding notes in the same way as if they were played on the keyboard. CHORD The received notes are used for chord detection for all accompaniment parts other than BASS.
-
Page 138: Panel Control
The PSR-8000 “Functions” PANEL CONTROL The parameters in this display page assign specific PSR-8000 panel controls to notes. The assigned notes then control the corresponding panel control operations when received via a MIDI channel which is set to the PANEL CONTROL receive mode in the RECEIVE display, above. -
Page 139: Disk Operations
The PSR-8000 [DISK] button accesses a range of functions that are used for storage and retrieval of floppy disk data. The PSR-8000 can also be fitted with an optional internal hard disk for massive on-line storage capacity. See page 156 for details on hard disk installation. -
Page 140: Exiting
LOAD FROM DISK Loads the specified file from a floppy disk inserted into the PSR-8000 disk drive, or the optional hard disk. Use the FILE LIST LCD dials to select the file to load. The size of the file appears to the right of the file name in kilobytes (approximate). -
Page 141: Save To Disk
LIST display before executing). SAVE TO DISK Saves the data listed below to a floppy disk inserted into the PSR-8000 disk drive, or to the optional hard disk. To overwrite the data in an existing file, use FILE LIST LCD dials to select the file to which you want to save the data. - Page 142 Disk Operations SETUP All setup data — see list on page 171. EFFECT DATA All “User Set” effect data — page 43. REGISTRATION BANK LCD dials turn the individual banks within the selected group ON or OFF. GROOVE STYLE The LCD dials turn the individual groove style within the selected group ON or OFF.
-
Page 143: Copy File/Fd
It is also possible to make complete copies of floppy disks. A perfect way to make backup copies of important files and disks. • Custom style files created on the PSR-8000 cannot be copied using the style file copy function. Copying Files Use the COPY LCD button to select the type of file to be copied. -
Page 144: Copying Floppy Disks
Disk Operations Copying Floppy Disks To make a complete backup copy of a floppy disk, use the COPY LCD button to select disk copy, insert the disk to be copied, and press the EXECUTE LCD button. After responding “YES” to the confirmation display, the number of disk ex- changes needed will appear on the display. -
Page 145: Rename File/Song
RENAME FILE/SONG Allows the name of the specified user-recorded song or user file to be changed as required. Press the SONG LCD button if the SONG LIST is not showing in order to rename a song file, or the USER FILE LCD button if the USER FILE LIST is not showing in order to rename a user file. -
Page 146: Format Fd
EXECUTE LCD button to actually begin the format opera- tion. • The PSR-8000 uses only 3.5" 2DD or 2HD type floppy disks. • Formatting a disk completely erases all data on the disk, so be sure that the disk you’re formatting does not contain important data! -
Page 147: Format Hard Disk
FORMAT HARD DISK To format the hard disk press the EXECUTE button. • Formats an internal hard disk for use with the PSR-8000. Any previous data on the disk will be completely erased by the format operation. CHECK HARD DISK Performs a check on the internal hard disk. -
Page 148: Troubleshooting
F4 VOICE SET parameters are turned on (page 128). This is normal and is a result of the PSR-8000’s sampling system. Some voices have a pitch limit which, when reached, causes this type of pitch shift. This is normal. - Page 149 Symptom The displayed disk free area value does not coincide with the actual value. Disk save operations — particularly when saving wave/waveform data to floppy disk — take a long time. In the SAMPLING WAVEFORM EDIT mode, added waves don’t sound. Appropriate harmony notes are not pro- duced by the VOCAL HARMONY feature.
-
Page 150: Index
Index Index Accompaniment volume ... 36 Accompaniment, starting ... 33 Add wave, Sampling ... 97 After touch ... 126 Custom voice ... 55 Audio sampling library contents ... 200 Auto accompaniment ... 28 Auto load ... 131 Auto trigger level, Sampling ... 91 Aux in jacks ... - Page 151 Multi track record mode editing, Song ... 116 Multi track record, Song ... 111 Music stand ... 16 NTR & NTT ... 71 Name entry ... 21 Normalize, Sampling ... 95 Note limit Custom style ... 72 Custom voice ... 56 Note shift, Song record ...
-
Page 152: Installing Options
4, 8, or 16 megabytes x 2. • Install SIMM memory at your own risk. Yamaha will not be held responsible for any damage or injury resulting from improper installation. - Page 153 Remove the six screws from the SIMM cover in the center of the instrument’s bottom panel, and remove the cover. Do not remove the circuit board in front of the SIMM slot (the system memory is on this board). Insert the SIMMs in the SIMM slots as described below. WARNING Install the SIMM modules carefully as per the procedure outlined below (steps 3-1 through 3-3).
- Page 154 • Slot protrusion -2 Install the first SIMM in the REAR SLOT (the slot closest to the PSR-8000 rear panel), inserting it at an angle as shown in the illustration. Make sure that the parts at locations A, B, and C are properly aligned.
-
Page 155: Removing Simms
SIMM module. Replace the SIMM cover and attach with the six screws. Install the backup batteries, set the PSR-8000 right-side up, and connect the power cord to the rear-panel AC INLET jack and an AC outlet. -
Page 156: Optional Hard Disk Installation
Toshiba MK1003MAV Fujitsu M2724TAM • The maximum effective use of any hard disk used with the PSR-8000 will be 780 megabytes, even if the hard disk itself has higher capacity. Please note that these recommendations may be changed at a later date. Ask your nearest Yamaha representative or an authorized distributor listed at the end of this owner’s... - Page 157 • The label side of the hard disk unit should face down. Pull the connector out from the hard disk recess, and connect it to the hard disk unit as shown in the illustration. • Four of the pins on the hard disk unit are not used. Refer to the illustration carefully to ensure proper connection.
- Page 158 Loose screws inside the instrument can cause improper operation or serious damage. If you are unable to retrieve a dropped screw, consult your Yamaha dealer for advice. Replace the hard disk cover, and attach with the four black screws removed in step C.
-
Page 159: Voice List
Voice List Category Voice Names Preset Preset 1 Order 2 Order Piano Grand Piano BrightPiano Harpsichord GrandHarpsi Honky Tonk Rock Piano Midi Grand CP 80 E.Piano Galaxy EP Stage EP New Tines Funk EP DX Modern Vintage EP Modern EP Tremolo EP Hyper Tines Clavi... - Page 160 Voice List Category Voice Names Preset Preset 1 Order 2 Order Analog Strs Soft Violin Viola Cello Contrabass Harp Str.Quartet MarcatoStrs PizzStrings Orch.Hit Syn Strings Hackbrett Fiddle Banjo Sitar Koto Shamisen Trumpet Sweet Trump SoftTrumpet JazzTrumpet Muted Trump SoloTrumpet Air Trumpet Flugel Horn Trombone Solo Tromb...
- Page 161 Category Voice Names Preset Preset 1 Order 2 Order Synthesizer Fire Wire Analogon Adrenaline Vintage Ld Vinylead Fargo Wire Lead Portatone Blaster Synchronize Big Lead Impact Funky Lead Square Lead Stardust Saw.Lead Aero Lead Tiny Lead Mini Lead Rhythmatic Synth Flute Sub Aqua Warp Meta Wood...
- Page 162 Voice List Category Voice Names Preset Preset 1 Order 2 Order Cimbalom Santur DrawOrgn DetDrwOr 60sDrOr1 60sDrOr2 70sDrOr1 DrawOrg2 60sDrOr3 EvenBar 16+2’2/3 Organ Ba 70sDrOr2 CheezOrg DrawOrg3 PercOrgn 70sPcOr1 DetPrcOr LiteOrg PercOrg2 RockOrgn RotaryOr SloRotar FstRotar ChrchOrg ChurOrg3 ChurOrg2 NotreDam OrgFlute TrmOrgFl ReedOrgn...
- Page 163 Category Voice Names Preset Preset 1 Order 2 Order Trem.Str SlowTrStr Susp Str Pizz.Str Harp YangChin Timpani Strings1 S.Strngs SlowStr ArcoStr 60sStrng Orchestr Orchstr2 TremOrch VeloStr Strings2 S.SlwStr LegatoSt Warm Str Kingdom 70s Str Str Ens3 Syn.Str1 ResoStr Syn Str4 SS Str Syn.Str2 ChoirAah...
- Page 164 Voice List Category Voice Names Preset Preset 1 Order 2 Order CaliopLd Pure Pad Chiff Ld Rubby CharanLd DistLead WireLead Voice Ld SynthAah VoxLead Fifth Ld Big Five Bass &Ld Big&Low Fat&Prky SoftWurl NewAgePd Fantasy2 Warm Pad ThickPad Soft Pad SinePad Horn Pad RotarStr...
- Page 165 Category Voice Names Preset Preset 1 Order 2 Order Kanoon Kalimba Bagpipe Fiddle Shanai Shanai2 Pungi Hichriki TnklBell Bonang Gender Gamelan S.Gamlan Rama Cym AsianBel Agogo SteelDrm GlasPerc ThaiBell WoodBlok Castanet TaikoDrm Gr.Cassa MelodTom Mel Tom2 Real Tom Rock Tom Syn.Drum Ana Tom ElecPerc...
-
Page 166: Keyboard Drum Assignments
Keyboard Drum Assignments Bank Select MSB Bank Select LSB Program Change# (0-127) MIDI Keyboard Key Alternate Standard Kit 1 Note# Note Note Group C# -1 (C# 0) Surdo Mute D -1 (D 0) Surdo Open D# -1 (D# 0) Hi Q E -1 (E 0) Whip Slap... - Page 167 Bank Select MSB Bank Select LSB Program Change# (0-127) MIDI Keyboard Key Alternate Dance Kit Note# Note Note Group C# -1 (C# 0) <—— D -1 (D 0) <—— D# -1 (D# 0) <—— E -1 (E 0) <—— F -1 (F 0) <——...
-
Page 168: Style List
Style List Category Preset Preset Name 1 Order 2 Order 8 BEAT 1 8 Beat 1 8 Beat 2 8 Beat 3 8 Beat 4 8 Beat Adria Heart Beat Organ Ballad Piano Ballad Pop Rock 1 Pop Rock 2 8 BEAT 2 8 Beat Soft 8 Beat Heat... - Page 169 Category Preset Preset Name 1 Order 2 Order SWING & Swing 1 JAZZ Big Band Swing 1 Big Band Swing 2 Swing Ballad Swing Waltz 1 Dixieland 1 Ragtime Gypsy Swing Jazz Quartet Lazy Jive Swing 2 Big Band Swing 3 Cool Jazz Bebop Jazz Waltz...
-
Page 170: Direct Access Chart
Direct Access Chart Operation ([DIRECT ACCESS] + button or controller listed below) [DEMO/HELP] [SONG SELECT] [SONG] [AUTO ACCOMPANIMENT] [STYLE] Buttons [GROOVE STYLE] [CUSTOM STYLE] [INTRO A/B] [MAIN/AUTO FILL A] [MAIN/AUTO FILL B] [ENDING A/B/rit.] VOICE EFFECT [REVERB (1)] VOICE EFFECT [CHORUS (2)] VOICE EFFECT [HARMONY/ECHO] VOICE EFFECT [DSP (4-6)] VOICE EFFECT [DSP VARIATION]... -
Page 171: Parameter Chart
Parameter Chart • About the symbols O: Memorized. –: Not memorized. On: Always on when One Touch Setting recalled. FADER: Refer to the MIXING CONSOLE (FADER) section. PANEL: Refer to the Panel Controls section. * 1: Included in LOAD FROM DISK and SAVE TO DISK SETUP. * 2: Backs up data created by the user. - Page 172 Parameter Chart VOICE OrganFlute Reverb On/Off OrganFlute Reverb Depth OrganFlute Chorus On/Off OrganFlute Chorus Depth OrganFlute DSP On/Off OrganFlute DSP Depth OrganFlute Vibrato Speed OrganFlute DSP Type OrganFlute DSP Variation On/Off OrganFlute DSP Parameter Num – OrganFlute DSP Parameter Value OrganFlute EQ Low Freq.
- Page 173 Auto Load – – Memory Backup – – Display MIDI Bank Select & – – ProgramChange # Display Message TimeOut – – Metronome Volume – – Parameter Lock – – MIDI Local Control – – MIDI Clock Internal/External – – MIDI Transmit Clock –...
- Page 174 Parameter Chart Acmp. Phrase1 EQ Low Acmp. Phrase2 EQ Low Acmp. Rhythm1 EQ High Acmp. Rhythm2 EQ High Acmp. Bass EQ High Acmp. Chord1 EQ High Acmp. Chord2 EQ High Acmp. Pad EQ High Acmp. Phrase1 EQ High Acmp. Phrase2 EQ High Song Track Volume (Track1~16) FADER <—...
- Page 175 Right1 Octave Voice Right2 Octave Voice Lead Octave Voice Left Pitch Bend Range Acmp. Right1 Pitch Bend Range Voice Right2 Pitch Bend Range Voice Lead Pitch Bend Range Voice Left Portamento Time Acmp. Right1 Portamento Time Voice Right2 Portamento Time Voice Lead Portamento Time Voice...
-
Page 176: Effect Signal Flow Chart
Effect Signal Flow Chart (Insertion1) (Insertion3) LEAD (Insertion4) LEFT (Insertion2) HPF1 HPF2 STYLE (Variation) connection=insertion DSP4 Rev Send Cho Send DSP5 Rev Send Cho Send DSP6 Rev Send Cho Send Rev Send Cho Send DSP7 Vocal Rev Send Harmony Cho Send DSP3 Rev Send Cho Send... -
Page 177: Midi Data Format
PITCH BEND SENS. BnH,65H,00H,64H,00H,06H,mmH FINE TUNING BnH,65H,00H,64H,01H,06H,mmH, PROGRAM CHANGE CHANNEL AFTER TOUCH PITCH BEND CHANGE SYSTEM EXCLUSIVE MESSAGE <YAMAHA MIDI FORMAT> <UNIVERSAL> UNIVERSAL NON-REALTIME F0H 7EH...F7H <XG STANDARD> XG PARAMETER CHANGE F0H 43H 1nH 4CH aaH aaH aaH ddH SYSTEM REALTIME MESSAGE... - Page 178 ALL NOTES OFF OMNI OFF OMNI ON MONO POLY PROGRAM CHANGE CHANNEL AFTER TOUCH PITCH BEND CHANGE SYSTEM EXCLUSIVE MESSAGE <YAMAHA MIDI FORMAT> <UNIVERSAL> UNIVERSAL REALTIME UNIVERSAL NON-REALTIME <XG STANDARD> XG PARAMETER CHANGE XG BULK DUMP PARAMETER REQUEST DUMP REQUEST <SPETIAL OPERATORS>...
- Page 179 400ms, the MIDI Receive Buffer will be cleared, and all notes, including those being sustained, will be cut OFF. Also, all control values will be reset to their factory defaults. (3-6) SYSTEM EXCLUSIVE MESSAGE (3-6-1) YAMAHA MIDI FORMAT (3-6-1-1) SECTION CONTROL binary 11110000...
- Page 180 MIDI Data Format (3-6-1-2) TEMPO CONTROL binary hexadecimal 11110000 Exclusive status 01000011 YAMAHA ID 01111110 Style 00000000 0ttttttt Tempo4 0ttttttt Tempo3 0ttttttt Tempo2 0ttttttt Tempo1 11110111 End of Exclusive The internal clock will be set to the received Tempo value.
- Page 181 (3-6-3) XG STANDARD (3-6-3-1) XG PARAMETER CHANGE (3-6-3-1-1) XG SYSTEM ON binary hexadecimal 11110000 Exclusive status 01000011 YAMAHA ID 0001nnnn Device Number (When N is received N=0-F, whichever is received. When N is transmitted N always=0.) 01001100 Model ID 00000000...
- Page 182 MIDI Data Format (3-6-4) SPECIAL OPERATORS (3-6-4-1) VOLUME ,EXPRESSION AND PAN REALTIME CONTROL OFF binary hexadecimal 11110000 Exclusive status 01000011 YAMAHA ID 01110011 Clavinova ID 00000001 Model ID(Clavinova common ID) 00010001 Sub ID 0000nnnn n: Channel No.(00H~0FH) 01001001 Volume and Expression Realtime Control Off...
- Page 183 < Table 1-1 > Parmeter Basic Address Parameter Change Address (H) (M) (L) Description SYSTEM 00 00 00 System 00 00 7D Drum Setup Reset 00 00 7E XG System On 00 00 7F All Parameter Reset INFORMATION 01 00 00 System Information EFFECT 1 02 01 00...
- Page 184 MIDI Data Format < Table 1-4 > MIDI Parameter Change table (EFFECT 1) Address Size Data Prameter Name 00..7F Reverb Type MSB 00..7F Reverb Type LSB 00..7F Reverb Parameter 1 00..7F Reverb Parameter 2 00..7F Reverb Parameter 3 00..7F Reverb Parameter 4 00..7F Reverb Parameter 5 00..7F...
- Page 185 Address Size Data Prameter Name 00..7F Send Vari. To Reverb 00..7F Send Vari. To Chorus 00..01 Variation Connection 00..1F Variation Part 01..7F MW Vari. Ctrl Depth 01..7F PB Vari. Ctrl Depth 01..7F CAT Vari. Ctrl Depth Not Used Not Used TOTAL SIZE *4 The default Variation Type is selected when an XG System On message is received.
- Page 186 MIDI Data Format Address Size Data Prameter Name 00..7F Insertion Parameter11 00..7F Insertion Parameter12 00..7F Insertion Parameter13 00..7F Insertion Parameter14 00..7F Insertion Parameter15 00..7F Insertion Parameter16 TOTAL SIZE 00..7F Ins. Param.1 MSB 00..7F Ins. Param.1 LSB 00..7F Ins. Param.2 MSB 00..7F Ins.
- Page 187 Address Size Data Parameter 00..7F Program Number 00..0F, Rcv Channel 00..01 Mono/Poly Mode 00..02 Same Note Number Key On Assign 00..02 Part Mode 28..58 Note Shift 00..FF Detune 00..7F Volume 00..7F Velocity Sense Depth 00..7F Velocity Sense Offset 00..7F 00..7F Note Limit Low 00..7F Note Limit High...
- Page 188 MIDI Data Format Address Size Data Parameter Not Used Not Used 00..7F EQ BASS 00..7F EQ TREBLE TOTAL SIZE Not Used Not Used 04..28 EQ BASS frequency 1C..3A EQ TREBLE frequency Not Used Not Used TOTAL SIZE nn = PartNumber(00..0F) If there is a Drum Voice assigned to the Part, the following parameters are ineffective.
-
Page 189: Reverb Type
< Table 1-11 > Effect Type List XG ESSENTIAL EFFECT(XG required) Same as LSB=0 XG OPTION EFFECT PSR8000 Original EFFECT * If the received value does not contain an effect type in the TYPE LSB, the LSB will be directed to TYPE 0. * ( ) is the panel effect name. - Page 190 MIDI Data Format VARIATION TYPE(64~127) TYPE MSB TYPE LSB DEC HEX THRU CHORUS1(Chorus6) CHORUS2(Chorus7) CELESTE1(Celeste1) CELESTE2(Chorus4) FLANGER 1(Flanger5) FLANGER 2(Flanger4) SYMPHONIC(Synphonic2) ROTARY SP.(RotarySp6) TREMOLO(Tremolo3) AUTO PAN(AutoPan2) PHASER 1(Phaser1) DISTORTION(DistHvy) COMP+DISTORTION (Comp+Dist) OVER DRIVE(OverDrive) AMP SIM.(AmpSim) 3BAND EQ(3BandEQ) 2BAND EQ(2BandEQ) AUTO WAH(AutoWah2) AUTO WAH+DIST (AtWah+Dist) THRU...
- Page 191 < Table 1-12 > Effect Parameter List * Effect names in all caps are XG effects. Effect names in square brackets are panel effects. * Parameter 10 Dry/wet only affects insertion type effects. HALL1,HALL2, ROOM1,ROOM2,ROOM3, STAGE1,STAGE2, PLATE (reverb, variation, insertion block) [Hall1..5, Room1..7, Stage1..4, Plate 1..3(Reverb,DSP3,DSP4-7)] Parameter...
- Page 192 MIDI Data Format FLANGER1,2,3 (chorus, variation, insertion block) [Flanger1..5 (Chorus,DSP3,DSP4-7)] Parameter Display LFO Frequency 0.00Hz~39.7Hz LFO Depth 0~127 Feedback Level -63~+63 Delay Offset 0.0mS~50mS EQ Low Frequency 32Hz~2.0kHz EQ Low Gain -12~+12dB EQ High Frequency 500Hz~16.0kHz EQ High Gain -12~+12dB Dry/Wet D63>W ~ D=W ~ D<W63 EQ Mid Frequency...
- Page 193 AMP SIMULATOR (variation, insertion block) [DistHard, DistSoft, AmpSim(DSP3,DSP4-7)] Parameter Display Drive 0~127 AMP Type Off,Stack,Combo,Tube LPF Cutoff 1.0k~Thru Output Level 0~127 Dry/Wet D63>W ~ D=W ~ D<W63 Edge(Clip Curve) 0~127 3BAND EQ(MONO) (variation, insertion block) [EQDisco, EQTel, 3BandEQ(DSP3,DSP4-7)] Parameter Display EQ Low Gain -12~+12dB EQ Mid Frequency...
- Page 194 MIDI Data Format NO EFFECT (reverb, chorus, variation block) [NoEffect (Reverb,Chorus,DSP3)] Parameter Display THRU (variation, insertion block) [Thru (DSP3,DSP4-7)] Parameter Display [DelayLCR@T (DSP3,DSP4-7)] Parameter Display Lch Delay 16th,16th/3,16th.,8th,8th/3,8th.,4th,4th/3,4th. Rch Delay 16th,16th/3,16th.,8th,8th/3,8th.,4th,4th/3,4th. Cch Delay 16th,16th/3,16th.,8th,8th/3,8th.,4th,4th/3,4th. Feedback Delay 16th,16th/3,16th.,8th,8th/3,8th.,4th,4th/3,4th. Feedback Level -63~+63 Cch Level 0~127 High Damp...
- Page 195 < Table 1-13 > Effect Data Value Assign Table Table#1 Table#4 LFO Frequency Reverb time Data Value Data Value Data Value Data Value Data 0.00 1.35 2.69 8.41 0.04 1.39 2.78 8.75 0.08 1.43 2.86 9.08 0.13 1.47 2.94 9.42 0.17 1.51 3.03...
- Page 196 MIDI Implementation Chart [Portable Keyboard] Model: PSR-8000 Function Basic Default 1~16 Channel Changed 1~16 Default Mode Messages Altered ************** Note 0~127 Number : True voice ************** Velocity Note ON O 9nH, v=1~127 Note OFF X 9nH, v=0 After key’s Touch Ch’s...
- Page 197 “CHORD” are recognized as the fingering for the accompani- ment section. The chords to be detected depend on the fingering modes specified for the PSR-8000. The chords will be detected regardless of the accompaniment on/off and split point settings on the PSR-8000 panel.
- Page 198 MIDI Implementation Chart MIDI RECEVE MESSAGES FOR INDIVIDUAL PARTS Receivable messages depend on the part. MIDI reception parts Recognized Note Note On/Off Control Changes Bank Select MSB,LSB Modulation Portament Time Volume Expression Sustain Portament Sostenute Soft pedal Harmonic Content Release Time Attck Time Brightness Reverb Send Level...
- Page 199 VOCAL HARMONY MIDI SPECIFICATIONS Channel message 1) Note on / off Harmony ch 9n kk vv note on message Specifies pitch in the Vocoder mode. Velocity not recognized. Also used as Gender Threshold source for the Melody channel. 8n kk vv note off message Turns the current note off in the Vocoder mode.
-
Page 200: Midi Implementation Chart
Audio Sampling Library CD Contents Black II Black 1 and 2 — Steve McIntosh & Joe Charles Track1 ... Chalis Loop - 71 bpm SUB - 84 bpm Slow Jamz - 85 bpm Track2 ... Kool Jamz II Loop - 90 bpm Laid Black Loop - 90 bpm Kickin - 93 bpm Rub’n’Roll Loop - 93 bpm... - Page 201 Track37 ... Monsterous Loop A - 98 bpm Monsterous Loop B - 98 bpm Monsterous Loop C - 98 bpm Monsterous Loop D - 98 bpm Monsterous Loop E - 98 bpm Monsterous Loop F - 98 bpm Track38 ... LA Groove A - 118 bpm LA Groove B - 118 bpm LA Groove C - 118 bpm...
- Page 202 Siren whistle <Notes> Produced by AMG. All other samples produced by Yamaha. Produced by AMG, renamed by Yamaha. All samples have been converted to mono for easier sampling with the PSR-8000. This CD features samples from the World’s fore- most sample developer...
-
Page 203: Specifications
• Specifications and descriptions in this owner’s manual are for information purposes only. Yamaha Corp. reserves the right to change or modify products or specifications at any time without prior notice. Since specifications, equipment or options may not be the same in every locale, please check with your Yamaha dealer. FUNCTIONS:... - Page 204 INTRODUIRE LA LAME LA PLUS LARGE DE LA FICHE DANS LA BORNE CORRESPONDANTE DE LA PRISE ET POUSSER JUSQU’AU FOND. • This applies only to products distributed by Yamaha Canada Music Ltd. • Ceci ne s’applique qu’aux produits distribués par Yamaha Canada Musique Ltée. OBSERVERA! Apparaten kopplas inte ur växelströmskällan (nätet) sá...
- Page 205 For details of products, please contact your nearest Yamaha or the authorized distributor listed below. Pour plus de détails sur les produits, veuillez-vous adresser à Yamaha ou au distributeur le plus proche de vous figurant dans la liste suivante. NORTH AMERICA CANADA Yamaha Canada Music Ltd.
- Page 206 M.D.G., EMI Division © 1997 Yamaha Corporation VZ20220 801POCP4.3-03C0 Printed in Japan...