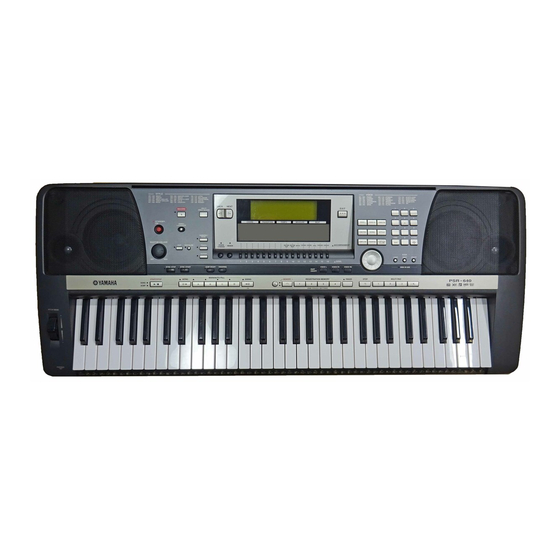
Yamaha PSR640 Step By Step Procedures
Hide thumbs
Also See for PSR640:
- Manual de instrucciones (188 pages) ,
- Owner's manual (188 pages) ,
- Service manual (80 pages)
Advertisement
PSR640/740 STEP BY STEP PROCEDURES
I. Enabling an External MIDI Device to Control Keyboard Sections on a
PSR640/740
II. Creating a User Style
III. Loading Styles
IV. Multi Track Recording
V. Playing Songs Continuously
VI. Quick Recording
VII. Recording to PSR640/740 Sequencer from External MIDI Source
VIII. Recording Tempo Changes
IX. Registration Memory
X. Tracks 2 and 3 Won't Record
XI. Using Vocal Harmony on a PSR740
Advertisement
Table of Contents

Related Manuals for Yamaha PSR640


Summary of Contents for Yamaha PSR640
- Page 1 III. Loading Styles IV. Multi Track Recording V. Playing Songs Continuously VI. Quick Recording VII. Recording to PSR640/740 Sequencer from External MIDI Source VIII. Recording Tempo Changes IX. Registration Memory X. Tracks 2 and 3 Won’t Record XI. Using Vocal Harmony on a PSR740...
- Page 2 I. Enabling an External MIDI Device to Control Keyboard Sections on a PSR640/740 The PSR640/740 can be configured so that an external MIDI device will control it the same way its own keyboard does (controlling whatever sections are active on the front panel).
- Page 3 The following procedure describes how to create a User Style from scratch. This is useful when the PSR640/740 does not have a built-in Style which fits the style of music that the user wants to play. Creating a User Style from scratch is also useful to create custom drum accompaniments.
- Page 4 PHRASE 2’ must be played in the key of C, in order for the Tracks to transpose correctly when played as a PSR640/740 Style. This means that the pattern must use only the chordal tones of C Major 7, (C, E, G and B).
- Page 5 f) Press the [+] button to select ‘ON'. g) Press the [EXIT] button. At this point the user may try out the Voice or Drum Kit before recording. 15) Press the black [SYNC START] button (red LED illuminates). The Metronome will start to tick (if activated in step 14). Begin playing the Style pattern at any time.
- Page 6 d) Press the [EXIT] button to exit Record mode, or proceed to step 6 to continue recording. 20) To Quantize a recorded Track of the User Style: NOTE: Quantizing aligns the timing of the notes. It can, in many cases, correct timing mistakes.
- Page 7 o) Press the [NEXT] 3 times. p) Press the [START/STOP] button to hear the changes of the Quantize operation. 1] If the changes are acceptable proceed to step 18. 2] If the changes are not acceptable proceed to step 19. Reference: Owner's Manual, p.
-
Page 8: Loading Styles
III. Loading Styles 1) Insert the floppy disk into the disk drive. 2) Press the [LOAD] button. 3) Select the file to be loaded, using the Data Dial, or [+/YES] and [-/NO] buttons. 4) Press the [NEXT] button to display the ‘LOAD TO’ screen. 5) Select the destination, using the Data Dial, or [+/YES] and [-/NO] buttons. -
Page 9: Multi Track Recording
IV. Multi Track Recording The PSR640/740 has the ability to do Multi Track recording. The following procedure explains how to record the Auto Accompaniment, as well as individual Tracks. Recording the Auto Accompaniment into a Song: 1) Insert a formatted floppy disk. - Page 10 16) Use the DATA DIAL, [-/NO] and [+YES] buttons, or Numeric Keypad to select an Auto Accompaniment Style. 17) Press one of the [MAIN A] – [MAIN D] buttons to select the first section that will play (red LED illuminates). 18) If an Introduction to the Song is desired, press the [INTRO] button (red LED illuminates).
- Page 11 6) Use the DATA DIAL or [-/NO] and [+YES] buttons to select ‘REC’ for the Track. 7) Press the [NEXT] button. 8) Press the silver [VOICE R1] button above the Data Dial. 9) Use the DATA DIAL, [-/NO] and [+YES] buttons, or Numeric Keypad to select a Voice.
- Page 12 V. Playing Songs Continuously Songs on disk can be played back in five ways; SINGLE, SINGLE REPEAT, ALL, ALL REPEAT, and RANDOM. To have Songs play continuously, select 'ALL REPEAT' from the 'Play Mode' screen. 1) Insert the desired Song disk into the Floppy Disk Drive. 2) Press the [SONG] button.
-
Page 13: Quick Recording
VI. Quick Recording 1) Insert a formatted floppy disk. 2) Press the [RECORD] button. 3) Turn the (DATA) knob or press the [-/NO] or [+/YES] buttons to choose ‘Song'. 4) Press the [NEXT] button. 5) Turn the (DATA) knob or press the [-/NO] or [+/YES] buttons to choose New Song’. - Page 14 VII. Recording to PSR640/740 Sequencer from External MIDI Source The on-board sequencer of the PSR640/740 can be used to record MIDI data from external sources, such as MIDI bass pedals, keyboards and hardware or computer-based sequencers. This is done by assigning the desired MIDI Receive Channels to 'Keyboard' mode.
-
Page 15: Recording Tempo Changes
VIII. Recording Tempo Changes Tempo changes can be recorded throughout a Song by changing the Tempo and recording to a blank Track. 1) With a Song in Record mode, use the [BACK] and [NEXT] buttons to display the 'RECORD MODE' screen. 2) Turn the Data Dial to select ‘Multi Track’. -
Page 16: Registration Memory
4) Press the [NEXT] button. 5) Turn the Data Dial to select a Registration Bank. 6) Press the [NEXT] button. 7) Use the keys of the PSR640/740 to name the Registration Bank, if necessary. 8) Press the [EXIT] button. 9) Press the round button in the 'REGISTRATION MEMORY' section to make the green LED illuminate. - Page 17 4) Turn the Data Dial to select a Registration Bank. 5) Press the [EXIT] button. 6) Press the round button in the 'REGISTRATION MEMORY' section to make the green LED illuminate. 7) Press the desired gray 'REGISTRATION MEMORY' button [1] through [4] to get the Registration to be used.
- Page 18 X. Tracks 2 and 3 Won’t Record Many Yamaha Portable Keyboard models have multiple keyboard Parts such as 'Right 1', 'Right 2' and 'Left'. These are used for Voice splits and layers when playing live or using 'Quick Record'. However, when using the 'Multi Track’...
- Page 19 XI. Using Vocal Harmony on a PSR740 PSR740 Vocal Harmonies can be generated from the original voice of a singer, by playing notes on the keyboard, or from a Track of a Song. This effect is used “live,” and does not record the actual sound of the singer’s voice. Setup: 1) Turn ON the keyboard.
- Page 20 Making Vocal Harmony Follow Chords Played on the Keyboard: Vocal Harmony effects can be controlled by playing chords on the keyboard (and singing into a microphone), but the type of effect chosen depends on which section of the keyboard is being played. Effects using the 'Chordal' Harmony mode require chords to be played in the Auto Accompaniment section of the keyboard.
- Page 21 5) Turn ON the 'VOCAL HARMONY' [ON/OFF] button (red LED illuminates). 6) Turn OFF the [TALK] button (red LED turns OFF). Play chords in the desired section to control Vocal Harmonies while singing into the microphone. Using Vocal Harmony with a “Tune 1000” Disk: (or any Disk with Vocal Harmony Data) 1) Insert the disk.
Need help?
Do you have a question about the PSR640 and is the answer not in the manual?
Questions and answers