Table of Contents
Advertisement
Quick Links
Advertisement
Table of Contents

Related Manuals for Coemar iCyc 250


Summary of Contents for Coemar iCyc 250
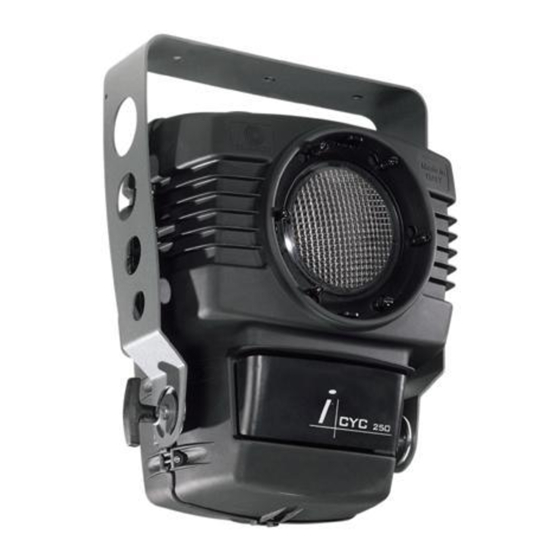
- Page 1 instructions manual edition, november 2001...
- Page 2 11.6 Double pressing the menu button 12.Setting the unit to function automatically “solo” ,, 16 13.DMX 512 functions ,, 17 14.Operating multiple iCyc 250 fixtures in the absence of DMX 512 ,, 18 ,, 18 14.1 “Master” units ,, 18 14.2 “Slave”...
-
Page 3: Important Safety Information
3. Important safety information Fire prevention: 1. iCyc 250 utilises a Philips MSD 250W/2 lamp or equivalent; the use of any other lamp is not recommended and will null and void the fixture’ s warranty. 2. Never locate the fixture on any flammable surface. -
Page 4: Lamp: Installation And Replacement
English 4. Lamp: installation and replacement iCyc 250 utilises a Philips MSD 250W or Philips MSD 250W/2 lamp or equivalent. The lamp is available from your authorised coemar sales agent: coemar code 105214/1 power 250 w luminous flux 18.000 lm colour temperature 8.500°... -
Page 5: Operating Voltage And Frequency
5. Operating voltage and frequency The fixture may operate at voltages ranging from 100-115-208, 230 or 240V .at 50 or 60 Hz; coemar factory presets (barring spe- cific requests), a voltage of 230v and a frequency of 50 Hz. This preset is indicated on the sticker located on the base of the projec- tor, as indicated in the following diagram. -
Page 6: Installation
Installing the unit incorrectly may cause damage to occur and will immediately void the warranty. safety chain When hanging the iCyc 250 we recommend the use of a safety chain (cod. 069), affixed to the appropriate hole (B) on the yoke of the iCyc 250 and to the suspension device. -
Page 7: Mains Connection
250 can operate at voltages from 100V-115V-208V-230V-240V at 50 or 60Hz (operating voltage and frequency can be selec- ted as described in section 6 and 18 of this manual). Prior to connecting the unit to your mains supply, ensure that the model in your possession correctly matches the mains supply available to you. -
Page 8: Signal Connection
Connection is serial, utilising the XLR 3 sockets located on the base of the iCyc 250. coemar supplies with the unit XLR 3 connectors with an IP 67 protection rating; use only similar plugs for the connection of signal to the unit, thereby ensuring that the protection rating of the unit is maintained. - Page 9 Only by suitably isolating these sockets will the protection rating of the unit be maintained. coemar supplies with the unit XLR 3 connectors with an IP 67 protection rating; use only similar plugs for the connection of signal to the unit, thereby ensuring that the protection rating of the unit is maintained.
- Page 10 After having followed the preceding steps, turn on the power to the unit. If you have chosen to control the iCyc 250 using a DMX 512 controller, you should always turn on the power to the controller first. The fixture will perform a reset function on its internal motors. This will last some few seconds, after which it will be subject to the external signal from the controller.
-
Page 11: Dmx Addressing
10. DMX addressing Each iCyc 250 utilises utilises 6 channels of DMX 512 signal for complete control. To ensure that each unit accesses the correct signal, it is necessary to correctly address each fixture. Any number between 1 and 506 can be generated via the multifunction panel of the unit iCyc 250. -
Page 12: Operating Mode (Mode)
The display panel of the iCyc 250 is used to display and set function information and alter various parameters. Altering the coemar factory settings may vary the functioning of the projector, causing it to not respond to external DMX 512 signal. - Page 13 English 11.2. Functions (FUNC) The projector allows the altering of several functions and select personalised settings. Settings available via the “FUNC” menu are able to be altered at any time regardless of the operating mode “MODE” selected. AOO1 menu MODE S T R D L A M P FUNC...
- Page 14 English 11.3. Parameters and testing (MEAS) The internal microprocessor of the iCyc 250 allows for several diagnostic and output parameters to be displayed. AOO1 menu + o – MEAS 5 8 C T EMP enter temperature enter temperature reading internal temperature 3 0.0 V...
-
Page 15: Rapid Scrolling
S T O R 11.5. Rapid scrolling Via the iCyc 250 display, it is possible to rapidly scroll through the various numbers displayed in the menu which apply to the fol- lowing 3 uses: 1) Pressing down and holding the + or - buttons will cause the numbers to scroll more quickly than by simply pressing buttons repea-... - Page 16 5) Press the + button to select the number of the required program. coemar has provided numerous colour change combinations in the internal memory of the projector, grouping them with consi- deration to the tonality and speed of the colour changes:...
- Page 17 English 13. DMX 512 functions iCyc 250 may be controlled using the DMX 512 control protocol. Connection should be as described in section ”8.2 Operation via DMX 512”. If you have correctly followed all the steps described up to this point, your DMX 512 controller will allow you complete control of all the functions of the iCyc 250 as described in the following table.
- Page 18 Power up the projector and use the 4 button menu system and the display panel to set the units correctly. 14.1 “Masters” iCyc 250 may operate automatically with output in the form of pre-recorded programs, as described in section “9.3. Synchronising multiple iCyc 250 fixtures without using DMX512” Only one unit may be designated as “master”.
-
Page 19: Mechanical Adjustments
The electronic counter should be reset to zero hours every time the lamp is changed in order to provide accurate information about lamp life 1) Turn off the projector. 2) Power up the iCyc 250 whilst holding both the + and – buttons simultaneously. function display A00 I... - Page 20 English After having adjusted the unit to the required tilt, firmly tighten both bolts to avoid the unit slipping out of position. 16.2 Altering beam angles by inserting diffusion filters. Several optional and interchangeable diffusion filters may be utilised on the unit to vary the beam characteristics in particular appli- cations.
- Page 21 English Prior to changing lenses, it is advisable to either turn off the unit or to dim the lamp. Attention Direct exposure to the output of the unit is not recommended. 1) Loosen the 6 screws (A) using an appropriate screwdriver. 2) Rotate and remove the fixing ring.
-
Page 22: Opening Up The Projector
English 17. Opening up the projector Various operations described in this manual can only be performed if the projector housing is open. Attention! Remove mains power prior to opening up the unit. The internal temperature of the unit may reach 250° C after 5 minutes, with a peak of 350°C. Ensure that the lamp is cool prior to removing. -
Page 23: Altering The Operating Voltage And Frequency
English 18. Altering the operating voltage and frequency (Reserved for technical staff only) If the factory preset operating voltage and frequency do not correspond to those in use in your country of operation, you may alter the settings as described in the following paragraphs. Incorrect selection of operating voltage and frequency will seriously compromise the functioning of the pro- jector. - Page 24 English 18.2 Selecting the frequency of the power supply of the iCyc 250 1) Locate the power supply on the right of the base. 2) Select from either 50 or 60Hz by moving cables n° 10 and 11 to the required position. To ensure you have selected the correct tap, refer to the sticker located on the power supply.
- Page 25 The projector should only be opened after it has been allowed to stand and cool for 10 minutes after is has been turned off. After having opened up the rear housing of the iCyc 250 as described in sections 4 And 21, proceed as follows: 1) Loosen the 6 screws (A) using an appropriate screwdriver.
- Page 26 English 3) Remove the lense. 4) Remove the 2 screws (B). 5) Slide the front housing of the unit away from the rubber seal. NOTE: When replacing the housing, you must ensure that the housing (B) is seated correctly into the rubber seal (C); then repla- ce and retighten all the screws.
-
Page 27: Thermal Protection
22. Maintenance Whilst every possible precaution has been taken to ensure the trouble-free operation of your iCyc 250, the following periodic main- tenance is highly recommended. We recommend that the voltage to the unit be removed prior to any maintenance procedure taking place. -
Page 28: Electronic Motor Alignment
This section is reserved for technicians and persons with technical experience only. The display panel on the rear of the iCyc 250 allows for the electronic alignment of the projector’ s motors. This procedure is per- formed by coemar at the factory. It may be useful to perform this procedure in the case of internal components being replaced. -
Page 29: Error Messages
25. Spare parts All the components of the iCyc 250 are available as spare parts from your coemar service centre. Accurate description of the fixture, model number, and type will assist us in providing for your requirements in an efficient and effec-...
Need help?
Do you have a question about the iCyc 250 and is the answer not in the manual?
Questions and answers