
Related Manuals for Coemar iWash Led


Summary of Contents for Coemar iWash Led
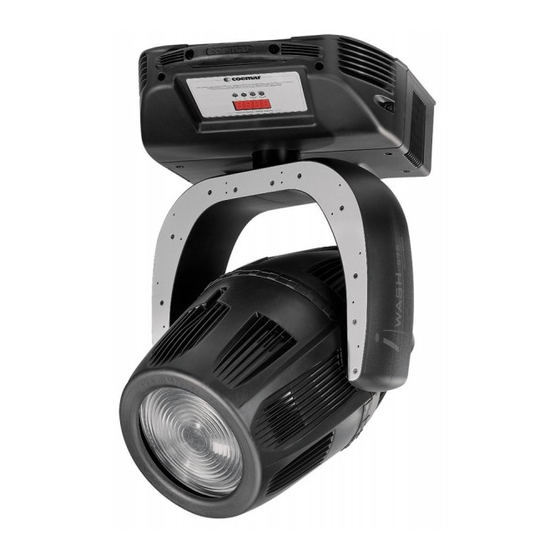
- Page 1 Wash L e d manuale di istruzioni instructions manual 1^ edizione provvisoria, Agosto 2004 provisional edition, August 2004...
- Page 3 iWashLed numero di serie/serial number data di acquisto/date of purchase fornitore/retailer indirizzo/address cap/città/suburb provincia/capital city stato/state tel./fax/ Prendete nota, nello spazio apposito, dei dati relativi al modello e al rivenditore del vostro iWashLed: in caso di richiesta di informazioni, pezzi di ricambio, servizi di riparazione o altro ci permetteranno di assistervi con la massima rapidità...
- Page 4 English Index 1. Packaging Pag. 5 2. Transportation “ 3. Important safety information “ 4. Operating voltage and frequency “ 5. Installation “ 6. Mains connection “ 7. Signal connection “ 8. Powering up “ 9. DMX addressing “ 10. Display panel functions “...
-
Page 5: Transportation
English Congratulations on having purchased a coemar product. You have assured yourself of a fixture of the highest quality, both in compo- nentry and in the technology used. We renew our invitation to you to complete the service information on the previous page, to expe- dite any request for service information or spares (in case of problems encountered either during, or subsequent to, installation). -
Page 6: Operating Voltage And Frequency
240 V. The operating voltage of the projector selected by coemar or its reseller is noted on the base of the unit near to the mains cable. iWashLed may operate at either 50 or 60 Hz without the need to adjust any settings. -
Page 7: Mains Connection
English 6. Mains connection cabling The mains cable providedis thermally resistant, conforming to the most recent international standards. N.B. in case of cable replacement, similar cable with comparable thermal resistant qualities must be used exclusively. (cable 3x1,5 external 8 mm, rated 300/500V, tested to 2KV, operating temperature -40° +180°). mains connection iWashLed may operate at 100V-115V-208V-230V-240V at either 50 or 60 Hz (operating voltage should be selected as discussed in section 5 of this manual). -
Page 8: Signal Connection
English 7. Signal connection Control signal is digital and is transmitted via two pair screened ø 0,5cable. Connection is serial, utilising XLR 3 male and female sockets on the base of the iWashLed, labeled DMX 512. If signal output is from a DMX 512 console using cannon XLR5 (5 pin) connectors, do not use pins 4 and 5: leave them unconnected. Pin connection conforms to international standards: pin 1 = screening 0 volts pin 4 = not connected... -
Page 9: Powering Up
English 8. Powering up After having followed the preceding steps, turn on the projector via the power button. upon powering up, the projector will perform a reset on all its motor, allowing them to be correctly aligned. Software version Two software systems are located within the projector, located in the display pcb “ ”... -
Page 10: Display Panel Functions
Incorrectly altering the Coemar factory settings may vary the functioning of the projector, causing it to not repond to external DMX512 control signal. Please read and familiarise yourself witht he following information very carefully prior to altering any selec- tions. -
Page 11: Measure And Test (Meas)
English 10.2 Measure and Test (MEAS) The electronic pcbs of the iWashLed allow for various digital and auto-diagnostic measurements to be made. You may, in this section, record a home position to which the projector will return when it is turned on in the absence of dmx signal. AOO1 menu MEAS... -
Page 12: Quick Guide To Menu Navigation
English 10.3 Quick guide to menu navigation The following guide will allow you to scroll quickly through the various menus located in the display. A 0 13 AOO1 A 0 13 enter +o– menu MEAS F U NC +o– enter enter TEM P PD I R... -
Page 13: Dmx Operation
171 - 200 67% - 78% fan at maximum speed 201 - 240 79% - 94% allows independent control of the white colour balance 241 - 255 95% - 100% Fixture: iWash Led Table name: DMX 512 Table number:240 Edition:0 Date: 03/06/2004... -
Page 14: Automatic Repositioning
(reserved for technical staff) If the operating voltage set by coemar does not correspond to that in use in your country of operation, or if the projector is destined for use in another country, a new operating voltage selection may be made as described below. -
Page 15: Maintenance
English 3) Select the required voltage from amongst 100V-115V-208V-230V-240V by removing the cable n.7 and moving it to the appropriate position. Refer to the sticker on the transformer to ensure you are selecting the correct voltage. Cable n.6 should not be moved under any circumstances. 4) If your operating voltage is set at 100V or 115V, replace the 0,6 Amp T fuse, which is suitable for 208V-230V-240V operation, with one rated at 1,2 Amps T in the fuse holder on the base of the unit. -
Page 16: Electronic Motor Alignment
The display panel of the iWashLed allows for the electronic alignment of the projector’ s motors. This procedure is per- formed by coemar at the factory. It may be useful to perform this procedure in the case of internal components being replaced. -
Page 17: Error Messages
ER99 ÷ SYSTEM Error Turn the unit off and on again. Should the error reoccur, refer it to your authorised coemar service centre. 18.Spare parts All the components of the iWashLed are available as spare parts from your authorised coemar service centre. - Page 18 Indice 1. Imballo Pag. 5 2. Trasporto “ 3. Importanti informazioni di sicurezza “ 4. Tensione e frequenza di funzionamento “ 5. Fissaggio meccanico “ 6. Connessione alla rete elettrica “ 7. Connessione di segnale “ 8. Alimentazione “ 9. Indirizzi DMX “...
Need help?
Do you have a question about the iWash Led and is the answer not in the manual?
Questions and answers