Table of Contents
Advertisement
Quick Links
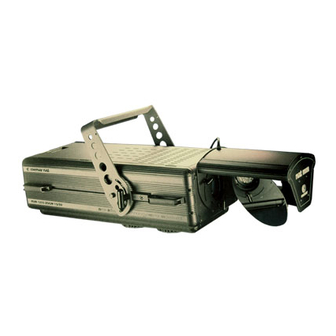
coemar nat
mm
1200 ZOOM 15/30°
484mm
19"
305 mm
12"
serial number
date of purchase
retailer
address
suburb
capital city
state
tel./fax/
Please note in the space provided above the relative service information of the model and the retailer from
whom you purchased your
spare parts, repairs or in answering any technical enquiries with the utmost speed and accuracy.
WARNING: the security of the fixture is granted only if these instructions are strictly followed; therefore it is
absolutely necessary to keep this manual.
coemar nat mm 1200 ZOOM 15/30°
1235 mm
48,62"
875 mm
34,45"
370 mm
14,56"
300 mm
11,81"
: This information will assist us in providing
Advertisement
Table of Contents

Related Manuals for Coemar NAT MM1200 Zoom


Summary of Contents for Coemar NAT MM1200 Zoom
- Page 1 : This information will assist us in providing coemar nat mm 1200 ZOOM 15/30° spare parts, repairs or in answering any technical enquiries with the utmost speed and accuracy. WARNING: the security of the fixture is granted only if these instructions are strictly followed; therefore it is...
-
Page 2: Table Of Contents
Index 1.Technical characteristics 2.Packaging 3.Lamp: installation & replacement 4.Voltage and frequency selection 4.1 Selecting the operating frequency on the ballast 4.2 Selecting the operating voltage and frequency on the ballast to other than than specified upon ordering 5.Mounting the unit 6.Installing the mirror head 6.1 Mounting the mirror head 6.2 Electrical connection of the mirror head... - Page 3 Congratulations on having purchased a new coemar product; you have assured yourself of a fixture of the highest quality, both in the components used and in the technology. We renew our request to you to complete the service information on the preceding page, to expedite any request for information, or for service (in case of problems encountered either during, or sub- sequent to, installation).
- Page 4 colour • limitless colour mixing via full cyan, magenta, and yellow dichroic filters • multicolour effect, rotatable at variable speed in both directions • separate 9 colour wheel for creation of unique seamless bi, tri, and quad colour beams with ability for variable speed rotocolour effect •...
-
Page 5: Packaging
4th parcel: 1 mirror for coemar nat mm 1200 ZOOM 15/30°. 3. Lamp: Installation coemar nat mm 1200 ZOOM 15/30 utilises an Osram HMI 1200w/GS lamp and replacement with an SFc 15,5 lamp base. This lamp is available through your authorised coemar sales agent: coemar cod. - Page 6 3) Locate the safety clip (E) which can be used to attach the lid to any appropriate component which can support its weight, for example the yoke of the projector (F). 4) Locate the SFc 15,5 lampbase (C). 4) The SFc 15,5 lampbase is symmetrical; the lamp is quartz glass and must be hand- led with care;...
-
Page 7: Voltage And Frequency Selection
4.2 Selecting the operating voltage and frequency on the ballast to other than that specified when ordering If the factory preset voltage set by coemar is other than that requied, you may alter the setting to between 208 and 240 V. - Page 8 3)Remove the extruded housing (C). 4)Locate the multipole terminal block labelled 208v/50Hz, 208v/60Hz, 230v/50Hz, 230v/60Hz, 240v/50Hz, 240v/60Hz. Under no circumstances should you remove or move the cable connected to earth, numbered 0. 5)Connect the cable numbered 16 to the required voltage 208, 230, 240 and the frequency 50Hz and the cable numbered 15 to the same voltage value as for cable 16, but with a frequency of 60 Hz.
-
Page 9: Mounting The Unit
1200 ZOOM 15/30°. safety chain The use of a safety chain (cod. 069) - fixed to the coemar nat mm 1200 ZOOM 15/30° and to the primary suspension point, is highly recommended to protect against accidental failure, however unlikely, of the primary suspension point. - Page 10 When hanging the ballast, the use of a safety chain (cod. 069) fixed to the coemar nat mm 1200 ZOOM 15/30° ballast and to the primary suspension point is recommended- to protect against the accidental failure (however unlikely) of the pri- mary suspension point.
-
Page 11: Installing The Mirror Head
6. Installing the For ease of transport, and easy installation, the coemar nat mm 1200 mirror head ZOOM 15/30° is provided with a removeable mirror and mirror head. 6.1 Mounting the mirror head 1) Locate the 3 threaded holes (A) and the 3 mounting T-bolts(B). - Page 12 If you are mounting the mirror head with the mirror facing upwards, you will need to locate the cable which coemar has folded and secured internally (F); to utilise this cable, remove it from its mounting clips (G) and slide the required length through the rubber grommet so that the plug can reach the socket (D).
-
Page 13: Mirror Installation
6.3 Mirror installation 1) Whilst supporting the mirror with your hand on the mirror-face, slide the central hole (I) over the threaded rod (L) ensuring that the cogs (M) engage correctly. 2) Tighten the thumbscrew (N) along the threaded rod (L) firmly. 3) Locate the safety cable and thumbscrew (O) supplied on mirror. -
Page 14: Electrical Connection
1200 ZOOM 15/30° 1) Locate the power cable at the rear of the coemar nat mm 1200 ZOOM 15/30°; this is provided with a 6 pin, 16A plug(A). 2) Insert the plug into the socket (B) located on the ballast, ensuring a secure fit. -
Page 15: Signal Connection
Control signal is digital and is transmitted via two pair screened ø 0,5mm cable. Connection is serial, using the XLR 3 or XLR5 male and female sockets set on the rear part of the coemar nat mm 1200 ZOOM 15/30°, labelled DMX 512 and DMX 512 standard (see diagram). -
Page 16: Powering Up
Switch on the power supply and engage the circuit breaker on the coemar nat mm 1200 ZOOM 15/30° ballast (A) This will, in turn, sup- ply power to the projector which will perform a reset function on all the internal and external motors. -
Page 17: Dmx Addressing
10. DMX addressing Each coemar nat mm 1200 ZOOM 15/30° utilises 18 channels of DMX 512 signal for complete control. To ensure that each projector accesses the correct signal, it is necessary to correctly address each fixture. Any number between 1 and 494 can be generated via the rear multi-function panel of the coemar nat mm 1200 ZOOM 15/30°. -
Page 18: Display Panel Functions
11. Display panel The display panel at the rear of the coemar nat mm 1200 ZOOM 15/30° functions is used to display and set function information and various parameters. Altering the coemar factory settings may vary the functioning of the projector, cau- sing it to not respond to external DMX 512 signal. - Page 19 This function should not be altered under any circumstances Attention coemar has factory preset this function as rESo standard. This function should, under no circumstances, be altered. 1) Press the menu button. 2) Press the + or - keys until rESo (for resolution) is displayed.
- Page 20 3) Press the enter button to confirm your selection. The display will show Strd (for standard) which corresponds to centreing the 10 gobos in the optical path (a variation in the DMX 512 signal corresponds to a change in the gobo projected by the coemar nat mm 1200 ZOOM 15/30°). function display menu enter 4) Press the + or - until SPEc (for special) is displayed.
- Page 21 colr This function is unavailable. lamp This function allows for the on/off control of the lamp via DMX 512 signal, or for the permanent on (disenabling DMX control of this function) of the lamp. 1) Press the menu button 2) Press the + or - buttons until LAMP (for lamp) is displayed. function display menu enter...
-
Page 22: Control Channel Functions From A
12. Control channel The 18 channels of your DMX 512 controller should now have control of all the functions from a functions of your coemar nat mm 1200 ZOOM 15/30° as described. DMX 512 controller (18 channels) channel function type of control... - Page 23 channel function type of control effect percentage decimal effects selection (prism, split step no effects 0/16% 0-41 color) effect 1 17/32% 42-85 effect 2 33/48% 86-125 effect 3 49/65% 126-169 effect 4 66/80% 170-209 effect 5 81/100% 210-255 effects rotation proportional proportional effect rotation 360°...
- Page 24 13. Control channel The 20 channels of your DMX 512 controller should now have control of all the functions from a functions of your coemar nat mm 1200 ZOOM 15/30° as described. DMX 512 controller (20 channels) channel function type of control...
- Page 25 channel function type of control effect percentage decimal gobo 2 rotation proportional proportional gobo rotation 360° 0-50% 0-128 continuos gobo rotation clockwise with proportional proportional 51-74% 129-190 speed from max to min. step gobo stop continuos gobo rotation counter-clockwise with proportional 76-100% 192-255...
-
Page 26: Maintenance
Upon completion of the following, replace the inspection lid and tighten the screws (A) firmly. Fuse replacement Locate the fuse on the circuit board at the rear of the coemar nat mm 1200 ZOOM 15/30° (see diagramme). Using a multimeter, test the condition of the fuse, replacing it with one of equivalent type if necessary. - Page 27 Check all electrical components for correct earthing and proper attachment of all connectors, refastening if necessary. gobos coemar nat mm 1200 ZOOM 15/30° utilises a ø53 mm gobo with a ø37.5mm image, known generally as a “D” type gobo. The gobo is mounted via 3 screws with a round mounting bracket.
- Page 28 4) Replace all components, ensuring the screws are replaced correctly and fastened securely Replacing gobos on the second gobo wheel 1) Position the first gobo wheel in such a manner as to allow a screwdriver to be inserted readily as in the figure below. 2) Follow instructions 2, 3, and 4, as described above (Replacing gobos on the first gobo wheel)
- Page 29 This procedure is performed by coemar at the factory. It may be useful to perform this procedure in the case of internal components being replaced. Altering the coemar factory settings may radically alter the functinoing of the projector;...
- Page 30 3) Press the + or - until the displayed number corresponds with the correct align- ment of the gobo (indexing) amongst the other coemar nat mm 1200 ZOOM 15/30° in the same installation (note that with each press of + or - the gobo will rotate).
- Page 31 3) Press the + or - until the displayed number corresponds with the correct focusing of the lens amongst the other coemar nat mm 1200 ZOOM 15/30° in the same installation (note that with each press of + or - the focus lens will rotate).
-
Page 32: Spare Parts
16. Spare parts All the components of the coemar nat mm 1200 ZOOM 15/30° are available as replacement spares from your authorised coemar service centre. Accurate description of the fixture, model number, and type will assist us in provi- ding for your requirements, in an efficient and effective manner.
Need help?
Do you have a question about the NAT MM1200 Zoom and is the answer not in the manual?
Questions and answers