
Related Manuals for Reed Instruments R9910SD


Summary of Contents for Reed Instruments R9910SD
- Page 1 R9910SD Data Logging Air Quality Meter Instruction Manual REED Instruments 1-877-849-2127 | info@reedinstruments.com | www.reedinstruments.com...
-
Page 2: Table Of Contents
Enabling/Disabling Auto Power Off (PoFF) ......... 14 Enabling/Disabling the Beeper (bEEP) ..........14 Setting Data Decimal Format (dEC) ............ 14 Selecting the Temperature Unit of Measure (t-CF) ......15 Setting Alarm Value for CO ............... 15 continued... REED Instruments 1-877-849-2127 | info@reedinstruments.com | www.reedinstruments.com... -
Page 3: Introduction
Product Disposal and Recycling .............. 26 Product Support ..................26 Introduction Thank you for purchasing your REED R9910SD Data Logging Air Quality Meter. Please read the following instructions carefully before using your instrument. By following the steps outlined in this manual your meter will provide years of reliable service. -
Page 4: Product Quality
• Records up to 3 readings simultaneously • User adjustable audible alarms • User selectable unit of measure (°F or °C) • Data hold and Max/Min functions • Real-time datalogger with integrated SD memory card • User selectable sampling rate from 2 secs to 8 hrs • Easy-to-read backlit LCD display • Tripod mount for long-term monitoring • Low battery indicator and auto shut off Included • Humidity Probe • Carbon Monoxide Probe • Carbon Dioxide Probe • Oxygen Probe • Hard Carrying Case • Batteries REED Instruments 1-877-849-2127 | info@reedinstruments.com | www.reedinstruments.com... -
Page 5: Specifications
>1,000 ppm ≤3000 ppm: ±5% rdg >3,000 ppm: ±250 ppm Resolution: 1 ppm Measuring Range: 0 to 1,000 ppm Accuracy: ±(5% + 2 ppm) Resolution: 1 ppm Measuring Range: 0 to 30% O Accuracy: ±(1% + 0.2% O Resolution: 0.10% continued... REED Instruments 1-877-849-2127 | info@reedinstruments.com | www.reedinstruments.com... - Page 6 Yes (after 10 minutes/off) Kick Stand: Tripod Mountable: Low Battery Indicator: Power Supply: 6 x AA batteries or AC Adapter (optional) Data Output: Yes (RS-232) Product Certifications: Operating Temperature: 0 to 122°F (0 to 50°C) Storage Temperature: 14 to 140°F (-10 to 60°C) Operating Humidity Range: 10 to 85% Dimensions: Instrument: 7.0 x 2.7 x 1.8" (177 x 68 x 45mm) Humidity Probe Length: 7.8" (197mm) CO Probe Length: 5.9" (150mm) Probe Length: 7.5" (190mm) Probe Length: 5.9" (150mm) Weight: 0.8lb (350g) REED Instruments 1-877-849-2127 | info@reedinstruments.com | www.reedinstruments.com...
-
Page 7: Instrument Description
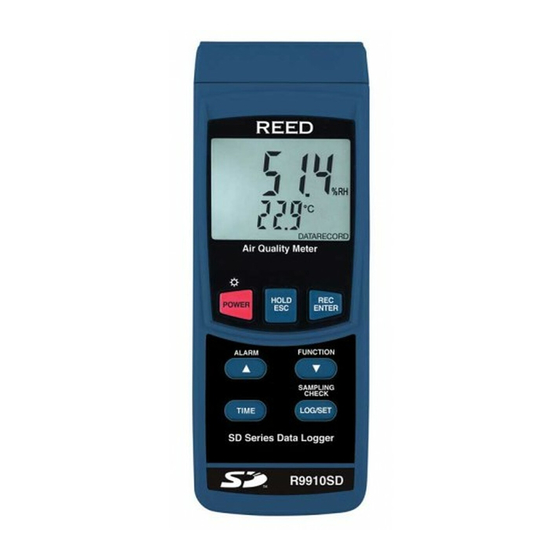
Instrument Description Air Quality Meter HOLD POWER ALARM FUNCTION SAMPLING CHECK TIME LOG/SET SD Series Data Logger R9910SD 14. Battery Cover 1. POWER/Backlight Button 15. Kickstand 2. Up/ALARM Button 16. Humidity Input Jack 3. TIME Button 17. O /CO Input Jack 4. SD Card Slot 18. CO Input Jacket 5. -
Page 8: Display Description
9. CO Sensor Signal Reading 10. Maximum and Minimum 3. Date/Time Stamp Indicators 4. Data Logging Status Indicator 11. Record Mode Indicator 5. SD Card Status Indicator 12. Data Hold Indicator 6. Temperature Unit of Measure 13. Low Battery Indicator 7. CO/Humidity/Dew Point Units of Measure REED Instruments 1-877-849-2127 | info@reedinstruments.com | www.reedinstruments.com... -
Page 9: Operating Instructions
Turn the meter on by pressing the POWER button. To turn the meter off, press and hold the POWER button for 2 seconds. Note: This meter can be powered by either six (6) "AA" batteries or AC adapter (sold separately). Selecting Measurement Modes The R9910SD has 6 measurement modes: • Humidity/Temperature • Dew Point Temperature • Wet Bulb Temperature • CO/Temperature • O... -
Page 10: Humidity/Temperature Mode
/Temperature Measurement Mode Select the "O " function (see Selecting Measurement Modes for details). The top part of the display will indicate the O value, and the lower part of the display will show the temperature value as shown. continued... REED Instruments 1-877-849-2127 | info@reedinstruments.com | www.reedinstruments.com... -
Page 11: Co /Temperature Measurement Mode
REC button for two seconds. When in recording mode the POWER button is disabled and the meter cannot be turned off. Backlight After powering the meter ON, the LCD Backlight will turn on automatically. Press the BACkLIGHT button to turn the LCD Backlight on or off. REED Instruments 1-877-849-2127 | info@reedinstruments.com | www.reedinstruments.com... -
Page 12: Setup Mode
Note: The meter will automatically exit out of the mode if no key is pressed within 7 seconds. Formatting the SD Card (Sd F) Follow steps 1 through 4 when "Sd F" appears on the LCD. Press the and buttons to select "YES" to format the card. Select "nO" to abort. Press the ENTER button to confirm selection. Press the ENTER button again to re-confirm. continued... REED Instruments 1-877-849-2127 | info@reedinstruments.com | www.reedinstruments.com... -
Page 13: Setting The Time And Date (Date)
Press the ENTER button to confirm each selection. Press the SET button to save the selected sampling rate and skip to next parameter. Note: At any time, you can press the ESC button to exit the Setup mode and resume normal operation. continued... REED Instruments 1-877-849-2127 | info@reedinstruments.com | www.reedinstruments.com... -
Page 14: Enabling/Disabling Auto Power Off (Poff)
Press the buttons to select between bASIC and Euro. Press the ENTER button to confirm selection. Press the SET button to save and skip to the next parameter. Note: At any time, you can press the ESC button to exit the Setup mode and resume normal operation. continued... REED Instruments 1-877-849-2127 | info@reedinstruments.com | www.reedinstruments.com... -
Page 15: Selecting The Temperature Unit Of Measure (T-Cf)
Follow steps 1 through 3 when "HIghF" appears on the LCD. Press the and buttons to adjust the CO height compensation value ranging from 0 to 2930 feet. Press the ENTER button to confirm selection. Press the SET button to save and skip to the next parameter. Press the SET button when "ESC" appears on the LCD to exit the Setup mode and resume normal operation. continued... REED Instruments 1-877-849-2127 | info@reedinstruments.com | www.reedinstruments.com... -
Page 16: Verify Set Time And Date
Press the LOG button to enter manual data logging function as indicated by "DATARECORD". The meter will also display P-X (X = memory position number between 1 and 99) Press the buttons to select one of the 99 data memory positions in which to record. continued... REED Instruments 1-877-849-2127 | info@reedinstruments.com | www.reedinstruments.com... -
Page 17: Automatic Data Logging Mode
Transferring Data from the SD Memory Card to a Computer While the meter is powered Off remove the SD memory card from the SD card slot. Insert the SD memory card into the computer. continued... REED Instruments 1-877-849-2127 | info@reedinstruments.com | www.reedinstruments.com... - Page 18 19-07-10 10:14:21 DEW C 19-07-10 10:14:23 DEW C 19-07-10 10:14:26 DEW C 19-07-10 10:14:28 DEW C 19-07-10 10:14:30 DEW C 19-07-10 10:14:32 DEW C 19-07-10 10:14:34 DEW C 19-07-10 10:14:36 DEW C continued... REED Instruments 1-877-849-2127 | info@reedinstruments.com | www.reedinstruments.com...
- Page 19 19-‐07-‐10 19-‐07-‐10 19-‐07-‐10 19-‐07-‐10 19-‐07-‐10 19-‐07-‐10 19-‐07-‐10 19-‐07-‐10 19-‐07-‐10 19-‐07-‐10 19-‐07-‐10 19-‐07-‐10 1 2 3 4 5 6 7 8 9 10 11 12 continued... REED Instruments 1-877-849-2127 | info@reedinstruments.com | www.reedinstruments.com...
- Page 20 10:14:26 CO PPM Degree_C 19-07-10 10:14:28 CO PPM Degree_C 19-07-10 10:14:30 CO PPM Degree_C 19-07-10 10:14:32 CO PPM 21.1 Degree_C 19-07-10 10:14:34 CO PPM 21.2 Degree_C 19-07-10 10:14:36 CO PPM 21.2 Degree_C continued... REED Instruments 1-877-849-2127 | info@reedinstruments.com | www.reedinstruments.com...
-
Page 21: Calibration Of O Sensor
Press the ENTER button and the display should indicate "20.9". Note: If it does not display the corrected value of "20.9", press the and buttons to adjust the displayed value to the standard value of "20.9". Press the ENTER button again to confirm and complete the O sensor calibration procedure. At this point, the sensor is now calibrated and should be reading accurately. REED Instruments 1-877-849-2127 | info@reedinstruments.com | www.reedinstruments.com... -
Page 22: Data Stream Output
(sonde 2) = 5 Données de température/CO (sonde 2) = 6 Données de O (sonde 3) = 7 REED Instruments Données de température/O (sonde 3) = 8 Données de CO (sonde 3) = 7 1-877-849-2127 | info@reedinstruments.com | www.reedinstruments.com Données de température/CO (sonde 3) = 8... -
Page 23: System Reset
Remove the battery cover. Replace 6 x "AA" batteries. Secure the battery cover with the two (2) Phillips screws. Applications Environmental Monitoring in: • Schools • Office buildings • Greenhouses • Factories • Hotels • Hospitals • Areas where high levels of carbon dioxide are generated REED Instruments 1-877-849-2127 | info@reedinstruments.com | www.reedinstruments.com... -
Page 24: Accessories And Replacement Parts
Accessories and Replacement Parts R9910SD-TH Replacement Temp/Humidity Probe R9910SD-CO Replacement CO Probe R9910SD-CO2 Replacement Carbon Dioxide Probe R9910SD-O2 Replacement Oxygen Probe R1500 Tripod RSD-ADP-NA Power Supply, 110V RSD-ADP-EU Power Supply, 220V CA-05A Soft Carrying Case R8888 Deluxe Hard Carrying Case SD-4GB 4GB Class 4 SDHC Memory Card RSD-16GB 16GB Micro SD Memory Card w/ Adapter Don't see your part listed here? For a complete list of all accessories and replacement parts visit your product page on www.reedinstruments.com. -
Page 25: Product Care
If I wanted to monitor CO/CO and temp at the same time do all the probes have to be connected and can they be? Yes, the R9910SD can have three probes plugged in at the same time: the Humidity, CO , and either the O or the CO Probe. -
Page 26: Product Warranty
REED Instruments guarantees this instrument to be free of defects in material or workmanship for a period of one (1) year from date of shipment. During the warranty period, REED Instruments will repair or replace, at no charge, products or parts of a product that proves to be defective because of improper material or workmanship, under normal use and maintenance. - Page 27 TeST & MeASuRe wITh ConfIDenCe CheCk ouT ouR LATeST PRoDuCTS! REED Instruments 1-877-849-2127 | info@reedinstruments.com | www.reedinstruments.com...
- Page 28 REED Instruments 1-877-849-2127 | info@reedinstruments.com | www.reedinstruments.com...
Need help?
Do you have a question about the R9910SD and is the answer not in the manual?
Questions and answers