Table of Contents
Advertisement
Quick Links
UNE-EN 1865-1789 models TG-243 y TG-244
Please read the instruction
manual before usage and keep
them for future reference.
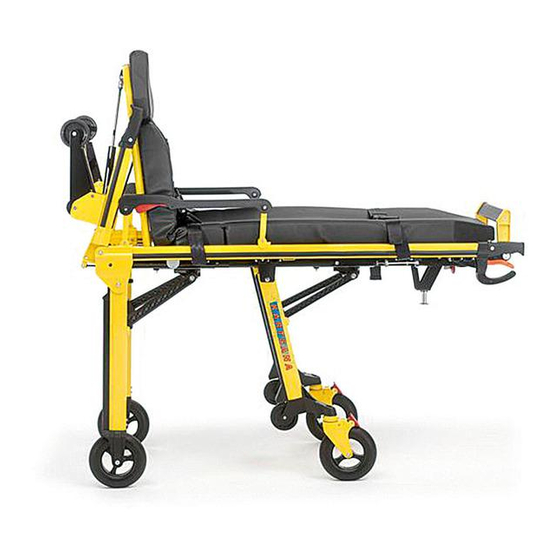
INSTRUCTION MANUAL
COMPACT STRETCHER
Pol. Ind. Can Carner C/. Urgell 1
08211 Castellar del Valles
Barcelona (Spain)
TEL. FAX : + 34 937144924
ventas@kartsana.com
www.kartsana.com
Advertisement
Table of Contents

Subscribe to Our Youtube Channel
Related Manuals for Kartsana Fuego TGR-244


Summary of Contents for Kartsana Fuego TGR-244
- Page 1 Pol. Ind. Can Carner C/. Urgell 1 08211 Castellar del Valles Barcelona (Spain) TEL. FAX : + 34 937144924 ventas@kartsana.com www.kartsana.com INSTRUCTION MANUAL COMPACT STRETCHER UNE-EN 1865-1789 models TG-243 y TG-244 Please read the instruction manual before usage and keep...
- Page 2 OPERATION AND HANDLING OF THE FUEGO STRETCHER ...
-
Page 3: Table Of Contents
OPERATION AND HANDLING OF THE FUEGO STRETCHER CONTENTS 1. Introduction Pages 1.1. Foreword................................2 1.2. Responsibility and warranty ........................2 Care ................................... 2 2. Instructions Manual 2.1. Technical characteristics ..........................3 2.2. Operating and handling the stretcher 2.2.1. Removable cuffs ........................ -
Page 4: Introduction
The Warranty will not cover the fault if that fault is due to incorrect installation, mistreatment or improper use of the stretcher. All repairs must be made by a technical service authorised by Kartsana or its respective representative. The manufacture will not be responsible for any anomaly caused to the stretcher due to using any products other than original Kartsana products. -
Page 5: Instructions Manual
OPERATION AND HANDLING OF THE FUEGO STRETCHER INSTRUCTIONS MANUAL The stretcher is adapted for mounting on the Kartsana R-415, R-450 S rail, based on the UNE-EN 1789 standard. To reduce the risk of injuries to the patient and accompanying persons in the event of an accident, it is advisable to avoid sharp edges and projecting parts inside the ambulance, paying special attention to the areas nearest to the stretcher. -
Page 6: Operating And Handling The Stretcher
OPERATION AND HANDLING OF THE FUEGO STRETCHER 2.2. Operating and handling the stretcher To prevent injuries to limbs and other body parts, make sure they are not within the range of the moving parts of the stretcher. Note: The front part of the stretcher corresponds to the head part. 2.2.1. - Page 7 OPERATION AND HANDLING OF THE FUEGO STRETCHER Head Head lever ...
-
Page 8: Foldable Head Zone
OPERATION AND HANDLING OF THE FUEGO STRETCHER -Foldable head zone As shown in the figure, the stretcher can be folded in the head zone for manoeuvring it in areas that are difficult to access. Press the device shown below and raise the cuffs of the stretcher until it is folded. ... -
Page 9: Adjustable Leg Rest
OPERATION AND HANDLING OF THE FUEGO STRETCHER 2.2.3. Adjustable leg rest Button for adjusting the leg inclination (Only for models TG-243, TG-248 and TG-244, TG-249) The required inclination of the leg rest can be obtained by pressing button A and moving the leg rest manually. -
Page 10: Safety Rail
OPERATION AND HANDLING OF THE FUEGO STRETCHER 2.2.4. Safety rail The safety rail has a red bar that locks the rail into place. To lower the rail, just press the bar as shown in the figure below. To lock it in the safety position again, move it to that position manually, and it will automatically lock into place. -
Page 11: Method For Fastening The Safety Belts On The Patient's Head And Feet
OPERATION AND HANDLING OF THE FUEGO STRETCHER The length of the mentioned stick of whey can get longer or shorter by pressing a small device placed in the interior face of the group, to raise the hook up to the top position.The maximum load permitted for the drip rod is 6 kg. -
Page 12: Method For Fastening The Safety Belt On The Patient's
OPERATION AND HANDLING OF THE FUEGO STRETCHER 2.2.7. Method for fastening the safety belt on the patient’s stomach It is advisable for this belt to be attached to the stretcher to ensure the complete safety of the patients and guarantee compliance with the UNE-EN 1865 standard test that is performed. -
Page 13: Anchoring With A Plate
OPERATION AND HANDLING OF THE FUEGO STRETCHER Anchoring with a plate Loosen the screws as shown in the following figure. To assemble them just follow the same process but in reverse order. To assemble them just follow the process in reverse order, fastening the ‘A’ screws to the ‘B’... -
Page 14: Position Of The Belts
OPERATION AND HANDLING OF THE FUEGO STRETCHER 2.2.8.1. Position of the belts 2.2.8.1.1. Lateral belts The belts are positioned at the approximate distances shown in the figure below. 2.2.8.1.2. Head belts The belts must be passed through the holes in the head part and secured on the crosspiece of the panel through the rings (09-027) as shown in the following figure. -
Page 15: Control For Operating The Stretcher Legs
OPERATION AND HANDLING OF THE FUEGO STRETCHER 2.2.9. Control for operating the stretcher legs 2.2.9.1. Rear controls Red (knob): locks/unlocks the front and rear legs when they are in the folded position. Blue (right): Folds/unfolds the front leg of the cart. Blue lever ... -
Page 16: Lateral Front Leg Control
OPERATION AND HANDLING OF THE FUEGO STRETCHER Note: If the cart is to be folded, release the control just before the leg reaches the fully folded position. To activate the intermediate positions, release the control when the leg starts to move. If the intermediate position is not correct, apply the control again until the leg is locked in the correct position. - Page 17 OPERATION AND HANDLING OF THE FUEGO STRETCHER 1st intermediate position It is achieved by activating the intermediate position lever (red) located on the right-hand side of the stretcher. This releases the front legs up to a mechanical stop. Then apply the rear control (orange) once until it reaches the first position. Hold the stretcher firmly with both hands to prevent it from making dangerous movements.
- Page 18 OPERATION AND HANDLING OF THE FUEGO STRETCHER 2nd Trendelenburg position It is achieved by activating the intermediate position lever (red) located on the right-hand side of the stretcher. This releases the front legs up to a mechanical stop. To perform this manoeuvre, apply the brakes on the front wheels and place them in the position shown in the adhesive, before activating the red lever at the side.
-
Page 19: Brake Lever
OPERATION AND HANDLING OF THE FUEGO STRETCHER 2.2.11. Brake lever Activate the red lever with your foot to enable the brake to lock the rear wheels. That special brake blocks both the longitudinal and the rotating movement of the stretcher. - Locking/unlocking the wheel rotation The green bolt is used to block or unblock the rotation of the wheels, as shown in the following figure. -
Page 20: Front Wheels
Guide the stretcher to the ambulance platform and mount its front wheels (wheels with a diameter of 100 mm), on the stretcher holder, and if the platform has a Kartsana rail, place the front wheels outside the rails. Then activate the front wheels control to fold the front leg (blue control) and insert the stretcher into the stretcher holder up to the rear wheels. - Page 21 (see the figures below). These anchoring points prevent the stretcher from overturning in the event of an accident. In the event of not using the Kartsana rails, it is advisable that the front part of the stretcher cart be anchored at the end of the bar marked 12 in the exploded diagram of the cart that is included in this manual.
-
Page 22: Disinfection
OPERATION AND HANDLING OF THE FUEGO STRETCHER DISINFECTION When disinfecting the stretcher, use products that will not damage the surface of the materials and wipe with a cloth or something similar. If the surface to be disinfected is greased, regreased it after disinfecting it. -
Page 23: Exploded View
OPERATION AND HANDLING OF THE FUEGO STRETCHER 5.- EXPLODED VIEW TG-242 11-09-09 Review 0 ... - Page 24 OPERATION AND HANDLING OF THE FUEGO STRETCHER EXPLODED VIEW TG-243 (UNE-EN 1865-1789) 30-06-10 Review 2...
- Page 25 OPERATION AND HANDLING OF THE FUEGO STRETCHER EXPLODED VIEW TG-244 (UNE-EN 1865-1789) 30-06-10 Review 2...
- Page 26 OPERATION AND HANDLING OF THE FUEGO STRETCHER EXPLODED VIEW TG-247 30-06-10 Review 2...
- Page 27 OPERATION AND HANDLING OF THE FUEGO STRETCHER EXPLODED VIEW TG-248 11-09-09 Review 0 ...
- Page 28 OPERATION AND HANDLING OF THE FUEGO STRETCHER EXPLODED VIEW TG-249 11-09-09 Review 0 ...
- Page 29 OPERATION AND HANDLING OF THE FUEGO STRETCHER ...
Need help?
Do you have a question about the Fuego TGR-244 and is the answer not in the manual?
Questions and answers