Table of Contents
Advertisement
Advertisement
Table of Contents

Related Manuals for CAME BPT MTM AUDIO ENTRY KIT


Summary of Contents for CAME BPT MTM AUDIO ENTRY KIT
- Page 1 MTM AUDIO & VIDEO ENTRY KITS Installation Instructions Technical Documentation...
-
Page 2: Table Of Contents
CONTENTS MTM AUDIO > AGATA AUDIO MTM VIDEO KEYPAD > OPALE VIDEO MTM AUDIO KEYPAD > AGATA AUDIO MTM VIDEO > OPALE VIDEO 2 WAY MTM AUDIO > AGATA AUDIO 2 WAY MTM VIDEO KEYPAD > OPALE VIDEO 2 WAY MTM AUDIO KEYPAD >... -
Page 3: Mtm Audio > Agata Audio
MTM AUDIO > AGATA AUDIO DRAWING SUITABLE FOR SYSTEM 200 KITS VRWSAG1 VRWFAG1 DRAWING SUITABLE MTMSAG1 FOR X1 KITS MTMFAG1 MTMSVRAG1 MTMFVRAG1 Technical Support: 01442 230 800 Email: technical@bpt.co.uk Drawing No. KIT-1M1A1LC(AUD) -
Page 4: Mtm Audio Keypad > Agata Audio
MTM AUDIO KEYPAD > AGATA AUDIO DRAWING SUITABLE FOR X1 KITS DRAWING SUITABLE VRWSKAG1 MTMSKAG1 MTMSVRKAG1 FOR X1 KITS VRWFKAG1 MTMFKAG1 MTMFVRKAG1 Technical Support: 01442 230 800 Email: technical@bpt.co.uk Drawing No. KIT-1MA1LCK(AUD) -
Page 5: Mtm Audio > Agata Audio 2 Way
MTM AUDIO > AGATA AUDIO 2 WAY DRAWING SUITABLE FOR SYSTEM 200 KITS VRWSAG2 MTMSAG2 MTMSVRAG2 DRAWING SUITABLE FOR X1 KITS VRWFAG2 MTMFAG2 MTMFVRAG2 Technical Support: 01442 230 800 Email: technical@bpt.co.uk Drawing No. KIT-2MA2LC(AUD) -
Page 6: Mtm Audio Keypad > Agata Audio 2 Way
MTM AUDIO KEYPAD > AGATA AUDIO 2 WAY DRAWING SUITABLE FOR SYSTEM 200 KITS VRWSKAG2 MTMSKAG2 MTMSVRKAG2 DRAWING SUITABLE FOR X1 KITS VRWFKAG2 MTMFKAG2 MTMFVRKAG2 Technical Support: 01442 230 800 Email: technical@bpt.co.uk Drawing No. KIT-2M1A2LCK(AUD) -
Page 7: Mtm Video > Agata Video
MTM VIDEO > AGATA VIDEO DRAWING SUITABLE FOR X1 KITS VRWSAGCV1 VRWFAGCV1 DRAWING SUITABLE MTMSAGCV1 FOR X1 KITS MTMFAGCV1 MTMSVRAGCV1 MTMFVRAGCV1 Technical Support: 01442 230 800 Email: technical@bpt.co.uk Drawing No. KIT-1M1A1C... -
Page 8: Mtm Video > Agata Video 2 Way
MTM VIDEO > AGATA VIDEO 2 WAY DRAWING SUITABLE FOR X1 KITS VRWSAGCV2 MTMSAGCV2 MTMSVRAGCV2 DRAWING SUITABLE FOR X1 KITS VRWFAGCV2 MTMFAGCV2 MTMFVRAGCV2 Technical Support: 01442 230 800 Email: technical@bpt.co.uk Drawing No. KIT-2M1A2C... -
Page 9: Mtm Video Keypad > Agata Video 2 Way
MTM VIDEO KEYPAD > AGATA VIDEO 2 WAY DRAWING SUITABLE FOR X1 KITS VRWSKAGCV2 MTMSKAGCV2 MTMSVRKAGCV2 DRAWING SUITABLE FOR X1 KITS VRWFKAGCV2 MTMFKAGCV2 MTMFVRKAGCV2 Technical Support: 01442 230 800 Email: technical@bpt.co.uk Drawing No. KIT-2M1A2CK... -
Page 10: Mtm Video > Perla Video
MTM VIDEO > PERLA VIDEO DRAWING SUITABLE FOR X1 KITS VRWSPWV1 MTMSPWV1 MTMSVRPWV1 DRAWING SUITABLE VRWFPWV1 MTMFPWV1 MTMFVRPWV1 FOR X1 KITS VRWSPBV1 MTMSPBV1 MTMSVRPBV1 VRWFPBV1 MTMFPBV1 MTMFVRPBV1 Technical Support: 01442 230 800 Email: technical@bpt.co.uk Drawing No. KIT-1M1S1C... -
Page 11: Mtm Video Keypad > Perla Video
MTM VIDEO KEYPAD > PERLA VIDEO DRAWING SUITABLE FOR X1 KITS VRWSKPWV1 MTMSKPWV1 MTMSKPBV1 DRAWING SUITABLE VRWFKPWV1 MTMFKPWV1 MTMFKPBV1 FOR X1 KITS VRWSKPBV1 MTMSVRKPWV1 MTMSVRKPBV1 VRWFKPBV1 MTMFVRKPWV1 MTMFVRKPBV1 Technical Support: 01442 230 800 Email: technical@bpt.co.uk Drawing No. KIT-1M1S1CK... -
Page 12: Mtm Video > Perla Video 2 Way
MTM VIDEO > PERLA VIDEO 2 WAY DRAWING SUITABLE FOR SYSTEM X1 KITS VRWSPWV2 MTMSPWV2 MTMSVRPWV2 DRAWING SUITABLE VRWFPWV2 MTMFPWV2 MTMFVRPWV2 FOR X1 KITS VRWSPBV2 MTMSPBV2 MTMSVRPBV2 VRWFPBV2 MTMFPBV2 MTMFVRPBV2 Technical Support: 01442 230 800 Email: technical@bpt.co.uk Drawing No. KIT-2M1S2C... -
Page 13: Mtm Video Keypad > Perla Video 2 Way
MTM VIDEO KEYPAD > PERLA VIDEO 2 WAY DRAWING SUITABLE FOR SYSTEM X1 KITS VRWSKPWV2 MTMSKPWV2 MTMSVRKPWV2 DRAWING SUITABLE VRWFKPWV2 MTMFKPWV2 MTMFVRKPWV2 FOR X1 KITS VRWSKPBV2 MTMSKPBV2 MTMSVRKPBV2 VRWFKPBV2 MTMFKPBV2 MTMFVRKPBV2 Technical Support: 01442 230 800 Email: technical@bpt.co.uk Drawing No. KIT-2M1S2CK... -
Page 14: Mtm Video > Opale Video
MTM VIDEO > OPALE VIDEO DRAWING SUITABLE FOR X1 KITS VRWSOW1 MTMSOW1 MTMSVROW1 DRAWING SUITABLE VRWFOW1 MTMFOW1 MTMFVROW1 FOR X1 KITS VRWSOB1 MTMSOB1 MTMSVROB1 VRWFOB1 MTMFOB1 MTMFVROB1 Technical Support: 01442 230 800 Email: technical@bpt.co.uk Drawing No. KIT-1M1Z1C... -
Page 15: Mtm Video Keypad > Opale Video
MTM VIDEO KEYPAD > OPALE VIDEO DRAWING SUITABLE FOR X1 KITS VRWSKOW1 MTMSKOW1 MTMSVRKOW1 DRAWING SUITABLE VRWFKOW1 MTMFKOW1 MTMFVRKOW1 FOR X1 KITS VRWSKOB1 MTMSKOB1 MTMSVRKOB1 VRWFKOB1 MTMFKOB1 MTMFVRKOB1 Technical Support: 01442 230 800 Email: technical@bpt.co.uk Drawing No. KIT-1M1Z1CK... -
Page 16: Mtm Video > Opale Video 2 Way
MTM VIDEO > OPALE VIDEO 2 WAY DRAWING SUITABLE FOR SYSTEM X1 KITS VRWSOW2 MTMSOW2 MTMSVROW2 DRAWING SUITABLE VRWFOW2 MTMFOW2 MTMFVROW2 FOR X1 KITS VRWSOB2 MTMSOB2 MTMSVROB2 VRWFOB2 MTMFOB2 MTMFVROB2 Technical Support: 01442 230 800 Email: technical@bpt.co.uk Drawing No. KIT-2M1Z2C... -
Page 17: Mtm Video Keypad > Opale Video 2 Way
MTM VIDEO KEYPAD > OPALE VIDEO 2 WAY DRAWING SUITABLE FOR SYSTEM X1 KITS VRWSKOW2 MTMSKOW2 MTMSVRKOW2 DRAWING SUITABLE VRWFKOW2 MTMFKOW2 MTMFVRKOW2 FOR X1 KITS VRWSKOB2 MTMSKOB2 MTMSVRKOB2 VRWFKOB2 MTMFKOB2 MTMFVRKOB2 Technical Support: 01442 230 800 Email: technical@bpt.co.uk Drawing No. KIT-2M1Z2CK... -
Page 18: Mtm Video > Xts 7 Video
MTM VIDEO > XTS 7 VIDEO DRAWING SUITABLE FOR X1 KITS VRWS7XW1 MTMS7XW1 MTMSVR7XW1 DRAWING SUITABLE VRWF7XW1 MTMF7XW1 MTMFVR7XW1 FOR X1 KITS VRWS7XB1 MTMS7XB1 MTMSVR7XB1 VRWF7XB1 MTMF7XB1 MTMFVR7XB1 Technical Support: 01442 230 800 Email: technical@bpt.co.uk Drawing No. KIT-1M1XTS1C... -
Page 19: Mtm Video Keypad > Xts 7 Video
MTM VIDEO KEYPAD > XTS 7 VIDEO DRAWING SUITABLE FOR X1 KITS VRWSK7XW1 MTMSK7XW1 MTMSVRK7XW1 DRAWING SUITABLE VRWFK7XW1 MTMFK7XW1 MTMFVRK7XW1 FOR X1 KITS VRWSK7XB1 MTMSK7XB1 MTMSVRK7XB1 VRWFK7XB1 MTMFK7XB1 MTMFVRK7XB1 Technical Support: 01442 230 800 Email: technical@bpt.co.uk Drawing No. KIT-1M1XTSCK... -
Page 20: Mtm Video > Xts 7 Video 2 Way
MTM VIDEO > XTS 7 VIDEO 2 WAY DRAWING SUITABLE FOR SYSTEM X1 KITS VRWS7XW2 MTMS7XW2 MTMSVR7XW2 DRAWING SUITABLE VRWF7XW2 MTMF7XW2 MTMFVR7XW2 FOR X1 KITS VRWS7XB2 MTMS7XB2 MTMSVR7XB2 VRWF7XB2 MTMF7XB2 MTMFVR7XB2 Technical Support: 01442 230 800 Email: technical@bpt.co.uk Drawing No. KIT-2M1XTS2C... -
Page 21: Mtm Video Keypad > Xts 7 Video 2 Way
MTM VIDEO KEYPAD > XTS 7 VIDEO 2 WAY DRAWING SUITABLE FOR SYSTEM X1 KITS VRWSK7XW2 MTMSK7XW2 MTMSVRK7XW2 DRAWING SUITABLE VRWFK7XW2 MTMFK7XW2 MTMFVRK7XW2 FOR X1 KITS VRWSK7XB2 MTMSK7XB2 MTMSVRK7XB2 VRWFK7XB2 MTMFK7XB2 MTMFVRK7XB2 Technical Support: 01442 230 800 Email: technical@bpt.co.uk Drawing No. KIT-2M1XTS2CK... -
Page 22: Quick Start - Manual Programming Guide
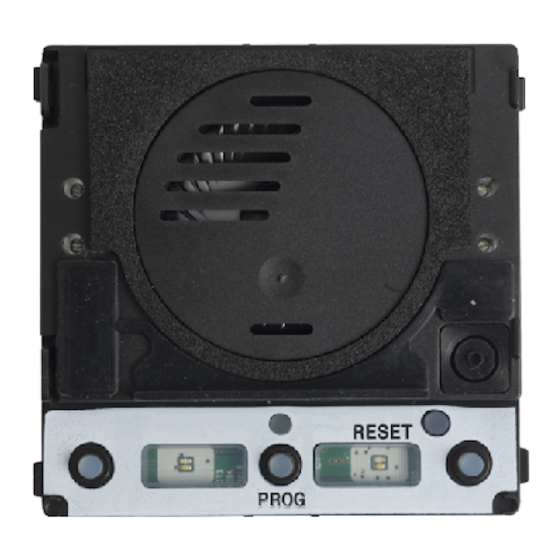
❻ ❼ QUICK START - FOR MTMV01 or MTMA01 Panel with VAS/101, MANUAL PROGRAMMING GUIDE VAS/100 or VA/301 To successfully install ❶ ❶ a door entry system you MTMA/01 MTMV/01 must have at least 1 x MTMV01 or 1 x MTMA01 ⓫... -
Page 23: Pre-Commissioning Checks
PRE-COMMISSIONING CHECKS IMPORTANT - Carry out the ONLY if all the above checks Programming systems with only following checks BEFORE have been completed and are one entry panel – NOTE! Always switching on the 230v AC correct progress as follows: program the entry panel first electrical supply 1. - Page 24 QUICK START - To PROGRAM RECEIVERS carry out the following only PROG MANUAL PROGRAMMING GUIDE after the entry panel has been programmed AGATA / LYNEA VIDEO RECEIVERS Lift handset off Press Door Release Check for video image Place handset on hook the hook (KEY) &...
- Page 25 For Agata and Lynea Audio Receivers follow steps 1, 2, 4 and 5 on the opposite page for the video version. NOTE: Agata audio handset buttons are similar to Lynea (for step 2 above). AGATA / LYNEA / PERLA AUDIO ONLY RECEIVERS Press Door Release (KEY) and AUX 2 At the entry panel, press and hold the Press the handset button to close...
- Page 26 QUICK START - MANUAL PROGRAMMING GUIDE FOR PERLA, OPALE, NOVA & FUTURA VIDEO RECEIVERS Press Door Release (KEY) and AUX 2 (2 dot) buttons (see below) together until you have a video image Perla Video Example Nova Video Example Opale Video Example Futura Video Example Check for video image - Check for video image -...
- Page 27 At the entry panel, press and hold the Press the handset button to close While still in programming mode, call button (hold until audible communication if programming further receivers confirmation tone) to program of a different type, please refer it to this receiver. to the relevant receiver programming section.
- Page 28 QUICK START - MANUAL PROGRAMMING GUIDE FOR XTS 7 X2 From the homepage, swipe left then select ‘Settings’ Then swipe up and select ‘Advanced settings’ at the bottom Adjustment of camera viewing angle on video receivers (Global function), if required. 1.
- Page 29 Now select ‘Configure X2’ OR ‘X2 Configuration’ Select ‘Manual Programming’ You will be prompted for a password. Enter ‘112233’ and then ‘OK’ Click ‘OK’ to close the message box that appears and after While still in programming mode, if programming further receivers a short delay you will be presented with video from the of a different type, please refer to the relevant receiver programming entry panel.
-
Page 30: Mtm Na 'Quick' Start Instructions
MTM NA ‘QUICK’ START INSTRUCTIONS set an entry code associated with user ID 001 for relay 1. (999 slots available) The following instructions relate to Keypad supplied Enter this sequence: 21 2 001* XXXX (new code 4-8 digits) # ** from new only and set to Master. - Page 32 CAME BPT UK LTD - North Unit 1B Sills Road, Willow Farm Business Park, Castle Donington, DE74 2US T 0115 921 430 F 0115 921 431 CAME BPT UK LTD - South Liberta House, Maxted Road, Maylands Industrial Est, Hemel Hempstead, Herts.
Need help?
Do you have a question about the MTM AUDIO ENTRY KIT and is the answer not in the manual?
Questions and answers