
Related Manuals for CAME BPT XTS 7IP WH WIFI


Summary of Contents for CAME BPT XTS 7IP WH WIFI
- Page 1 Handsfree entry phone for IP360 system FB01265-EN XTS 7IP WH WIFI XTS 7IP BK WIFI XTS 7IP WH WFBF USER MANUAL EN English...
-
Page 2: General Precautions
GENERAL PRECAUTIONS Carefully read the instructions before using the device. • The installation, programming, commissioning and maintenance of the product must only be carried out by • qualified technicians, properly trained in compliance with the regulations in force, including health and safety measures and the disposal of packaging. - Page 3 Commands and notifications found on the home page The appearance of the homepage may vary according to the system configuration or the user interface. Favourites Entry panels Contacts Video Recording Aux List Call register 19:02 Thursday 01 Feb 2018 Info Back Home A Command to exclude call ringer;...
-
Page 4: How To Use The Device
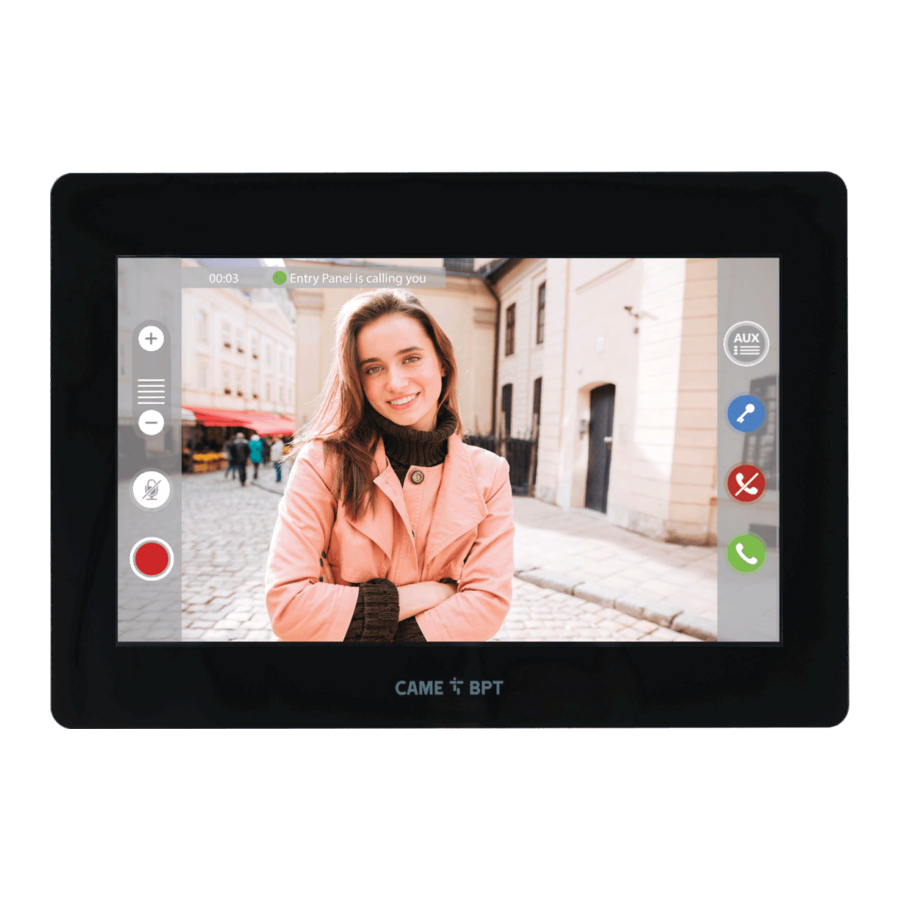
HOW TO USE THE DEVICE Answering a call Call from Entry Panel An image of the caller appears on the screen. The audio from and towards the caller is turned off. A Touch the button to answer the call and to turn on the audio communication. B Touch the button to refute the call and to return to the homepage. -
Page 5: Making A Call
Making a call This device lets you call other indoor receivers (intercommunication), any devices connected over the Wifi network or, any entry panels. Calling a contact on the favorites list Favourites Entry panels Contacts A Touch the icon to access the list of favorite contacts. - Page 6 Turn on communication to entry panel Favourites Entry panels Contacts B Touch the icon to access the list of entry panels. To fill the list of entry panels, see the "Contacts" chapter on page 7. Video Recording Aux List Call register 19:02 Thursday 01 Feb 2018...
- Page 7 Contacts Touch the icon to access the con- tacts list. Favourites Entry panels Contacts Video Recording Aux List Call register 19:02 Thursday 01 Feb 2018 Info Back Home The list contains all the devices that can be contacted. Concierge Main entry panel EAST entry panel Home NORTH entry panel...
-
Page 8: Entry Panel
Unit A Residential unit Home B The indoor receiver. EXTENSIONS C Devices belonging to the resi- XTS receiver dential unit. Mobile App 1 Attic XTS receiver Touch the icon to add the con- Mobile App 3 tact to the list of favorites. Touch one of the contacts to initiate Cellar XTS receiver a call. -
Page 9: Video Recording
Video Recording A Touch the icon the turn the an- swering service on or off. Favourites Entry panels Contacts To properly set up the an- swering service, see the "Video answering service" chapter on page 16. B The number with the red back- Video Recording Aux List Call register... -
Page 10: Call Register
Touch the name of the wanted command to activate its corre- Gate sponding contact. Entry panel Light Touch the icon to edit the Entry panel command name. Touch the Back button to return to the previous screen. 19:02 Thursday 01 Feb 2018 Info Back Home... - Page 11 CCTV A Touch the icon to access the list of available video cameras. CCTV Messages Settings To fill the list of IP cameras, see the "IP Cameras" chapter on page 16. 19:02 Thursday 01 Feb 2018 Info Back Home Select the IP video camera that you want to view.
- Page 12 Messages from the concierge are grouped by conversation sub- Concierge 01 Feb 2018 14:58 ject. Electric power cut off Concierge 28 Jan 2018 11:23 Any unseen messages are high- Mail delivery lighted. New message Touch the icon to remove the message from the list.
-
Page 13: General Settings
GENERAL SETTINGS Touch the icon to return to the list of settings. CCTV Settings 19:02 Thursday 01 Feb 2018 Info Back Home System information This window gives technical infor- mation that is useful for identifying System information the device's characteristics and the hardware and software versions. - Page 14 Date/time This window is for setting the date and time on the indoor receiver. Mode Manual Auto A The date and time are manually Auto mode System set by the user. NTP server B Date and time are synchronized automatically. Date/Time 01 Feb 2018 19:02 The network to which the de-...
-
Page 15: Quick Commands
B Touch the area to assign a name to the AUX command that you are Description Gate opener going to add. Command Aux 3 C Choose the command to asso- ciate the AUX to, from the list. Destination Entry panel D Choose the destination of the AUX command from the list. - Page 16 Video Recording If the system has a video intercom entry panel installed, if the called user is not in, the device lets the caller record a video message. The caller may be notified of this by a courtesy message, for example, "The user is not available at the moment, please leave a message after the beep".
- Page 17 B Touch the area to assign a name to the IP video camera that you are Description going to add. URI for real-time con- C Touch the area and type the nection URI string for connecting the video camera. URI for the fixed image D Touch the area and type the URI string for acquiring the static image from the video camera, needed for...
- Page 18 Display A Adjusts the brightness of the screen during use. Brightness B Adjusts the brightness of the Brightness in stand-by screen saver when the screen is in stand-by mode. Clean screen This makes the screen insensitive to the touch for 20 seconds, to enable cleaning over it.
-
Page 19: Advanced Settings
Advanced settings On master receiver On slave receiver This section requires specific know-how in operating the vid- Network Network eo-intercom system. Wrong set- tings may cause partial or even CAME Connect SIP Settings total malfunctions; that is why Credentials Automatic door opener the editing of some parameters Automatic door opener is allowed only after entering the... -
Page 20: Wireless Connection Configuration
Static The device's IP address is manually assigned. E If you have chosen a static IP address, enter the device's IP, which must belong to the same subnet as that of the router and of the other connected devices. F If the netmask is different from the default one, provide the proper netmask. G Provide the default gateway for your network. - Page 21 To save the configuration touch the button K. SSID Hidden network To connect to a WiFi network with a Security hidden SSID, touch this button J. None On the page provided yo can enter Encryption an SSID, that is, network name, Password type of security, encryption and password;...
-
Page 22: Manual Mode
SIP settings (only on slave receiver) Manual Mode A In this space enter the “SIP User Mode Manual Automatic Name” assigned to the device by Flat Id PCS Xip. Username B In this space enter the password assigned in the receiver credentials Password in the server set-up window. -
Page 23: Automatic Door Opener
Automatic door opener This function, which is especially useful for businesses, lets you automatically open the entrance once the call-but- ton is pressed on the entry panel. The activation of this function can be programmed to schedule time slots and days of the week. -
Page 24: Configuring The User Interface
For editing the selected ele- ment. 08:30 12:30 For eliminating the selected 13:30 18:30 element. Touch the Back button to return to New time-slot the list of configurable parameters. Delete all 19:02 Thursday 01 Feb 2018 Info Back Home Configuring the user interface Using the PC software [UI Creator], it is possible to design and program a custom graphical interface within the system master server for the XTS device. -
Page 25: Maintenance
Touch each of the empty sections and use the drop-down menu to Number of frames: select the content that you want to assign to the section. Empty Empty Save the setting by touching the Save button. Empty Settings Save 19:02 Thursday 01 Feb 2018 Info... - Page 26 SETTINGS AVAILABLE ONLY FROM WEB PAGE The web pages, in addition to allowing the configuration of most of the parameters that can be set by the interface of the receiver, allow provide some additional functions illustrated in this section. Type the address of the device in the browser address bar XTS 7 IP (Chrome, Firefox, Safari).
- Page 27 Maintenance Maintenance Help Exit Update System UPDATE... CHANGE PASS... CONFIGUTION... This window is for updating the Date and Time device's firmware, by proceeding as follows: Network VERSION A Press the button, select the file containing the firmware update on your computer, and start the pro- IP video cameras cess.
- Page 28 Pertinent Regulations. CAME SpA, the manufacturer, declares that the products described in this manual con- forms to Directive 2014/53/EU. The complete wording of the EU declaration of conformity is available at the follow- ing Internet address: www.came.com Decommissioning and disposal. Dispose of the packaging and the device at the end of its life cycle responsibly, in compliance with the laws in force in the country where the product is used.
Need help?
Do you have a question about the XTS 7IP WH WIFI and is the answer not in the manual?
Questions and answers