L-Acoustics X12 User Manual
Hide thumbs
Also See for X12:
- User manual (35 pages) ,
- Rigging manual (55 pages) ,
- Owner's manual (100 pages)
Table of Contents
Advertisement
Quick Links
Advertisement
Table of Contents

Related Manuals for L-Acoustics X12


Summary of Contents for L-Acoustics X12
- Page 1 user manual 2.1 (EN)
- Page 2 Document reference: X12 user manual (EN) version 2.1 Distribution date: December 28, 2015 © 2015 L-Acoustics. All rights reserved. No part of this publication may be reproduced or transmitted in any form or by any means without the express written consent of the...
-
Page 3: Table Of Contents
X12 point source...........................10 X12 point source with LF.........................11 X12 with SB15m...........................11 X12 with SB18..........................12 X12 stage monitor..........................13 X12 stage monitor with LF........................14 X12 with SB15m...........................14 X12 with SB18..........................15 Loudspeaker connection............................ 16 Connectors............................. 16 Connection to LA4X..........................17 Using SP cables with passive enclosures.................. - Page 4 Disassembly and Reassembly procedures....................29 D/R - X12 GRILL........................... 30 D/R - X12 COAXIAL LOUDSPEAKER....................32 D/R - X12 DIAPHRAGM........................ 34 Illustrations............................... 37 Loudspeaker cables..........................37 X12 specifications.............................38...
-
Page 5: Safety
Safety Safety Instructions Never incorporate equipment or accessories not approved by L-Acoustics. Read all the related PRODUCT INFORMATION documents shipped with the products before exploiting the system. Beware of sound levels. Do not stay within close proximity of loudspeakers in operation. -
Page 6: Welcome
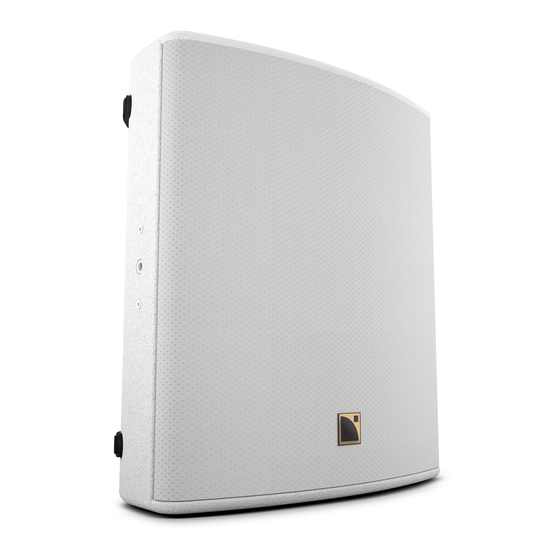
With a cabinet combining the properties of birch and beech plywood, X12 weighs 20 kg and its elegance makes for an easy integration in any situation. Ergonomic handles provide a solid grip and efficient handling. An optional white or RAL color program means that it can melt into any architecture. -
Page 7: System Components
Refer to the LA4X / LA8 user manual for detailed instructions about the whole cabling scheme, including modulation cables and network. Rigging elements Rigging elements or procedures are not presented in this document. Refer to the X12 rigging manual. Software applications Soundvision 3D acoustical and mechanical modeling software... -
Page 8: Technical Description
Low-latency preset A low-latency preset is available for the X12 enclosure used as a monitor ([X12_MO]). It reduces latency from 3.84 ms down to 1.19 ms (LA8) and 0.76 ms (LA4X). If the monitor is combined with a subwoofer, a custom preset must be used. -
Page 9: Monitor Angles
Technical description Monitor angles X12 features risers that allow to change the monitor angle from 35° to 55°. 55° 35° X12 user manual (EN) version 2.1... -
Page 10: Loudspeaker Configurations
Loudspeaker configurations X12 point source Deployed as a standalone point source, an X12 system operates over the nominal bandwidth of the X12 enclosure. The [X12] preset allows for a reference frequency response in short throw applications. The X12 enclosure is driven by the LA4X / LA8 amplified controllers. -
Page 11: X12 Point Source With Lf
The X12, SB15m and SB18 enclosures are driven by the LA4X / LA8 amplified controllers. X12 with SB15m With SB15m, the X12 system contour is reinforced by 8 dB at 100 Hz and the system bandwidth is extended down to 40 Hz. -
Page 12: X12 With Sb18
Loudspeaker configurations X12 with SB18 With SB18, the X12 system contour is reinforced by 8 dB at 100 Hz, and the system bandwidth is extended down to 32 Hz. Enclosure Preset X12 [X12] SB18 [SB18_100] Frequency range (-10 dB) 32 Hz - 20 kHz... -
Page 13: X12 Stage Monitor
Loudspeaker configurations X12 stage monitor Deployed as a stage monitor, an X12 system operates over the nominal bandwidth of the X12 enclosure. The [X12_MO] preset allows for a reference frequency response in stage monitoring applications. The X12 enclosure is driven by LA4X / LA8. -
Page 14: X12 Stage Monitor With Lf
The X12, SB15m and SB18 enclosures are driven by the LA4X / LA8 amplified controllers. X12 with SB15m With SB15m, the X12 system contour is reinforced by 8 dB at 100 Hz and the system bandwidth is extended down to 40 Hz. -
Page 15: X12 With Sb18
Loudspeaker configurations X12 with SB18 With SB18, the X12 system contour is reinforced by 8 dB at 100 Hz, and the system bandwidth is extended down to 32 Hz. 55° 35° Enclosure Preset X12 [X12_MO] SB18 [SB18_100] Frequency range (-10 dB) 32 Hz - 20 kHz... -
Page 16: Loudspeaker Connection
Loudspeaker connection Loudspeaker connection Connectors The X12 is equipped with two 4-point speakON connectors. LINK Internal pinout for L-ACOUSTICS 2-way passive enclosures speakON points Transducer connectors + Not linked Not linked The SB15m is equipped with two 4-point speakON connectors. -
Page 17: Connection To La4X
— Use SP cables (SP.7, SP5, SP10 or SP25) to connect one enclosure to each of the four speakON connectors of the amplified controller. — If necessary, use SP cables to connect identical enclosures in parallel with the first ones. Refer to the cabling schemes below for more instructions. OUT1 OUT3 OUT4 OUT2 X12 user manual (EN) version 2.1... - Page 18 Loudspeaker connection SB15m OUT1 OUT3 OUT4 OUT2 SB18 OUT1 OUT3 OUT2 OUT4 X12 user manual (EN) version 2.1...
-
Page 19: Using Sp-Y1 Cables
— If necessary, use SP cables to connect identical enclosures in parallel with the first ones. Refer to the cabling schemes below for more instructions. SP-Y1 CC4FP OUT3/OUT4 OUT1/OUT2 SP-Y1 CC4FP SB15m SP-Y1 CC4FP OUT1/OUT2 OUT3/OUT4 SP-Y1 CC4FP X12 user manual (EN) version 2.1... - Page 20 Loudspeaker connection SB18 SP-Y1 CC4FP OUT1/OUT2 OUT3/OUT4 SP-Y1 CC4FP X12 user manual (EN) version 2.1...
-
Page 21: Connection To La8
— Use a DOSUB-LA8 to split the signal into four channels, each feeding one enclosure. — If necessary, use SP cables to connect identical enclosures in parallel with the first ones. Refer to the cabling schemes below for more instructions. CA-COM X12 user manual (EN) version 2.1... - Page 22 Loudspeaker connection SB15m CA-COM SB18 CA-COM X12 user manual (EN) version 2.1...
-
Page 23: Using Sp-Y1 Cables
— If necessary, use SP cables to connect identical enclosures in parallel with the first ones. Refer to the cabling schemes below for more instructions. SP-Y1 CC4FP OUT1/OUT2 OUT3/OUT4 SP-Y1 CC4FP SB15m SP-Y1 CC4FP OUT1/OUT2 OUT3/OUT4 SP-Y1 CC4FP X12 user manual (EN) version 2.1... - Page 24 Loudspeaker connection SB18 SP-Y1 CC4FP OUT1/OUT2 OUT3/OUT4 SP-Y1 CC4FP X12 user manual (EN) version 2.1...
-
Page 25: Preset Description
0 dB 0 ms SB18 SB15m OUT 2 IN A 0 dB 0 ms SB18 SB15m OUT 3 IN A 0 dB 0 ms SB18 SB15m OUT 4 IN A 0 dB 0 ms X12 user manual (EN) version 2.1... -
Page 26: Recommendation For Speaker Cables
4 Ω load 2.7 Ω load For your installation projects, you can use the more detailed L-ACOUSTICS calculation tool to evaluate cable length and gauge based on the type and number of enclosures connected. The calculation tool is available on our website: http://www.l-acoustics.com/installation-outils-de-calcul-1367.html... -
Page 27: Maintenance
1250 12" speaker gasket 100222 X12 grill stop screw S100054 M6x30 Tuflok coated hex socket head cap screw S100033 M5x25 Tuflok coated flat countersunk head machine screw S100082 M4x14 hexagon socket head cap screw X12 user manual (EN) version 2.1... -
Page 28: G03175
1250 12" speaker gasket 100222 X12 grill stop screw S100054 M6x30 Tuflok coated hex socket head cap screw S100033 M5x25 Tuflok coated flat countersunk head machine screw S100082 M4x14 hexagon socket head cap screw X12 user manual (EN) version 2.1... -
Page 29: Disassembly And Reassembly Procedures
Maintenance Disassembly and Reassembly procedures In order to operate, follow the order outlined here. START X12 GRILL X12 COAXIAL SPEAKER X12 DIAPHRAGM X12 user manual (EN) version 2.1... -
Page 30: D/R - X12 Grill
Maintenance D/R - X12 GRILL How to remove and reassemble the X12 grill. Tools Name Reference Distributor electric screwdriver with torque selector T25 Torx bit EX.625 FACOM Pre-requisite The enclosure is placed on its bottom face, as illustrated. X12 grill disassembly procedure Procedure 1. - Page 31 Procedure 1. Position the grill. Make sure the logo is on the right hand side. 2. Secure the grill with the S100033 screws. Use the T25 Torx bit. Set the torque to 5 N.m. X12 user manual (EN) version 2.1...
-
Page 32: D/R - X12 Coaxial Loudspeaker
Maintenance D/R - X12 COAXIAL LOUDSPEAKER How to remove and replace the X12 coaxial speaker. Tools Name Reference Distributor electric screwdriver with torque selector 5 mm hex bit EH.605 FACOM Pre-requisite Grill disassembled. X12 GRILL (p.30). The enclosure is placed on its bottom face, as illustrated. - Page 33 2. Connect the speaker cables and position the speaker. The LF speaker connectors are positioned downwards. 3. Secure the speaker with the provided 100222 screws and S100054 screws. Use the 5 mm hex bit. Set the torque to 5 Nm. X12 user manual (EN) version 2.1...
-
Page 34: D/R - X12 Diaphragm
Maintenance D/R - X12 DIAPHRAGM How to remove and replace the X12 speaker diaphragm. Tools Name Reference Distributor electric screwdriver with torque selector 3 mm hex bit EH.603 FACOM Allen wrench n°3 Pre-requisite Grill disassembled. X12 GRILL (p.30). Coaxial speaker removed. - Page 35 Gradually secure each screw manually with the Allen wrench n°3. Follow a cross scheme. b) Tighten the screws in the same order with the electric screwdriver. 3 mm hex bit. Set the torque to 3.5 Nm. X12 user manual (EN) version 2.1...
-
Page 36: Troubleshooting
Pay close attention to the number of shims and the position of the diaphragm. Apply the recommended torque. 4. Repeat the acoustical check. If a buzzing sound is still audible, it might be necessary to add an extra shim on the air gap. X12 user manual (EN) version 2.1... -
Page 37: Illustrations
8-point PA-COM loudspeaker cable (0.7 m / 2.3 ft) DO10 8-point PA-COM loudspeaker cable (10 m / 32.8 ft) DO25 8-point PA-COM loudspeaker cable (25 m / 82 ft) DOSUB-LA8 breakout cable for four passive enclosures SP-Y1 breakout cable for two passive enclosures X12 user manual (EN) version 2.1... -
Page 38: X12 Specifications
PANTONE 426C pure white RAL 9010 custom RAL code on special order IP43 Peak level at 1 m under free field conditions using 10 dB crest factor pink noise with specified preset. X12 user manual (EN) version 2.1... - Page 39 403 mm / 496 mm / 471 mm 15.9 in / 19.5 in / 18.5 in 430 mm / 16.9 in 375 mm / 14.8 in 471 mm / 18.5 in 500 mm / 19.7 in X12 user manual (EN) version 2.1...
Need help?
Do you have a question about the X12 and is the answer not in the manual?
Questions and answers