Table of Contents
Advertisement
Quick Links
Advertisement
Table of Contents

Related Manuals for SIIG AV-GM06Y3-S1


Summary of Contents for SIIG AV-GM06Y3-S1
- Page 1 8x8 DVI Matrix User Manual P/N: AV-GM06Y3-S1...
-
Page 2: Table Of Contents
However, like all electronic equipments, the AV-GM06Y3-S1 should be used with care. Please read and follow the safety instructions to protect yourself from possible injury and to minimize the risk of damage to the unit. -
Page 3: Introduction
RS-232 control or Ethernet control. Easy installation with rack-mounting Fast response time – 2~5 seconds for channel switch Not HDCP compliant PACKAGE CONTENTS ● 1x AV-GM06Y3-S1 ● 1x IR Remote control ● 2x Rack-mounting ears set ● 1x User Manual... -
Page 4: Specifications
Technical Role of usage True 8x8 matrix switcher DVI compliance DVI 1.0 Video bandwidth [AV-GM06Y3-S1] – Single-link 165MHz [4.95Gbps] Video support VGA(640x480)~WUXGA (1920x1200),480p~1080p [1] Human body model — ±19kV [air-gap discharge] & ±12kV [contact ESD protection discharge] [2] Core chipset — ±2kV PCB stack-up 4-layer board [impedance control —... - Page 5 USB or RS-232 control must be connected either one at a time. Connecting both types of cables may cause command confusion.
-
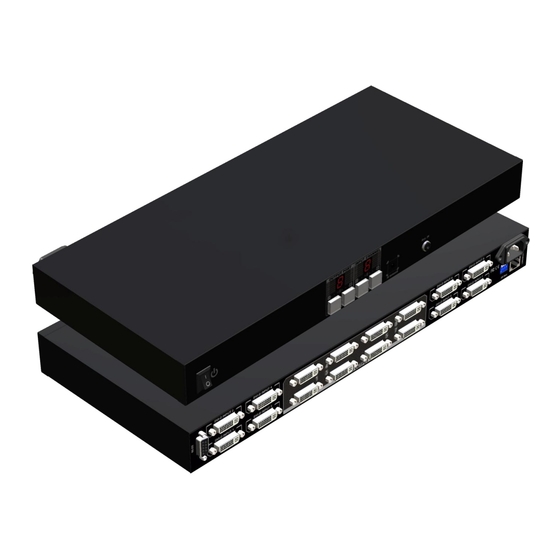
Page 6: Panel Descriptions
PANEL DESCRIPTIONS Front Panel Power: Power control Seven Segment LED Indicators: Control display Push button: Front panel push buttons used to select the number of input source and display channel IR SENSOR: IR sensor for receiving the IR commands from the IR remote Ext. -
Page 7: Connection Diagram
HARDWARE INSTALLATION AV-GM06Y3-S1 1. Connect all sources to DVI Inputs on the 8x8 DVI Matrix 2. Connect all outputs to DVI devices 3. Connect the power cord to the 8x8 DVI Matrix 4. Power on the 8x8 DVI Matrix AV-GM06Y3-S1... -
Page 8: Dip Switch
DIP SWITCH The AV-GM06Y3-S1 has a built-in EDID profiles designed to cover most of the widely used resolutions for the ease of installation. Default EDID Native/preferred timing: 1680 x 1050p at 60Hz (16:9) Detailed timing #1: 1920 x 1200p at 60Hz (16:9) - Page 9 [Firmware update only can be done via RS-232 port and connection to PC set at COM1) 1. Power off the AV-GM06Y3-S1. Execute the firmware update program on your PC via COM1 port connection to the RS-232 port of the AV-GM06Y3-S1.
-
Page 10: Channel Control
CHANNEL CONTROL Method A: Push Button 1. Use the “+” or “-” channel button on output port to select which port to be changed. “+”: change selected output port in ascending order “-”: change selected output port in descending order 2. - Page 11 OUTPUT 8 HDMI output port #8 FUNCTION KEY SOURCE SEL. 1 Escape System LOCK Enter System LOCK (most buttons, IR control, and RS-232 control SOURCE SEL. 2 become inactive, except Escape System LOCK command ) Method C: Software Control through RS-232 or Ethernet Using the control software located on the included software CD, it is possible to fully control the matrix switch by either RS-232 or Ethernet connection.
- Page 12 Setting The “Setting” button brings up the communication configuration menu with the following controls: The “Get” button reads the connected device’s ID number. The “Set” button assigns a new device ID number to the connected device. The “Rename” button opens up the String Table menu which allows you to assign custom names to inputs and outputs within the software.
- Page 13 Linkage The “Linkage” button will cause the software to re-read the active Input and Output routes on the matrix switch. You may need to use this if you have made changes to the matrix switch by some method other than the control software. Open/Close The “Open”...
- Page 14 Direct Input/Output Selection Area It is also possible to directly select Inputs and Outputs using the buttons and drop down menus located in the Input and Output Selection Areas to the left and right. To directly send an input to an output, open up the drop down menu to the right of the Output and select the Input to route to it.
- Page 15 Command Set: COMMAND ACTION COMMAND ACTION System Status Firmware Version Output A selects Input 1 Output E selects Input 1 Output A selects Input 2 Output E selects Input 2 Output A selects Input 3 Output E selects Input 3 Output A selects Input 4 Output E selects Input 4 Output A selects Input 5...
- Page 16 Output D selects Input 7 Output H selects Input 7 Output D selects Input 8 Output H selects Input 8...
-
Page 17: Warranty
The SELLER will NOT be liable for direct, indirect, incidental, special, or consequential damages resulting from any defect or omission in this manual, even if advised of the possibility of such damages. Also, the technical information contained herein regarding the AV-GM06Y3-S1 features and specifications is subject to change without further notice.
Need help?
Do you have a question about the AV-GM06Y3-S1 and is the answer not in the manual?
Questions and answers