Advertisement
Quick Links
Advertisement

Subscribe to Our Youtube Channel
Related Manuals for SIIG AV-GM07N3-S1


Summary of Contents for SIIG AV-GM07N3-S1
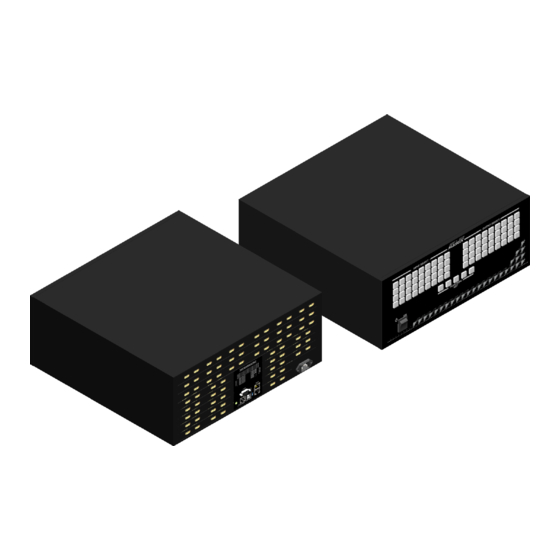
- Page 1 36x36 HDMI Matrix Switcher with Full 3D Support P/N: AV-GM07N3-S1...
- Page 2 Safety and Notice The AV-GM07N3-S1 36x36 HDMI Matrix Switcher with Full 3D Support has been tested for conformance to safety regulations and requirements, and has been certified for international use. However, like all electronic equipments, the AV-GM07N3-S1 should be used with care. Please read and follow the safety instructions to protect yourself from possible injury and to minimize the risk of damage to the unit.
- Page 3 Introduction The 36x36 HDMI Matrix Switcher with Full 3D Support HDMI Matrix provides the most flexible and cost effective solution in the market to route high definition video sources plus multi-channel (up to 7.1 channel) digital audio from any of the four HDMI sources to the any four displays at the same time.
- Page 4 Features Support HDMI Deep Color & full 3D HDCP compliant. Allows any source to be displayed on multiple displays at the same time. Allows any HDMI display to view any HDMI source at any time. Supports 7.1 channel digital audio. ...
- Page 5 AC Power 100-240V Power consumption 116 Watts [max] Operation 0~40C [32~104F] temperature Storage temperature -20~60C [-4~140F] Relative humidity 20~90% RH [no condensation] 1x AV-GM07N3-S1 1x User Manual Package Contents 2x Rack-mounting ears 1x UL AC power cord ~ 4 ~...
- Page 6 Panel Descriptions Front Panel 1. Input selection group: Input channel selection. 2. Output selection group: Output channel selection. 3. Power: Power on/off switcher. 4. Function Keys: Input/Output mode select & Save/Load channel status & EDID setting buttons. ~ 5 ~...
- Page 7 Rear Panel 5. HDMI Input: HDMI input port. 6. HDMI Output: HDMI output port. 7. RS-232: Serial control. 8. Dip switch: RS-232/485 control switch. 9. RJ-45: LAN(Ethernet) control. 10. USB: USB Type-B (RS232 interface) control. 11. RS-485: Far distance RS232 control interface. RJ45: pin1 –...
- Page 8 Note : RS232 Control: The USB, RS232 and RS485 ports share one UART port. The priority of USB, RS232, and RS485 is as below: USB port > RS232(RS485) For example, if you connect USB line from control source, the RS232(RS485) port will be useless.
- Page 9 Channel Control HDMI 36 x 36 Matrix Button Examples Button Control Path: 1 – Host Button 2 – Software Input Region Output Region #Firmware Update Module Update .hex file Step1: The 36x36 matrix maintain power off status. Step2: Connect the 36x36 matrix and the PC with Ethernet interface. Step3: Open PC TCP/IP setting ~ 8 ~...
- Page 10 If your PC network domain is 192.168.1.XXX(XXX is from 1~255, 233 is not included), you can set TCP/IP like this. If your PC network domain is not 192.168.1.XXX, please “directly” connect your PC and ASP-3636 with a LAN cable and set IP like this. 1~255 except 233 ~ 9 ~...
- Page 11 Step4: Open the software. Step5: Press Firmware Update button. ASP-3636 IP Step6: Load .hex file and press start. ~ 10 ~...
- Page 12 Step7: Power on the AV-GM07N3-S1 Step8: Please reset the 36x36 matrix when firmware update finished. **1. The 36x36 matrix .hex firmware update IP is fixed. 192.168.1.233. Please confirm the PC is the same network domain as the 36x36 matrix. 2. Sometimes the .hex firmware update can’t start or interrupt in the processing, please retry again.
- Page 13 Step4: Press Firmware Update button. Step5: Load .bin file and start to update. ~ 12 ~...
- Page 14 Step6: Please reset(power off then power on) the 36x36 matrix when firmware update finished. #Observe output status Step 1: Press output button, if output button light, you can skip this step. Step 2: Press output button X, if output region X light, you can skip this step. Output 1 <->...
- Page 15 Output 9 <-> Input 9 #Set different input to specific output Now status: Input 1 <-> Output 1 Input 2 <-> Output 2 Desired status: Input3 <-> Output 1 Input 4 <-> Output 2 Step 1: Press output button, if output button light, you can skip this step. Step 2: Press output region 1, if output region 1 light, you can skip this step.
- Page 16 Step 3: Press input region 3, if input region 3 light, you can skip this step. Output 1 <-> Input 3 Step 4: Press output region 2, if output region 2 light, you can skip this step. Output 2 <-> Input 2 Step 5: Press input region 4, if input region 4 light, you can skip this step.
- Page 17 #Observe input status Step 1: Press input button, if input button light, you can skip this step. Step 2: Press output button X, if output region X light, you can skip this step. Input 4 <-> Output 2 ~ 16 ~...
-
Page 18: Table Of Contents
Input 7 <-> Output 7 Input 8 <-> Output 8 #Set different outputs to the specific input Now status: Input 24 <-> Output 24 Input 7 <-> Output 7 Desired status: Input 24 <-> Output 11, 12, 13, 14, 15 Input 7 <->... -
Page 19: Input 7 <-> Output
Step 2: Press input region 24, if input region 24 light, you can skip this step. Input 24 <-> Output 24 Step 3: Press output region 24, if output region 24 dim, you can skip this step. Input 24 <-> Output None Step 4: Press output region 11, if output region 11 light, you can skip this step. - Page 20 Step 5: Press output region 12, if output region 12 light, you can skip this step. Input24 <-> Output 11, 12 Step 6: Press output region 13, if output region 13 light, you can skip this step. Input 24 <-> Output 11, 12, 13 Step 7: Press output region 14, if output region 14 light, you can skip this step.
-
Page 21: Input 8 <-> Output
Step 9: Press input region 7. Input 7 <-> Output 7 Step 10: Press output region 7, if output region 7 dim, you can skip this step. Input 7 <-> Output None Step 11: Press output region 16, if output region 16 light, you can skip this step. Input 7 <->... -
Page 22: Now Status: Input 24 <-> Output
Step 13: Press output region 18, if output region 18 light, you can skip this step. Input 7 <-> Output 16, 17, 18 #Cancel outputs for the specific input Now status: Input 24 <-> Output 11, 12, 13, 14, 15 ~ 21 ~... -
Page 23: Desired Status: Input 24 <-> Output
Input 7 <-> Output 16, 17, 18 Desired status: Input 24 <-> Output 11, 12, 13 Input 7 <-> Output 16, 17 Step 1: Press input button, if input button light, you can skip this step. Step 2: Press input region 24, if input region 24 light, you can skip this step. Input 24 <->... -
Page 24: Input 7 <-> Output
Step 5: Press input region 7 Input 7 <-> Output 16, 17, 18 Step 6: Press output region 18, if output region 18 dim, you can skip this step. Input 7 <-> Output 16, 17 #Observe each input EDID Step 1: Press EDID button, if EDID button light red, you can skip this step. ~ 23 ~... - Page 25 Step 2: Press input region X, if input region X light, you can skip this step. Input 5 EDID <-> Default EDID number 25 Step 3: Press input region X, if input region X light, you can skip this step. Step 4: Press EDID button, if EDID button light blue, you can skip this step.
- Page 26 36 bits Bitstream Full HD 36 bits Multi Ch Full HD 36 bits Full HD 30 bits Bitstream Full HD 30 bits Multi Ch Full HD 30 bits Full HD 24 bits Bitstream Full HD 24 bits Multi Ch Full HD 24 bits Full HD 36 bits...
- Page 27 24 bits Bitstream Full HD Input 32 EDID <-> number 25 24 bits Bitstream Full HD Desired status: Input 31 <-> number 22 30 bits Bitstream Full HD Input 32 <-> BLUE number 1(Output 1 record EDID) Step 1: Press EDID button, if EDID button light red, you can skip this step. Step 2: Press input region 31, if input region 31 light, you can skip this step.
- Page 28 Input 32 EDID <-> default EDID number 25 Step 5: Press EDID button, if EDID button light blue, you can skip this step. Step 6: Press output region 1, if output region 1 light, you can skip this step. Input 32 EDID <-> Output number 1 EDID **This process will perform about 10 seconds;...
- Page 29 **The Save button & Load button only effective in channel setting, not include EDID setting. Now status: Output 34 <-> Input 34 Output 35 <-> Input 35 Output 36 <-> Input 36 Next status: Output 34 <-> Input 36 Output 35 <-> Input 34 Output 36 <->...
- Page 30 Output 34 <-> Input 36, Output 35 <-> Input 35, Output 36 <-> Input 36 Step 5: Press input region 34. Output 34 <-> Input 36, Output 35 <-> Input 34, Output 36 <-> Input 36 Step 6: Press output region 36 Output 34 <->...
- Page 31 Output 34 <-> Input 34, Output 35 <-> Input 35, Output 36 <-> Input 36 #Set/get ethernet status & set/get ID **At the RS232 connection mode ~ 30 ~...
- Page 32 HDMI 36x36 Matrix Command Control The Command Protocol Format (RS-232 Serial Port) (Ethernet Port) Serial Port Setting: Baud rate : 115200 bps Data bit : 8 bits Parity : None Ethernet Port Setting: Demo IP – 192.168.1.234 ~ 31 ~...
- Page 33 The Sample Function Description: The command format and rules introduction. Command Byte Name Value Comment Command Length Check Code 1 Check Code 2 Check Code 3 Check Code 4 Device ID Command ID Command Parameter 1 Command Parameter 2 Command Parameter Check Sum BYTE CheckSum = 0;...
- Page 34 Demonstration Device ID Checksum Check Length Command Code Length Right Checksum Data Length Right Checksum Data Device ID Checksum Check Length Command Code ~ 33 ~...
- Page 35 Get Video Output Channel Function Description: Get video output signal is from what input signal. Command Byte Name Value Comment Command Length 0x08 Check Code 1 0x4D Check Code 2 0x41 Check Code 3 0x53 Check Code 4 0x62 Device ID Default : 0xFF Command ID 0x01...
- Page 36 ~ 35 ~...
- Page 37 Set Video Output Channel Function Description: Set video output signal is from what input signal. Command Byte Name Value Comment Command Length 0x2C Check Code 1 0x4D Check Code 2 0x41 Check Code 3 0x53 Check Code 4 0x62 Device ID Default : 0xFF Command ID 0x02...
- Page 38 ~ 37 ~...
- Page 39 Check Video Input Signal Function Description: Check each video input has signal or not. Command Byte Name Value Comment Command Length 0x08 Check Code 1 0x4D Check Code 2 0x41 Check Code 3 0x53 Check Code 4 0x62 Device ID Default : 0xFF Command ID 0x4D...
- Page 40 ~ 39 ~...
- Page 41 Check Video Ouput Link Function Description: Check each video output link display or not. Command Byte Name Value Comment Command Length 0x08 Check Code 1 0x4D Check Code 2 0x41 Check Code 3 0x53 Check Code 4 0x62 Device ID Default : 0xFF Command ID 0x4E...
- Page 42 This command will take several times. ~ 41 ~...
- Page 43 Get Device ID Function Description: Get Device ID Command Byte Name Value Comment Command Length 0x08 Check Code 1 0x4D Check Code 2 0x41 Check Code 3 0x53 Check Code 4 0x62 Device ID 0xFF Command ID 0x04 Check Sum 0x4E BYTE CheckSum = 0;...
- Page 44 ~ 43 ~...
- Page 45 Set Device ID Function Description: Set Device ID Command Byte Name Value Comment Command Length 0x09 Check Code 1 0x4D Check Code 2 0x41 Check Code 3 0x53 Check Code 4 0x62 Device ID 0xFF Command ID 0x05 Command Set Device ID to Parameter 1 Check Sum BYTE CheckSum = 0;...
- Page 46 ~ 45 ~...
- Page 47 Get Firmware Version Function Description: Get Firmware Version charater. Command Byte Name Value Comment Command Length 0x08 Check Code 1 0x4D Check Code 2 0x41 Check Code 3 0x53 Check Code 4 0x62 Device ID Default : 0xFF Command ID 0x08 Check Sum BYTE CheckSum = 0;...
- Page 48 ~ 47 ~...
- Page 49 Get Input & Output Channel Function Description: Get input and output channel number information. Command Byte Name Value Comment Command Length 0x08 Check Code 1 0x4D Check Code 2 0x41 Check Code 3 0x53 Check Code 4 0x62 Device ID Default : 0xFF Command ID 0x0A...
- Page 50 ~ 49 ~...
- Page 51 Get Single Video Output Channel Function Description: Get Single video output signal is from what input signal. Command Byte Name Value Comment Command Length 0x09 Check Code 1 0x4D Check Code 2 0x41 Check Code 3 0x53 Check Code 4 0x62 Device ID Default : 0xFF...
- Page 52 ~ 51 ~...
- Page 53 Set Single Video Output Channel Function Description: Set Single video output signal is from what input signal. Command Byte Name Value Comment Command Length 0x0A Check Code 1 0x4D Check Code 2 0x41 Check Code 3 0x53 Check Code 4 0x62 Device ID Default : 0xFF...
- Page 54 ~ 53 ~...
- Page 55 Get Machine MAC Address Function Description: Get Ethernet MAC address. Command Byte Name Value Comment Command Length 0x08 Check Code 1 0x4D Check Code 2 0x41 Check Code 3 0x53 Check Code 4 0x62 Device ID Default : 0xFF Command ID 0x30 Check Sum BYTE CheckSum = 0;...
- Page 56 ~ 55 ~...
- Page 57 Get IP Address Function Description: Get Ethernet IP address. Command Byte Name Value Comment Command Length 0x08 Check Code 1 0x4D Check Code 2 0x41 Check Code 3 0x53 Check Code 4 0x62 Device ID Default : 0xFF Command ID 0x31 Check Sum BYTE CheckSum = 0;...
- Page 58 ~ 57 ~...
- Page 59 Set IP Address Function Description: Set ethernet IP Address. Command Byte Name Value Comment Command Length 0x0C Check Code 1 0x4D Check Code 2 0x41 Check Code 3 0x53 Check Code 4 0x62 Device ID Default : 0xFF Command ID 0x32 Command Set IP Address 1...
- Page 60 ~ 59 ~...
- Page 61 Get Subnetmask Function Description: Get Ethernet subnetmask. Command Byte Name Value Comment Command Length 0x08 Check Code 1 0x4D Check Code 2 0x41 Check Code 3 0x53 Check Code 4 0x62 Device ID Default : 0xFF Command ID 0x33 Check Sum BYTE CheckSum = 0;...
- Page 62 NACK: 0x55 Command Value is error. Receive Receive Length 0x06 Receive Parameter Subnetmask Byte1 Receive Parameter Subnetmask Byte 2 Receive Parameter Subnetmask Byte 3 Receive Parameter Subnetmask Byte 4 Check Sum 0x06+A BYTE CheckSum = 0; for(int i =0; i<n; i++ ) CheckSum += Byte(i);...
- Page 63 ~ 62 ~...
- Page 64 Set Subnetmask Function Description: Set Ethernet subnetmask. Command Byte Name Value Comment Command Length 0x0C Check Code 1 0x4D Check Code 2 0x41 Check Code 3 0x53 Check Code 4 0x62 Device ID Default : 0xFF Command ID 0x34 Command Set subnetmask Byte1 Parameter 1 Command...
- Page 65 ~ 64 ~...
- Page 66 Get Default Gate Function Description: Get Ethernet default gate. Command Byte Name Value Comment Command Length 0x08 Check Code 1 0x4D Check Code 2 0x41 Check Code 3 0x53 Check Code 4 0x62 Device ID Default : 0xFF Command ID 0x35 Check Sum BYTE CheckSum = 0;...
- Page 67 ~ 66 ~...
- Page 68 Set Default Gate Function Description: Set Ethernet default gate. Command Byte Name Value Comment Command Length 0x0C Check Code 1 0x4D Check Code 2 0x41 Check Code 3 0x53 Check Code 4 0x62 Device ID Default : 0xFF Command ID 0x36 Command Set default gate Byte1...
- Page 69 Command Set default gate Byte4 Parameter 4 Check Sum BYTE CheckSum = 0; for(int i =0; i<n; i++ ) CheckSum += Byte(i); Acknowledgement character ACK/NACK 0xAA/0x55 ACK: 0xAA Command Value is right NACK: 0x55 Command Value is error. Receive No Receive ~ 68 ~...
- Page 70 ~ 69 ~...
- Page 71 Get Primary DNS Address Function Description: Get Ethernet primary DNS. Command Byte Name Value Comment Command Length 0x08 Check Code 1 0x4D Check Code 2 0x41 Check Code 3 0x53 Check Code 4 0x62 Device ID Default : 0xFF Command ID 0x37 Check Sum BYTE CheckSum = 0;...
- Page 72 ~ 71 ~...
- Page 73 Set Primary DNS Byte Function Description: Set Ethernet primary DNS byte. Command Byte Name Value Comment Command Length 0x0C Check Code 1 0x4D Check Code 2 0x41 Check Code 3 0x53 Check Code 4 0x62 Device ID Default : 0xFF Command ID 0x38 Command...
- Page 74 ~ 73 ~...
- Page 75 Get Secondary DNS Address Function Description: Get Ethernet secondary DNS. Command Byte Name Value Comment Command Length 0x08 Check Code 1 0x4D Check Code 2 0x41 Check Code 3 0x53 Check Code 4 0x62 Device ID Default : 0xFF Command ID 0x39 Check Sum BYTE CheckSum = 0;...
- Page 76 NACK: 0x55 Command Value is error. Receive Receive Length 0x06 Receive Parameter Secondary DNS Byte 1 Receive Parameter Secondary DNS Byte 2 Receive Parameter Secondary DNS Byte 3 Receive Parameter Secondary DNS Byte 4 Check Sum 0x06+A BYTE CheckSum = 0; for(int i =0;...
- Page 77 ~ 76 ~...
- Page 78 Set Secondary DNS Byte Function Description: Set Ethernet secondary DNS byte. Command Byte Name Value Comment Command Length 0x0C Check Code 1 0x4D Check Code 2 0x41 Check Code 3 0x53 Check Code 4 0x62 Device ID Default : 0xFF Command ID 0x3A Command...
- Page 79 ~ 78 ~...
- Page 80 Limited Warranty The SELLER warrants the 36x36 HDMI Matrix Switcher with Full 3D Support to be free from defects in the material and workmanship for 3 years from the date of purchase from the SELLER or an authorized dealer. Should this product fail to be in good working order within 3 years warranty period, the SELLER, at its option, repair or replace the unit, provided that the unit has not been subjected to accident, disaster, abuse or any unauthorized modifications including static discharge and power surge.
- Page 81 Support For more info or tech support http://www.siig.com/support April, 2018 ~ 80 ~...
Need help?
Do you have a question about the AV-GM07N3-S1 and is the answer not in the manual?
Questions and answers