
Related Manuals for Kampmann Katherm HK Series


Summary of Contents for Kampmann Katherm HK Series
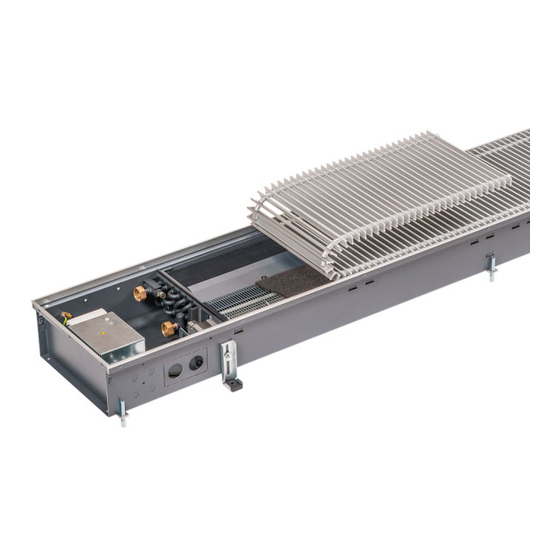
- Page 1 Katherm HK Ready-to-install trench heaters for heating or cooling with EC tangential fan Assembly and installation instructions Keep these instructions in a safe place for future use! I517/07/19 EN | SAP No. 1237680...
-
Page 2: Table Of Contents
1.43 Katherm HK Ready-to-install trench heaters with EC tangential fan Assembly and installation instructions Contents Key to symbols: 1. Intended use .....................4 1.1 Description ....................4 Caution! Danger! 1.2 Limits of operation and use ..............5 Non-compliance with this 2. Safety information ...................6 information can lead to 3. - Page 3 Katherm HK 1.43 Ready-to-install trench heaters with EC tangential fan Assembly and installation instructions 14.7 Time setting ..................45 14.8 Timer programs ..................46 14.9 Operating modes (mode key) ............... 49 15. Alarm messages ..................50 15.1 Alarm messages from KaControl PCB, display on KaController .... 50 15.2 KaController alarm messages ..............
-
Page 4: Intended Use
1. Intended use 1.1 Description Kampmann Katherm HK trench heaters are built in line with the state of the art and recognised safety regulations. Nevertheless their use can result in danger to people or damage to the unit or other material property if they are not properly installed or properly used. -
Page 5: Limits Of Operation And Use
Katherm HK 1.43 Ready-to-install trench heaters with EC tangential fan Assembly and installation instructions 1.2 Limits of operation and use Limits of operation Min./max. water temperature °C 5-120 Min./max. air intake temperature °C 15-40 Min./max. air humidity 15-75 Max. operating pressure Min./max. -
Page 6: Safety Information
1.43 Katherm HK Ready-to-install trench heaters with EC tangential fan Assembly and installation instructions 2. Safety information Make sure that installation, assembly and maintenance work on electrical units is only performed by a qualified electrician (in compliance with VDE regulations). Wiring should comply with the applicable VDE regulations and provisions laid down by the regional electricity providers. -
Page 7: Alignment And Positioning
Katherm HK 1.43 Ready-to-install trench heaters with EC tangential fan Assembly and installation instructions 4. Alignment and positioning 4.1 Alignment using height-adjustment feet and raised floor brackets • Remove the outer film and the packaging. • Flap open the transparent protective cover. •... -
Page 8: Water Connections
1.43 Katherm HK Ready-to-install trench heaters with EC tangential fan Assembly and installation instructions 5. Water connections • Use the pipe openings in the floor trench for the water-side connection • Remove the punched pipe entry opening or use the round connection openings for electrical wiring. -
Page 9: Water Connection / Pipe Openings
Katherm HK 1.43 Ready-to-install trench heaters with EC tangential fan Assembly and installation instructions 7. Water connection / Pipe openings Katherm HK 320, 2-pipe, trench height 130 mm Heating/Cooling flow Heating/cooling return 1/2” valve body, axial, type 346914 and/or type 346911 (flow-dependent) Thermoelectric actuator, type 146906 1/2"... - Page 10 1.43 Katherm HK Ready-to-install trench heaters with EC tangential fan Assembly and installation instructions Katherm HK 290, 2-pipe, trench height 160 mm Heating/Cooling flow Heating/cooling return 1/2” valve body, axial, type 346914 and/or type 346911 (flow-dependent) Thermoelectric actuator, type 146906 1/2"...
- Page 11 Katherm HK 1.43 Ready-to-install trench heaters with EC tangential fan Assembly and installation instructions Katherm HK 360, 2-pipe, trench height 210 mm Heating/Cooling flow Heating/cooling return 1/2” valve body, axial, for higher flow, type 346914 Thermoelectric actuator, type 146906 1/2" return shut-off valve, angled, type 145955 Pipe openings, punched Filter, optional Alternative: Valve kit, type 143241...
- Page 12 1.43 Katherm HK Ready-to-install trench heaters with EC tangential fan Assembly and installation instructions Katherm HK 320, 4-pipe, trench height 130 mm Flow pipe for cooling Return pipe for cooling Flow pipe for heating Heating return 1/2” valve body, axial, type 346914 and/or type 346911 (flow-dependent) Thermoelectric actuator, type 146906 1/2"...
- Page 13 Katherm HK 1.43 Ready-to-install trench heaters with EC tangential fan Assembly and installation instructions Katherm HK 290, 4-pipe, trench height 160 mm Flow pipe for cooling Return pipe for cooling Flow pipe for heating Heating return 1/2” valve body, axial, type 346914 and/or type 346911 (flow-dependent) Thermoelectric actuator, type 146906 1/2"...
- Page 14 1.43 Katherm HK Ready-to-install trench heaters with EC tangential fan Assembly and installation instructions Katherm HK 360, 4-pipe, trench height 210 mm Flow pipe for cooling Return pipe for cooling Flow pipe for heating Heating return 1/2” valve body, axial, for higher flow, type 346914 Thermoelectric actuator, type 146906 1/2"...
- Page 15 Katherm HK 1.43 Ready-to-install trench heaters with EC tangential fan Assembly and installation instructions...
-
Page 16: Katherm Hk Optionally With Supply Air Function
1.43 Katherm HK Ready-to-install trench heaters with EC tangential fan Assembly and installation instructions 8. Katherm HK optionally with supply air function 8.1 Katherm HK with supply air modules Figure Katherm HK with supply air modules Function of supply air with supply air modules Slider positions The conditioned primary air enters through a variable number of supply air modules below... - Page 17 Katherm HK 1.43 Ready-to-install trench heaters with EC tangential fan Assembly and installation instructions Dimensions: Katherm HK with supply air modules Window side Room side Front view of HK 320 (example shows 1 supply air module) Side view of HK 320 with supply air module Front view of HK 290 (example shows 2 supply air modules) Side view of HK 290 with supply air...
-
Page 18: Katherm Hk - Supply Air Ducts Zl
1.43 Katherm HK Ready-to-install trench heaters with EC tangential fan Assembly and installation instructions 8.2 Katherm HK – Supply air ducts ZL Supply air duct with supply air spigots Connecting brackets Supply air slider Reinforcing struts Perforated plate Filter Example of Optiline roll-up grille Combination of Katherm HK with supply air trench (filter optional accessory) Supply air duct, oval, for Katherm HK 320/130... - Page 19 Katherm HK 1.43 Ready-to-install trench heaters with EC tangential fan Assembly and installation instructions Design diagrams Slider position 30% open Slider position 50% open Slider position 75% open Slider position 100% open Sound power level 30 dB(A) Primary air volume Primary air volume Slider position 30% open Slider position 50% open...
-
Page 20: Condensation Drainage
1.43 Katherm HK Ready-to-install trench heaters with EC tangential fan Assembly and installation instructions 9. Condensation drainage 9.1. General information A differentiation is made between tow fundamentally different designs when operation the Katherm HK in cooling mode: dry cooling and wet cooling, both in 2-pip and 4-pipe mode. -
Page 21: Condensation Drainage With A Natural Gradient
Katherm HK 1.43 Ready-to-install trench heaters with EC tangential fan Assembly and installation instructions 9.2 Condensation drainage with a natural gradient 9.2.1 Condensation drainage kit with a natural gradient We recommend ordering a supplementary kit as an accessory to drain the condensation in the event of a natural gradient. -
Page 22: On-Site Condensation Drainage With A Natural Gradient
1.43 Katherm HK Ready-to-install trench heaters with EC tangential fan Assembly and installation instructions 9.2.3 On-site condensation drainage with a natural gradient The following drawing shows the on-site condensation connection of the Katherm HK with a natural gradient to a condensation collecting pipe. min 2% Gefälle min. -
Page 23: Additional On-Site Condensation Drainage
Katherm HK 1.43 Ready-to-install trench heaters with EC tangential fan Assembly and installation instructions 9.2.4 Additional on-site condensation drainage: Additional on-site condensation drainage needs to be provided at this Condensate bend point. The on-site condensation pipe can be fixed by cable ties to the Coupling section openings provided by the pre-punched openings in the base to maintain Hose clamp... -
Page 24: Condensation Drainage Using The Condensation Pump Kit
1.43 Katherm HK Ready-to-install trench heaters with EC tangential fan Assembly and installation instructions 9.3 Condensation drainage using the condensation pump kit If condensation drainage is provided by a condensation pump, any condensation produced cannot be discharged by a natural pipe gradient so that a condensation pump kit needs to be bought as an accessory for the Katherm HK. -
Page 25: Connection Fitting Kit For Katherm Hk 320, H = 130 Mm / Hk 290, H = 160 Mm / Hk 360, H = 210 Mm
Katherm HK 1.43 Ready-to-install trench heaters with EC tangential fan Assembly and installation instructions 9.3.1 Connection fitting kit for Katherm HK 320, H = 130 mm / HK 290, H = 160 mm / HK 360, H = 210 mm Important! Note the increase in the height of the trench when the fitting kit is installed. - Page 26 1.43 Katherm HK Ready-to-install trench heaters with EC tangential fan Assembly and installation instructions Step 4: Fix a section of condensate hose to the float module with a cable tie provided. Use the coupling section to connect the condensation hose section to the condensation bend section .
-
Page 27: On-Site Condensation Drainage With A Condensation Pump
Katherm HK 1.43 Ready-to-install trench heaters with EC tangential fan Assembly and installation instructions min 2% Gefälle 9.3.2 On-site condensation drainage with a condensation pump The following drawing shows the on-site condensation connection of the Katherm HK with condensation pump connected to a condensation collecting pipe. -
Page 28: Maintenance
1.43 Katherm HK Ready-to-install trench heaters with EC tangential fan Assembly and installation instructions 11. Maintenance 11.1 Information / Maintenance / Maintenance intervals The section below describes maintenance work on the Katherm HK needed for optimum and trouble-free operation of the equipment. If there are signs of increased wear during regular checks, adjust the required maintenance intervals to the actual wear and tear. -
Page 29: Cleaning The Condensation Tray
Katherm HK 1.43 Ready-to-install trench heaters with EC tangential fan Assembly and installation instructions 11.2 Cleaning the condensation tray Optional pump Important: Disconnect all parts of the system from the mains power supply and prevent them from being reconnected before starting any maintenance work. -
Page 30: Consumption Figures
1.43 Katherm HK Ready-to-install trench heaters with EC tangential fan Assembly and installation instructions 12. Consumption figures Katherm HK - Power consumption (P)* / Current consumption (A) Speed setting [%] Trench length Design Katherm HK [mm] [mA] [mA] [mA] [mA] [mA] 49.0 52.0... -
Page 31: Electrical Wiring
(e.g. a lockable switch with a contact opening of at least 3 mm up to a rated voltage of 480 V). No protective measures are indicated in the Kampmann wiring diagrams. These must be provided additionally when installing the system and when connecting the units in accordance with VDE 0100 and the regulations of each of the respective energy supply companies. -
Page 32: Overview Of Controls
1.43 Katherm HK Ready-to-install trench heaters with EC tangential fan Assembly and installation instructions 13.1 Overview of controls The unit comes in a series of different electrical versions. Connect it via a terminal strip in the electrical junction box. which is located on the side of the unit's water connection. -
Page 33: Electromechanical Electrical Model
The operating voltage must be provided by a central on-site 24 V DC voltage supply. Kampmann offers a range of switching power units in different output classes as accessories for the voltage supply (24 V DC). The fan automatically switches off in the event of a motor fault. The electro-mechanical 24 V version is not available for the Katherm HK 360. - Page 34 1.43 Katherm HK Ready-to-install trench heaters with EC tangential fan Assembly and installation instructions Electrical cabling Control via clock thermostat, type 30456 Lay shielded cables (e.g. IY(ST)Y, 0.8 mm), separately from high-voltage cables. W1: Voltage supply (on-site fuse, 0.64 A) and control signal for fan and actuator. Important: In the event of on-site valve control, the cooling valve must be closed when the fans are switched off.
-
Page 35: Electromechanical Electrical Model
Katherm HK 1.43 Ready-to-install trench heaters with EC tangential fan Assembly and installation instructions 13.3 230 V electromechanical electrical model Product features The clock thermostat type 30155 permits the operation and temperature control of 230 V electromechanical Katherm HK units. Features: - Operating mode switch OFF / MAN / Auto - Fan speed selector switch 1 / 2 / 3... - Page 36 1.43 Katherm HK Ready-to-install trench heaters with EC tangential fan Assembly and installation instructions Electrical cabling - BMS control * Abgesch verlegen. W1: Span W2: Steue - Optional - Actuator Cooling Type 146906 Mains power 230 VAC Fuse by others Trench convector Katherm HK Actuator...
- Page 37 Katherm HK 1.43 Ready-to-install trench heaters with EC tangential fan Assembly and installation instructions Electrical cabling – Control via clock thermostat, type 30155 W1: Spannungsversorgung (Abis W2: Spannungsversorgung, Steu W3: Spannungsversorgung, Steu - Optional - Actuator Cooling Type 146905 Mains power 230 VAC Fuse by others Trench convector...
- Page 38 1.43 Katherm HK Ready-to-install trench heaters with EC tangential fan Assembly and installation instructions Electrical cabling – Climate controller actuation type 14894x Lay shielded cables (e.g. IY(ST)Y, 0.8 mm), separately from high-voltage cables. Shielded, paired cables, e.g. UNITRONIC® BUS LD 2 x 2 x 0.22 W1: Digital input 1 (optional) W2: Digital input 2 (optional) W3: Digital input 230 V AC (optional)
-
Page 39: Katherm Hk, Kacontrol Model (*C1)
14. Katherm HK, KaControl model (*C1) 14.1 Intended use Kampmann KaControllers and KaControl modules are built in line with the state of the art and recognised safety regulations. Nevertheless, its use can result in danger to people or damage to the units or other material property if it is not appropriately installed and operated or correctly and properly used. -
Page 40: Function Keys, Display Elements
1.43 Katherm HK Ready-to-install trench heaters with EC tangential fan Assembly and installation instructions 14.2 Function keys, display elements Display with LED background lighting ON/OFF button (depending on setting) - ON / OFF (factory setting) - Eco mode/Day mode TIMER button –... -
Page 41: Operation
Katherm HK 1.43 Ready-to-install trench heaters with EC tangential fan Assembly and installation instructions 14.3 Operation The KaController is operated by the navigator dial and the function keys. The functions that can be called up and set using the navigator dial are identical on both versions (with and without function keys on the side). -
Page 42: Activating And Deactivating The Control
1.43 Katherm HK Ready-to-install trench heaters with EC tangential fan Assembly and installation instructions 14.4 Activating and deactivating the control When the controller is switched on, the display shows the default view with the current room temperature setpoint and the fan stage set. Following initial commissioning of the KaController, the time is no longer shown in the default view (see "Time setting"... -
Page 43: Temperature Adjustment (Absolute Value)
Katherm HK 1.43 Ready-to-install trench heaters with EC tangential fan Assembly and installation instructions 14.5 Temperature adjustment (absolute value) The temperature setpoint is entered from the standard view. To call up the standard view, press ESC or do not touch the KaController for 3 seconds. -
Page 44: Fan Setting
1.43 Katherm HK Ready-to-install trench heaters with EC tangential fan Assembly and installation instructions 14.6 Fan setting Press the FAN key (quick access) or use the navigator dial to call up the "Fan setting" selection menu. Calling up the "Fan setting" menu using the navigator dial: Press navigator Press and hold Press and hold... -
Page 45: Time Setting
Katherm HK 1.43 Ready-to-install trench heaters with EC tangential fan Assembly and installation instructions 14.7 Time setting Press the TIMER key (quick access) or use the navigator dial to call up the "Time setting" selection menu. Calling up the "Time setting" menu using the navigator dial: Press navigator Press and hold Press and hold... -
Page 46: Timer Programs
1.43 Katherm HK Ready-to-install trench heaters with EC tangential fan Assembly and installation instructions 14.8 Timer programs The KaController provides the option of programming switching on and off times using a timer program if rooms are only to be air conditioned during certain times of the day. - Page 47 Katherm HK 1.43 Ready-to-install trench heaters with EC tangential fan Assembly and installation instructions Press the TIMER key twice (quick access) or use the navigator dial to call up the "Timer programs" selection menu. Use the navigator dial to call up the "Timer programs" menu: Press navigator Press and hold Press and hold...
- Page 48 1.43 Katherm HK Ready-to-install trench heaters with EC tangential fan Assembly and installation instructions Step 4: Set the switch-off time you require by turning the navigator dial. Once the minutes have been set, press the navigator dial to apply the switch-off time and to call up the timer start screen ( Action 1).
-
Page 49: Operating Modes (Mode Key)
Katherm HK 1.43 Ready-to-install trench heaters with EC tangential fan Assembly and installation instructions 14.9 Operating modes (mode key) Press the MODE key (quick access) or use the navigator dial to call up the "Operating modes" selection menu. Calling up the "Operating modes" menu using the navigator dial: Press navigator Press and hold Press and hold... -
Page 50: Alarm Messages
1.43 Katherm HK Ready-to-install trench heaters with EC tangential fan Assembly and installation instructions 15. Alarm messages The KaController displays faults by means of the alarm messages listed in the table below. The alarm messages are displayed according to their priority. -
Page 51: Troubleshooting
Katherm HK 1.43 Ready-to-install trench heaters with EC tangential fan Assembly and installation instructions 16. Troubleshooting General: Faults in the motor of a slave unit are not shown on the KaController. Only a motor fault in a master unit is shown on the KaController. 16.1 A11 Control sensor faulty The room temperature is regulated on the selected control sensor, that is to say that the external room sensor/intake sensor can be... -
Page 52: A14 Condensation Alarm
1.43 Katherm HK Ready-to-install trench heaters with EC tangential fan Assembly and installation instructions 16.4 A14 Condensation alarm The parametrised input for detecting condensation is continuously monitored and “A14” appears in the display of the KaController if a condensation alarm is emitted. Cause: condensation produced Effect of this alarm:... -
Page 53: A18 Eeprom Error
Katherm HK 1.43 Ready-to-install trench heaters with EC tangential fan Assembly and installation instructions 16.8 A18 EEPROM error The EEPROM error is displayed if an error is detected in the internal memory on the KaControl PCB. Cause: Overflow of values, maximum read and write cycles reached. Effect of this alarm: Communication in the tLan network and control is interrupted. -
Page 54: Kacontroller Installation
1.43 Katherm HK Ready-to-install trench heaters with EC tangential fan Assembly and installation instructions 17. KaController installation Installation/dismantling Electrical wiring Connect the KaController to the nearest KaControl in accordance with the wiring diagram. The maximum bus length between the KaController and the KaControl is 30 m. -
Page 55: Cabling
Katherm HK 1.43 Ready-to-install trench heaters with EC tangential fan Assembly and installation instructions 18. Cabling 18.1 General information Route all low voltage cables along the shortest route. Ensure that low-voltage and power cables are separated, using metal partitions on cable harnesses. Use only shielded cables as low-voltage and bus cables. -
Page 56: Terminal Resistors In A Can-Bus System
1.43 Katherm HK Ready-to-install trench heaters with EC tangential fan Assembly and installation instructions 18.2 Terminal resistors in a CAN-bus system The bus cables between the CAN-bus cards must be linear. Disconnect the unit before adjusting the terminal resistors. A terminal resistor must be connected between terminals "+" and "-” on the first and last CANbus card in a bus line. -
Page 57: Setting Configuration Of Unit By Means Of Dip Switch
Katherm HK 1.43 Ready-to-install trench heaters with EC tangential fan Assembly and installation instructions 19. Setting Configuration of Unit by means of DIP Switch Set the configuration of a KaControl unit using the DIP switch on the KaControl PCB. Once the DIP switch has been set, all the basic functions of the configuration have been parametrised and the KaControl can be operated immediately. - Page 58 1.43 Katherm HK Ready-to-install trench heaters with EC tangential fan Assembly and installation instructions DIP switch no. 1 DIP switch no. 1 must be set to ON to actuate a KaControl by means of 0…10 V signals within a building management system provided by others. The parameter settings required are described in Section 20.1.
-
Page 59: Parameter Settings
Katherm HK 1.43 Ready-to-install trench heaters with EC tangential fan Assembly and installation instructions 20. Parameter settings 20.1 General Special system requirements can be configured using parameter settings in the Service menu. Special system requirements may include: Display: room temperature or setpoint temperature Lock operating functions Set absolute setpoint temperature or ±... -
Page 60: Heating/Cooling Changeover Via Clip-On Sensor In 2-Pipe Systems
1.43 Katherm HK Ready-to-install trench heaters with EC tangential fan Assembly and installation instructions 20.3 Heating/cooling changeover via clip-on sensor in 2-pipe systems The changeover between heating and cooling is performed as standard in 2-pipe systems via an external contact and the digital input DI2. If there is no external contact to change over between heating and cooling, the changeover can be made via a clip-on sensor. - Page 61 Katherm HK 1.43 Ready-to-install trench heaters with EC tangential fan Assembly and installation instructions Option 1: The ON/OFF key and timer programs are used to switch between Eco mode and Day mode. Option 2: Use the ON/OFF key and the timer programs to switch the KaControl on and off.
-
Page 62: Function Of Digital Inputs Di1 And Di2
1.43 Katherm HK Ready-to-install trench heaters with EC tangential fan Assembly and installation instructions 20.6 Function of digital inputs DI1 and DI2 The function of digital inputs DI1 and DI2 can be configured using parameters settings. 20.6.1 Function of DI1 Parameter P43 Parameter P43 is used to set the function of the digital input DI1. -
Page 63: Function Of Di2
Katherm HK 1.43 Ready-to-install trench heaters with EC tangential fan Assembly and installation instructions 20.6.2 Function of DI2 The digital input DI1 is predominantly used to execute specific functions. If the use of the digital input DI2 is needed, then the following settings have to be made: 1. -
Page 64: Function Of Digital Outputs V1 And V2
1.43 Katherm HK Ready-to-install trench heaters with EC tangential fan Assembly and installation instructions 20.6.3 Function of digital outputs V1 and V2 The function of the digital output V1 is fixed depending on the system (2-pipe / 4-pipe). The function of the digital output V2 can be configured using parameters. 20.6.4 Digital output V1 The digital output V1 is used for the following function, depending on the application;... -
Page 65: Function Of Multifunctional Inputs Ai1, Ai2 And Ai3
Katherm HK 1.43 Ready-to-install trench heaters with EC tangential fan Assembly and installation instructions 20.6.6 Function of Multifunctional Inputs AI1, AI2 and AI3 The function of the multifunctional inputs AI1, AI2 and AI3 can be configured using parameter settings. 20.6.7 Function of AI1 Parameter P15 Parameter PI5 is used to set the function of the multifunctional input AI1. -
Page 66: Function Of Ai2
1.43 Katherm HK Ready-to-install trench heaters with EC tangential fan Assembly and installation instructions 20.6.8 Function of AI2 Parameter P16 Parameter PI6 is used to set the function of the multifunctional input AI2. The multifunctional input AI2 can only be set using parameter P16 if DIP switch no. -
Page 67: Functional Testing Of Connected Assemblies
Katherm HK 1.43 Ready-to-install trench heaters with EC tangential fan Assembly and installation instructions 21. Functional testing of connected assemblies The KaController provides the option of checking the function of the external units connected independently of the software application. The function of individual assemblies, such as the EC fan, can be directly activated and checked by means of inputs on the KaController. -
Page 68: External Control Via 0
1.43 Katherm HK Ready-to-install trench heaters with EC tangential fan Assembly and installation instructions 21.1 External control via 0..10 Volts The analogue inputs AI2 and AI3 offer the option of actuating the valves and the EC fan by means of 0..10 volt signals. Set the DIP switches in accordance with the diagram with actuation using 0...10 volt signals. -
Page 69: Parameter List For Kacontrol Pcb
Katherm HK 1.43 Ready-to-install trench heaters with EC tangential fan Assembly and installation instructions 21.2 Parameter list for KaControl PCB Function P000 Software version P001 °C Base setpoint for setpoint entry ± 3K P002 K/10 Switching on / off hysteresis for valves P003 K/10 Neutral zone in a 4-pipe system (only in automatic mode) - Page 70 1.43 Katherm HK Ready-to-install trench heaters with EC tangential fan Assembly and installation instructions P034 Flushing function: activation in operating modes P035 Time the fan runs at Stage 1 after change of operating mode P036 Type of setpoint setting P037 Display P038 Lock/disable function on control unit...
- Page 71 Katherm HK 1.43 Ready-to-install trench heaters with EC tangential fan Assembly and installation instructions P073 Serial address of Slave 3 P074 Serial address of Slave 4 P075 Serial address of Slave 5 P076 Serial address of Slave 6 P077 Serial address of Slave 7 P078 Serial address of Slave 8 P079...
- Page 72 1.43 Katherm HK Ready-to-install trench heaters with EC tangential fan Assembly and installation instructions P113 reserved P114 reserved P115 reserved P116 reserved P117 Locking operating functions (function keys on KaController) P118 reserved P119 reserved P120 reserved P121 reserved P122 reserved P123 reserved P124...
-
Page 73: Electrical Wiring
Katherm HK 1.43 Ready-to-install trench heaters with EC tangential fan Assembly and installation instructions 21.3 Electrical wiring 21.3.1 Control by on-site BMS ** Route shielded, paired cables e.g. UNITRONIC® BUS LD 2x2x0,22 or of the same value, separately from high-voltage cables. W1: Power supply W2: Voltage supply, control signal for fan and actuator. -
Page 74: Master Unit And Slave Units
1.43 Katherm HK Ready-to-install trench heaters with EC tangential fan Assembly and installation instructions 21.3.2 Master unit and slave units - Optional - Actuator - Optional - Cooling Type 146906 External contact On/Off CAN bus card Mains power Type 3260301 - Optional - 230 VAC Room sensor... - Page 75 Katherm HK 1.43 Ready-to-install trench heaters with EC tangential fan Assembly and installation instructions - Optional - - Optional - Actuator Actuator Cooling Cooling Type 146906 Type 146906 CAN bus card CAN bus card Type 3260301 Type 3260301 Trench Trench convector convector Actuator...
-
Page 76: Declaration Of Conformity
1.43 Katherm HK Ready-to-install trench heaters with EC tangential fan Assembly and installation instructions 22. Declaration of Conformity... - Page 77 Katherm HK 1.43 Ready-to-install trench heaters with EC tangential fan Assembly and installation instructions...
- Page 78 1.43 Katherm HK Ready-to-install trench heaters with EC tangential fan Assembly and installation instructions...
- Page 79 Katherm HK 1.43 Ready-to-install trench heaters with EC tangential fan Assembly and installation instructions...
- Page 80 1.43 Katherm HK Ready-to-install trench heaters with EC tangential fan Assembly and installation instructions...
- Page 81 Katherm HK 1.43 Ready-to-install trench heaters with EC tangential fan Assembly and installation instructions...
- Page 82 1.43 Katherm HK Ready-to-install trench heaters with EC tangential fan Assembly and installation instructions...
- Page 84 Kampmann.eu/katherm-hk Kampmann.co.uk/katherm-hk Kampmann GmbH Kampmann UK Ltd. Friedrich-Ebert-Str. 128 - 130 Dial House, Govett Avenue 49811 Lingen (Ems) Shepperton, Middlesex, TW17 8AG Germany Great Britain +49 591 7108-660 +44 (0)1932 228592 +49 591 7108-173 +44 (0)1932 228949 export@kampmann.de info@kampmann.co.uk Kampmann.eu...
Need help?
Do you have a question about the Katherm HK Series and is the answer not in the manual?
Questions and answers