Table of Contents

Related Manuals for Amazone Groundkeeper GHL


Summary of Contents for Amazone Groundkeeper GHL
- Page 1 Operating manual GROUNDKEEPER GHL, GHL-T SMARTCUT Please read and follow this op- erating manual before putting MG5075 the machine into operation. BAF0006.2 05.17 Keep it in a safe place for future Printed in France use.
- Page 2 Only in this way would you be satisfied both with the machine as also with yourself. To achieve this is the purpose of this in- struction manual. Leipzig-Plagwitz 1872. Groundkeeper GHL; GHL-T SMARTCUT BAF0006.2 05.17...
- Page 3 +33 (0) 3 87 84 65 71 E-mail: forbach@amazone.fr Spare part orders Spare parts lists are freely accessible in the spare parts portal at www.amazone.de. Please send orders to your AMAZONE dealer. Formalities of the operating manual Document number: MG5075 Compilation date: 02.14 ...
- Page 4 Foreword Dear Customer, You have chosen one of the quality products from our wide range of AMAZONE agricultural machinery. We thank you for your confidence in our products. On receiving the machine, check to see if it was damaged during transport or if parts are missing.
-
Page 5: Table Of Contents
Connecting the hydraulics ...................... 39 The mower unit ..................41 Fitting the mowing and scarifying tools .................. 41 Mowing ........................... 45 Scarifying ..........................46 Mulching ..........................48 Collecting ..........................48 Emptying the catcher ......................49 Groundkeeper GHL; GHL-T SMARTCUT BAF0006.2 05.17... - Page 6 Oil level in the angular gearbox ..................... 54 Lubrication points ........................54 Extended periods of downtime ....................56 Tyre pressure ........................56 Additional operating instructions for the towed AMAZONE GHL-T Lift Groundkeeper .................... 57 10.1 Attaching and detaching the machine ................... 57 10.1.1...
-
Page 7: User Information
Numbers in round brackets refer to the item numbers in the diagrams. The first digit refers to the diagram; the second digit, to the item num- ber in the illustration. Example (Fig. 3/6) • Figure 3 • Item 6 Groundkeeper GHL; GHL-T SMARTCUT BAF0006.2 05.17... -
Page 8: General Safety Instructions
If this is not the task of the user or if the user does not possess the appropriate technical knowledge, then they should report this fault to their superior (operator). Groundkeeper GHL; GHL-T SMARTCUT BAF0006.2 05.17... - Page 9 Independently-executed construction changes to the machine. • Insufficient monitoring of machine parts that are subject to wear. • Improperly executed repairs. • Catastrophic events as a result of the impact of foreign objects or force majeure. Groundkeeper GHL; GHL-T SMARTCUT BAF0006.2 05.17...
-
Page 10: Representation Of Safety Symbols
Non-compliance with these instructions can cause faults on the machine or in the environment. NOTE Indicates handling tips and particularly useful information. These instructions will help you to use all the functions of your machine to the optimum. Groundkeeper GHL; GHL-T SMARTCUT BAF0006.2 05.17... -
Page 11: Organisational Measures
As well as all the safety information in this operating manual, comply with the general, national regulations pertaining to accident prevention and environmental protection. When driving on public roads and routes, then you should comply with the statutory road traffic regulations. Groundkeeper GHL; GHL-T SMARTCUT BAF0006.2 05.17... -
Page 12: User Training
The personnel of a specialist workshop shall possess the appropriate knowledge and suitable aids (tools, lifting and support equipment) for carrying out the maintenance and repair work on the machine in a way which is both appropriate and safe. Groundkeeper GHL; GHL-T SMARTCUT BAF0006.2 05.17... -
Page 13: Safety Measures In Normal Operation
It is forbidden to: • Drill holes in the frame or on the chassis. • Increasing the size of existing holes on the frame or the chassis. • Welding support parts. Groundkeeper GHL; GHL-T SMARTCUT BAF0006.2 05.17... -
Page 14: Spare And Wear Parts And Aids
When carrying out work on lubrication systems and equipment • When cleaning using solvents. 2.12 User workstation The machine may be operated by only one person sitting in the driv- er's seat of the tractor. Groundkeeper GHL; GHL-T SMARTCUT BAF0006.2 05.17... -
Page 15: Warning Symbols And Other Signs On The Machine
2. The consequence of non observance of the danger protection instructions. For example: causes serious injuries to fingers or hands. 3. Instructions for avoiding the danger. For example: only touch machine parts when they have come to a complete standstill. Groundkeeper GHL; GHL-T SMARTCUT BAF0006.2 05.17... - Page 16 Ensure that persons not involved in the operation of the machine maintain a sufficient safety dis- tance from the danger area created by the ma- chine while the tractor engine is running. Groundkeeper GHL; GHL-T SMARTCUT BAF0006.2 05.17...
- Page 17 This hazard can cause serious injuries, including loss of parts of the body from toes or feet. Maintain a sufficient safety distance from the danger area while the tractor engine is running and the PTO shaft/hydraulic system is connect- Groundkeeper GHL; GHL-T SMARTCUT BAF0006.2 05.17...
- Page 18 Never attempt to plug leaks in hydraulic lines using your hand or fingers. Read and understand the information in the op- erating manual before carrying out maintenance and repair work. If you are injured by hydraulic fluid, contact a doctor immediately. Groundkeeper GHL; GHL-T SMARTCUT BAF0006.2 05.17...
- Page 19 Secure the tractor and the machine against unintentional start-up and rolling before any intervention in the machine. • Depending on the type of intervention, read and understand the information in the rele- vant sections of the operating manual. Groundkeeper GHL; GHL-T SMARTCUT BAF0006.2 05.17...
- Page 20 Study and observe the instructions for cleaning, servicing and maintaining in the appropriate chapter of the operating manual. MD 114 This symbol indicates a lubrication point MD 115 The maximum operating pressure of the hydrau- lic system is 200 bar. Groundkeeper GHL; GHL-T SMARTCUT BAF0006.2 05.17...
- Page 21 This hazard can cause extremely serious inju- ries, including the loss of body parts. Close protective equipment which has been opened or refit protective equipment which has been removed before you start the ma- chine. Groundkeeper GHL; GHL-T SMARTCUT BAF0006.2 05.17...
- Page 22 • It is prohibited to stand in the tipping area when the loading bed has been raised. • Instruct people to leave the tipping area of the machine before raising the loading bed. Groundkeeper GHL; GHL-T SMARTCUT BAF0006.2 05.17...
-
Page 23: Positioning Of Warning Symbols And Other Labels
Positioning of warning symbols and other labels Warning symbols The following diagrams show the arrangement of the warning symbols on the machine. MD100 MD171 MD123 MD081 MD097 MD078 MD078 MD145 MD076 MD079 MD118 MD100 MD078 MD087 MD075 MD078 MD170 Groundkeeper GHL; GHL-T SMARTCUT BAF0006.2 05.17... - Page 24 General safety instructions MD100 MD171 MD123 MD081 MD097 MD078 MD078 MD145 MD079 MD118 MD100 MD078 MD104 MD076 MD087 MD075 MD078 MD170 Groundkeeper GHL; GHL-T SMARTCUT BAF0006.2 05.17...
-
Page 25: Dangers If The Safety Information Is Not Observed
Comply with the accident prevention instructions on the warning sym- bols. When driving on public roads and routes, comply with the appropriate statutory road traffic regulations. Groundkeeper GHL; GHL-T SMARTCUT BAF0006.2 05.17... -
Page 26: Safety Information For Users
• Secure the operating lever of the tractor hydraulic system so that unintentional raising or lowering is impossible, before connecting the machine to or disconnecting the machine from the tractor's Groundkeeper GHL; GHL-T SMARTCUT BAF0006.2 05.17... - Page 27 Secure the tractor against unintentional start-up and rolling be- fore you leave the tractor. For this: ο Lower the machine onto the ground ο Apply the parking brake ο Switch off the tractor engine ο Remove the ignition key Groundkeeper GHL; GHL-T SMARTCUT BAF0006.2 05.17...
- Page 28 • Adjust your driving speed to the prevailing conditions. • Before driving downhill, switch to a low gear. • Before moving off, always switch off the independent wheel braking (lock the pedals). Groundkeeper GHL; GHL-T SMARTCUT BAF0006.2 05.17...
-
Page 29: Hydraulic System
If you are injured by hydraulic fluid, contact a doctor immediately. Danger of infection. • When searching for leakage points, use suitable aids, to avoid the serious risk of infection. Groundkeeper GHL; GHL-T SMARTCUT BAF0006.2 05.17... -
Page 30: Electrical System
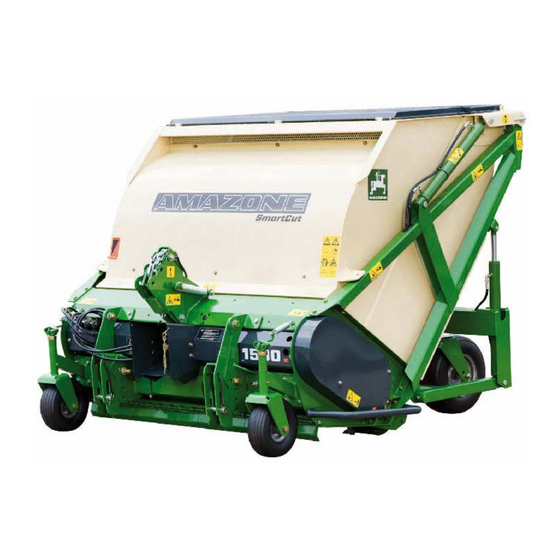
General description of the machine Areas of application The AMAZONE Groundkeeper is intended to be used for grass cut- ting and scarifying, for example, in public parks as well as sports fields and gardens. -
Page 31: Identification Of The Machine
1.94 x 1.90 x 1.58 Unloading height approx. 1.80 m Front tyres 260 x 85 Front tyre pressure 1.5 bar Rear tyres 16 x 6.5-8 16 x 6.5-8 GHL-T1350 GHL-T1500 Rear tyre pressure 2 bar Groundkeeper GHL; GHL-T SMARTCUT BAF0006.2 05.17... -
Page 32: Noise Production Data
The Amazone Lift Groundkeeper may only be used, serviced and maintained by persons who are familiar with the machine and who have received instruction concerning the risks involved. -
Page 33: Taking Delivery Of The Machine
Move the lower link sockets to the required position and fasten in place with 4 screws each. • Adjust the lower 3-point linkage to the tractor, so that the tractor tire is no tin contact with the machine front castor wheels. Groundkeeper GHL; GHL-T SMARTCUT BAF0006.2 05.17... - Page 34 • Attach the upper link. Choice the optimal adjustment of the upper 3-point linkage. • Pretension the upper link to halfway along the slotted hole (see fig. 5-2/1) • Plug in the hydraulic lines Groundkeeper GHL; GHL-T SMARTCUT BAF0006.2 05.17...
- Page 35 The time it takes for the unit to lower after filling must be at least two seconds. If fitted, adjust the lowering restrictor on the trac- tor. Groundkeeper GHL; GHL-T SMARTCUT BAF0006.2 05.17...
-
Page 36: Pto Shaft
When first attached, adjust the PTO shaft to the tractor accord- ing to fig. 5.2.2. Since this adjustment is only applicable for this one type of tractor, the PTO shaft adjustment must be checked and repeated if the type of tractor is changed. Groundkeeper GHL; GHL-T SMARTCUT BAF0006.2 05.17... - Page 37 This manual also contains instructions which must be observed regarding fitting and maintenance operations. To avoid damage, only connect the universal joint shaft slowly when the tractor engine is running at low revs. Groundkeeper GHL; GHL-T SMARTCUT BAF0006.2 05.17...
-
Page 38: Groundkeeper Transmission Input Speed
Warranty claims for damage which can be traced back to an ex- cessively high drive speed of the universal joint shaft will not be recognised. Groundkeeper GHL; GHL-T SMARTCUT BAF0006.2 05.17... -
Page 39: Connecting The Hydraulics
Function GH/GHS marker colour flow for Hydrau- return for Hy- lic block draulic block Lower hop- yellow Tilt hopper Lower ma- Lift machine in chine in green back back Drawbar + (Cutting deck nature operation) Groundkeeper GHL; GHL-T SMARTCUT BAF0006.2 05.17... - Page 40 Attaching and detaching the machine to/from the tractor The time it takes for the unit to lower after filling must be at least eight seconds. If fitted, adjust the lowering restrictor (see fig. 5.5-2 and fig. 5.5-3). Groundkeeper GHL; GHL-T SMARTCUT BAF0006.2 05.17...
-
Page 41: The Mower Unit
Care must be taken to ensure that the rotor is equally fitted with blades. If cutting tools are missing or have been incorrectly fit- ted, an imbalance is created which, over time, will lead to the whole machine being damaged. Groundkeeper GHL; GHL-T SMARTCUT BAF0006.2 05.17... - Page 42 Fig. 6.1-6 and fig. 6.1-4 show the limits of wear for the blades and blade mounting brackets. used used CAUTION The blades and the blade fasteners must be checked before the start of every run. All screw unions must be firmly tightened. Groundkeeper GHL; GHL-T SMARTCUT BAF0006.2 05.17...
- Page 43 100 % Wing blade, all conditions long, H77, ground excellent result good result (*) Pairs of rows opposite one another on the rotor are each fitted with mowing blades or wing blades (fig. 6.1-2). Groundkeeper GHL; GHL-T SMARTCUT BAF0006.2 05.17...
- Page 44 Fold up the intermediate hood (fig. 6.1.7). Caution: When you intend to work on the rotor with the catcher raised, make sure that the rotor is stationary and fit the safety support on the catcher. Groundkeeper GHL; GHL-T SMARTCUT BAF0006.2 05.17...
-
Page 45: Mowing
While the indicator is in the lower position, cuttings can continue to be collected. When the pointer starts to approach or has reached the upper position, the catcher must be emptied. The sensitivity of the indicator is dependent on the type of the cuttings. Groundkeeper GHL; GHL-T SMARTCUT BAF0006.2 05.17... -
Page 46: Scarifying
For this type of scarifying. the rotor is fitted with scarifying blades 2 or 3 mm wide. Due to the wider spacing between the blades it is possible to work the turf more deeply without causing excessive damage. Marker for row 1 GH 1350 GH 1500 Groundkeeper GHL; GHL-T SMARTCUT BAF0006.2 05.17... - Page 47 5. When the catcher is full, the machine must only be lowered slowly. If the rear cage roller encounters stones or solid ridges, the machine may suffer damage. Groundkeeper GHL; GHL-T SMARTCUT BAF0006.2 05.17...
-
Page 48: Mulching
The material is then lifted up by air suction, chopped to smaller pieces by the rotat- ing blades and conveyed through the chute to the catcher. Groundkeeper GHL; GHL-T SMARTCUT BAF0006.2 05.17... -
Page 49: Emptying The Catcher
The closing procedure for the catcher should take at least 8 seconds. It is possible to adjust this lowering speed using the integrated check valve (only on double acting cylinders) (fig. 6.6-1 and 6.6-2). Groundkeeper GHL; GHL-T SMARTCUT BAF0006.2 05.17... -
Page 50: Adjusting The Cutting Height
Then hook the guide wheel retractor back in and secure. The height of the rear cage roller is adjusted as follows: • Raise the machine. • Loosen the clamping screw (fig. 7-2), Groundkeeper GHL; GHL-T SMARTCUT BAF0006.2 05.17... - Page 51 Tighten the clamping screws. Care must be taken to ensure that the cage roller is equally adjusted on both sides. For this purpose, a check scale has been fitted on both sides (fig. 7-4). Groundkeeper GHL; GHL-T SMARTCUT BAF0006.2 05.17...
-
Page 52: Front Roller
It is fitted into the holders of the front guide wheels (fig. 7.1-1). To adjust the height, the lynch pin and the pin must be removed on both sides and the roller must be pegged in the required position (fig. 7.1-2). Groundkeeper GHL; GHL-T SMARTCUT BAF0006.2 05.17... -
Page 53: Cleaning The Machine
The machine can, on occasion, become heavily soiled, especially when mowing and scarifying wet grass which is also sometimes inter- spersed with earth. In such cases, it is recommended to clean the rotor and the catcher intensively with a jet of water. Groundkeeper GHL; GHL-T SMARTCUT BAF0006.2 05.17... -
Page 54: Maintenance Are Care
Rotor bearings (the V-belt guard on the left-hand side of the machine must be removed for access (WAF 13) (fig. 9.2-2, 9.2- • Rear cage roller bearing (fig. 9.2-4). • PTO shaft. • Cage roller bearings (fig. 9.2-5) Groundkeeper GHL; GHL-T SMARTCUT BAF0006.2 05.17... - Page 55 Maintenance are care Groundkeeper GHL; GHL-T SMARTCUT BAF0006.2 05.17...
-
Page 56: Extended Periods Of Downtime
Tyre pressure Front guide wheels: 2 bar When removing or fitting tyres, the tyres must always be fully deflated (a split tyre wall can fly apart with explosive force during removal). Groundkeeper GHL; GHL-T SMARTCUT BAF0006.2 05.17... -
Page 57: Additional Operating Instructions For The Towed Amazone Ghl-T Lift Groundkeeper
10.1 Attaching and detaching the machine Compared with the AMAZONE Lift Groundkeeper, the connection of the hydraulic lines and the upper link are different on this machine. 10.1.1 Hydraulic connections In order to be able to work correctly with the machine, the following hydraulic connections must be available on the tractor side. -
Page 58: Three-Point Attachment
Additional operating instructions for the towed AMAZONE GHL-T Lift Groundkeeper 10.1.2 Three-point attachment The upper link is replaced by a chain. The spring mechanism in the machine's upper three point system allow the front guide wheels to always be in contact with the ground, even on rough, undulating ter- rain. - Page 59 Additional operating instructions for the towed AMAZONE GHL-T Lift Groundkeeper If the machine is parked on uneven ground after adjustments have been completed, the spring upper link must be pretensioned to ap- proximately half way along the slotted hole (fig. 10.1.2-3). If this is not the case, the active length of the chain on the spring upper link must be corrected.
-
Page 60: Transport On Public Roads
Additional operating instructions for the towed AMAZONE GHL-T Lift Groundkeeper The pin must be easy to pull out of the bore hole. If this is not the case, check whether the spring in the upper link has been detensioned. •... -
Page 61: Rear Guide Wheel Vibration Damping
Additional operating instructions for the towed AMAZONE GHL-T Lift Groundkeeper 10.2.1 Rear guide wheel vibration damping On relatively long road journeys, especially if the machine is unladen, it is recommended that vibration damping for the rear guide wheels should be engaged. - Page 62 Additional operating instructions for the towed AMAZONE GHL-T Lift Groundkeeper When working on soft ground, damping must be disengaged in order that the guide wheels have freedom of movement. • Damping engaged: no gap visible (fig. 10.2.1-3), • Damping disengaged: gap visible (fig. 10.2.1-4).
-
Page 63: Machine In Working Use
Additional operating instructions for the towed AMAZONE GHL-T Lift Groundkeeper 10.3 Machine in working use 10.3.1 Mowing and scarifying The mower unit is adjusted and operated in much the same way as the basic GHL machine. There are only differences when it comes to raising or lowering the machine. -
Page 64: Maintenance
Lift Groundkeeper 10.5 Maintenance In addition to the few maintenance tasks which need to be carried out on the AMAZONE GHL Lift Groundkeeper, there are two points which require attention in the case of the GHL-T. 10.5.1 Tyre pressure Front guide wheels:... -
Page 65: Additional Lubrication Point
Additional operating instructions for the towed AMAZONE GHL-T Lift Groundkeeper 10.5.2 Additional lubrication point • Rear guide wheel damping elements (fig. 10.5.2-1). • Transport frame pivot point (fig. 10.5.2-2) • Wheel fork on rear guide wheels (fig. 10.5.2-3) Groundkeeper GHL; GHL-T SMARTCUT BAF0006.2 05.17... - Page 66 H. DREYER GmbH & Co. KG Postfach 51 Phone: +49 5405 501-0 D-49202 Hasbergen-Gaste e-mail: amazone@amazone.de Germany http:// www.amazone.de az S.A. FORBACH 17, rue de la Verrerie – BP 90106 Tel.: +33 (0)3 87 84 65 70 F-57602 FORBACH Cedex...
Need help?
Do you have a question about the Groundkeeper GHL and is the answer not in the manual?
Questions and answers