Advertisement
LightHz
click
1. Introduction
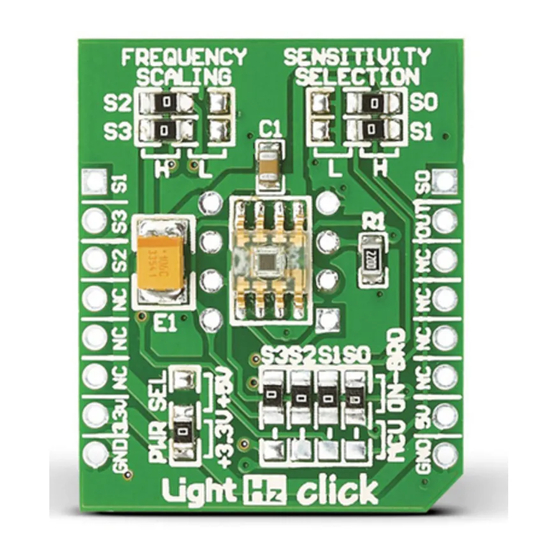
Front and back side appearance
of the LightHz click Board
LightHz Click is an accessory board in
mikroBus™
form factor. Board features
TSL230BR
programmable light-to-frequency
converter. The output can be either a pulse
train or a square wave (50% duty cycle)
with frequency directly proportional to light
intensity. Device sensitivity and frequency
scaling can be determined by the MCU, or
selected using available SMD jumpers if used
in hardware selection configuration. Solder
PWR SEL
SMD jumper to 5V position if used
with 5V systems.
2. Soldering the headers
Before using your click board, make sure
to solder the provided 1x8 male headers
to both sides of the board. Two 1x8 male
headers are included with the board in
the package.
2
Turn the board upside down, so that
bottom side is facing you upwards. Place
shorter parts of the header pins in the
both soldering pad locations.
1
3
Turn the board upward again. Make sure
to align the headers so that they are
perpendicular to the board, then solder the
pins carefully.
3. Plugging the board in
Once you have soldered the headers your
board is ready to be placed into desired
mikroBUS™ socket. Make sure to align the
cut in the lower-right part of the board
with the markings on the silkscreen at the
mikroBUS™ socket. If all the pins are aligned
correctly, push the board all the way
into the socket.
4. SMD Jumpers
Frequency
scaling
and
sensitivity
selection
of the sensor can be set by
bringing the logic combination to
S0
–
S3
according to sensor specification. This can
be done by soldering
corresponding
jumpers to appropriate
logic voltage levels, or
they can be connected
to
your
MCU
determined by software. Board comes with
SMD jumpers which are set to
ON-BOARD
configuration of scaling and sensitivity. If you
want those lines to be available to your MCU,
just resolder SMD jumpers to
MCU
position.
Default on-board configuration for scaling
is
(S2, S3) = (H, H),
and for sensitivity is
(S0, S1) = (H,
H).
click
BOARD
www.mikroe.com
LightHz click Manual
ver. 1.00
lines
SMD
and
Advertisement
Table of Contents

Subscribe to Our Youtube Channel
Related Manuals for mikroElektronika LightHz click


Summary of Contents for mikroElektronika LightHz click
- Page 1 Front and back side appearance both soldering pad locations. pins carefully. of the LightHz click Board LightHz Click is an accessory board in click 3. Plugging the board in mikroBus™ form factor. Board features...
- Page 2 MikroElektronika assumes no responsibility or liability for any errors or inaccuracies that may appear in the present document. Specification and information contained in the present schematic are subject to change at any time without notice. Copyright © 2012 MikroElektronika. All rights reserved.
Need help?
Do you have a question about the LightHz click and is the answer not in the manual?
Questions and answers