Avdel Genesis G2LB Instruction Manual
Hydro-pneumatic power tool
Hide thumbs
Also See for Genesis G2LB:
- Instruction manual (48 pages) ,
- Instruction manual (8 pages) ,
- Instruction manual (48 pages)

Related Manuals for Avdel Genesis G2LB


Summary of Contents for Avdel Genesis G2LB
- Page 1 B e t r i e b s a n l e i t u n g Üb e r s e t z u n g d e r O r i g i n a l - B e t r i e b s a n l e i t u n g ®...
-
Page 3: Table Of Contents
Im Falle eines Defekts oder Fehlers werden von Avdel nur fehlerhafte Teile nach eigenem Ermessen repariert oder ausgewechselt. Im Rahmen der Geschäftspolitik der ständigen Produktentwicklung und -verbesserung behält sich Avdel das Recht vor, die Spezifikation von Produkten ohne vorherige Ankündigung zu ändern. -
Page 4: Sicherheitsvorschriften
Mit diesem Gerät keine anderen als die von Avdel UK Limited empfohlenen und gelieferten Ausrüstungen verwenden. Für jede vom Kunden durchgeführte Änderung an Gerät/Maschine, Mundstücken, Zubehör und anderen von Avdel UK Limited oder von ihren Vertretern gelieferten Einzelteilen ist der Kunde alleine verantwortlich. Avdel UK Limited wird Sie bei allen geplanten Veränderungen gerne beraten. -
Page 5: Spezifikationen
S p e z i f i k a t i o n e n Te c h n i s c h e D a t e n Luftdruck Minimum - Maximum 5-7 bar Erforderliches Luftvolumen bei 5,5 bar 2,1 Liter Minimum 13 mm... -
Page 6: Arbeitsbereich
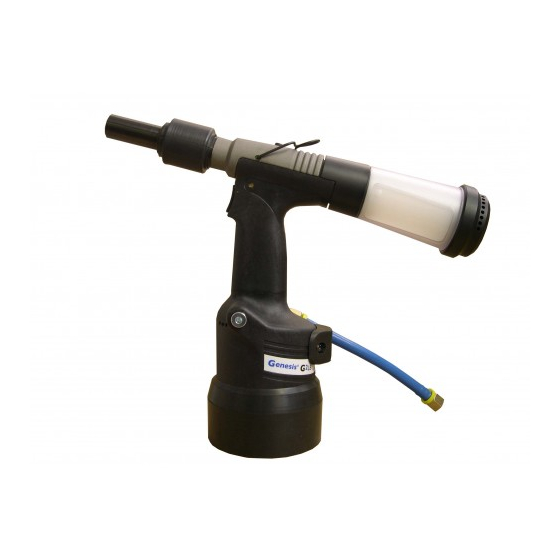
A r b e i t s b e re i c h ® ® ® Das Druckluftgerät G2LB dient zum Setzen von Avdel Avdelok und Maxlok bei hohen Geschwindigkeiten. Es ist dadurch ideal für die Serien- und Fließbandmontage für eine Vielfalt von Anwendungen in allen Industriebereichen. -
Page 7: Inbetriebnahme
I n b e t r i e b n a h m e D r u c k l u f t v e r s o rg u n g Alle Geräte werden durch Druckluft betätigt. Der optimale Druck beträgt 5,5 bar. Wir empfehlen die Verwendung von Druckreglern und automatischen Öler/Filtersystemen für den Anschluss an die Druckluftleitung. -
Page 8: Ausrüstungen
A u s r ü s t u n g e n ® ® A v d e l o k u n d M a x l o k A u s r ü s t u n g NI ET AUSRÜSTUNG siehe... -
Page 9: Einbauanweisungen Avdelok
A u s r ü s t u n g e n ® E i n b a u a n w e i s u n g e n A v d e l o k W I C H T I G Ausrüstungen enthalten KEINE Mundstucke. -
Page 10: Einbauanweisungen Maxlok
A u s r ü s t u n g e n ® E i n b a u a n w e i s u n g e n M a x l o k W I C H T I G Ausrüstungen enthalten KEINE Mundstucke. -
Page 11: Zubehör
Z u b e h ö r G r e i f t e i l a b w e i s e r Der Nietdorn-Abweiser ist eine einfache Alternative zum serienmäßigen Nietdorn-Auffangbehälter und erlaubt Zugang zu GREIFTEILABWEISER Bereichen mit beschränktem Raum. Das Gerät ist wie folgt 07340-00342 leicht einzubauen: •... -
Page 12: Wartung Des Gerätes
Wa r t u n g d e s G e r ä t e s W I C H T I G Die Sicherheitsvorschriften auf Seite 4 lesen. Der Arbeitgeber trägt die Verantwortung sicherzustellen, dass die Gerätewartungsanweisungen dem entsprechenden Personal ausgehändigt werden. -
Page 13: Molykote ® 55M
Wa r t u n g d e s G e r ä t e s ® M o l y K o t e 5 5 m S c h m i e r f e t t s i c h e r h e i t s d a t e n Erste-Hilfe HAUT: Mit Wasser abspülen. -
Page 14: Jährlich
Bauteile sind auszuwechseln. Sämtliche O-Ringe und Dichtungen sind zu erneuern und pneumatische Abdichtungen mit MolyKote ® Schmierfett oder hydraulische Abdichtungen mit MolyKote 111 Schmierfett einzufetten. ® Für eine leicht durchzuführende und vollständige Wartung wird von Avdel ein kompletter Werkzeugsatz angeboten. WERKZEUGSATZ: 71210-99990 Wenn nicht anders angegeben, entsprechen die Doppelmaulschlüsselmaße der Schlüsselweite (in Zoll) ART-NR. -
Page 15: Druckluftkolben
Wa r t u n g d e s G e r ä t e s K o p f K o m p l e t t Der Zusammenbau erfolgt in umgekehrter Reihenfolge des Zerlegens. Bitte folgende Punkte beachten: •... -
Page 16: Übersichtszeichnung Des Grundgerätes
Übersichtszeichnung des Grundgerätes 71255-02000... - Page 17 E r s a t z t e i l l i s t e f ü r 7 1 2 5 5 - 0 2 0 0 0...
-
Page 18: Auffüllen
A u f f ü l l e n Das Auffüllen mit Öl ist IMMER nach dem Zerlegen des Gerätes und vor der Inbetriebnahme erforderlich. Es könnte auch notwendig sein, nach längerem Gebrauch den vollen Hub wiederherzustellen, da bei geringerem Hub die Niete durch eine Betätigung des Auslösers nicht richtig gesetzt werden. -
Page 19: Auffüllvorgang
A u f f ü l l e n A u f f ü l l v o rg a n g W I C H T I G GERÄT VON DER DRUCKLUFTVERSORGUNG ABTRENNEN ODER AM VENTIL 55 ABSCHALTEN. BAUTEILE DER KOMPLETTEN AUSRÜSTUNG ODER DES DREHKOPFES ENTFERNEN. Sämtliche Arbeitsvorgänge sind auf einer sauberen Werkbank, mit sauberen Händen und in einem sauberen Bereich durchzuführen. -
Page 20: Beseitigen Von Störungen
Niedriger Ölstand oder Lufteinschlüsse im Öl Gerät mit Öl auffüllen 18-19 Die fettgedruckten Positionsnummern beziehen sich auf die Übersichtszeichnung und die Ersatzteilliste auf Seite 16 - 17. Andere Symptome oder Störungen sind Ihrem örtlichen autorisierten Avdel ® -Händler oder -Reparaturcenter mitzuteilen. - Page 21 A n m e r k u n g e n...
- Page 22 A n m e r k u n g e n...
- Page 23 K o n f o r m i t ä t s e r k l ä r u n g Wir, Avdel UK Limited; Watchmead Industrial Estate, Welwyn Garden City, Hertfordshire, AL7 1LY erklären unter unserer alleinigen Verantwortung, dass das Produkt:...
- Page 24 Besitzer sein. Alle Angaben dieser Unterlage sind unverbindlich und dienen nur zur Information. Unsere Produkte werden ständig weiterentwickelt und verbessert. Daher unterliegen die hier angegebenen Informationen grundsätzlich dem Ausschluss jeglicher Gewähr und dem Vorbehalt der jederzeit unbeschränkten Änderung ohne vorherige Ankündigung. Ihr lokaler Avdel Repräsentant steht Ihnen für neueste Informationen zur Verfügung.
- Page 25 I n s t r u c t i o n M a n u a l O r i g i n a l I n s t r u c t i o n ® G e n e s i s G 2 L B H y d ro - P n e u m a t i c P o w e r To o l...
- Page 27 AND REMEDIES. ANY IMPLIED WARRANTY AS TO QUALITY, FITNESS FOR PURPOSE, OR MERCHANTABILITY ARE HEREBY SPECIFICALLY DISCLAIMED AND EXCLUDED BY AVDEL. Avdel UK Limited policy is one of continuous product development and improvement and we reserve the right to change the specification of any product without prior notice.
-
Page 28: Safety Rules
Any modification undertaken by the customer to the tool/machine, nose assemblies, accessories or any equipment supplied by Avdel UK Limited or their representatives, shall be the customer’s entire responsibility. Avdel UK Limited will be pleased to advise upon any proposed modification. -
Page 29: Specifications
S p e c i f i c a t i o n s To o l S p e c i f i c a t i o n Air Pressure Minimum - Maximum 5-7 bar (72.5 - 101.5 psi) Free Air Volume Required @ 5.5 bar 2.1 litres... -
Page 30: Intent Of Use
I n t e n t o f U s e ® ® G2LB is a hydro-pneumatic tool designed to place Avdel Avdelok /Maxlok fasteners at high speed making it ideal for batch or flow-line assembly in a wide variety of applications throughout all industries. -
Page 31: Putting Into Service
P u t t i n g i n t o S e r v i c e A i r S u p p l y All tools are operated with compressed air at an optimum pressure of 5.5 bar. We recommend the use of pressure regulators and automatic filtering systems on the main air supply. -
Page 32: Nose Assemblies
N o s e A s s e m b l i e s ® ® A v d e l o k a n d M a x l o k N o s e A s s e m b l i e s F A S T E N E R N O S E A S S E M B LY s ee... -
Page 33: Fitting Instructions Avdelok
N o s e A s s e m b l i e s ® F i t t i n g I n s t r u c t i o n s A v d e l o k I M P O R T A N T Air supply must be disconnected when fitting or removing nose assemblies •... -
Page 34: Fitting Instructions Maxlok
N o s e A s s e m b l i e s ® F i t t i n g I n s t r u c t i o n s M a x l o k I M P O R T A N T Air supply must be disconnected when fitting or removing nose assemblies •... -
Page 35: Stem Deflector
A c c e s s o r i e s S t e m D e f l e c t o r The stem deflector is a very simple alternative to the standard STEM DEFLECTOR stem collector and allows access in restricted areas. It is easy 07340-00342 to fit to the tool as follows: •... -
Page 36: Servicing The Tool
S e r v i c i n g t h e To o l I M P O R T A N T Read Safety Instructions on page 4. The employer is responsible for ensuring that tool maintenance instructions are given to the appropriate personnel. The operator should not be involved in maintenance or repair of the tool unless properly trained. - Page 37 S e r v i c i n g t h e To o l ® M o l y k o t e 5 5 m G r e a s e S a f e t y D a t a First Aid SKIN: Flush with water.
-
Page 38: Annually
55m grease for pneumatic sealing or ® Molykote 111 for hydraulic sealing. ® For an easy complete service, Avdel is offering a complete service kit. SERVICE KIT : 71210-99990 Spanners are specified in inches and across flats unless otherwise stated PART Nº... -
Page 39: Pneumatic Piston Assembly
S e r v i c i n g t h e To o l H e a d A s s e m b l y Assemble in reverse order to dismantling noting the following points: • Place Lip Seal 8 onto the insertion rod* ensuring correct orientation. Push the guide tube* into the head of the tool and push the insertion rod* with the seal into place through the guide tube*. -
Page 40: General Assembly Of Base Tool
G e n e r a l A s s e m b l y o f B a s e To o l 7 1 2 5 5 - 0 2 0 0 0... - Page 41 P a r t s L i s t f o r 7 1 2 5 5 - 0 2 0 0 0...
-
Page 42: Oil Details
P r i m i n g Priming is ALWAYS necessary after the tool has been dismantled and prior to operating. It may also be necessary to restore the full stroke after considerable use, when the stroke may be reduced and fasteners are not fully placed by one operation of the trigger. O i l D e t a i l s ®... -
Page 43: Priming Procedure
P r i m i n g P r i m i n g P ro c e d u r e I M P O R T A N T DISCONNECT THE TOOL FROM THE AIR SUPPLY OR SWITCH OFF AT VALVE 55. REMOVE NOSE ASSEMBLY. - Page 44 Low oil level or air present in oil Prime tool 18-19 Item numbers in bold refer to the General Assembly drawing and Parts List on pages 16-17. ® Other symptoms or failures should be reported to your local Avdel authorised distributor or repair centre.
- Page 45 N o t e s...
- Page 46 N o t e s...
- Page 47 D e c l a r a t i o n o f C o n f o r m i t y We, Avdel UK Limited, Watchmead Industrial Estate, Welwyn Garden City, Herts, AL7 1LY declare under our sole responsibility that the product: Model G2LB Serial No.
- Page 48 This document is for informational purposes only. Infastech makes no warranties, expressed or implied, in this document. Data shown is subject to change without prior notice as a result of continuous product development and improvement policy. Your local Avdel representative is at your disposal should you need to confirm latest information.
Need help?
Do you have a question about the Genesis G2LB and is the answer not in the manual?
Questions and answers