Table of Contents
Advertisement
Quick Links
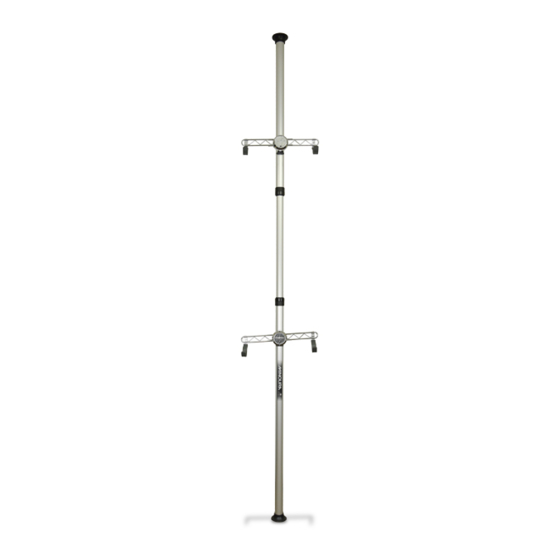
Thank you for choosing the Minoura BikeTower 20D.
BikeTower is a very convenient and easy to set up bike
storage stand that can be installed in any room where the
ceiling height is between 2.1 and 2.7 meters high.
BikeTower comes with two bike cradles, and it can be
expanded up to 4 bikes and other items by installing
optional bike cradles and attachments.
Read this instructions manual carefully before use for
your safety, and keep on hand for future reference.
Part Name
}
[Pillar Joint]
Recommended Tightening Torque = 8 N.m
bicycle storage stand
Top Rubber Cup
(with spring inside)
Red Caution Indicator
Clamp
Bike Cradle
Upper Pillar
(45mm diameter)
Pillar Joint
8 N.m
Center Pillar
(40mm diameter)
Cradle Arm
(Right and Left)
Cradle Hook
Lower Pillar
(45mm diameter)
Bottom Rubber Cup
(without spring inside)
Pillar Joint
(Plastic)
Cap Bolt M6x15 (Do not loosen)
Metal Ring
8 N.m
Cap Bolt M6x20
Cap Bolt M6x15
8 N.m
Lock Plate
BikeTower20D
Important Notes
•
Use the supplied plastic tie to hold the pillar to the ceiling
or the wall to avoid the stand from toppling over if the pillar
length was shortened if there was an issue with the locking
bolt.
Minoura is not responsible to any trouble if you don't use
this plastic tie correctly.
• For standard 2-wheel bike only. Not for use with
tandems or long wheel base bicycles.
• Each bike cradle is rated to hold up to 25 kgs.
If mounting heavy bikes, check the bolts often to make
sure they are not loose.
•
Check to make sure the Pillar Joint has remained secure by
pulling down the Upper Pillar after tightening the Pillar Joint
Bolt and the Lock Plate Bolt.
If the pillar has moved after tightening, discontinue using
and contact your dealer or Minoura directly. You may need to
replace the metal ring of the Pillar Joint.
• The pillar is supported by the internal spring applying
pressure to the ceiling.
Make sure that the pillar comes in contact with a stud
or other reinforced area of the ceiling otherwise the
pressure may cause a break through on dry wall or
other non-supportive material.
•
Adjust the pillar length correctly. If the red plastic appears
beneath the Upper Rubber Cup, it means the pillar is not
adjusted properly (too short).
•
Do not install the pillar upside down.
NEVER use BikeTower horizontally. It is for vertical use
ONLY.
•
The pillar must be completely vertical, and not at any angle.
Failure to do so will cause the stand to fall.
•
The rubber cap material may leave a mark on some ceilings
or floors.
We recommend placing a small piece of fabric or paper
between the rubber cup and the ceiling. Do not use a slippery
material.
• The coating on the cradle hook may leave a mark on
your bicycle frame, especially in light colors.
We recommend wrapping a piece of bar tape on the
hook where it comes in contact with the frame.
• Depending on the bike size, you may have to change the
clamp position from the fatter Upper or Lower Pillar to the
narrower Center Pillar.
In this case, install the supplied plastic shim between the
clamp and the pillar.
• The pillar is just a single pole so it's easy to turn. Do not place
any fragile items or sharp edge articles around the pillar.
• This product is subject to change without prior notice
for quality and safety improvements.
- 1 -
instructions manual
(ver.1.0 2017/8)
Advertisement
Table of Contents

Summary of Contents for MINOURA BikeTower 20D
- Page 1 BikeTower comes with two bike cradles, and it can be bolt. expanded up to 4 bikes and other items by installing Minoura is not responsible to any trouble if you don't use optional bike cradles and attachments. this plastic tie correctly.
- Page 2 How To Setup Measurement → Temporally Setting → Adjusting Length → Setting → Check → Fix Required Tool : 5mm Hex Wrench The Upper Loosen the Insert the Center In anticipation and Lower M6x15 bolt of Pillar into the of the stand Pillars come the Lock Plates, Lower Pillar.
- Page 3 Grab the Upper Pillar and try to pull down in order to confirm if the Pillar Joint is securely locked. This confirmation must be done. Minoura is not responsible for any damage or injury if this step is not followed. If the stand has been set up properly but the remains too short, contact your dealer and request replacement parts.
- Page 4 Schematics of Bike Cradle Pivot Pin Clamping Bolt Fixing Bolt M6 Spring Washer Left Arm (Foreside) M6 Flat Washer Base Plate Clamp Body Pivot Pin Right Arm (Backside) Hook Hook Fixing Bolt Angle Adjusting Bolt Arm Connecting Bolt Cradle Cap (Fig.
- Page 5 For more details, read the enclosed Minorua Limited Warranty Policy card in the kit. Also please regularly check our Minoura web site for the latest information. Insert the 5mm hex wrench in the center hole on the Cradle Cap, and loosen the inside bolt slightly.
- Page 6 Contact MINOURA JAPAN 1197-1 Godo, Anpachi, Gifu 503-2305 Japan Fax : +81-584-27-7505 URL: www.minoura.jp Mail : minoura@minoura.jp Made in Japan - 6 -...


Need help?
Do you have a question about the BikeTower 20D and is the answer not in the manual?
Questions and answers