Advertisement
Table of Contents
Advertisement
Table of Contents

Related Manuals for Vivo MOUNT-E-MT100


Summary of Contents for Vivo MOUNT-E-MT100
- Page 1 Electric TV Wall Mount Instruction Manual SKU: MOUNT-E-MT100 Scan the QR code with your mobile device or follow the link for helpful videos and specifications related to this product. https://vivo-us.com/products/mount-e-mt100 help@vivo-us.com www.vivo-us.com 309-278-5303...
- Page 2 CAUTION! DO NOT INSTALL INTO DRYWALL ALONE. VERIFY YOUR WALL CONSTRUCTION. USE WOOD STUDS TO MOUNT. We include mounting for brick and concrete walls. If unsure, please contact us at vivo-us. com, email at help@vivo-us.com, or call us at 309-278-5303.
- Page 3 TOOLS NEEDED 3/8” Drill Bit Pencil Hammer Ruler Stud Finder Phillips Drill 3/16” Drill Bit Screwdriver PRE-ASSEMBLY STEP 1 STEP 2 Temperature at the front edge of mantel should If the main wall is wood frame, the spacing never exceed 110°F (43°C). between the studs center must be no more than 16.5”...
- Page 4 ASSEMBLY STEPS STEP 1 STEP 2 Measure the centerline of the mantel. Mark Locate studs using a stud finder and mark with tape on the wall. locations with a pencil or marker. Make sure markings are in line with the center of the studs.
- Page 5 STEP 4 If the main wall is brick or concrete, plastic anchors (M) must be used. Please reference the table in Pre-Assembly for proper locations of mounting holes, making sure there are no more than minor deviations from the diagram. Drill 2.7” (68mm) deep holes using a 3/8” (10mm) drill bit, then press plastic anchors into holes.
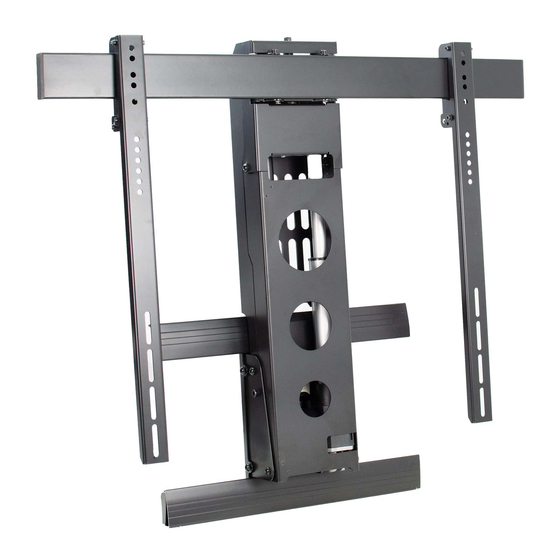
- Page 6 STEP 7 STEP 8 Mount Motorized Arm (EE) to Wallboard using Assemble Beam (DD) to Motorized Arm using M8x10 Bolts (N), and tighten with the Allen M6x80 Bolts (B) and tighten with the Allen Wrench (E). Wrench (E). Insert Stoppers (D) into ends of Beam.
- Page 7 STEP 11 Plug the connected power adapter into the wall, then operate the mount using the included Remote. “A” raises the TV, “B” lowers the TV, “C” swivels the TV to the left, and “D” swivels the TV to the right. If needed, adjust the swivel motion limit as shown using the Allen Wrench (E).
- Page 8 - 83% within < 2hr - 92% within < 3hr www.vivo-us.com : < 15 M AVG. RESOLUTION TIME (within office hrs) : 5M 4S 309-278-5303 AVG. RESOLUTION TIME (within office hrs) FOR MORE VIVO PRODUCTS, CHECK OUT OUR WEBSITE AT: www.vivo-us.com...
Need help?
Do you have a question about the MOUNT-E-MT100 and is the answer not in the manual?
Questions and answers