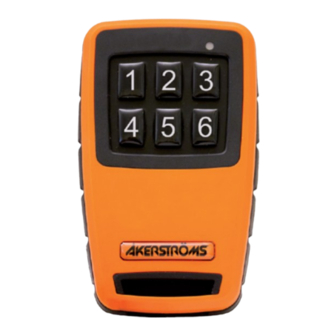
Akerstroms SESAM 800 Operating Manual
Configurable
Hide thumbs
Also See for SESAM 800:
- Manual (112 pages) ,
- Operating manual (28 pages) ,
- Operating manual (20 pages)
Table of Contents
Advertisement
Quick Links
Advertisement
Table of Contents

Subscribe to Our Youtube Channel
Summary of Contents for Akerstroms SESAM 800
- Page 1 OPERATING MANUAL SESAM 800 CONFIGURABLE 947422-000 EN -C1...
-
Page 2: Table Of Contents
Output Configuration _______________________________14 Receiver Drill Measures _____________________________15 List of figures Figure 1. Sesam 800 RXM model indicators, connections and jumper _____ 6 Figure 2. Output LED numbering and relationship with output terminals ____ 7 Figure 3. Configuring internal supply of output power __________________ 9 Figure 4. -
Page 3: Introduction
For cleaning use a dry cleaning cloth, if necessary use a wet cleaning cloth and a soap solution. Never use an alcohol-based product for cleaning; it can seriously damage the plastic. Do not use pressure washer on the product! Sesam 800 Configurable (original instructions) Document-ID: 947422-000 EN Version: C1... -
Page 4: Technical Specifications
120 x120 x 50 mm Weight: 350g Transmitter Specifications S800M6 IP- class: IP67 Dimensions: 100 x 60 x 25 mm Weight: 130g Battery type: 2*AA/LR06 Alkaline Table 1. Technical Specifications, Sesam 800 Configurable Sesam 800 Configurable (original instructions) Document-ID: 947422-000 EN Version: C1 Author: SH... -
Page 5: Short Description Of The System
1...6. For the unit with no print there is a default or cus- tom made label frame. The transmitters are very rugged and waterproof (IP67). Type label position Sesam 800 Configurable (original instructions) Document-ID: 947422-000 EN Version: C1 Author: SH... -
Page 6: Description Of The Receiver
Description of the Receiver 6 (16) Description of the Receiver Figure 1. Sesam 800 RXM model indicators, connections and jumper 1. Power LED 2. Ground 3. Positive (+) 12-24 V DC connector 4. Output power input 5. LED 5 6. LED 6 7. -
Page 7: Indications On The Receiver
Description of the Receiver 7 (16) Indications on the Receiver The Sesam 800 RXM model has LED indicators that indicate different param- eters (see fig. 1 for positions of the LEDs). The indications on the LEDs are as follows: Power LED (see in fig. -
Page 8: Installation Of The Receiver
Step 2 Drill 4 holes (for measures see Figure 11). Mount the receiver. Sesam 800 Configurable (original instructions) Document-ID: 947422-000 EN Version: C1 Author: SH... -
Page 9: Figure 3. Configuring Internal Supply Of Output Power
Output Power Input (SW) and Positive (+) 12-24 V DC using a 0,75 mm cable (see fig. 3). 941551 PB-Free Figure 3. Configuring internal supply of output power Sesam 800 Configurable (original instructions) Document-ID: 947422-000 EN Version: C1 Author: SH... -
Page 10: Figure 4. Numbering Of Outputs
• By pressing the buttons on the transmitter, verify that all functions work correctly as described in table 2. Note that some of the buttons may be set as remaining (see chap. 13). Sesam 800 Configurable (original instructions) Document-ID: 947422-000 EN Version: C1... -
Page 11: Description Of The Transmitter
Indicator LED Control buttons 1 2 3 4 5 6 Figure 5. The Sesam 800 M6 transmitter indicator and buttons Indications on the Transmitter Normal operation Quick flashing RED LED = Sending message but no feedback available from the receiver. -
Page 12: Replacing Batteries In The Transmitter
Figure 7. Batteries inserted in the transmitter. Make sure the batteries are inserted with the correct polarity Figure 8. Rear side of the cover inserted in its position Sesam 800 Configurable (original instructions) Document-ID: 947422-000 EN Version: C1 Author: SH... -
Page 13: Pairing Receiver And Transmitter
J2 (right) position (see Figure 10). • For safety reasons the receiver is inactive for five seconds when switching between two transmitters. • See chapter 12 for pairing instructions. Sesam 800 Configurable (original instructions) Document-ID: 947422-000 EN Version: C1 Author: SH... -
Page 14: Output Configuration
Power off the receiver (if you have a conversion box for 230 V AC wait 10 seconds). 10. Reinstall the Jumper in its previous setting. 11. Start the receiver. Sesam 800 Configurable (original instructions) Document-ID: 947422-000 EN Version: C1 Author: SH... -
Page 15: Receiver Drill Measures
Receiver Drill Measures 120 mm 102 mm Figure 11. Receiver drill measure The receiver shall be attached with 4 mm screws that are suitable for the sur- rounding environment Sesam 800 Configurable (original instructions) Document-ID: 947422-000 EN Version: C1 Author: SH... - Page 16 Åkerströms Björbo AB Box 7, SE-785 21 Gagnef, Sweden street Björbovägen 143 SE-786 97 Björbo, Sweden Phone +46 241 250 00 Fax +46 241 232 99 E-mail sales@akerstroms.com www.akerstroms.com © Åkerströms Björbo AB, 2012...


Need help?
Do you have a question about the SESAM 800 and is the answer not in the manual?
Questions and answers