
Related Manuals for Framery O VCR


Summary of Contents for Framery O VCR
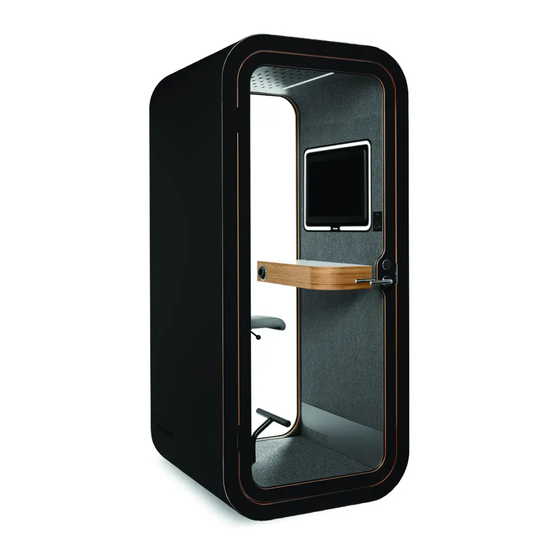
- Page 1 English Framery O VCR Version 1.0 Troubleshooting instructions Pods ordered 02/2019–08/2019...
-
Page 3: Table Of Contents
Contents 1 Safety......................5 2 The door is leaking sound or does not seal properly......7 3 The body covers do not fit...............23 4 Power issues....................26 4.1 There is no electricity in the pod or the electricity goes on and off...... 26 4.2 The power outlet is not working................37 5 Fans and lights.................. -
Page 5: Safety
Note: Do not place heavy objects on the roof of the pod. Note: Do not attach or hang extra weight from the door. Warning: Always disconnect the pod from the power outlet before performing any maintenance. To disconnect, remove plug from outlet. Framery O VCR Troubleshooting instructions info@frameryacoustics.com... - Page 6 Installation environment The pod is intended to be used in the following conditions. • Ambient temperature: +15°C ... +30°C (59°F ... 86°F) • Humidity: max. 50% Framery O VCR Troubleshooting instructions info@frameryacoustics.com...
-
Page 7: The Door Is Leaking Sound Or Does Not Seal Properly
When you are standing outside the pod you can hear what a person inside the pod is saying and the person inside the pod can hear noises from outside the pod. Cause: The floor of the pod is not leveled. Solution: Level the floor. Remove the carpet. Framery O VCR Troubleshooting instructions info@frameryacoustics.com... - Page 8 Measure the floor module with a spirit level at four measuring points: • Along the sides • At the edge of the floor module (on the ABS strips) Measure opposite points repeatedly and adjust the leveling screws gradually. Framery O VCR Troubleshooting instructions info@frameryacoustics.com...
- Page 9 Cause: The pod is not standing straight. Solution: Straighten the pod. Check the straightness of the pod with a spirit level on both sides. If the pod is not standing straight, complete the following steps. Framery O VCR Troubleshooting instructions info@frameryacoustics.com...
- Page 10 Remove the wall body covers. Remove the roof and bottom body covers. Framery O VCR Troubleshooting instructions info@frameryacoustics.com...
- Page 11 Remove the carpet. Unscrew the 4x30 screws (8 pcs) and remove the wall cover panels (4 pcs). Framery O VCR Troubleshooting instructions info@frameryacoustics.com...
- Page 12 Unscrew the 4x30 screws (32 pcs) and remove the top and bottom cover panels (4 pcs). Unscrew the 4x30 screws (4 pcs) and remove the floor cover panels (2 pcs). Framery O VCR Troubleshooting instructions info@frameryacoustics.com...
- Page 13 Unscrew the 4x30 screws (4 pcs) and remove the roof cover panels (2 pcs). Remove the seal from the glass wall. Framery O VCR Troubleshooting instructions info@frameryacoustics.com...
- Page 14 10. Open the door completely (180°). 11. Loosen all the frame and body bolts slightly. Framery O VCR Troubleshooting instructions info@frameryacoustics.com...
- Page 15 Note: Do not overtighten the bolts. 13. Install a new seal to the glass wall. 14. Reinstall the removed parts. Cause: The door is too low. The door is not vertically in the middle of the door opening. Framery O VCR Troubleshooting instructions info@frameryacoustics.com...
- Page 16 Solution: Adjust the door height. Remove the caps from the hinges. Open the door and loosen the set screws. Close the door. Framery O VCR Troubleshooting instructions info@frameryacoustics.com...
- Page 17 Note: After the initial installation, the door normally does not have to be lowered, but raised. Adjust the height setting of the lower hinge accordingly so that the load on both hinges is the same. Turn clockwise to raise and counter-clockwise to lower the setting. Framery O VCR Troubleshooting instructions info@frameryacoustics.com...
- Page 18 If the flashlight shines through the door seams, adjust the door. Repeat steps 4–6 if needed. Close the door. 10. Open the door and tighten the set screws when the adjustment is complete. Note: Make sure that both hinges have the same height setting. Framery O VCR Troubleshooting instructions info@frameryacoustics.com...
- Page 19 11. Install the caps. Cause: The door is sagging. Solution: Install an adjustment plate under the lower hinges. Open the door completely (180°). Framery O VCR Troubleshooting instructions info@frameryacoustics.com...
- Page 20 Lift the door to detach it. Unscrew the 5x30 screws (4 pcs) and remove the lower hinges. Framery O VCR Troubleshooting instructions info@frameryacoustics.com...
- Page 21 Cause: The door seal has come loose or is compressed. Solution: Reinstall the door seal. Insert the seal into the groove. Make sure that the seal is correctly installed. Tip: A spline roller can be a useful tool to help you work faster. Framery O VCR Troubleshooting instructions info@frameryacoustics.com...
- Page 22 Framery O VCR Troubleshooting instructions info@frameryacoustics.com...
-
Page 23: The Body Covers Do Not Fit
The fold of the body cover will not go into the installation groove, or there is a gap between the roof or bottom body cover and the frame, or there is a big gap between two body covers. Figure 1: Gap between two body covers Framery O VCR Troubleshooting instructions info@frameryacoustics.com... - Page 24 Solution: Adjust the position of the wall cover panels. Remove the body cover that does not fit and the body cover next to it. Unscrew the 4x30 screws (8 pcs) and remove the wall cover panel. Framery O VCR Troubleshooting instructions info@frameryacoustics.com...
- Page 25 Position the cover panel slightly higher or lower and reinstall the cover panel. Install the body covers. Framery O VCR Troubleshooting instructions info@frameryacoustics.com...
-
Page 26: Power Issues
Solution: If needed, connect the power cord of the pod to another power outlet. Cause: One or more electrical connections have come loose. Solution: Check all electrical connections inside the table. Disconnect the power cord. Framery O VCR Troubleshooting instructions info@frameryacoustics.com... - Page 27 Remove countersunk M6x25 screws (2 pcs) from the table bottom board and open the table bottom board. Check that all electrical connections are secure. Framery O VCR Troubleshooting instructions info@frameryacoustics.com...
- Page 28 Fasten the table bottom board with countersunk M6x25 screws (2 pcs). Note: Make sure that the cords are not between the table boards. Connect the power cord. Framery O VCR Troubleshooting instructions info@frameryacoustics.com...
- Page 29 Cause: The power cord and AC extension cord are disconnected. Solution: Check that the connection between the power cord and AC extension cord is secure (power cord installed from the floor). Disconnect the power cord. Remove the wall body cover from the techwall. Framery O VCR Troubleshooting instructions info@frameryacoustics.com...
- Page 30 Remove the bottom body cover. Unscrew the 4x30 screws (8 pcs) and remove the wall cover panel. Framery O VCR Troubleshooting instructions info@frameryacoustics.com...
- Page 31 Check that the connection between the power cord and AC extension cord is secure. Install the removed parts in reverse order. Connect the power cord. Framery O VCR Troubleshooting instructions info@frameryacoustics.com...
- Page 32 Solution: Check that the connection between the power cord and AC extension cord is secure (power cord installed from the roof). Disconnect the power cord. Remove the wall body cover from the techwall. Framery O VCR Troubleshooting instructions info@frameryacoustics.com...
- Page 33 Remove the roof body cover. Unscrew the 4x30 screws (8 pcs) and remove the wall cover panel. Framery O VCR Troubleshooting instructions info@frameryacoustics.com...
- Page 34 Check that the connection between the power cord and AC extension cord is secure. Install the removed parts in reverse order. Connect the power cord. Framery O VCR Troubleshooting instructions info@frameryacoustics.com...
- Page 35 Cause: The fuse has tripped. Solution: Reset the fuse. Disconnect the power cord. Remove countersunk M6x25 screws (2 pcs) from the table bottom board and open the table bottom board. Framery O VCR Troubleshooting instructions info@frameryacoustics.com...
- Page 36 Press the button on the inline thermal protection to reset the fuse. Fasten the table bottom board with countersunk M6x25 screws (2 pcs). Framery O VCR Troubleshooting instructions info@frameryacoustics.com...
-
Page 37: The Power Outlet Is Not Working
The fans and lights work normally. There is no electricity in the power outlet in the table. Cause: The cord of the power outlet has come loose. Solution: Check that the cord of the power outlet is connected. Disconnect the power cord. Framery O VCR Troubleshooting instructions info@frameryacoustics.com... - Page 38 Remove countersunk M6x25 screws (2 pcs) from the table bottom board and open the table bottom board. Check that the cord of the power outlet is connected. Framery O VCR Troubleshooting instructions info@frameryacoustics.com...
- Page 39 Fasten the table bottom board with countersunk M6x25 screws (2 pcs). Connect the power cord. Framery O VCR Troubleshooting instructions info@frameryacoustics.com...
-
Page 40: Fans And Lights
The fans and light do not switch on when a person enters the pod but the power outlet in the table is working. Cause: One or more electrical connections have come loose. Solution: Check all electrical connections inside the table. Disconnect the power cord. Framery O VCR Troubleshooting instructions info@frameryacoustics.com... - Page 41 Remove countersunk M6x25 screws (2 pcs) from the table bottom board and open the table bottom board. Check that all electrical connections are secure. Framery O VCR Troubleshooting instructions info@frameryacoustics.com...
- Page 42 Fasten the table bottom board with countersunk M6x25 screws (2 pcs). Note: Make sure that the cords are not between the table boards. Connect the power cord. Framery O VCR Troubleshooting instructions info@frameryacoustics.com...
- Page 43 Cause: The roof module DC cord and wall module DC cord are disconnected. Solution: Check that the connection between the roof module DC cord and wall module DC cord is secure. Disconnect the power cord. Remove the wall body cover from the techwall. Framery O VCR Troubleshooting instructions info@frameryacoustics.com...
- Page 44 Remove the roof body cover. Unscrew the 4x30 screws (8 pcs) and remove the wall cover panel. Framery O VCR Troubleshooting instructions info@frameryacoustics.com...
-
Page 45: The Fans And Lights Switch Off Too Quickly Or Are Always On
5.2 The fans and lights switch off too quickly or are always on Condition The fans and lights switch off when there has been no movement in some seconds, or the fans and lights do not switch off though no one is using the pod. Framery O VCR Troubleshooting instructions info@frameryacoustics.com... - Page 46 Cause: The settings of the motion detector are incorrect. Solution: Adjust the settings of the motion detector. Disconnect the power cord. Remove countersunk M6x25 screws (2 pcs) from the table bottom board and open the table bottom board. Framery O VCR Troubleshooting instructions info@frameryacoustics.com...
- Page 47 Use a flat-head screwdriver to turn the arrow on the rightmost rotary switch to the desired setting. The default and recommended setting is 0. Setting Time (minutes) before switch off Note: Only settings from 0 to 2 are in use. Framery O VCR Troubleshooting instructions info@frameryacoustics.com...
-
Page 48: The Ceiling Light Does Not Switch On
Install the removed parts in reverse order. Connect the power cord. 5.3 The ceiling light does not switch on Condition The ceiling light is not working. The fans and the power outlet in the table work normally. Framery O VCR Troubleshooting instructions info@frameryacoustics.com... - Page 49 Solution: Check that the light's electrical connections are secure. Disconnect the power cord. Gently pull out the light from the ceiling. Note: Be careful when removing the light. The metal springs holding the light in place may break. Framery O VCR Troubleshooting instructions info@frameryacoustics.com...
- Page 50 Check that the connectors are securely connected. Push the light back into the ceiling. Framery O VCR Troubleshooting instructions info@frameryacoustics.com...
- Page 51 Connect the power cord. Cause: The light's connector is not connected to the control unit. Solution: Check that the light's connector is connected to the control unit. Disconnect the power cord. Framery O VCR Troubleshooting instructions info@frameryacoustics.com...
- Page 52 Remove countersunk M6x25 screws (2 pcs) from the table bottom board and open the table bottom board. Check that the light's connector is connected to the LED 1 connector of the control unit. Framery O VCR Troubleshooting instructions info@frameryacoustics.com...
- Page 53 Note: Make sure that the cords are not between the table boards. Connect the power cord. Cause: One of the wires of the roof module or wall module DC cord is broken or has come loose. Solution: Contact Framery support for a replacement part. Framery O VCR Troubleshooting instructions info@frameryacoustics.com...
-
Page 54: The Display Light Does Not Switch On
The display light is not working. The fans, ceiling light, and power outlet in the table work normally. Cause: The light's connector is not connected to the control unit. Solution: Check that the light's connector is connected to the control unit. Disconnect the power cord. Framery O VCR Troubleshooting instructions info@frameryacoustics.com... - Page 55 Remove countersunk M6x25 screws (2 pcs) from the table bottom board and open the table bottom board. Check that the light's connector is connected to the LED 2 connector of the control unit. Framery O VCR Troubleshooting instructions info@frameryacoustics.com...
- Page 56 Fasten the table bottom board with countersunk M6x25 screws (2 pcs). Note: Make sure that the cords are not between the table boards. Connect the power cord. Framery O VCR Troubleshooting instructions info@frameryacoustics.com...
-
Page 57: The Control Panel Is Not Working
Solution: Check that the control panel cord is connected. Cause: The bus connector is not connected to the control unit. Solution: Check that the bus connector is connected to the control unit connector. Disconnect the power cord. Framery O VCR Troubleshooting instructions info@frameryacoustics.com... - Page 58 Remove countersunk M6x25 screws (2 pcs) from the table bottom board and open the table bottom board. Check that the bus connector is connected to the BUS connector of the control unit. Framery O VCR Troubleshooting instructions info@frameryacoustics.com...
-
Page 59: When You Adjust The Ceiling Light, The Display Light Is Also Adjusted
Cause: The lights' connectors have been incorrectly connected. If the ceiling light has been connected to the connector reserved for the display light (LED 2 or LED 4) and vice versa, the lights are controlled together. Framery O VCR Troubleshooting instructions info@frameryacoustics.com... - Page 60 Solution: Check that the lights are connected to the correct connectors of the control unit. Disconnect the power cord. Remove countersunk M6x25 screws (2 pcs) from the table bottom board. Framery O VCR Troubleshooting instructions info@frameryacoustics.com...
- Page 61 LED 2 connector of the control unit. Fasten the table bottom board with countersunk M6x25 screws (2 pcs). Note: Make sure that the cords are not between the table boards. Framery O VCR Troubleshooting instructions info@frameryacoustics.com...
-
Page 62: One Or Both Fans Are Not Working
The lights and power outlet work normally. The fans are not running. Cause: The fan module's electrical connections have come loose. Solution: Check that the fan module’s electrical connections are secure. Disconnect the power cord. Framery O VCR Troubleshooting instructions info@frameryacoustics.com... - Page 63 Remove the 3.5x15 screws (4 pcs) and take out the fan module. Check that the fan DC cord and the DC extension cord are securely connected. Framery O VCR Troubleshooting instructions info@frameryacoustics.com...
- Page 64 Reinstall the fan module. Connect the power cord. Framery O VCR Troubleshooting instructions info@frameryacoustics.com...
- Page 65 Cause: The fan's connector is not connected to the control unit. Solution: Check that the fan's connector is connected to the control unit. Disconnect the power cord. Remove countersunk M6x25 screws (2 pcs) from the table bottom board and open the table bottom board. Framery O VCR Troubleshooting instructions info@frameryacoustics.com...
- Page 66 Check that the fan's connector is connected to the fan connector of the control unit. Fasten the table bottom board with countersunk M6x25 screws (2 pcs). Note: Make sure that the cords are not between the table boards. Framery O VCR Troubleshooting instructions info@frameryacoustics.com...
-
Page 67: The Fans Are Noisy
Connect the power cord. Cause: One of the wires of the roof module or wall module DC cord is broken or has come loose. Solution: Contact Framery support for a replacement part. 5.8 The fans are noisy Condition The fans are exceptionally loud or make an abnormal sound. - Page 68 Cause: There is something touching the fan blades. Solution: Check that there is nothing touching the fan blades. Disconnect the power cord. Remove the 3.5x15 screws (4 pcs) from the fan module. Framery O VCR Troubleshooting instructions info@frameryacoustics.com...
- Page 69 Take out the fan module and disconnect the fan DC cord. Check that there is nothing touching the blades. Connect the fan DC cord. Framery O VCR Troubleshooting instructions info@frameryacoustics.com...
- Page 70 Tip: By default, the fan speed is set to the maximum speed. Reducing the speed of the fans, reduces the noise they produce. If the fan noise is disturbing, the fan speed can be set to for instance 80% of the maximum speed. Framery O VCR Troubleshooting instructions info@frameryacoustics.com...
-
Page 71: The Air Inside The Pod Does Not Feel Fresh
Note: Reducing the fan speed decreases the rate of air flow inside the pod. 5.9 The air inside the pod does not feel fresh Cause: The ventilation channels are dirty. Solution: Clean the ventilation channels with a vacuum cleaner. Framery O VCR Troubleshooting instructions info@frameryacoustics.com... - Page 72 Cause: The fans are not working. Solution: Check that the fan module’s electrical connections are secure. Disconnect the power cord. Remove the 3.5x15 screws (4 pcs) and take out the fan module. Framery O VCR Troubleshooting instructions info@frameryacoustics.com...
- Page 73 Check that the fan DC cord and the DC extension cord are securely connected. Reinstall the fan module. Framery O VCR Troubleshooting instructions info@frameryacoustics.com...
- Page 74 Connect the power cord. Solution: Check that the fan's connector is connected to the control unit. Disconnect the power cord. Framery O VCR Troubleshooting instructions info@frameryacoustics.com...
- Page 75 Remove countersunk M6x25 screws (2 pcs) from the table bottom board and open the table bottom board. Check that the fan's connector is connected to the fan connector of the control unit. Framery O VCR Troubleshooting instructions info@frameryacoustics.com...
- Page 76 If the pod is located under a heating duct or in direct sunlight, the temperature inside the pod might rise. If there is not enough space around the pod, air does not circulate sufficiently. Framery O VCR Troubleshooting instructions info@frameryacoustics.com...
- Page 77 Figure 2: Operating space measures Solution: If needed, move the pod to a more suitable location. Framery O VCR Troubleshooting instructions info@frameryacoustics.com...
-
Page 78: Door Handle And Lock
6 Door handle and lock 6.1 The door handle is loose Cause: The screws have not been properly tightened. Solution: Reinstall the handle. Loosen the set screw on the inside handle. Remove the two M5x32 screws. Framery O VCR Troubleshooting instructions info@frameryacoustics.com... - Page 79 Adjust the spindle at least 5 mm to find a new spot for the set screw to pierce the spindle. Note: Do not turn or rotate the spindle in any way, because it can only be pierced on one side. Framery O VCR Troubleshooting instructions info@frameryacoustics.com...
- Page 80 In the final position, the head of the set screw is level with the handle surface. Replace the M5x32 screws with new ones. Tighten the M5x32 screws. Note: Do not overtighten them. If you overtighten the screws, the lock latch gets stuck. Framery O VCR Troubleshooting instructions info@frameryacoustics.com...
-
Page 81: The Door Handle Is Tight
In the final position, the head of the set screw is level with the handle surface. 6.2 The door handle is tight Cause: The screws used to attach the handles have been overtightened. Solution: Reinstall the handle. Loosen the set screw on the inside handle. Framery O VCR Troubleshooting instructions info@frameryacoustics.com... - Page 82 Remove the two M5x32 screws. Remove the inside handle and the outside handle with the spindle attached to it. Loosen the set screw on the outside handle. Framery O VCR Troubleshooting instructions info@frameryacoustics.com...
- Page 83 Tighten the set screw on the outside handle. The resistance increases steadily until the screw pierces the spindle. In the final position, the head of the set screw is level with the handle surface. Framery O VCR Troubleshooting instructions info@frameryacoustics.com...
- Page 84 Tighten the set screw on the inside handle. The resistance increases steadily until the screw pierces the spindle. In the final position, the head of the set screw is level with the handle surface. Framery O VCR Troubleshooting instructions info@frameryacoustics.com...
-
Page 85: The Lock Latch Is Stiff Or Gets Stuck
Cause: The screws used to attach the handles have been overtightened. Solution: Reinstall the handle. Loosen the set screw on the inside handle. Remove the two M5x32 screws. Remove the inside handle and the outside handle with the spindle attached to it. Framery O VCR Troubleshooting instructions info@frameryacoustics.com... - Page 86 Adjust the spindle at least 5 mm to find a new spot for the set screw to pierce the spindle. Note: Do not turn or rotate the spindle in any way, because it can only be pierced on one side. Framery O VCR Troubleshooting instructions info@frameryacoustics.com...
- Page 87 In the final position, the head of the set screw is level with the handle surface. Replace the M5x32 screws with new ones. Tighten the M5x32 screws. Note: Do not overtighten them. If you overtighten the screws, the lock latch gets stuck. Framery O VCR Troubleshooting instructions info@frameryacoustics.com...
- Page 88 Tighten the set screw on the inside handle. The resistance increases steadily until the screw pierces the spindle. In the final position, the head of the set screw is level with the handle surface. Framery O VCR Troubleshooting instructions info@frameryacoustics.com...
- Page 90 Framery O VCR Troubleshooting instructions Patamäenkatu 7 33900 Tampere FINLAND VAT: FI 23527139...
Need help?
Do you have a question about the O VCR and is the answer not in the manual?
Questions and answers