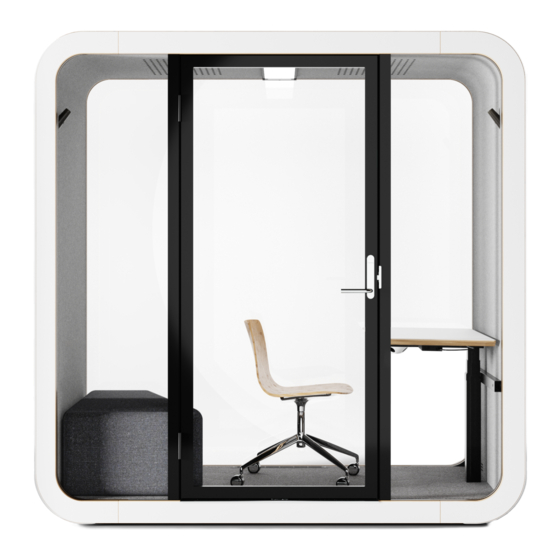
Framery Q Installation Instructions Manual
Seismic kit retrofit
Hide thumbs
Also See for Framery Q:
- Maintenance instructions manual (64 pages) ,
- Installation instructions manual (148 pages)

Related Manuals for Framery Framery Q


Summary of Contents for Framery Framery Q
- Page 1 English Framery Q Version 1.0 Tampere, Finland 08.04.2022 Seismic kit retrofit Installation instructions...
-
Page 3: Table Of Contents
Framery Q Contents 1 Important safety and product instructions..........5 1.1 Preface........................5 1.2 Product information....................5 1.3 Copyright.........................5 1.4 Manual contents..................... 5 1.5 Intended use......................5 1.6 Warning, information, and safety symbols in this manual........6 1.7 Main safety risks related to the installation, maintenance, disassembly, and use of the product.................... - Page 4 Framery Q...
-
Page 5: Important Safety And Product Instructions
• Installation instructions 1.5 Intended use The Framery Q is a pod intended for short term indoor commercial and household use by one to four (1-4) people at a time. Warning: WARNING –To reduce the risk of burns, fire, electric shock, or injury to persons: Use this product only for its intended use as described in the user instructions. -
Page 6: Warning, Information, And Safety Symbols In This Manual
Framery Q 1.6 Warning, information, and safety symbols in this manual The warnings in this manual have been divided into the following two categories: • The term "DANGER" indicates a hazardous situation which, if not avoided, will result in death or serious injury. -
Page 7: Electrical Safety
Framery Q Use steel toed safety boots during the installation, maintenance, or disassembly of the product. Use safety glasses during the installation, maintenance, or disassembly of the product. Read and understand the instructions and plan your work beforehand. Obey all local rules and regulations regarding workplace safety. -
Page 8: Fire Safety
Do not connect any extension cords to the power outlet(s) of the product. 1.7.3 Fire safety The fire load for the Framery Q is approx. 5200 MJ. WARNING! To reduce the risk of burns, fire, electric shock, or injury to persons, obey... -
Page 9: Use
Risk of injury! Keep hands and other body parts clear of the side edges of the table when raising or lowering the electrically adjustable table top. This applies to all Framery pods with an electric adjustable table. Do not use the product if the surrounding conditions are in any way hazardous;... -
Page 10: Moving The Product On Casters (Optional)
Framery Q Do not use the pod if you notice any defects in the electrical equipment or if the product is not working properly. Disconnect the power cord from the power outlet and contact your local dealer or the manufacturer immediately. -
Page 11: Tools And Accessories
Framery Q 2 Tools and accessories Figure 1: Tools required Seismic kit retrofit Installation instructions info@frameryacoustics.com... - Page 12 Framery Q Figure 2: Seismic kit Seismic kit retrofit Installation instructions info@frameryacoustics.com...
-
Page 13: Disassemble The Necessary Parts
Framery Q 3 Disassemble the necessary parts 3.1 Disconnect the power cord DANGER: Always disconnect the pod from the power outlet before you begin the disassembly, maintenance, or any other procedure. Remove the plug from the power outlet. 3.2 Remove the furniture Lift the sofas and seats out of the pod. -
Page 14: Remove The Floor Grid
Framery Q 3.3 Remove the floor grid Unscrew the black 5x30 screws (2 pcs) and remove the floor grid. 3.4 Remove the floor threshold Unscrew the 5x50 screws (2 pcs) and remove the floor threshold. Seismic kit retrofit Installation instructions... -
Page 15: Remove The Carpet
Framery Q 3.5 Remove the carpet Fold the carpet and lift it out of the pod. 3.6 Remove the table Seismic kit retrofit Installation instructions info@frameryacoustics.com... - Page 16 Framery Q Remove the small cover board. Disconnect the power outlet cord from the power unit. Seismic kit retrofit Installation instructions info@frameryacoustics.com...
- Page 17 Framery Q Remove the power cord out of the floor module. Install the small cover plate back in place. Seismic kit retrofit Installation instructions info@frameryacoustics.com...
-
Page 18: Remove The Floor Module Cover Boards And Acoustic Panels
Framery Q Unscrew the floor board. Lift the table and floor board out of the pod. Note: If the table is a wide table, remove the table top from the table leg by unscrewing the installation brackets from under the table (2 pcs) and unscrew the table top from the table leg. - Page 19 Framery Q Unscrew the floor module cover boards 5x50 screws (12 pcs). Remove the floor module cover boards by lifting them upwards. Seismic kit retrofit Installation instructions info@frameryacoustics.com...
-
Page 20: Screw Out The Feet Of The Leveling Screws
Framery Q Remove the acoustic panels. Note: Do not remove the electrics. 3.8 Screw out the feet of the leveling screws Screw out the feet of the leveling screws with a 4 mm hex key or 6 to 7 mm flathead screwdriver. - Page 21 Framery Q Remove bolts (4 pcs) from the frame. Seismic kit retrofit Installation instructions info@frameryacoustics.com...
-
Page 22: Install The Seismic Kit
Framery Q 4 Install the seismic kit 4.1 Drill holes for the reinforcement plates Place the reinforcement plates (8 pcs) on the floor modules. Mark the placement for the support board holes with a drill bit or a pen. Seismic kit retrofit Installation instructions... - Page 23 Framery Q Mark the placement of the holes for the floor module with a drill bit or a pen. Note: There are ready made holes beneath the four side brackets. Move the reinforcement plates aside. Seismic kit retrofit Installation instructions...
-
Page 24: Fasten The Reinforcement Plates
Framery Q Drill holes to the marked places.Use a HSS 10 mm drill bit for the support board. Use a HSS 14 mm drill bit for the floor modules. Note: The side plates have ready made holes in the floor. - Page 25 Framery Q Drill 50 mm deep holes for the frame screws with 5.5 or 6 mm HSS drill bit. Note: The places where bolts were removed from the frame have metal springs inside. Do not drill in the places the bolts (4 pcs) were removed from.
-
Page 26: Install The Wooden Frame Supports
Framery Q Fasten the 8x50 bolts in the pre-made in holes of the frame. Note: Fasten all the bolts, unfasten all slightly, and fasten all again. Fasten the bolts (16 pcs) in the support board with SW13. 4.3 Install the wooden frame supports Seismic kit retrofit Installation instructions info@frameryacoustics.com... - Page 27 Framery Q Align the holes in the plywood pieces with the holes in the reinforcement plate and bottom board. Screw in the plywood pieces with 4x30 screws. Seismic kit retrofit Installation instructions info@frameryacoustics.com...
-
Page 28: Anchor The Pod
Framery Q Screw in the leveling feet to lower the pod. 4.4 Anchor the pod Install the customer supplied anchors. Note: The type of the anchor is determined by local laws and regulations. Seismic kit retrofit Installation instructions info@frameryacoustics.com... -
Page 29: Reassemble
Framery Q 5 Reassemble 5.1 Install the acoustic panels and floor module cover boards Re-install the acoustic panels back into the pod. Lift the floor module cover boards in place. Seismic kit retrofit Installation instructions info@frameryacoustics.com... -
Page 30: Reinstall The Table
Framery Q Screw the floor module cover boards back into place with 5x50 screws (12 pcs). 5.2 Reinstall the table Lift the table and floor board back into the pod. Screw in the floor board. Seismic kit retrofit Installation instructions... - Page 31 Framery Q Unscrew the small cover plate. Lead the power outlet cord through the opening at the base of the table leg. Seismic kit retrofit Installation instructions info@frameryacoustics.com...
-
Page 32: Install The Carpet
Framery Q Connect the power outlet cord to the power unit. A "click" sound is audible when the connector locks into place. Screw in the small cover plate. 5.3 Install the carpet Install the carpet into place so that the edge slot is on the door side and the floor grid opening is on the glass wall side. -
Page 33: Install The Floor Threshold
Framery Q 5.4 Install the floor threshold Set the threshold down at the doorway. Seismic kit retrofit Installation instructions info@frameryacoustics.com... - Page 34 Framery Q Slide the threshold against the door frame. Note: Make sure that the side seals are not between the threshold and the door frame. Neatly cut the side frame seal to the correct length, if needed. Note: Make sure that the side frame seals and the threshold seal do not overlap.
-
Page 35: Install The Floor Grid
Framery Q 5.5 Install the floor grid Install the floor grid with black 5x30 screws (1 pcs each). Note: Use the existing screw holes. Seismic kit retrofit Installation instructions info@frameryacoustics.com... -
Page 36: Connect The Power Cord
Framery Q 6 Connect the power cord Connect the power cord to the power outlet. Seismic kit retrofit Installation instructions info@frameryacoustics.com... - Page 37 Framery Q...
- Page 38 Framery Q Seismic kit retrofit Installation instructions Patamäenkatu 7 33900 Tampere FINLAND VAT: FI 23527139...
Need help?
Do you have a question about the Framery Q and is the answer not in the manual?
Questions and answers