
Related Manuals for Framery Four


Summary of Contents for Framery Four
- Page 1 English Framery Four Version 4.0 Tampere, Finland 03.06.2024 Installation instructions...
-
Page 3: Table Of Contents
Framery Four Contents Important safety and product instructions..........5 Preface.........................5 Product information..................... 5 Copyright........................5 Manual contents......................5 Installation requirements................6 Components and accessories..................6 Tools and accessories....................6 Main dimensions......................7 Required operating space................... 7 Seismic anchoring requirements................. 8 1 Chassis......................9 1.1 Assemble the front frame..................9... - Page 4 Framery Four 3.6.2 Route the AC power cord through the roof..........41 3.6.3 Install the LAN cord (optional)..............42 3.7 Install the add-on rails..................42 3.8 Install the occupancy lights.................. 43 4 Door......................44 4.1 Install the door......................44 4.2 Install the door handle..................45 4.3 Inspect the door....................
-
Page 5: Important Safety And Product Instructions
This document must not be copied, presented, or delivered to a third party without explicit permission from Framery. The use of this document for any purpose other than those allowed by Framery is prohibited. Framery reserves the right to change the instructions related to the product without separate notice. -
Page 6: Installation Requirements
Framery Four Installation requirements Components and accessories Review the contents of the packaging along the installation instructions to confirm that the appropriate components and accessories are being used with the pod. Tools and accessories Figure 1: Tools and accessories Installation instructions... -
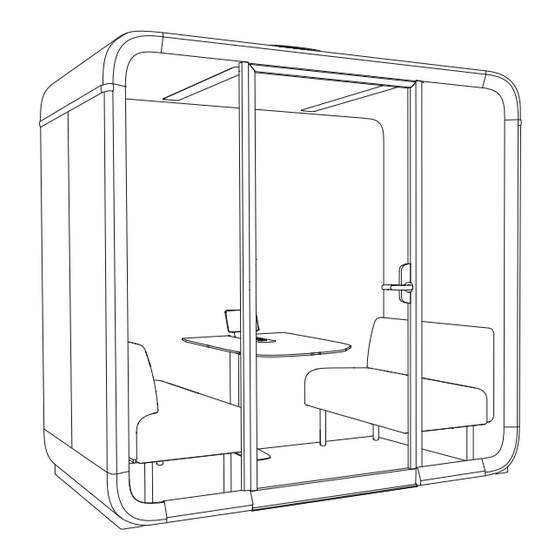
Page 7: Main Dimensions
Framery Four Main dimensions Figure 2: Main dimensions Required operating space Note: If installing the optional seismic anchors, the required operating space will differ. See section "Seismic anchoring requirements" for more information. Figure 3: Required operating space Installation instructions info@frameryacoustics.com... -
Page 8: Seismic Anchoring Requirements
Framery Four Seismic anchoring requirements Note: If the delivery includes the seismic kit, follow the separate Seismic kit installation instructions on help.frameryacoustics.com. Installation instructions info@frameryacoustics.com... -
Page 9: Chassis
Framery Four 1 Chassis Attention: Make sure that the bolts are tightened to correct torque (20 Nm / 14.75 ft-lbs). Front frame Back frame Bottom corner (2 pcs) Vertical frame (4 pcs) Horizontal frame (2 pcs) 1.1 Assemble the front frame Note: Make sure that the bolts are properly tightened. -
Page 10: Assemble The Back Frame
Framery Four 1.2 Assemble the back frame Note: Make sure that the bolts are properly tightened. 1.3 Install the bottom corners Installation instructions info@frameryacoustics.com... -
Page 11: Install The Floor Boards
Framery Four 1.4 Install the floor boards Attention: Make sure that the floor board with a recess is placed where the door will be. Note: Place a carpet on the floor before flipping the bottom frame. The metal hooks on the frame could scratch the floor. - Page 12 Framery Four Note: Place the floor board with a recess nearest to the door. Tip: Place the corner frame boxes under the floor boards to avoid bending the boards. Note: Make sure that the screw heads are level with the floor boards.
-
Page 13: Install The Vertical Frames
Framery Four 1.5 Install the vertical frames Note: Make sure that the bolts are properly tightened. 1.6 Install the horizontal frames Note: Make sure that the bolts are properly tightened. Installation instructions info@frameryacoustics.com... - Page 14 Framery Four Installation instructions info@frameryacoustics.com...
-
Page 15: Install The Horizontal Supports
Framery Four 1.7 Install the horizontal supports 1.8 Install the back glasses Note: Use suction cups to move glass components. Note: Handle glasses with care. To avoid cracks in the glass edges, do not slide the glasses with force against the vertical frame. -
Page 16: Tighten The Screws Of The Back Glass Wall
Framery Four 1.8.1 Tighten the screws of the back glass wall Note: Make sure that the glasses form a flat and even surface with no gaps or thresholds between the glasses. Installation instructions info@frameryacoustics.com... - Page 17 Framery Four Installation instructions info@frameryacoustics.com...
-
Page 18: Install The Front Glasses
Framery Four 1.9 Install the front glasses Warning: The glasses can slide out of the pod frame. Hold each glass in place until they are secured with screws. Note: Use suction cups to move glass components. Note: When sliding the glasses into the front frame of the pod, make sure not to scratch the frame pipes. - Page 19 Framery Four Figure 4: Door handedness. Left: Left-handed door. Right: Right-handed door. Note: Handle glasses with care. To avoid cracks in the glass edges, do not slide the glasses with force against the vertical frame. Installation instructions info@frameryacoustics.com...
-
Page 20: Install The Ceiling Threshold And Plugs To The Doorway
Framery Four 1.10 Install the ceiling threshold and plugs to the doorway Note: Check the straightness of the front glasses with a spirit level before fully tightening the ceiling threshold. Installation instructions info@frameryacoustics.com... -
Page 21: Install The Inlet Module
Framery Four Note: Use a rubber mallet to install the plugs. 1.11 Install the inlet module Note: Make sure that the inlet module locks into place on the frames. Note: The inlet module is installed to the frame of the pod with five screws on each side. -
Page 22: Install The Outlet Modules
Framery Four 1.12 Install the outlet modules Note: Make sure that the outlet modules lock into place on the frames. 1.13 Install the wall exterior panels Attention: Make sure that the wall exterior panels are bolted together firmly and in the order shown in the instructions. - Page 23 Framery Four Note: Make sure that the elastic gasket sits firmly under the edge of the exterior panel. Note: Before you tighten the bolts, make sure that the panel cuts surround the pin. Note: When tightening the screws on the slotted holes, pull down on the screw to align the exterior panels.
-
Page 24: Install The Coat Hook(S) (Optional)
Framery Four 1.14 Install the coat hook(s) (optional) Installation instructions info@frameryacoustics.com... -
Page 25: Electrics
Framery Four 2 Electrics Attention: Make sure that all connectors are securely attached and that the cables do not cover the core unit. Figure 5: Overview of the pod electrics 2.1 Install the power unit Note: Install the power unit to the side that is closer to the power outlet of the pod. -
Page 26: Install The Core Unit
Framery Four 2.2 Install the core unit 2.3 Install the wiring harness Note: If you attach the wiring harness to an incorrect position, you can twist and pull on the push-in cable clip to remove it. Installation instructions info@frameryacoustics.com... - Page 27 Framery Four Figure 7: Removing a cable clip Installation instructions info@frameryacoustics.com...
- Page 28 Framery Four Installation instructions info@frameryacoustics.com...
-
Page 29: Make The Electrical Connections
Framery Four 2.4 Make the electrical connections Note: To make connecting the cables to the unit easier, each cable is marked with a number and color corresponding to a connector on the unit. Note: Do not cover the core unit with anything. Route all cables around it. - Page 30 Framery Four Figure 8: Connector labels on the core unit Installation instructions info@frameryacoustics.com...
- Page 31 Framery Four Installation instructions info@frameryacoustics.com...
- Page 32 Framery Four Installation instructions info@frameryacoustics.com...
- Page 33 Framery Four Installation instructions info@frameryacoustics.com...
- Page 34 Framery Four Installation instructions info@frameryacoustics.com...
-
Page 35: Exterior
Framery Four 3 Exterior 3.1 Install the roof exterior panels (corners) Note: Stand on a step ladder when you install components to the roof of the pod. Never climb on top of the pod. Note: Before you tighten the screws on the wall side, make sure that the pin is in the panel cut. - Page 36 Framery Four Installation instructions info@frameryacoustics.com...
-
Page 37: Install The Fan Cover
Framery Four 3.3 Install the fan cover Note: Stand on a step ladder when you install components to the roof of the pod. Never climb on top of the pod. Installation instructions info@frameryacoustics.com... -
Page 38: Install The Floor Exterior Panels
Framery Four 3.4 Install the floor exterior panels Note: Minimize the gap between the frame pipes and exterior panels. Make sure that the exterior panels connect seamlessly to the body of the pod. Note: Turn the fasteners until there is no gap between the exterior panels and frame pipes. -
Page 39: Install The Ac Power Cord
Framery Four 3.6 Install the AC power cord Note: Before you install the AC power cord, confirm the location of the power outlet that the pod will be connected to. Route the AC power cord according to the location of the power outlet. -
Page 40: Route The Ac Power Cord Through The Floor
Framery Four 3.6.1 Route the AC power cord through the floor Note: Remove the precut flap only from the side where the power cord is routed out of the pod. Installation instructions info@frameryacoustics.com... -
Page 41: Route The Ac Power Cord Through The Roof
Framery Four 3.6.2 Route the AC power cord through the roof Note: Remove the precut flap only from the roof exterior panel that is located above the power unit. Installation instructions info@frameryacoustics.com... -
Page 42: Install The Lan Cord (Optional)
Framery Four 3.6.3 Install the LAN cord (optional) 3.7 Install the add-on rails Note: The add-on rails are installed with screws from the inside of the pod. Someone must apply force to the add-on rail from the outside for the screws to engage. -
Page 43: Install The Occupancy Lights
Framery Four 3.8 Install the occupancy lights Installation instructions info@frameryacoustics.com... -
Page 44: Door
Framery Four 4 Door 4.1 Install the door Note: Recommended attachment point for the suction cup is slightly above the knee. Installation instructions info@frameryacoustics.com... -
Page 45: Install The Door Handle
Framery Four 4.2 Install the door handle 4.3 Inspect the door Note: If the door does not close properly or it does not stay closed, adjust the door position. The door is adjusted correctly when the distance between the top of the door and pod frame is equal on the entire width of the door. -
Page 46: Adjust The Closing Speed Of The Door
Framery Four 4.4 Adjust the closing speed of the door Note: If you have a right-handed door, adjust the spring clockwise. Note: Make sure that you adjust both hinges to the same setting. Installation instructions info@frameryacoustics.com... -
Page 47: Change The Door Handedness (Optional)
Framery Four 4.5 Change the door handedness (optional) Installation instructions info@frameryacoustics.com... - Page 48 Framery Four Installation instructions info@frameryacoustics.com...
- Page 49 Framery Four Installation instructions info@frameryacoustics.com...
- Page 50 Framery Four Installation instructions info@frameryacoustics.com...
-
Page 51: Interior
Framery Four 5 Interior 5.1 Install the wall acoustic panels Note: The acoustic panels are an extremely important part of soundproofing the pod. They are not marked in any way, and they can resemble package cushioning. Do not throw the panels away. -
Page 52: Install The Ceiling Interior Panels
Framery Four 5.3 Install the ceiling interior panels Note: Ensure the quality of the installation of the interior panels. If necessary, move the panels sligthly to make sure that: • The interior panels are centered and aligned with each other. -
Page 53: Install The Wall Interior Panels
Framery Four 5.4 Install the wall interior panels 5.5 Install the lights Installation instructions info@frameryacoustics.com... -
Page 54: Install The Carpet And Table Leg
Framery Four 5.6 Install the carpet and table leg Attention: Turn the adjuster leg underneath the table until the table is level and stable. Installation instructions info@frameryacoustics.com... - Page 55 Framery Four Installation instructions info@frameryacoustics.com...
- Page 56 Framery Four Note: Be careful not to damage the back glass when installing the table leg. Installation instructions info@frameryacoustics.com...
-
Page 57: Install The Cable Channels
Framery Four Note: LAN and USB-C modules are options. Install the optional USB-C PD Charge Port. 5.7 Install the cable channels Installation instructions info@frameryacoustics.com... -
Page 58: Install The Kickboards
Framery Four 5.8 Install the kickboards 5.9 Install the gaskets Note: Do not stretch the gasket during installation. If you stretch the gasket, it is likely to come loose at some point. This results in reduced soundproofing of the pod. - Page 59 Framery Four Installation instructions info@frameryacoustics.com...
-
Page 60: Check The Interior Panel Alignment
Framery Four 5.9.1 Check the interior panel alignment 5.10 Install the threshold Installation instructions info@frameryacoustics.com... -
Page 61: Install The Table Top
Framery Four 5.11 Install the table top Installation instructions info@frameryacoustics.com... -
Page 62: Install The Monitor Arm (Optional)
Framery Four 5.11.1 Install the monitor arm (optional) 5.12 Install the touch screen holder and touch screen Installation instructions info@frameryacoustics.com... - Page 63 Framery Four Note: USB-C and LAN modules are options. Installation instructions info@frameryacoustics.com...
- Page 64 Framery Four Installation instructions info@frameryacoustics.com...
-
Page 65: Assemble The Sofas
Framery Four 5.13 Assemble the sofas Installation instructions info@frameryacoustics.com... -
Page 66: Finalize The Installation
Framery Four 6 Finalize the installation 6.1 Prepare the pod for use Clean the glasses with window cleaner. Connect the pod to a power outlet and connect the LAN cable. Perform the commissioning according to the instructions on the touch screen. - Page 67 Framery Four Follow the instructions in the Service Tool and fill out the installation report. Installation instructions info@frameryacoustics.com...
- Page 68 Framery Four Installation instructions info@frameryacoustics.com...
- Page 69 Framery Four...
- Page 70 Framery Four Installation instructions Patamäenkatu 7 33900 Tampere FINLAND VAT: FI 23527139...
Need help?
Do you have a question about the Four and is the answer not in the manual?
Questions and answers