Table of Contents
Advertisement
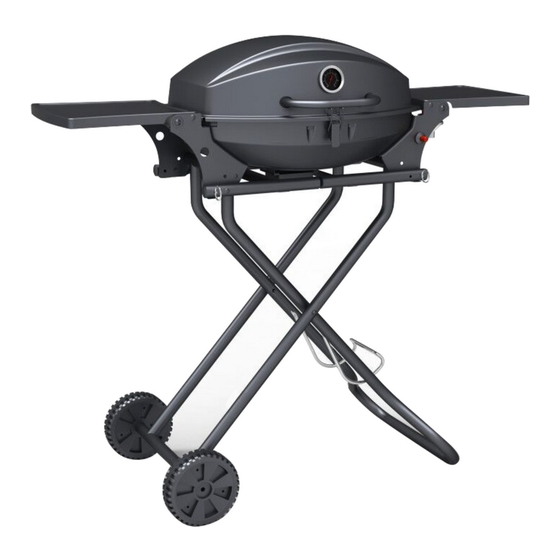
Portable Gas BBQ
With Trolley
Model No. G1013-NZ
For Outdoor Use Only- OPERATES ON NZ LPG
Retain these instructions for future use.
IMPORTANT: DO NOT LEAVE THIS BBQ UNATTENDED WHEN LIT AND IN USE
Advertisement
Table of Contents

Related Manuals for gascraft G1013-NZ


Summary of Contents for gascraft G1013-NZ
- Page 1 Portable Gas BBQ With Trolley Model No. G1013-NZ FOR OUTDOOR USE ONLY- OPERATES ON NZ LPG Retain these instructions for future use. IMPORTANT: DO NOT LEAVE THIS BBQ UNATTENDED WHEN LIT AND IN USE...
- Page 2 GENERAL INFORMATION changing over from an empty gas cylinder to a full one make sure this procedure is carried out outdoors in a well-ventilated, Gas Installation Code flame free atmosphere. This BBQ is to be used with NZ LPG only (9kg LPG cylinder) or with propane (1lb disposable propane canister).
- Page 3 Never alter or modify the regulator or gas supply assembly. This barbecue must not be used indoors. Do not leave this BBQ unattended when lit and in use. TECHNICAL INFORMATION GASCRAFT PORTABLE GAS BBQ WITH TROLLEY Model No G1013-NZ Gas Consumption MJ/h 15.12MJ/h Injector Size 1.0mm...
- Page 5 Description Figure Description Figure Q'TY Q'TY Hood Hinge Cooking Plate - Right Hood Hinge Hood - Left H o o d H a n d l e Bracket Cooking grill Thermometer Firebowl Hinge - Right Regulator Wheel Axle Hose assembly Wheel Clip Axle...
- Page 6 STEP 1 M6X15 Screw 4Pcs 4Pcs STEP 2 M6X10 Screw 4Pcs 4Pcs...
- Page 7 STEP 3 M4X10 Screw 2Pcs 2Pcs STEP 4...
- Page 8 STEP 5 M6X10 Screw 1Pcs 1Pcs STEP 6 M6X10 Screw 8Pcs 8Pcs...
- Page 9 STEP 7 M5X35 Screw 4Pcs 4Pcs STEP 8 M6X15 Screw 4Pcs...
- Page 10 STEP 9 M5X10 Screw 4Pcs 4Pcs STEP 10...
- Page 11 STEP 11 STEP 12 M6X10 Screw 4Pcs 4Pcs...
- Page 12 STEP 13 M5X10 Screw 2Pcs STEP 14 fix the lid with "Lid Support Axle and Clip" Clip 2PCS H i n g e A x l e 2PCS...
- Page 13 STEP 15 STEP 16...
- Page 14 STEP 17 STEP 18...
- Page 15 STEP 19...
- Page 16 STEP 20...
- Page 17 STEP 21...
- Page 18 STEP 22 GENERAL ASSEMBLY...
- Page 19 Connecting & Disconnecting to Gas Source Ensure the barbecue hood is open. IMPORTANT: Before connecting and disconnecting 1. Turn regulator off. barbecue to gas source, make sure regulator is in 2. Disconnect the QCC hand-wheel from the gas cylinder. ‘LOCK’ position. 3.
- Page 20 • Fat Fires If using the hose assembly accessory connected to a 9kg LPG cylinder, now open the gas control valve on the Empty and clean the fire bowl and grease box of food debris cylinder slowly and smoothly to ensure full gas flow. after each cooking session.
- Page 21 powders as they can permanently damage the finish. Rinse well and dry thoroughly. To protect the cast iron cooking surfaces; when clean and dry, apply a light coat of cooking Barbecue Body oil to the cooking surfaces. Due to the weight of the cooking Regularly remove excess grease or fat from the barbecue surfaces, we do not recommend cleaning in a dishwasher.
- Page 23 PLEASE NOTE: To allow the regulator to always deliver adequate pressure of gas to the BBQ, always ensure: All BBQ control knobs are in the ‘OFF’ position prior to opening the tap on the gas cylinder valve When opening the cylinder valve, open the first ¼ to ½ turn slowly before opening the cylinder valve fully. For reference and correspondence record your serial number here.
Need help?
Do you have a question about the G1013-NZ and is the answer not in the manual?
Questions and answers